Glowing Pin
Understanding Your Circuit
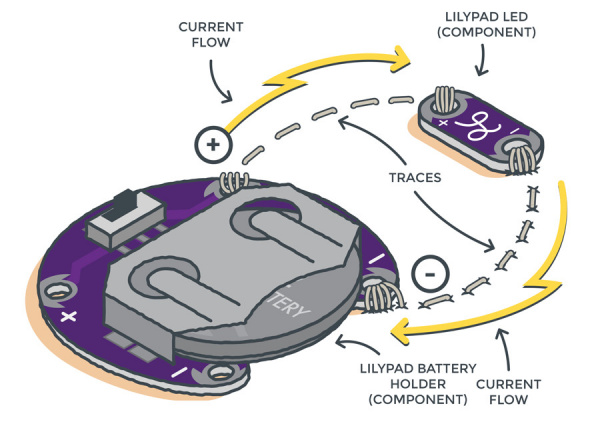
This project is an example of a basic circuit – an electrical loop that travels from a power source along a path (called a trace) to a component (or components) that uses the electricity to function, and then back to the power source. For our project, we’ll use an LED (Light-Emitting Diode). When this loop is completed by stitching the pieces together with conductive thread traces, electricity from the power source is able to flow from the positive (+) side of the battery through to the LED (lighting it up) and back to the negative (–) side of the battery. This electric flow is called current. As you build projects with LilyPad pieces, you will learn different ways to design conductive thread circuits and experiment with additional pieces that help control or use the flow of electricity.
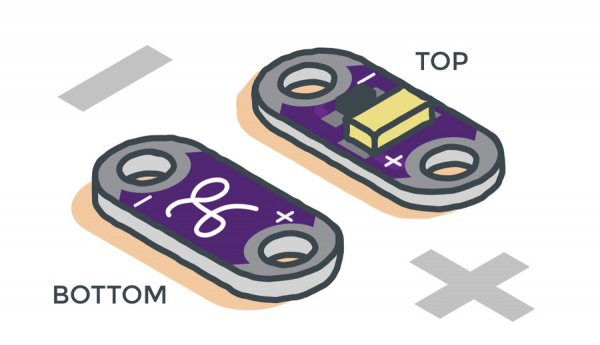
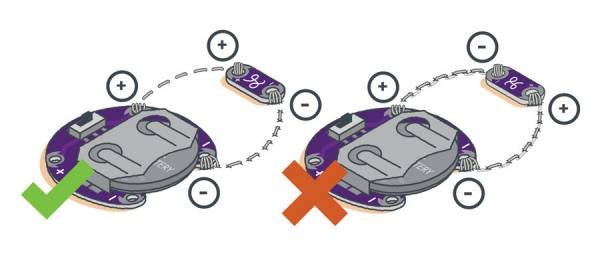
Take a look at the LED and battery holder. Notice that the silver sew tabs are labeled either positive or negative. Many electronic components have polarity, meaning electric current can only flow through them in one direction.
If hooked up incorrectly, they will not light up. The batteries in this kit are also polarized; they have a positive and negative side. Always check the labels on LilyPad pieces to make sure they are correctly oriented before sewing together a circuit.


