Getting Started with Walabot
 bboyho
Introduction
See through walls, track objects, monitor breathing patterns, and more using the power of radio frequency with the Walabot!
Walabot Starter
SEN-14534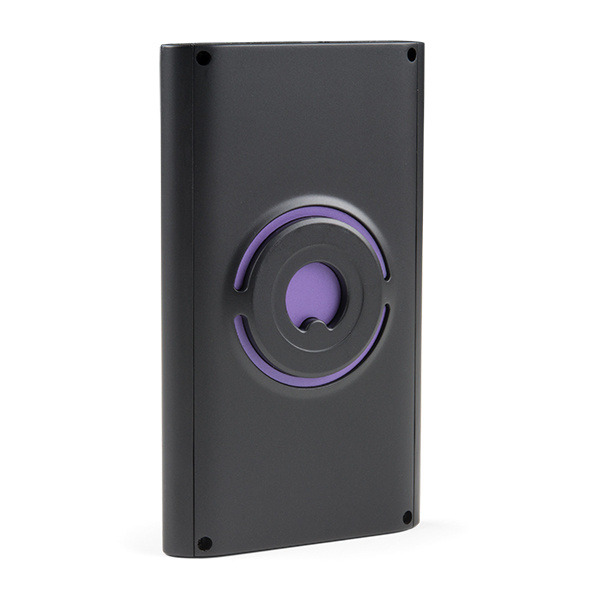
Walabot Developer
SEN-14535In this tutorial, we will explore Walabot's features using the Software Demo Kit (SDK) on Windows and the Application Programming Interface (API) on Linux-based OS for embedded projects.
Required Materials
To follow along with this tutorial, you will need the following materials to get started. You may not need everything though depending on what you have. Add it to your cart, read through the guide, and adjust the cart as necessary:
* Walabot (Starter or Developer) * Computer (Windows, Linux) w/ USB Port * micro-B to type A USB cable
For more embedded applications with a Raspberry Pi, you will need the following materials:
- Raspberry Pi 3 Starter Kit
- LCD 7" or Monitor w/ HDMI Cable
- Keyboard and Mouse
Suggested Reading
If you aren't familiar with the following concepts when using a Raspberry Pi, we recommend checking out these tutorials before continuing.
Serial Terminal Basics
SD Cards and Writing Images
Hardware Overview
Features
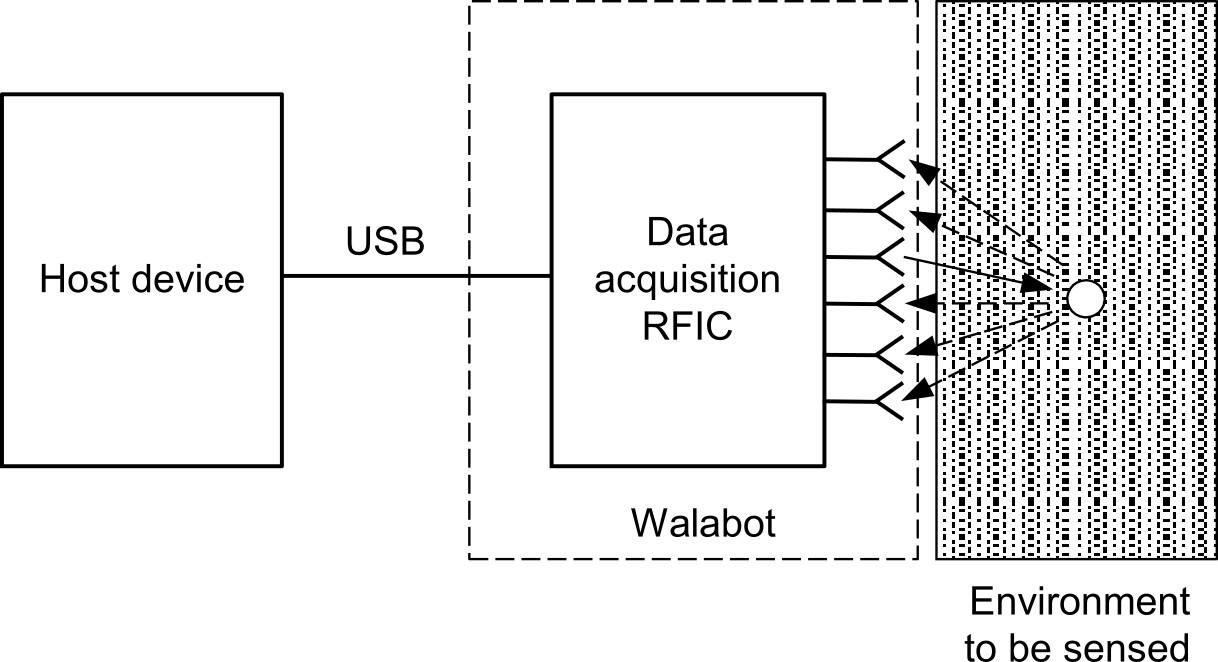
The Walabot utilizes radio frequency technology to sense the environment. An image of the environment is reconstructed using an array of linearly polarized broadband antennas to transmit, receive, and record signals. The data is processed and sent through a USB cable to a host device. The host device can be your computer, single board computer, or even a smartphone!
Depending on the Walabot model, here are a few possible applications:
- In-Room Imaging
- Object Detection, Location, and Tracking
- Motion Sensing (i.e. Breathing Patterns, Gestures)
- Speed Measurement
- In-Wall Imaging
- Dialectric Properties of Materials
Starter vs Developer
There are three models of the Walabot. For the scope of the tutorial, we will be using the starter and developer to begin. The starter uses 3x antennas as opposed to 18x antennas to detect the environment. The starter is capable of basic range measurements and monitoring breathing patterns. Due to the amount of antennas it has available, it will not be able to sense objects behind a material. The starter also does not come with an enclosure.
The developer has a higher resolution with the 18x antennas. It's capable of the applications listed earlier. However, the developer can consume more power depending on the configuration and it requires a little bit more time to process the data. Below is a comparison taken from the datasheet.
| Capability \ Model | Walabot Starter | Walabot Developer |
|---|---|---|
| Physical Specifications | ||
| Number of Antennas | 3 | 18 |
| Board Size | 72 mm * 48 mm | 72 mm * 140 mm |
| External Powering Option | ✓ | |
| Enclosure | ✓ | |
| Software API Capabilities | ||
| Basic API functions | ✓ | ✓ |
| 2D Acquisition | ✓ | ✓ |
| 3D Acquisition | ✓ | |
| Multiport Recorder (Raw Data) | ✓ | |
| Software Application Capabilities | ||
| Breathing Detection | ✓ | ✓ |
| Object Detection | ✓ | ✓ |
| Short Range Imaging | ✓ | |
Enclosure
The Walabot Starter does not come in an enclosure. To protect the bare board, you could:
Just make sure to adjust the size of the enclosure for the Walabot Starter.
Walabot w/ Other Wireless Devices
As stated in the datasheet on page 8, the Walabot operates over a range of frequencies. Make sure to configure your device so that it does not interfere with other wireless devices used in projects. The operating frequency of the Walabot is above the following range so there should not be any inteference:
- Bluetooth
- Zigbee
- Cellular
Antennas
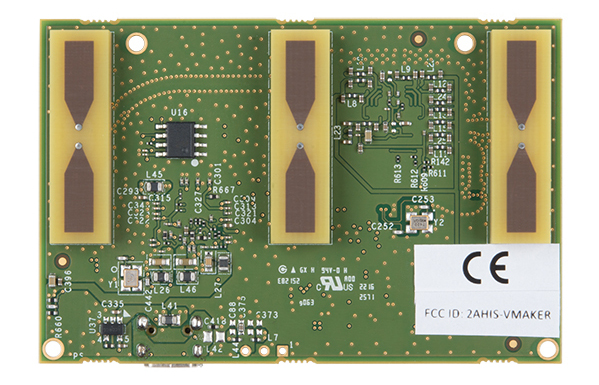
The side with the antennas should be facing out to sense the environment. The image below shows the Walabot Starter's 3x antennas.
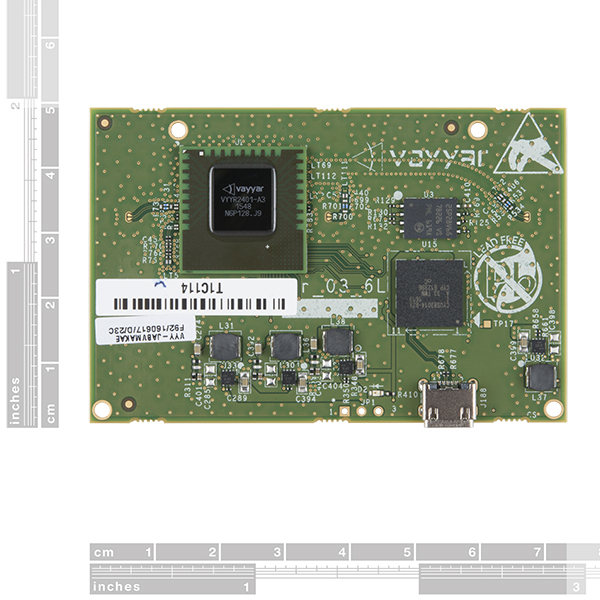
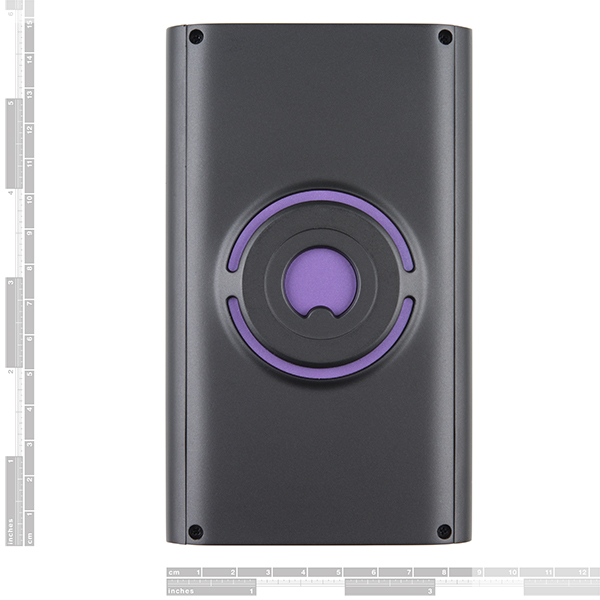
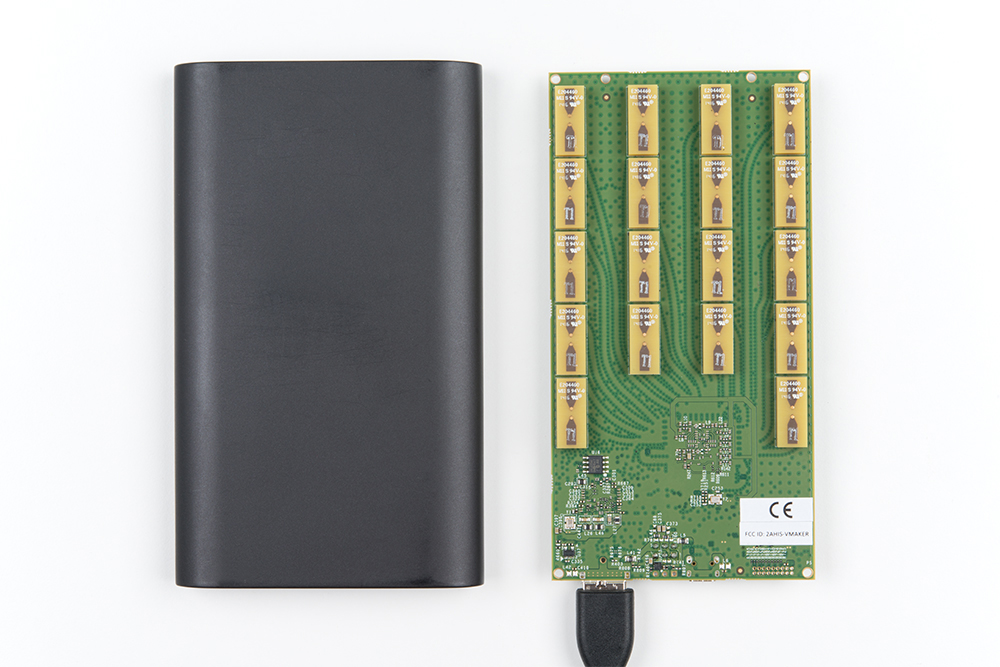
The image below shows the Walabot Developer's 18x antennas populated on the board. Make sure the flat side of the enclosure is facing out to sense the environment.
Power Consumption
The Walabot requires a 5V (+/-10%) power supply. The board can be powered using a USB port. Depending on the application and operation profile, the Walabot may consume up to 0.4A to 0.9A. You may need an additional power source for the Walabot Developer. If necessary, open the Walabot enclosure with a Phillips precision screw driver.
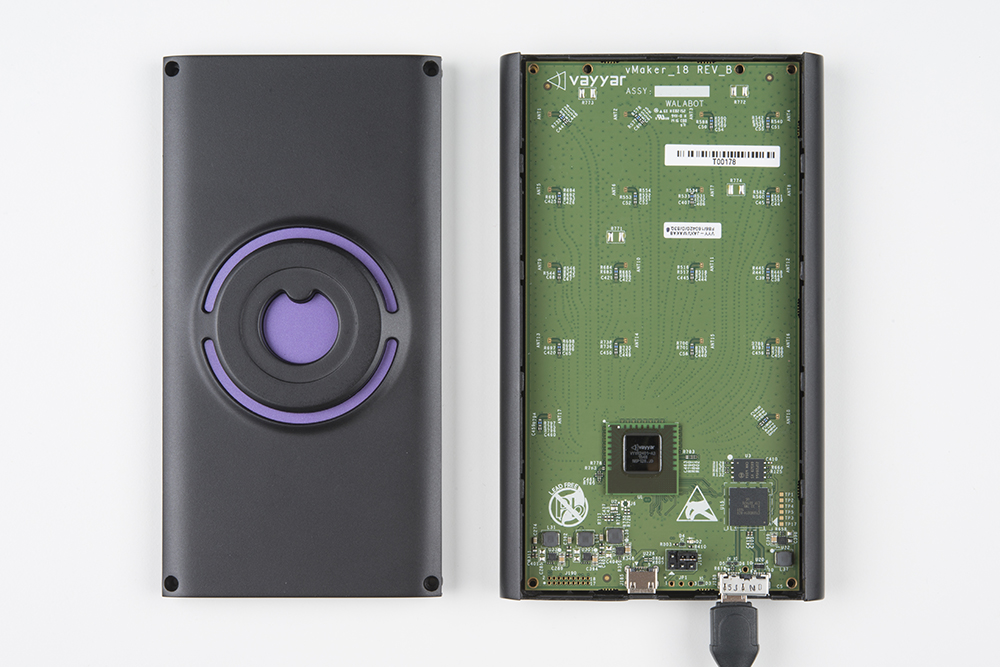
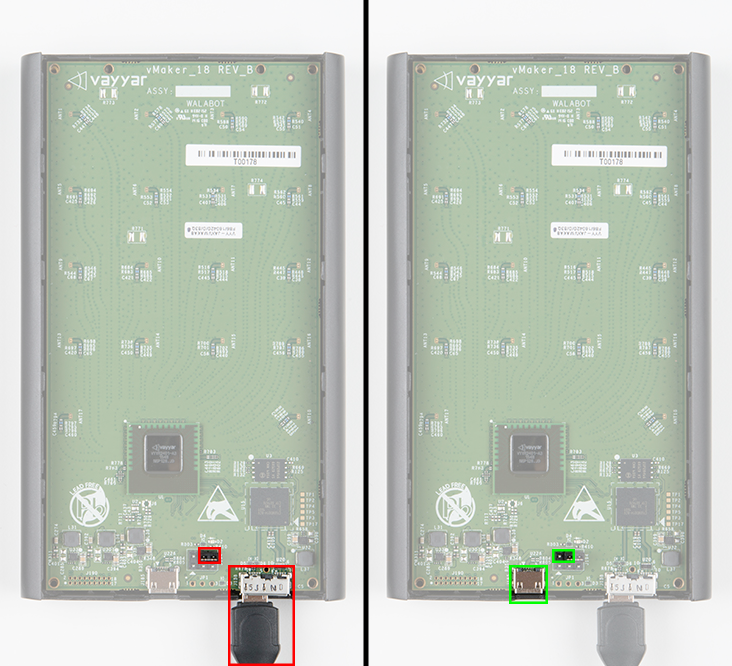
Highlighted in red is the default jumper position for data transfer and powering the Walabot. To power the board with an external power supply, move the jumper to the left side and connect an additional power source to the USB port highlighted in green. The USB connector is only for power so you would still need a USB cable connected on the right connector.
Hardware Assembly
Walabot Starter
If are using a USB cable that is not included with the Walabot, make sure that the data lines are connected when using the cable with the Walabot! Certain cables are designed to be charging cables, so there might not be any data lines connected in the USB cable.
To connect the Walabot Starter, you will need to align the "D" shape of the micro-B USB cable with the port.

Once the cable is connected to the Walabot, connect the other end to a computer's USB port.
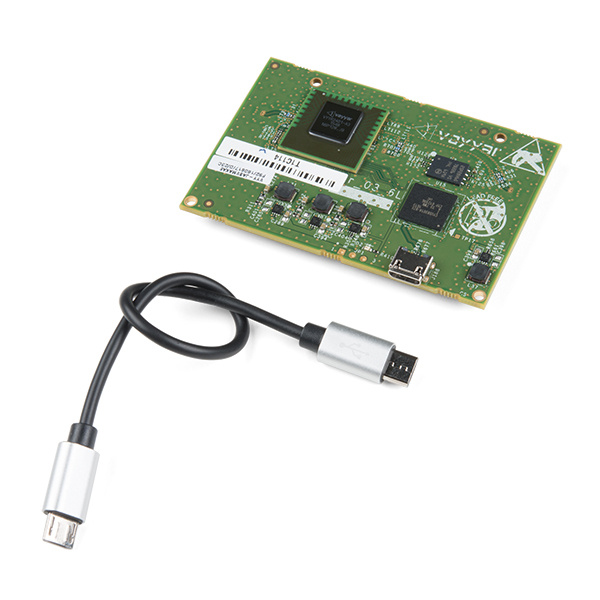
Walabot Developer
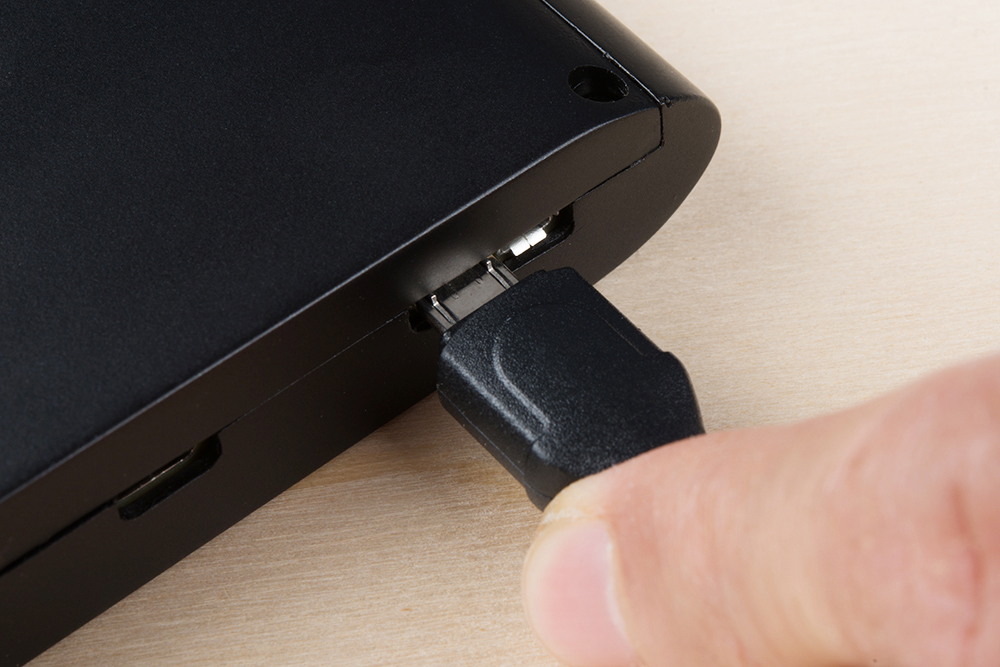
To connect the Walabot Developer, insert the USB cable's micro-B end to the Walabot's USB port. You can use a separate micro-B USB 2.0 cable or the included micro-B USB 3.0 cable. By default, there is a jumper that uses the port closest to the edge of the Walabot.
 |
 |
| Connecting with a separate micro-B USB 2.0 cable. | Connecting with the included micro-B USB 3.0 cable. |
If you decide to use a separate micro-B USB 2.0 cable to your computer, you will be aligning it with the "D" shape of the micro-B USB 3.0 connector as shown in the image below.
Once the cable is connected to the Walabot, connect the other end to a computer's USB port.
Mounting
You may want to mount the board during testing. Grab some electrical tape or mount the Walabot Starter to a box using standoffs. The Walabot Developer includes a magnetic disk that is able to stick to a surface such as a robot, smartphone, or wall. With the magnetic mount, it is able to attach and detach easily from the surface. In the examples provided, the starter and developer were mounted on a red box or resting on a table for testing.
Software Installation (Windows)
To get started with the Walabot, the easiest would be to use the Walabot demo on Windows to visualize the sensor data. It's a nice GUI that is able to display the sensor data. Head over to the download section for the Walabot Software Development Kit (SDK) to begin.
Click on the button for the Windows Installer to download the latest, stable version of the demo software. After downloading, open the executable to install the software.
Do you want to allow the following program from an unknown publisher to make changes to this computer? To install the WalabotSDK_1.0.35.exe, click Yes button.
Example SDK
Once you install the Walabot SDK, there should be a shortcut on the desktop. Click on the "WalabotSDK.WalabotAPItutorial.exe" icon on your desktop to open the program. If you have not already, plug the device to your computer's COM port.
Sensor - Target Detection
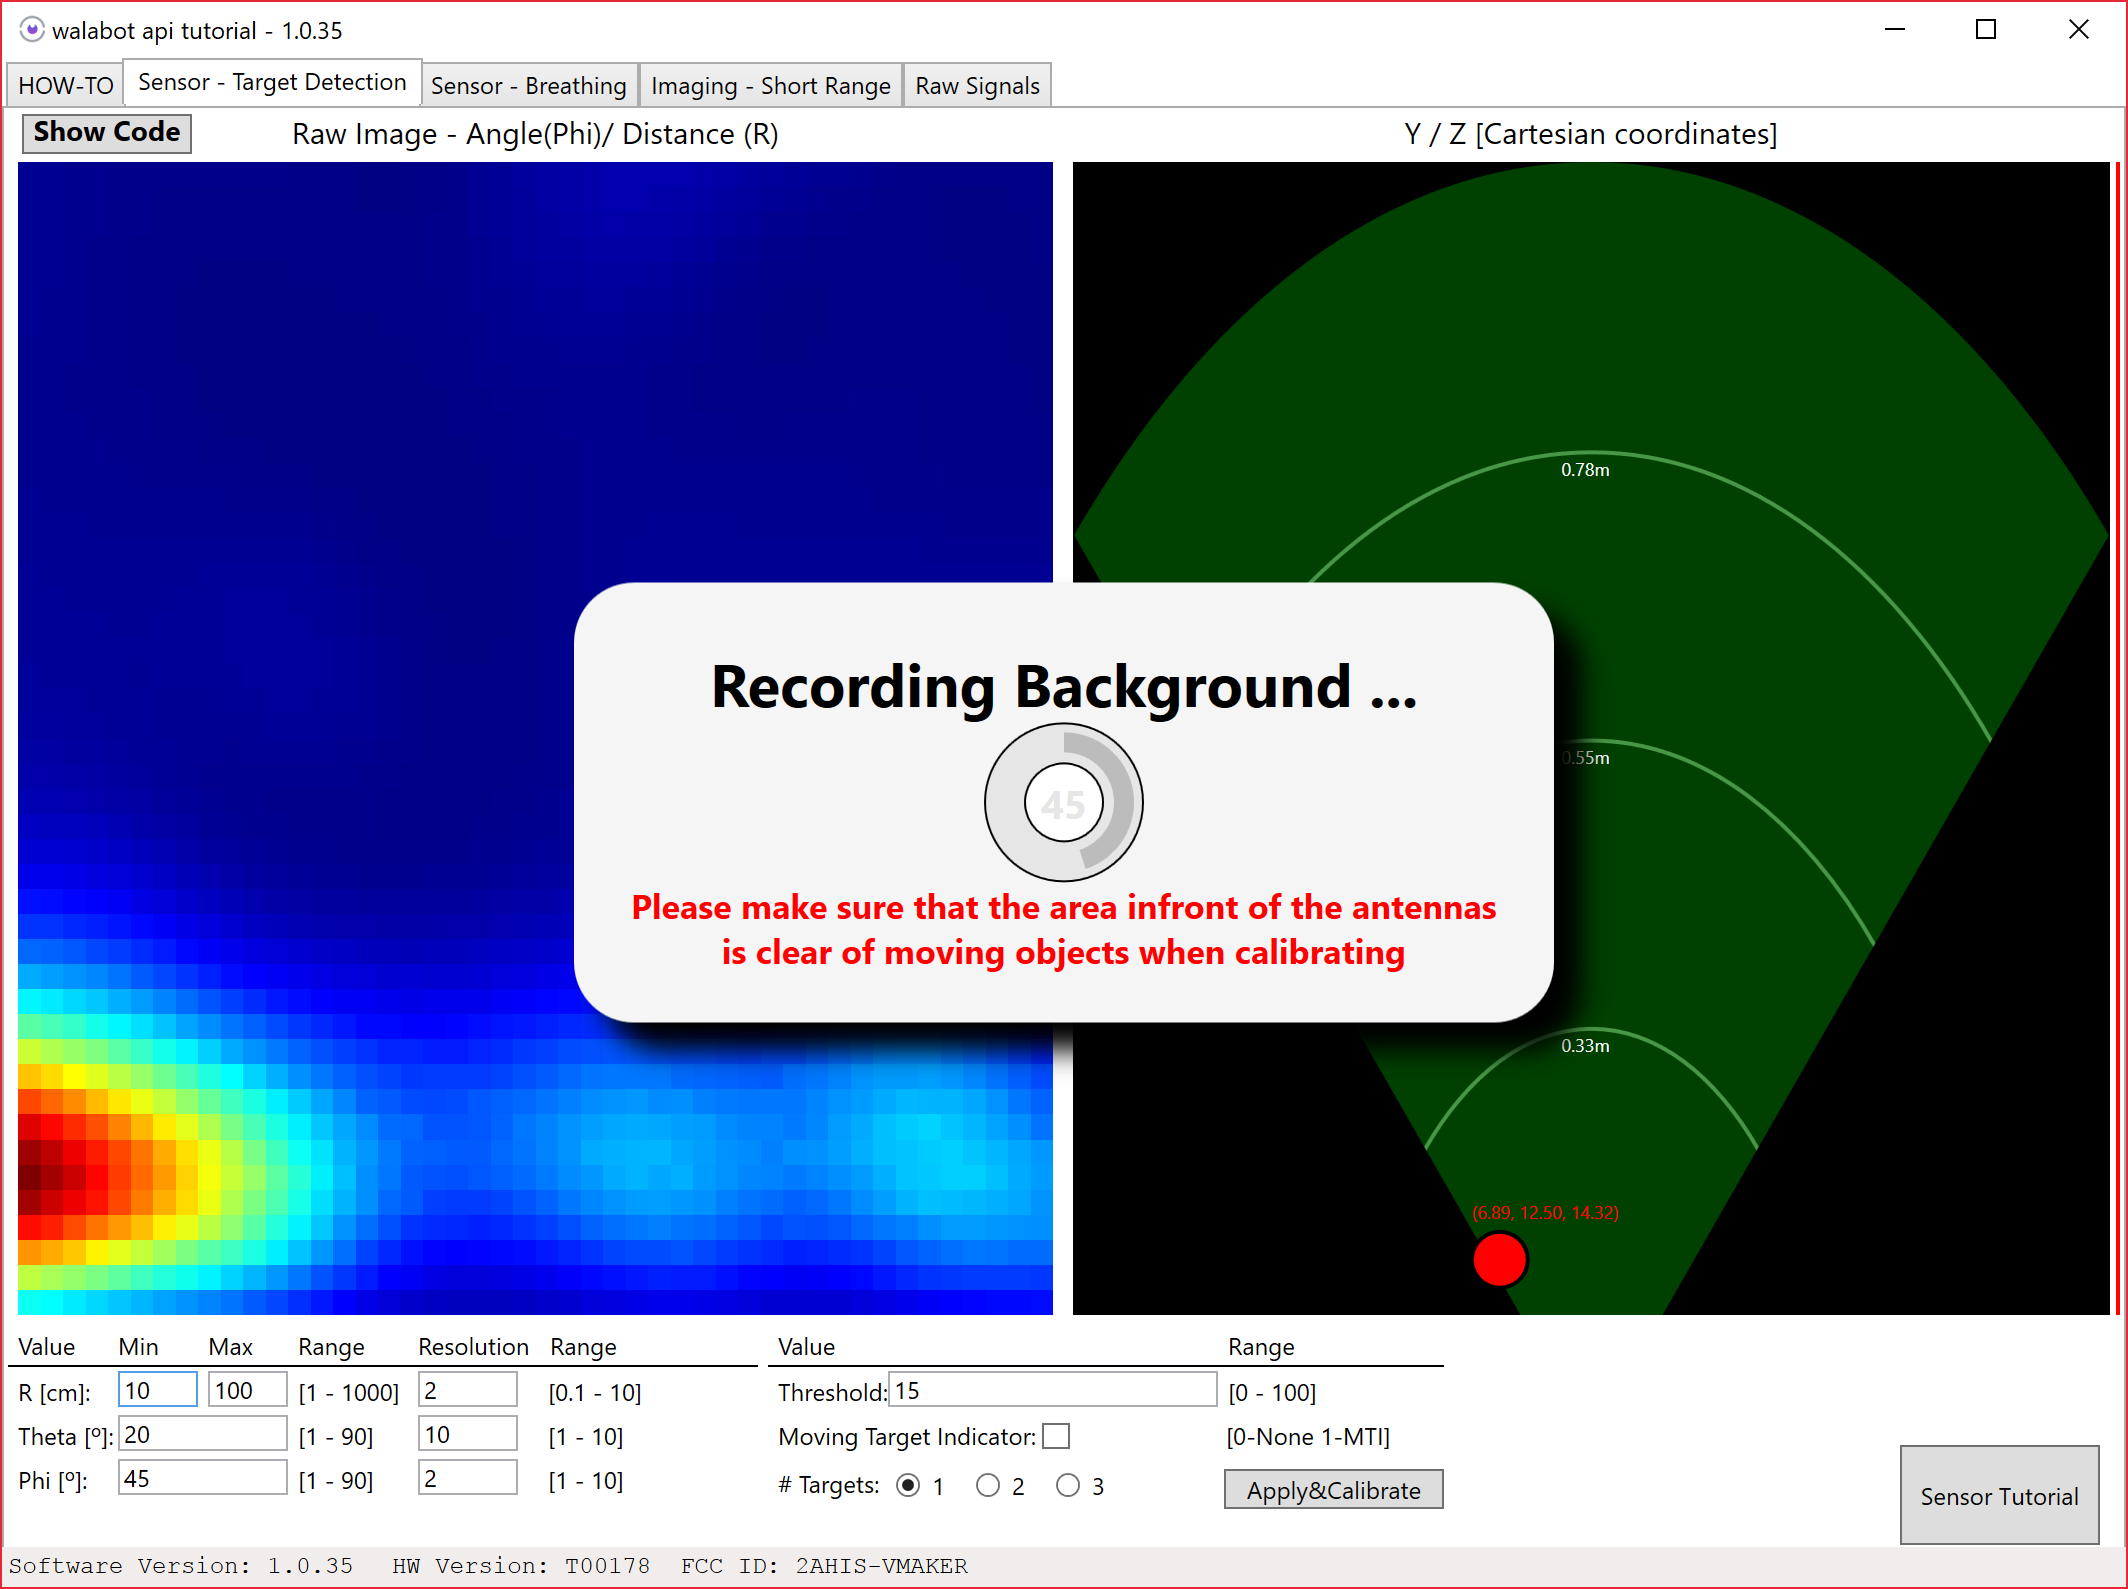
The first demo application looks for objects in front of the Walabot. Before we start, make sure that there are no moving objects in front of the sensor. The sensor was mounted to a box in the following example.

Click on the tab labeled "Sensor - Target Detection" in the SDK. The Walabot will begin calibrating. The range seemed a bit small so the arena size for R [cm] was increased to 200cm. Once adjusted, click on the Apply&Calibrate button to recalibrate.
Once calibrated, try moving an object in front of the sensor. For this example, try testing the Walabot by standing at a distance away from the sensor. For simplicity, stand directly in front of the Walabot until the sensor detects you.

Here's how it may look when an object is at a distance in the SDK.
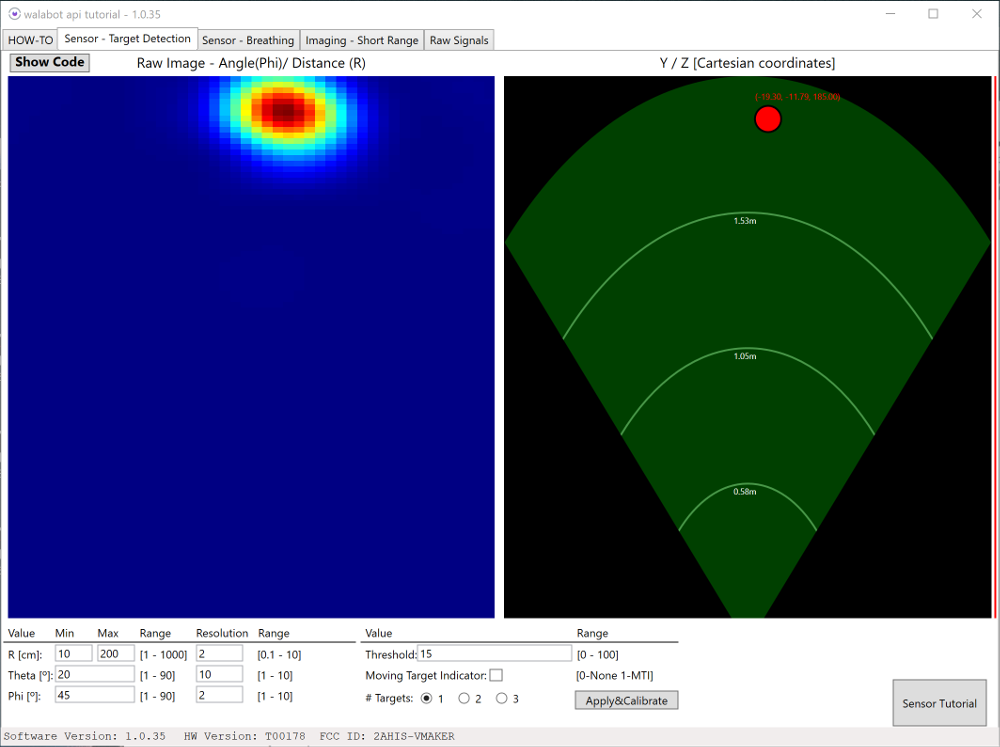
Then try moving closer to the Walabot.

Here's how it may look when an object is closer in the SDK.
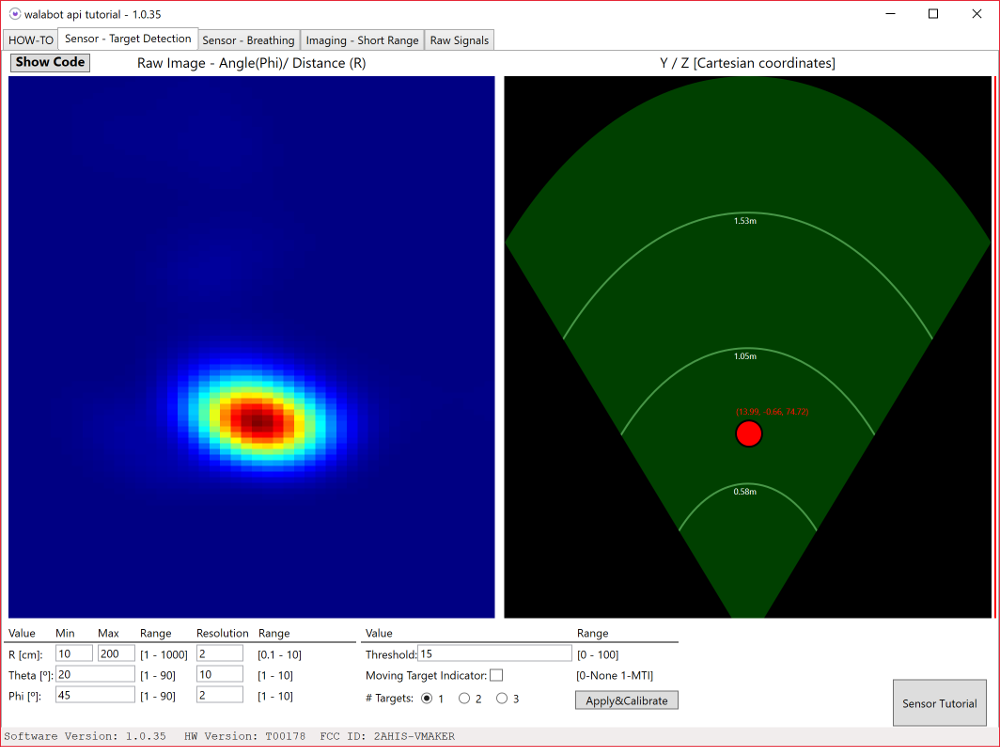
By comparison, you will notice that the SDK will update in real time with any object in range. Try adjusting the range to see how far the sensor can detect targets! You can also adjust the amount of targets to view!
Sensor - Breathing
The second demo application monitors breathing patterns and graphs the readings. You need to be at a certain distance away from the sensor to read. The default is between 20cm to 80cm. Click on the tab labeled "Sensor - Breathing" in the SDK.
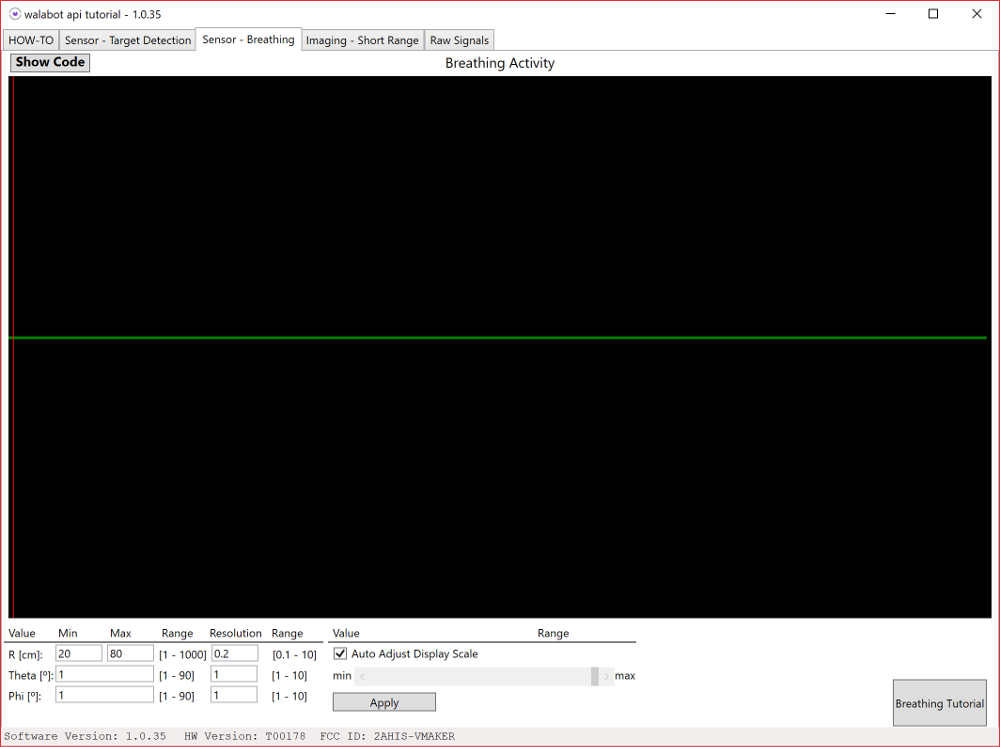
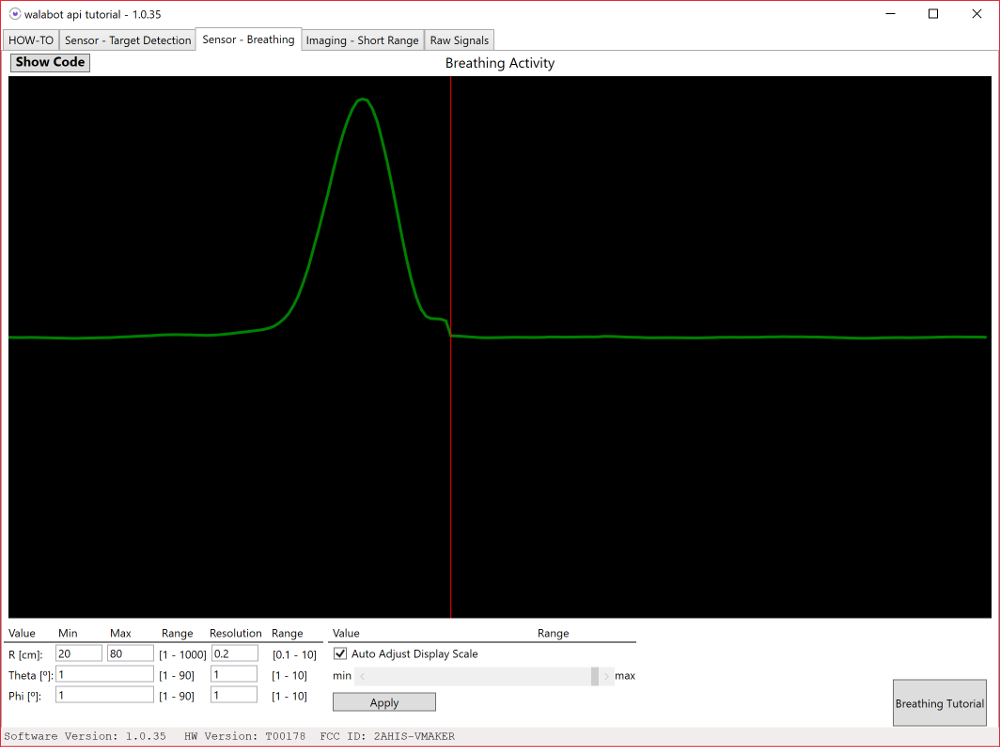
Stand in front of the sensor and inhale some air.

The graph will update in real time as you inhale. As you breathe, the graph should rise. Here's how it may look when you take a deep breath in the SDK.
While still standing in front, exhale the air that you gathered in your lungs.

As you exhale, the graph will dip. Here's how it may look when you exhale in the SDK.
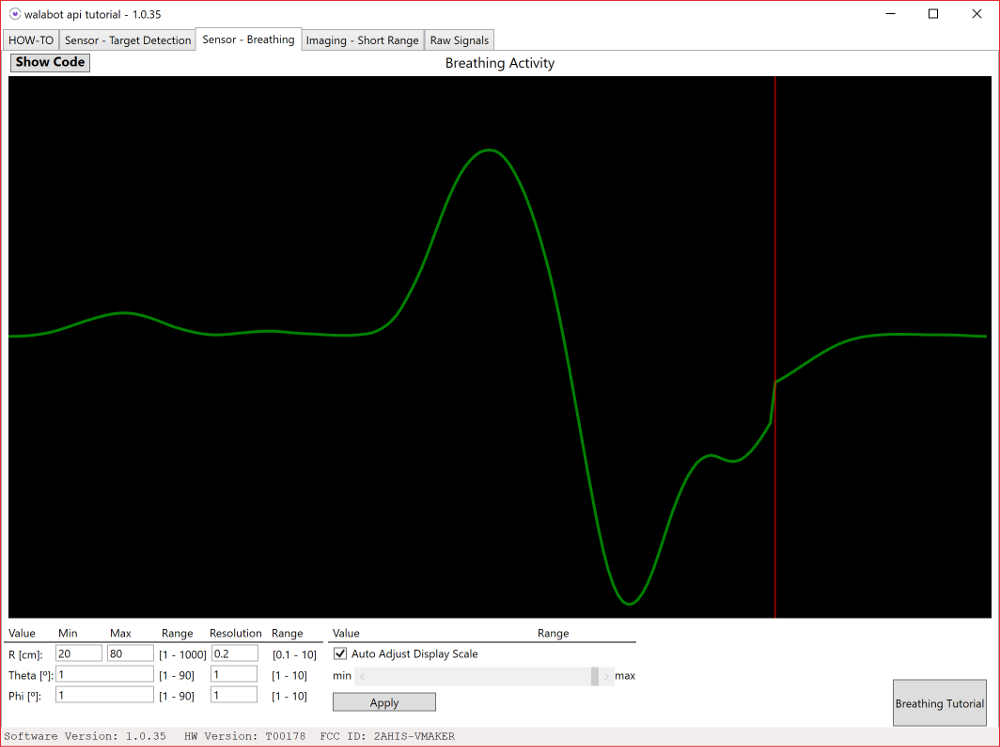
Try adjusting the range to see how far the Walabot can sense your breathing!
Imaging - Short Range
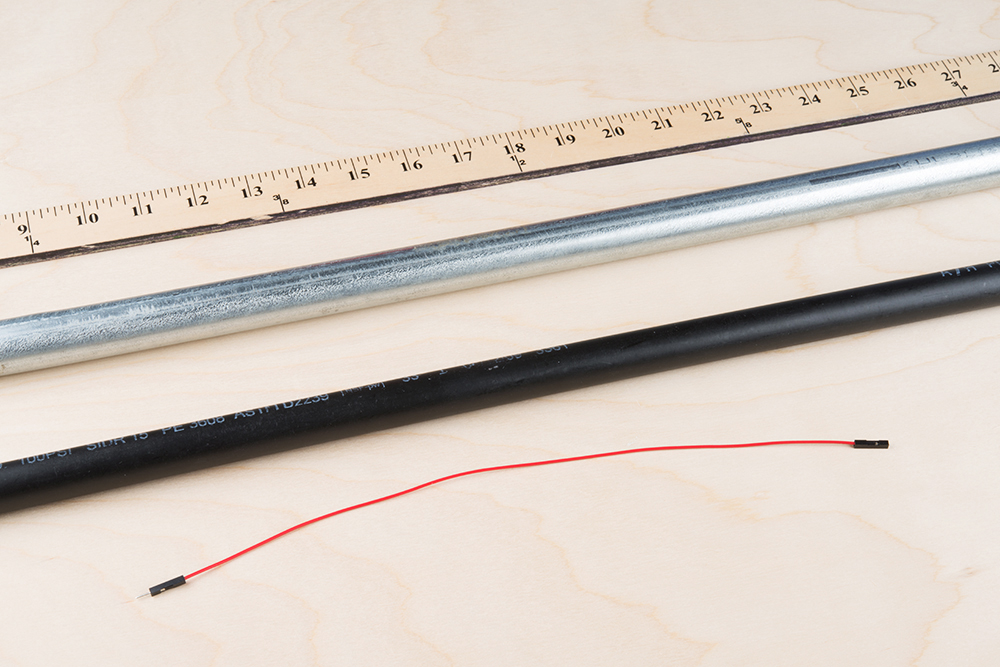
The third demo lets you view objects behind a wall. Since we are dealing with RF signals, make sure that the wall is not made of metal. For a quick test, let's try viewing a material behind a flat table. Grab a wooden yard stick, metal pipe, a PVC, or a piece of wire to test.
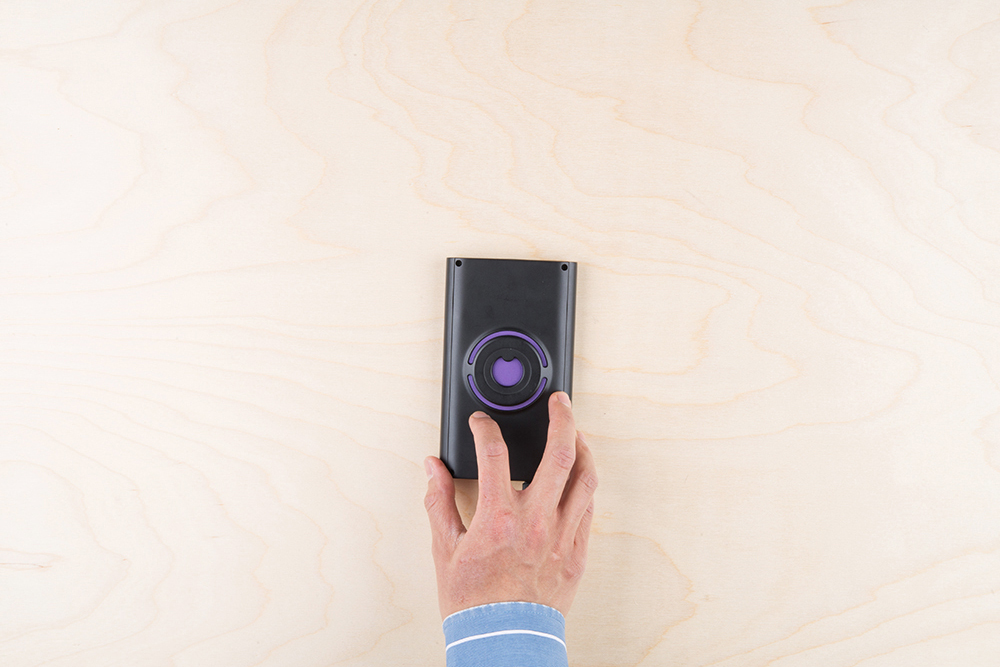
The sensor will need to view the material that it is looking through. Place the Walabot on a flat table.
Click on the tab labeled "Imaging - Short Range".
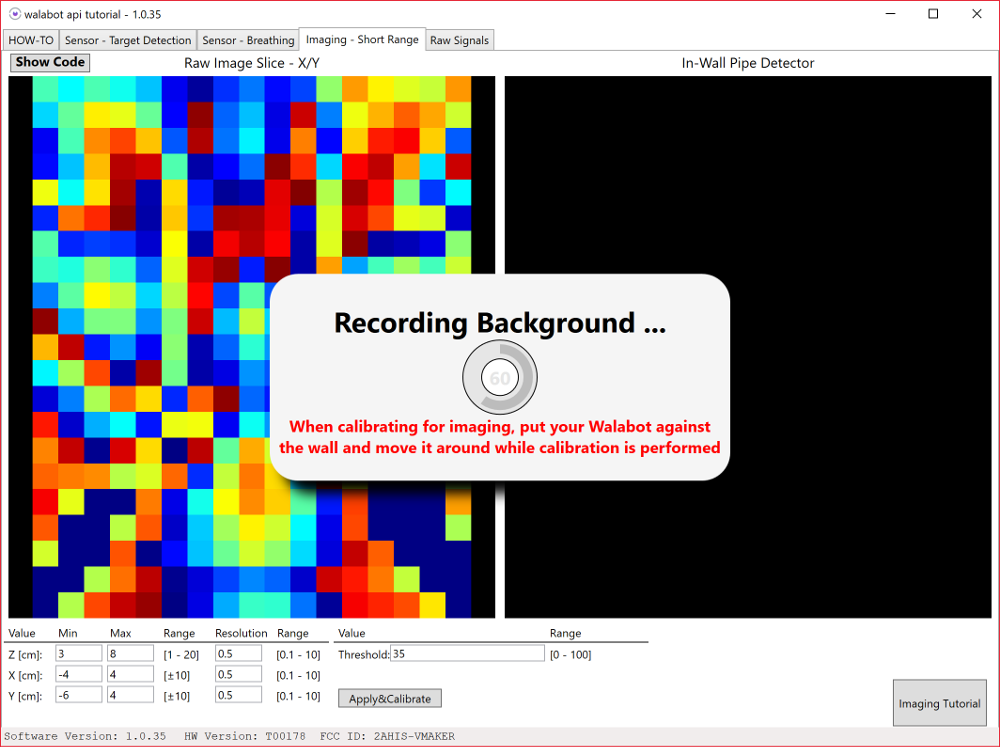
The sensor will begin calibrating. It is recommended to move the Walabot slowly in a circular motion for this calibration.
 |
 |
 |
Once calibrated, try placing the material behind the table.
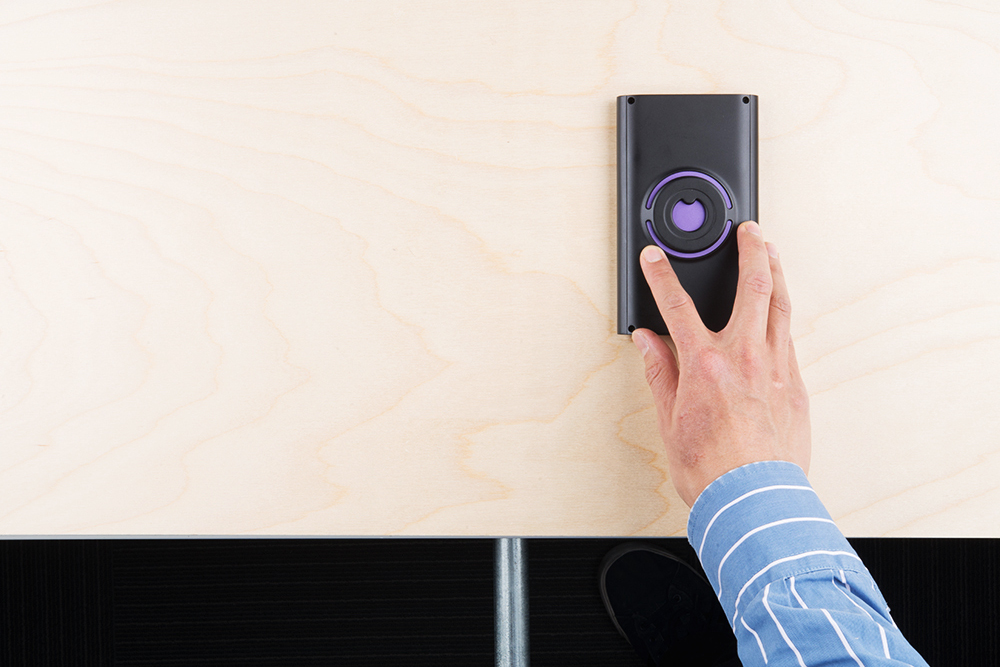
Move the Walabot over the material.

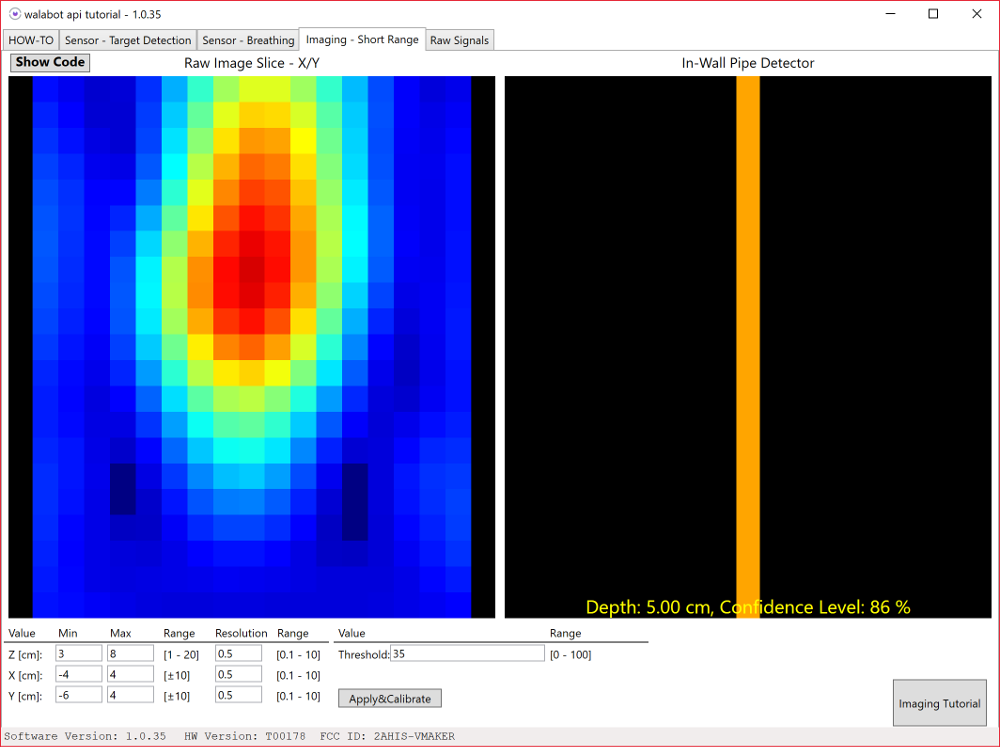
The In-Wall Pipe Detector should display a graphic and indicate the orientation of the pipe behind the table. The material thickness of the wall (in this case it is a table) and probability that there is an object there is displayed as the Depth and Confidence Level.
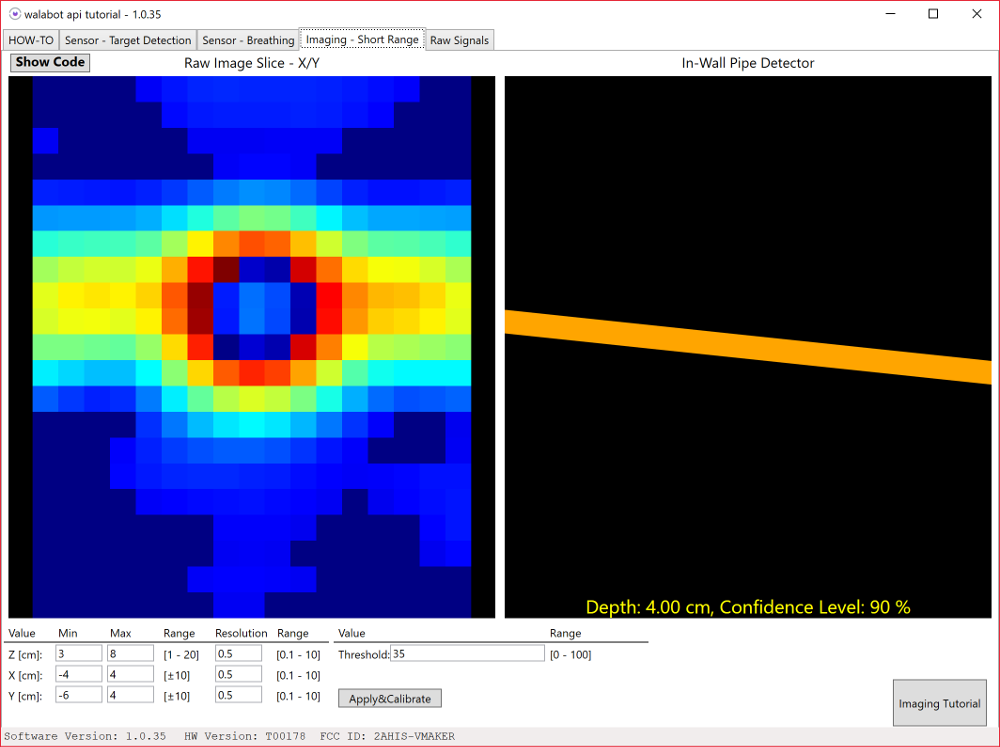
Rotate the Walabot.

The In-Wall Pipe Detector will respond by showing the material rotated.
Now try testing it with a wall to see if you can find a stud or a bundle of wires leading to a wall outlet! The Walabot Developer can see up to about ~4 inches (~10cm) behind a material!
Raw Signals
The fourth demo controls the antenna arrays. It is useful for visualizing a waveform for specific applications. Click on the tab labeled “Raw Signals”.
Using the default antenna pairs in open air, the signals will look like the graph on the right.
 |
 |
| Walabot measuring in open air | Raw signal with antenna pairs 7 -> 6 in open air. |
Let's try a little paper, rock, scissors to see how well the Walabot can recognize small changes in gestures. By placing your hand directly over the Walabot in the shape of a rock, the signal should look like the graph on the right.
 |
 |
| Walabot measuring rock. | Raw signal with antenna pairs 7 -> 6 with rock. |
Opening your had in the shape of a paper, you will notice a significant change in the graph.
 |
 |
| Walabot measuring paper. | Raw signal with antenna pairs 7 -> 6 with paper. |
Changing the shape of your hand to scissors, you should notice small changes in amplitude throughout the signal.
 |
 |
| Walabot measuring scissors. | Raw signal with antenna pairs 7 -> 6 with scissors. |
Try experimenting with different antenna pairs to see what works best when writing code for your custom application!
Walabot's Demo Video
Here's an explanation using the Walabot with the SDK for Windows.
Walabot API Library
The pseudocode for each example used in the Walabot SDK can be viewed by pressing the Show Code button. There is also a tutorial button that offers an explanation about the graphs relative to the Walabot. Head over to the Walabot API library for more information on the functions, parameters, and error codes when developing applications for Windows.
Software Installation (Linux)
Walabot API Library
python -V in the command line. Pressing the Enter key should notify you if Python is installed. If Python is not currently installed, head over to Python's download page.
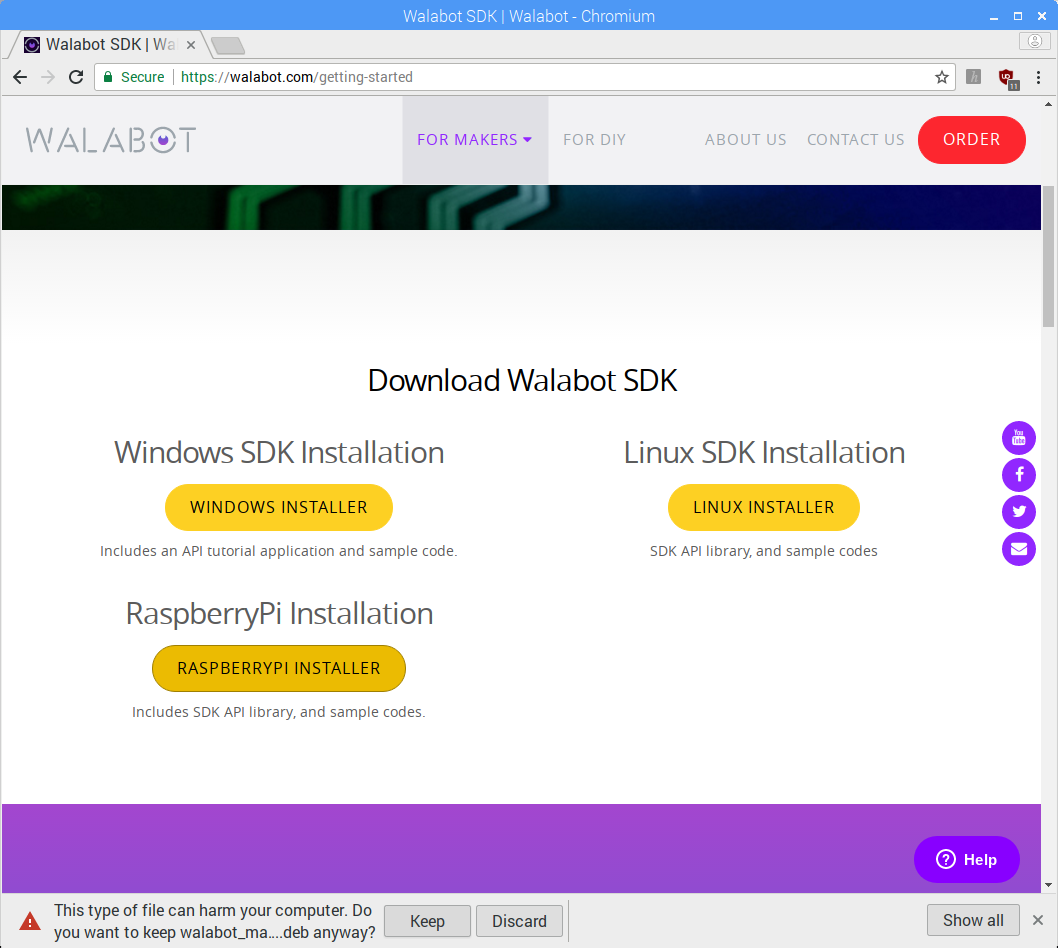
The process to install the Walabot API for Linux and Raspberry Pi are the same. The only difference is the package to download. Head over to Walabot's site to download the package.
Scroll down the page and click on the package for your distribution. For the scope of this tutorial, we will choose the package for Raspberry Pi.
Once downloaded, you may get the following warning:
Click on the "Keep" button to confirm the download.
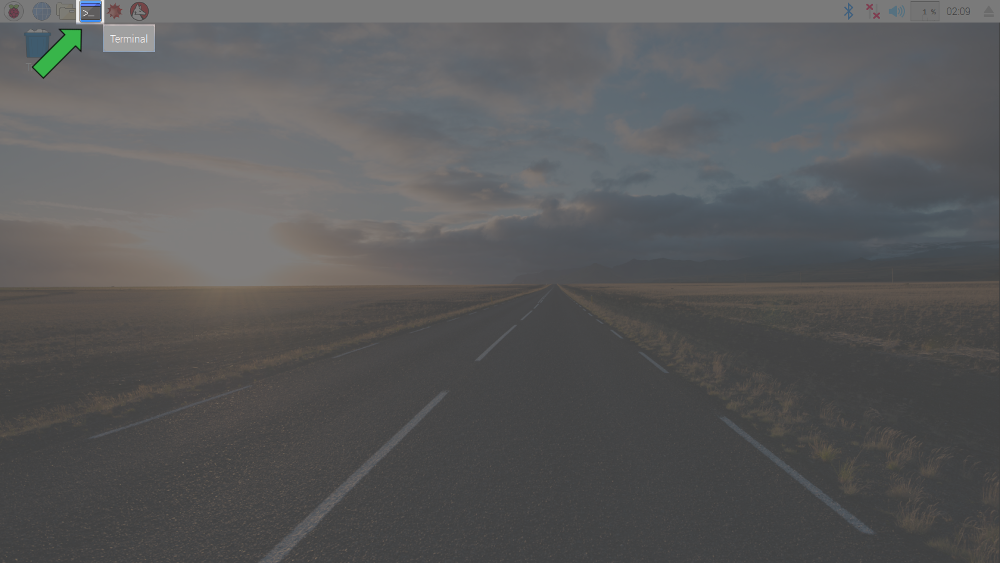
Open a command line as indicated by the green arrow and highlighted icon in the image below.
Head to the location where the package was downloaded. Most likely this was placed in the "Downloads" folder. Type this command and hit the "Enter key."
cd Downloads
To view the contents, feel free to type this command:
ls
In the command line, type this command based on the *.deb package that was downloaded:
sudo dpkg -i walabot_maker_1.0.34_raspberry_arm32.deb
Once the command is ready and matches the downloaded package, hit the "Enter" key.

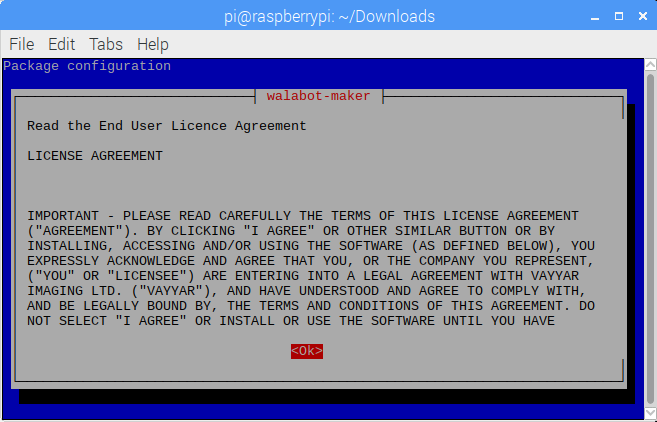
While installing, you may be prompted with an End User License Agreement. Read through it, press the "→" button on your keyboard, and hit "Enter."
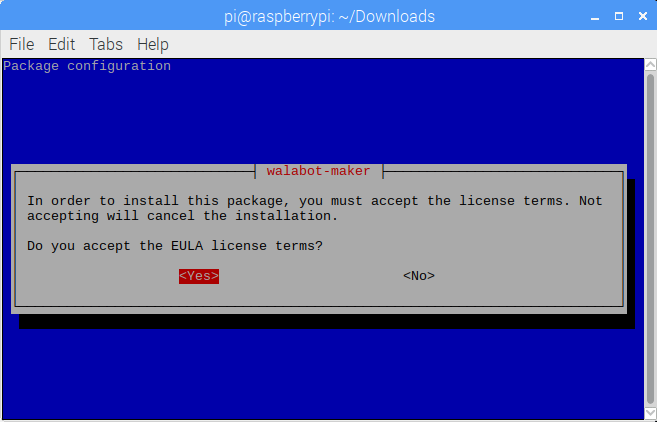
You will be prompted again with another question. Read through the brief message, navigate to "<Yes>", and hit "Enter."
The following paths and files will be installed in these locations:
- /usr/lib/libWalabotAPI.so - The Walabot library.
- /usr/include/WalabotAPI.h - The Walabot library header file.
- /var/lib/walabot/... - The Walabot database and configuration files. Give this path to Walabot_SetSettingsFolder.
- /usr/share/doc/walabot/... - Example code, license, and README.
- /etc/udev/rules.d/... - Special udev rule for Walabot device, so it could be accessed without root privileges.
For more information about the Walabot API Library, head over to Walabot's documentation.
Example API
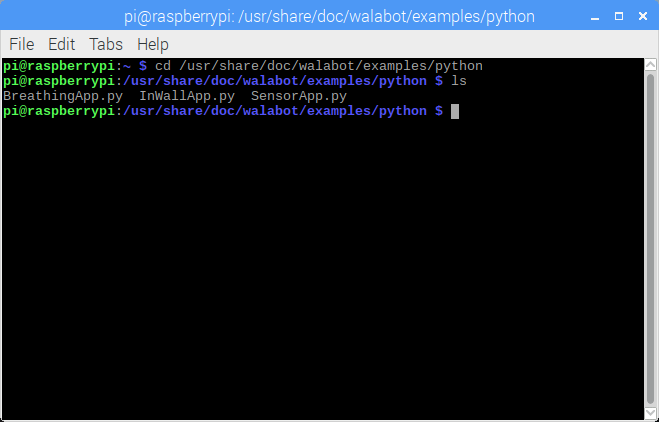
Let's try out the examples in Python! The examples enable the user to utilize the sensor data for embedded projects. There a few methods of running the examples. Since we still have the command line open, we'll open the Python example through the terminal. Navigate to the examples using this command:
cd /usr/share/doc/walabot/examples/python
Typing this command will list the three examples in that path:
ls
Connect the Walabot to the USB port to start testing the Walabot examples.
Target Detection w/ SensorApp.py
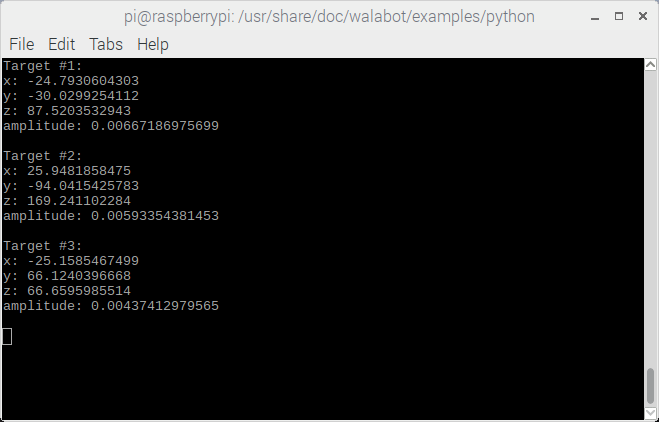
To run the SensorApp.py example, type this command once you are in the directory.
python SensorApp.py
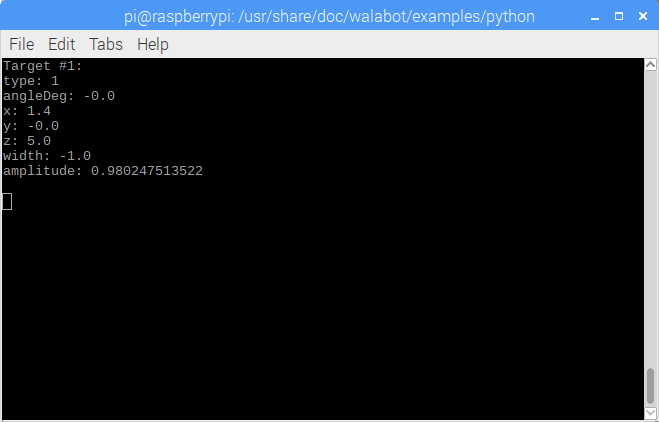
Again, make sure there are no moving objects in front of the sensor when the program begins. The SensorApp.py is just like the target detection example that was demonstrated in the SDK for Windows. The sensor data will be output in the terminal as shown below.
Try moving your hand in front of the sensor to get a feel for the sensor values. Type Ctrl+c in the command line to stop the program.
Breathing w/ BreathingApp.py
To run the BreathingApp.py example, type this command:
python BreathingApp.py
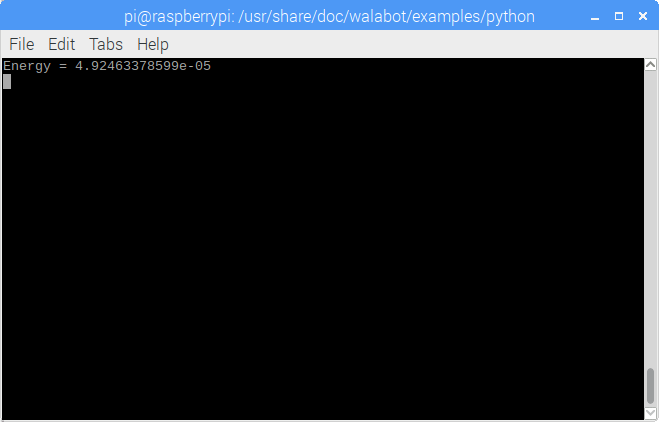
This is just like the breathing example that was demonstrated in the SDK for Windows. With nothing in front of the Walabot, the output should be a very small value.
Stand in front of the Walablot and take a deep breath in. As you inhale, the value may look like the output below. The value may be different depending on how far you are from the Walalbot.

As you exhale, the value should decrease. The output may look similar to the output below.

Type Ctrl+c in the command line to stop the program.
Detecting Objects Behind Materials w/ InWallApp.py
To run the InWallApp.py example, type this command:
python InWallApp.py
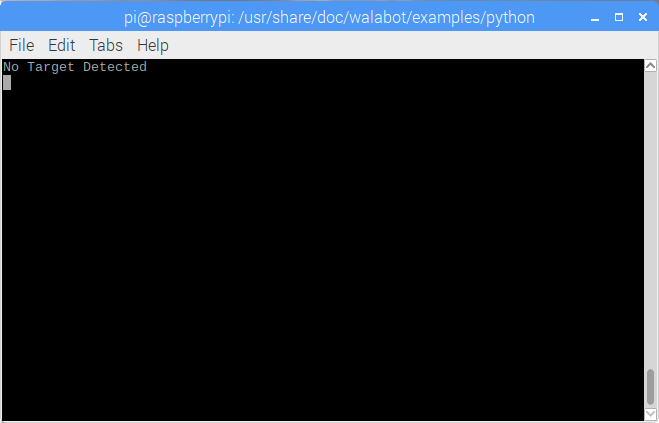
Again, move the Walabot slowly a circular motion on a flat surface once the program begins. Here's what the output may look like when there are no objects behind a wall or table.
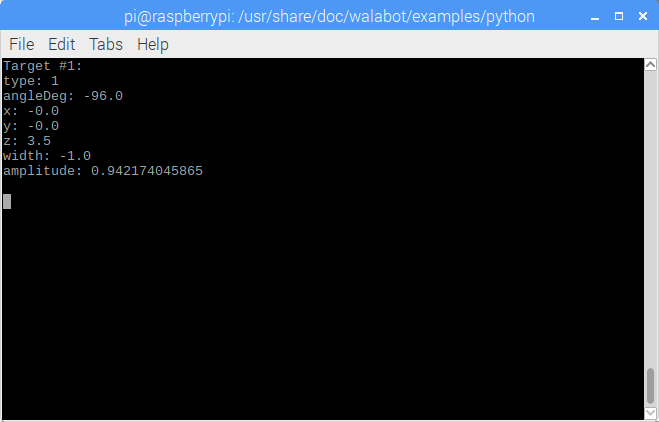
Here's what the output may look like when there is a metal pipe behind the surface.
Rotating the Walabot, here's what the output may look like with the metal pipe behind the surface.
Type Ctrl+c in the command line to stop the program.
Displaying Targets w/ SensorTargets.py
Let's try one more example from Walabot's GitHub repository:
For simplicity, we will head to the Walabot-SensorTargets repository. The other examples may require you to adjust the code and hardware to run the the examples. Download the example by clicking on the Clone or download button. Click again on Download ZIP. Head to the directory where the files were downloaded by typing the following command:
cd Downloads
Unzip the .zip with this command:
unzip Walabot-SensorTargets-master.zip
In the command line, type the following:
pip install WalabotAPI --no-index --find-links="/usr/share/walabot/python/"
Change the current directory where the example was unzipped:
cd Walabot-SensorTargets-master
Run the example by typing:
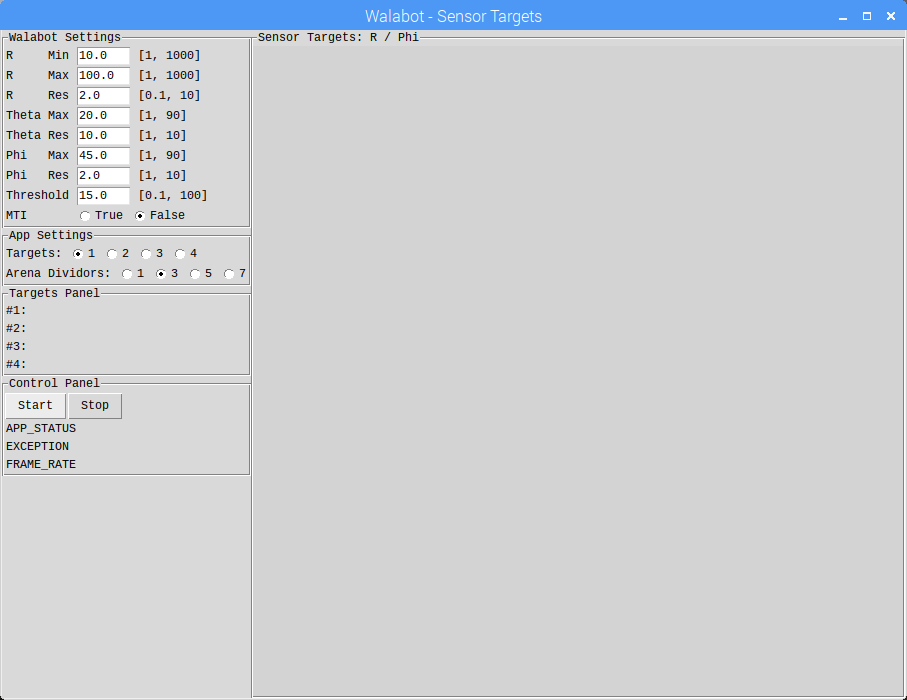
python SensorTargets.py
The program will begin running and open a separate window. Click on the Start button to begin reading and ensure that there is nothing moving in front of the Walabot.
An object should display in the arena when in front of the Walabot. In this example, I just placed my hand in front of the Walabot.
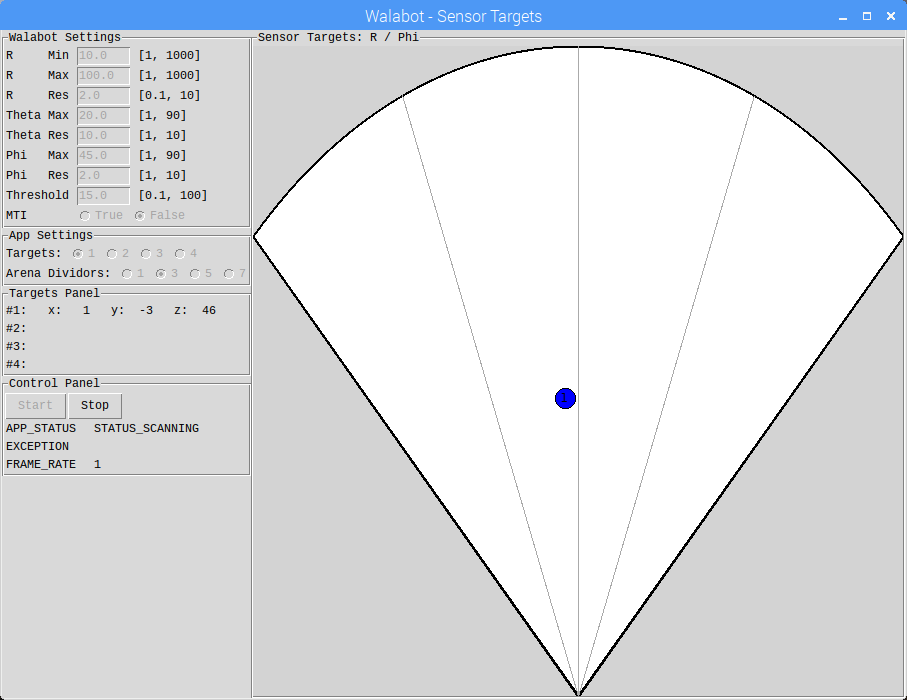
Now that we have tested the SensorTargets.py, try the other examples listed in the GitHub repository! The SeeThroughDemo.py is a neat example that visually notifies you if there is an object behind a wall instead of just the output values in the InWallApp.py . The RawImage.py graphically displays the image of objects in view just like the SDK in Windows.
Troubleshooting
Here are a few troubleshooting tips when using the Walabot on a Raspberry Pi.
• Missing Walabot API
If you are having issues running the Python examples from GitHub, the Python packages for the Walabot API may not be installed. You may receive an error similar to the output below.
language:emacs
Traceback (most recent call last):
  File "sensorTargets.py, line 3, in <module>
    import WalabotAPI
ImportError:NoModule named WalabotAPI
Try using the pip command as explained earlier.
• Suspended Program
If you typed Ctrl+z, the program is suspended. You may get an error similar to the output below.
language:emacs
^Z
[1]+  Stopped                 python SensorApp.py
pi@raspberrypi:/usr/share/doc/walabot/examples/python $ python SensorApp.py
Traceback (most recent call last):
  File "SensorApp.py", line 74, in <module>
    SensorApp()
  File "SensorApp.py", line 38, in SensorApp
    wlbt.ConnectAny()
  File "/usr/share/walabot/python/WalabotAPI.py", line 186, in ConnectAny
    _RaiseIfErr(_wlbt.Walabot_ConnectAny())
  File "/usr/share/walabot/python/WalabotAPI.py", line 122, in _RaiseIfErr
    raise WalabotError(message, res, extended)
WalabotAPI.WalabotError: WALABOT_INSTRUMENT_NOT_FOUND
pi@raspberrypi:/usr/share/doc/walabot/examples/python $
Traceback (most recent call last):
  File "SensorApp.py", line 74, in <module>
    SensorApp()
  File "SensorApp.py", line 38, in SensorApp
    wlbt.ConnectAny()
  File "/usr/share/walabot/python/WalabotAPI.py", line 186, in ConnectAny
    _RaiseIfErr(_wlbt.Walabot_ConnectAny())
  File "/usr/share/walabot/python/WalabotAPI.py", line 122, in _RaiseIfErr
    raise WalabotError(message, res, extended)
WalabotAPI.WalabotError: WALABOT_INSTRUMENT_NOT_FOUND
You could try closing the command line and restarting the program.
Resources and Going Further
Now that you've successfully got your Walabot up and running, it's time to incorporate it into your own project!
For more on the Walabot, check out the links below:
- Walalbot.com - Official website for the Walalbot.
- Technical Datasheet (PDF)
- SDK and API Package Downloads - Download the latest stable SDK and API packages here.
- API Library - Documentation for the Walabot API
- GitHub Project Repo - Walabot's project repository.
- Community - Projects from the Walabot community listed on Hackster.io. Control LEDs based on your breathing patterns, detect falls, or add unique sensing to your robot/drone. Some tutorials are completed while others are still documenting. There are many uses but here are some practical applications that are linked below:
- Home Monitoring And Alerts For The Blind
- People and Fall Detection with Walabot
- Walabot Sleep Quality Tracker
- WalaBreathe - A Wireless Breath To Speech Assistive Device
- Walabot Security Robot with Alexa Command and Control
- Vehicle Rear Vision
- Inspection Drone with Walabot Capability
- Wireless Light Switch Manipulator
- SFE Product Showcase
For information about stands and enclosures check out the 3D models used in these projects:
For a list of useful Raspberry Pi commands, head over to this page:
Need some inspiration for your next project? Check out some of these related tutorials: