Getting Started with 3D Printing Using Tinkercad
Troubleshooting
3D printing is still a relatively new technology, and it's only just become affordable for home and classroom use. As a result, it's still not quite a push-button-get-print operation. It's only natural that some things might go wrong or that your printer requires some maintenance. Once again, please refer to the manual for your specific printer to learn how to operate it and make adjustments/repairs!
Warping
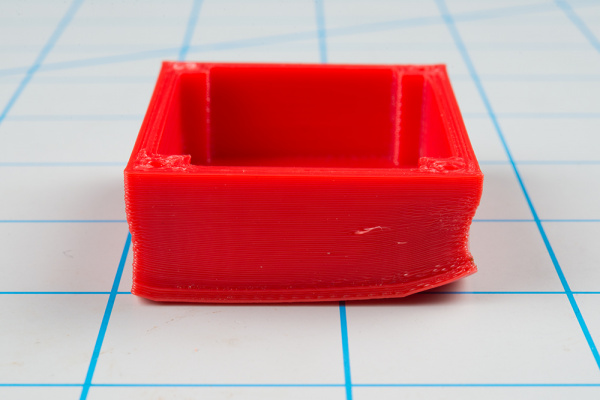
If your part has lifted corners on the bottom, it usually means that the material was cooling and shrinking. This shrinkage might be severe enough (especially on larger prints) that it pulls away from the print bed.
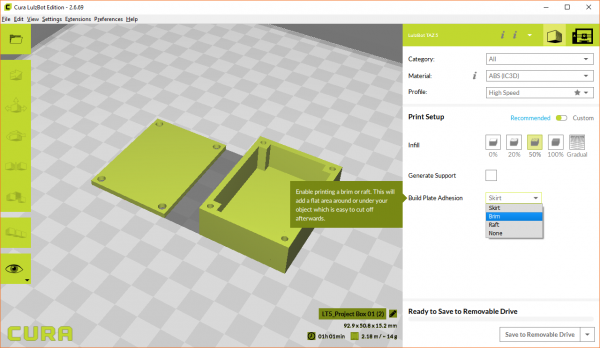
ABS plastic usually requires a hotter extruder to melt (vs. PLA), and as a result, is more prone to warping. You can try switching to PLA or tell your slicer program that you want to try printing with a brim (think of it like the brim of a hat) or raft.
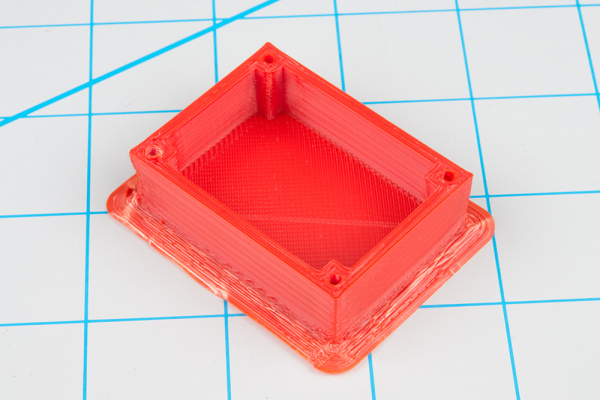
A brim will print material around and connected to the first layer (unlike a skirt, which is not connected). This has the effect of helping the first layer stick to the bed. However, it does mean you have to trim off the brim once the print is done.
A raft will place some material underneath your part (i.e. your part is sitting on a raft of material). This should help with your part sticking to the bed even more, but it means you have even more to trim away when you're done. Rafts should be used when there is not a flat surface on the bottom of your part that will allow for good bed adhesion.
If you would like to learn more about skirts, brims, and rafts, see this article.
Uneven Bottom Surface
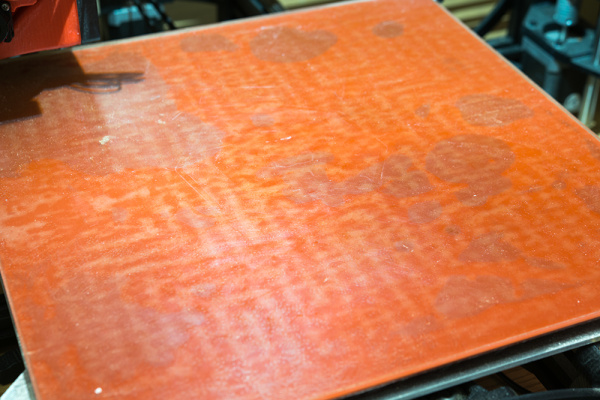
If you see large bubbles forming on your print bed, you will likely end up with an uneven print.
You can use something like a putty knife to try and move the bubbles after the bed has been heated, but you're only delaying the inevitable. Large bubbles usually mean that the PEI heated bed needs to be replaced. If you have a LulzBot, you can find instructions to replace the bed.
Uneven or Peeling Layers
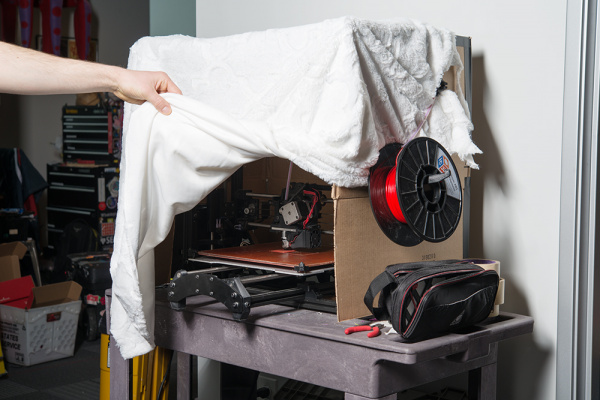
If you notice that some of the layers are not level or sticking together, you may have drafts of cool air moving through your print job. This can be fixed by moving your printer to a location away from any vents, doors, or windows. Alternatively, many 3D printing enthusiasts choose to build an enclosure around their printer to prevent any air from moving over their parts while they're being printed. It can be as simple as some cardboard or a piece of cloth.
Filament Not Coming Out
There could be several reasons that the filament is not coming out of the extruder:
- Make sure the extruder is heated to the appropriate temperature for the material
- Try carefully pushing the material through the extruder manually to see if you can start the flow
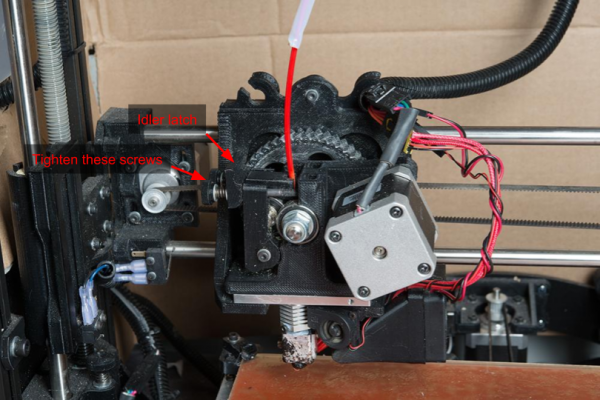
- Adjust the tension on the idler latch
If you have just changed out the type of material and are set at a lower temperature (for example, you had ABS in the machine and you are switching to PLA), you may need to raise the temperature for the former material in order to clear out the nozzle. Pre-heat the machine for the material requiring the highest temperature (e.g. ABS requires a higher temperature to melt than PLA), manually feed the new material through to clear out the nozzle, and then reset the temperature back to that required by the new material.
If you can manually feed the material, but it is not flowing during the printing process, you may need to adjust the tension on the idler latch in order to have the printer "grip" the filament better. Simply tighten the idler latch screws slightly, and tell the machine to extrude some material (on a LulzBot TAZ 5, you can find that in the menu: Prepare > Move Axis > 1 mm > Extruder).
More Troubleshooting
Found an issue that is not listed above? Besides checking the forums for your specific printer, there are websites that document common print issues. Here's one guide that we found to be quite extensive:
