ESP8266 Thing Development Board Hookup Guide
Example Sketch: Blink
Example 1: Blink
To verify that everything works, try uploading the old standard: Blink. But instead of blinking pin 13, toggle pin 5, which is attached to the onboard LED.
language:c
#define ESP8266_LED 5

void setup()
{
  pinMode(ESP8266_LED, OUTPUT);
}

void loop()
{
  digitalWrite(ESP8266_LED, HIGH); // LED off
  delay(500);
  digitalWrite(ESP8266_LED, LOW); // LED on
  delay(500);
}
Upload Fails – Troubleshooting
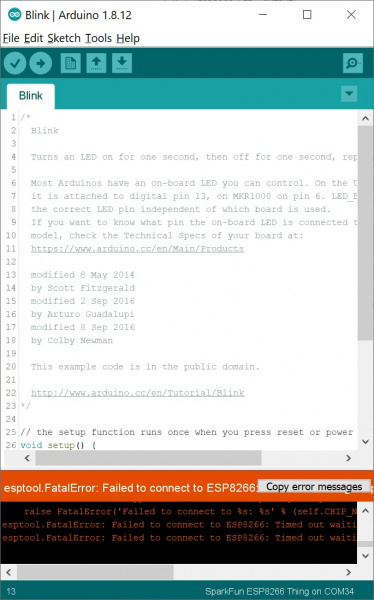
If you get the following error ending with something like esptool.FatalError: Failed to connect to ESP8266: Timed out waiting for packet header:
Make sure that you select the SparkFun ESP8266 Thing Dev as the board. Selecting just the "SparkFun ESP8266 Thing" without the word "Dev" can cause problems uploading when using the ESP8266 Community Board Add-On.
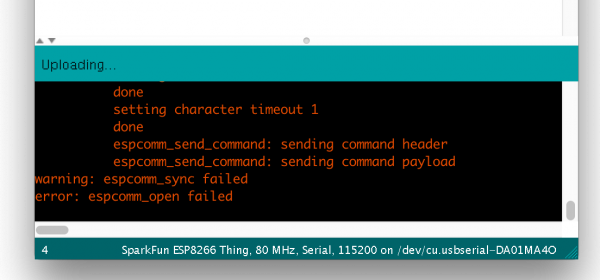
If every upload attempt results in an error ending with something like error: espcomm_open failed:
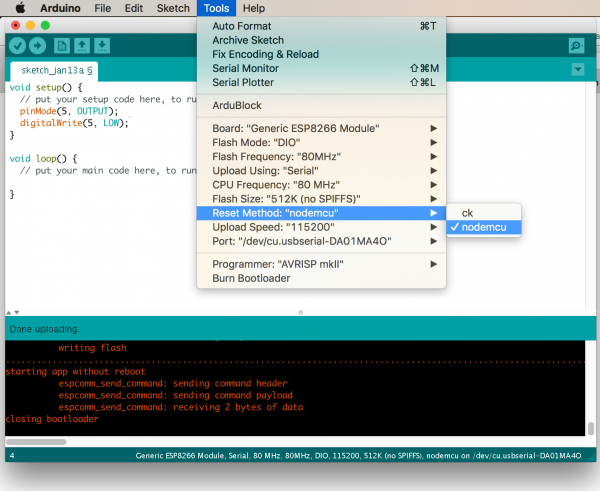
Try changing the board to Generic ESP8266 Module, and in the sub menus, make sure the following sub-menu's are also set:
- Flash Mode: DIO
- Flash Frequency: 80MHz
- Upload Using: Serial
- CPU Frequency: 80MHz
- Flash Size: 512K (no SPIFFS)
- Reset Method: nodemcu
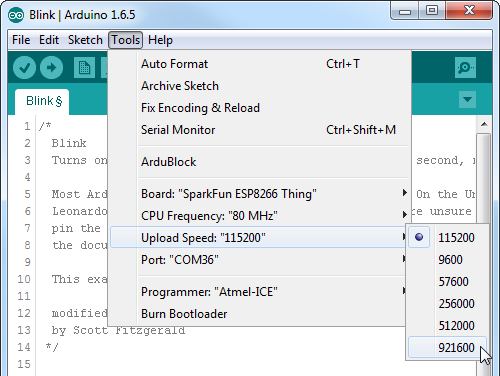
Faster Uploads! The serial upload speed defaults to 115200 bps, which is reliable, but can feel a bit slow. You can increase the upload speed by a factor of about 8 by selecting 921600 under the Tools > Upload Speed menu.
This faster upload speed can be slightly less reliable, but will save you loads of time!
There are still some bugs to be fleshed out of the esptool, sometimes it may take a couple tries to successfully upload a sketch. If you're still not having any luck uploading, try turning the board on then off, or unplug then replug the USB cable. If you still have trouble, get in touch with our amazing tech support team.


