CCS811 Air Quality Breakout Hookup Guide
 MTaylor
Example: Basic Reading
After you've got pins attached to your breakout board, the first example to use should be BasicReadings. Select it from examples or copy from below.
Connect the sensor as follows as a starting place for the examples.
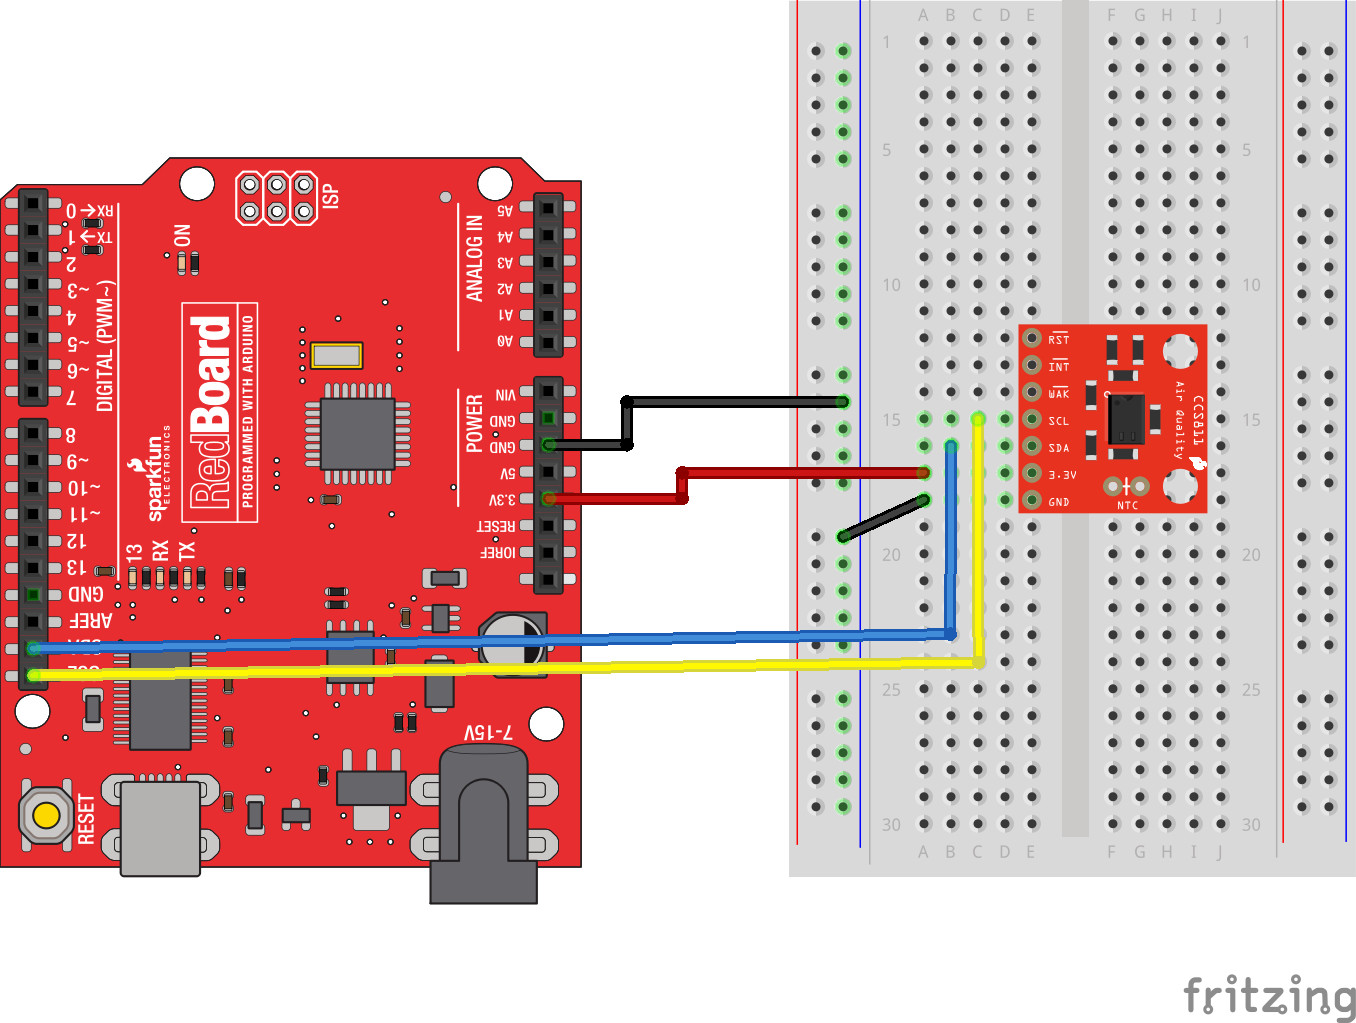
For this example, only 3.3V, GND, SDA and SCL are needed. The jumpers on the board are left in the default positions.
language:c
/******************************************************************************
  Read basic CO2 and TVOCs

  Marshall Taylor @ SparkFun Electronics
  Nathan Seidle @ SparkFun Electronics

  April 4, 2017

  https://github.com/sparkfun/CCS811_Air_Quality_Breakout
  https://github.com/sparkfun/SparkFun_CCS811_Arduino_Library

  Read the TVOC and CO2 values from the SparkFun CSS811 breakout board

  A new sensor requires at 48-burn in. Once burned in a sensor requires
  20 minutes of run in before readings are considered good.

  Hardware Connections (Breakoutboard to Arduino):
  3.3V to 3.3V pin
  GND to GND pin
  SDA to A4
  SCL to A5

******************************************************************************/
#include <Wire.h>

#include "SparkFunCCS811.h" //Click here to get the library: http://librarymanager/All#SparkFun_CCS811

#define CCS811_ADDR 0x5B //Default I2C Address
//#define CCS811_ADDR 0x5A //Alternate I2C Address

CCS811 mySensor(CCS811_ADDR);

void setup()
{
  Serial.begin(115200);
  Serial.println("CCS811 Basic Example");

  Wire.begin(); //Inialize I2C Hardware

  if (mySensor.begin() == false)
  {
    Serial.print("CCS811 error. Please check wiring. Freezing...");
    while (1)
      ;
  }
}

void loop()
{
  //Check to see if data is ready with .dataAvailable()
  if (mySensor.dataAvailable())
  {
    //If so, have the sensor read and calculate the results.
    //Get them later
    mySensor.readAlgorithmResults();

    Serial.print("CO2[");
    //Returns calculated CO2 reading
    Serial.print(mySensor.getCO2());
    Serial.print("] tVOC[");
    //Returns calculated TVOC reading
    Serial.print(mySensor.getTVOC());
    Serial.print("] millis[");
    //Display the time since program start
    Serial.print(millis());
    Serial.print("]");
    Serial.println();
  }

  delay(10); //Don't spam the I2C bus
}
At the beginning, an object is created in the global space CCS811 mySensor(CCS811_ADDR); and is constructed with the address as a parameter.
To get data from the sensor, mySensor.dataAvailable() is checked until a new reading is ready, mySensor.readAlgorithmResults(); is called to have the sensor process the reading, then mySensor.getCO2() and mySensor.getTVOC() are used to retrieve the calculated values for gas levels.
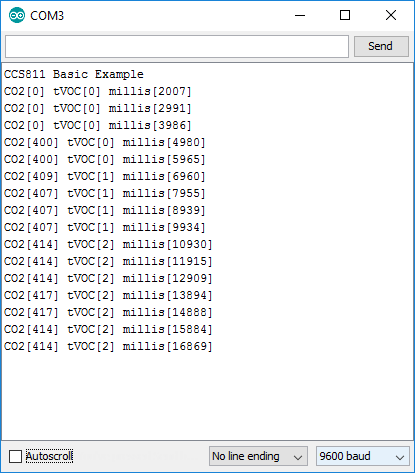
If everything is connected correctly, the serial window will report gas levels every second. Remember the sensor takes 20 minutes to properly warm up, so values reported will rise up in the early stages of operation!
Summary:
To get data from the CCS811, these minimum requirements must be met:
- Create a
CCS811object in the global space - Run
.begin()of your object (Return type monitoring optional) - Check for the availability of new data with
.dataAvailable() - Use
.readAlgorithmResults()to perform a measurement.getCO2()to get the last equivalent CO2 reading (no I2C bus operation).getTVOC()to get the last TVOC reading (no I2C bus operation)