Battery Babysitter Hookup Guide
 jimblom
BQ27441 Arduino Library
To make interfacing with the Battery Babysitter's BQ27441 LiPo fuel gauge as painless as possible, we've written an Arduino library to abstract away the unique I2C interface and register interfacing. Head over to the SparkFun_BQ27441_Arduino_Library GitHub repository to download the latest, greatest release, or click the button below to download the library in a ZIP file.
For help installing the library, check out our Installing an Arduino Library tutorial.
Start Simple: BQ27441_Basic Example
The library includes a handful of examples, which you're free to explore. To begin, we recommend BQ27441_Basic. Click through File > Examples > SparkFun BQ27441 LiPo Fuel Gauge Arduino Library > BQ27441_Basic to open it up.
Then set your Arduino port/board, and upload away!
After uploading, open up your serial monitor, and set the baud rate to 115200 bps. You should see the Arduino initialize the fuel gauge, and then begin printing some battery stats:
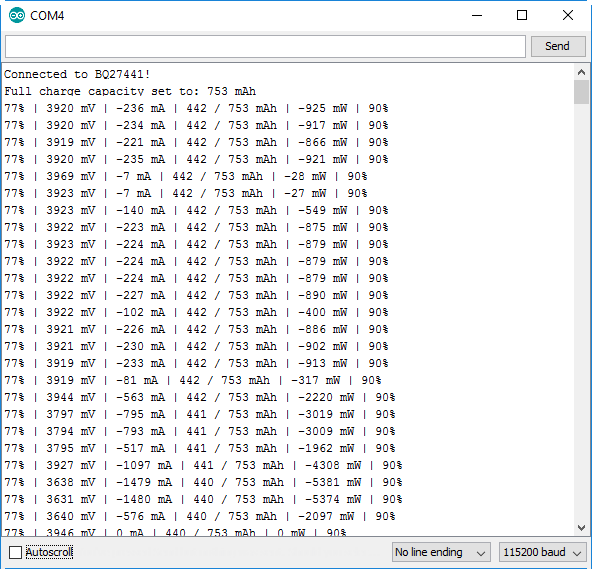
The basic example prints state-of-charge (%), battery voltage (mV), average current draw from the battery (mA), remaining and full capacities (mAh), average power draw on the battery (mW), and the battery's state-of-health (%). The current and power draws will be negative when the battery is sourcing current, and positive when it's charging. Try hooking up some power resistors to the Battery Babysitter's output, or start charging to see how these numbers change.
You can adjust the full capacity value by configuring the BATTERY_CAPACITY variable at the top of the example sketch. For example, by assigning that variable a value of 850, the sketch configures the BQ27441 to calculate the battery state assuming an 850 mAh battery is connected to it.
Using the BQ27441 Arduino Library
Here is a quick primer to incorporating the BQ27441 library into a sketch of your own. First, set the library up by including it. Then -- usually in the setup() function -- call lipo.begin(). You can check the return value of the begin function, to make sure the Battery Babysitter is connected correctly.
language:c
#include <SparkFunBQ27441.h>

void setup()
{
    Serial.begin(115200);
    if (!lipo.begin())
    {
        Serial.println("Error: Unable to communicate with BQ27441.");
        Serial.println("  Check wiring and try again.");
        Serial.println("  (Battery must be plugged into Battery Babysitter!)");
        while (1) ;
    }
    Serial.println("Connected to BQ27441!");
}
Next, you may want to set the battery's full capacity using the lipo.setCapacity() function:
language:c
lipo.setCapacity(1000); // Configure BQ27441 to assume a 1000 mAh battery
Expect a short delay -- 1-to-2 seconds -- before your Arduino completes the execution of this function. The Battery Babysitter's capacity setting will remain at the set value until it loses power (usually when a battery is disconnected or fully discharged).
After those quick function-calls, you're ready to read some battery statistics. You can use these functions to read state-of-charge, voltage, remaining capacity, current, power, and more.
language:c
unsigned int soc = lipo.soc(); // Read state-of-charge (in %)
unsigned int volts = lipo.voltage(); // Read voltage (in mV)
int current = lipo.current(AVG); // Read average current (in mA)
unsigned int capacity = lipo.capacity(REMAIN); // Read remaining capacity (in mAh)
int power = lipo.power(); // Read power consumption (in mW)
int health = lipo.soh(); // Read state-of-health (in %)
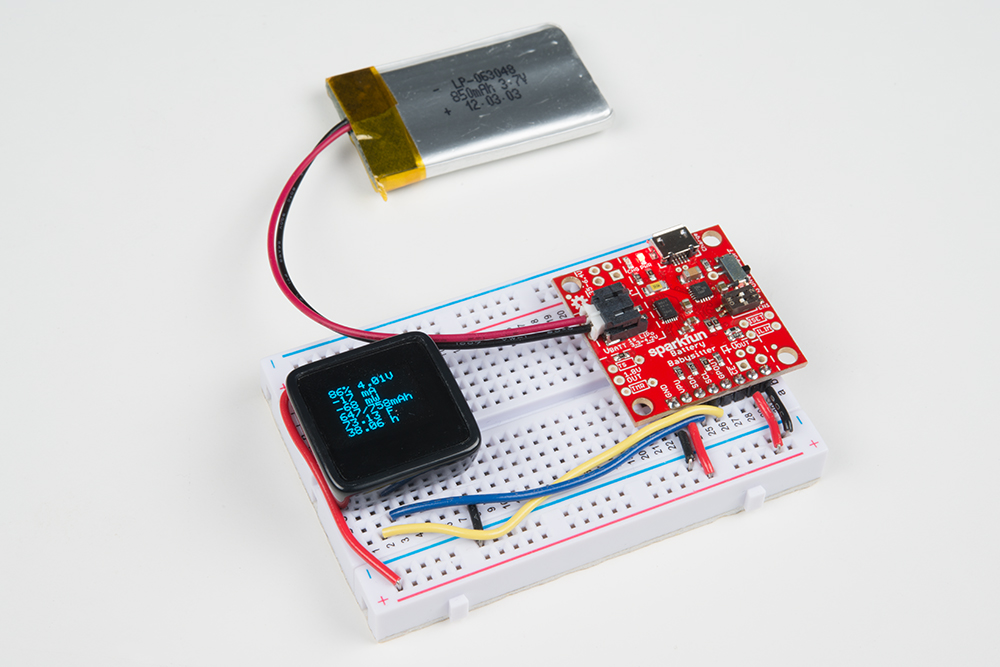
Now, take those values, and do something with them! Maybe that something is as simple as displaying the battery statistics on a MicroView.
Using GPOUT
The BQ27441’s programmable output – GPOUT – can be used to alleviate your microcontroller from constantly having to poll the fuel gauge. GPOUT can be configured to alert your Arduino of one of two state changes. To start using the pin, simply connect it to a free Arduino digital pin, and load up one of the examples.
Low Battery Alert
The GPOUT pin can be used to alert your system that the battery’s state-of-charge has fallen below a pair of values. You can set two SoC thresholds in this mode: a higher “SOC1” value, and a critically low “SOCF” value. For example, the SOC1 threshold might be 20%, while the SOCF threshold is 5%.
In this mode, when the battery voltage falls below a threshold the interrupt will activate. It will remain in that state until the battery is charged, and its SoC rises above the threshold.
This interrupt function is documented in the BQ27441_GPOUT_BAT_LOW example.
Change in State-of-Charge
Alternatively, the BQ27441 can be configured to trigger the GPOUT pin whenever the SoC goes up or down by a set integer value. That integer value can be configured between 1 and 100. So, for example, if the change-delta is set to 1, GPOUT will trigger every time the SoC goes up or down a percent – 0%, 1%, 2%, and so on. If the change-delta is set to 10%, the interrupt will fire every time the SoC rises or falls to a factor of 10: 0%, 10%, 20%, etc.
This interrupt function is documented in the BQ27441_GPOUT_SOC_INT example.