Using an LCD on the Edison
 Shawn Hymel
Introduction
One of the requests we often hear for the Intel® Edison is the ability to use an LCD. While the Edison does not have a display driver, we can use the onboard SPI port to control simple LCDs.
ReplaceMeOpen
ReplaceMeClose
For this particular tutorial, we will rely on a recent version of Intel's UPM library. In it is a module capable of calling the necessary functions to control an ILI9341 driver chip, which is a popular controller for 320x240, 2"-3" LCDs.
Required Materials
You will need an LCD with a ILI9341 controller. These can be found from a variety of sources, such as PJRC and Adafruit. Additionally, you will need the following:
Suggested Readings
Before getting started, you may find some of the tutorials below helpful.
Hardware Hookup
Build the Block Stack
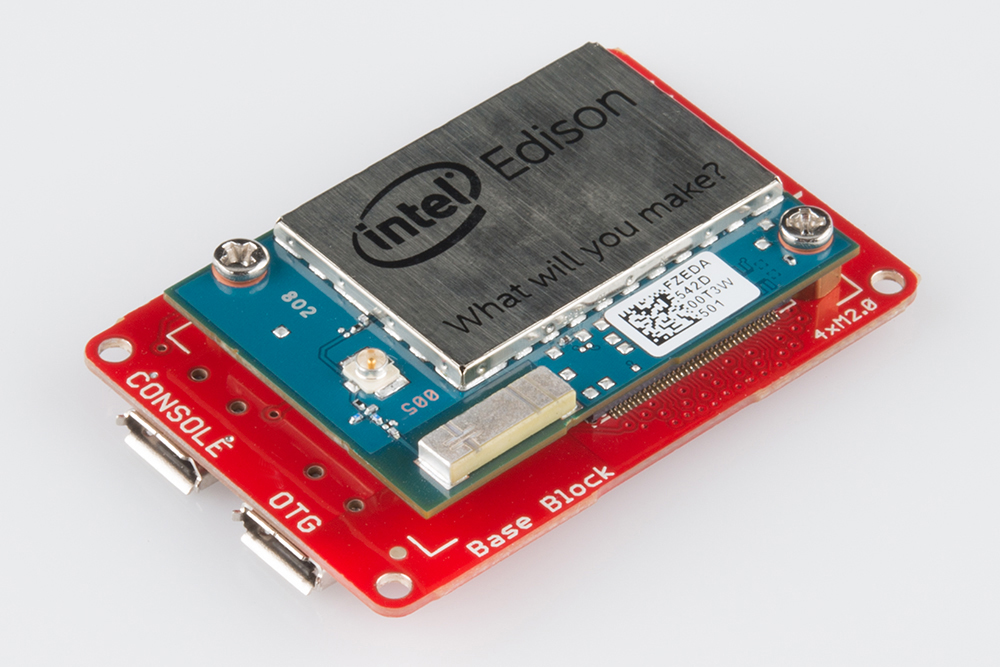
Using the Edison Hardware Pack, attach the Edison to the Base Block.
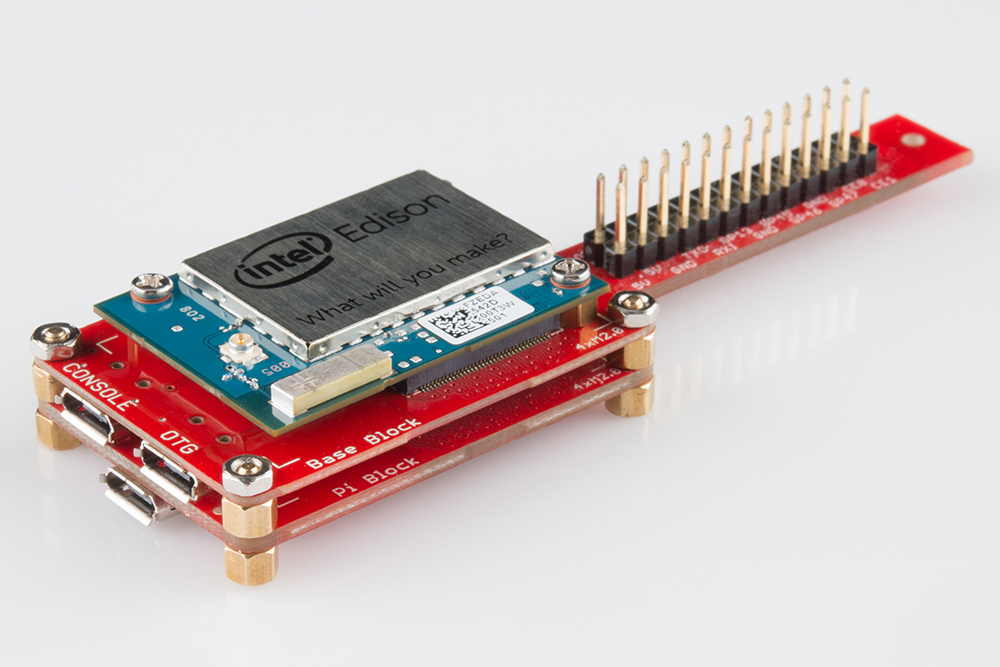
Attach the Base Block to the Pi Block. Secure them in place using screws and standoffs.
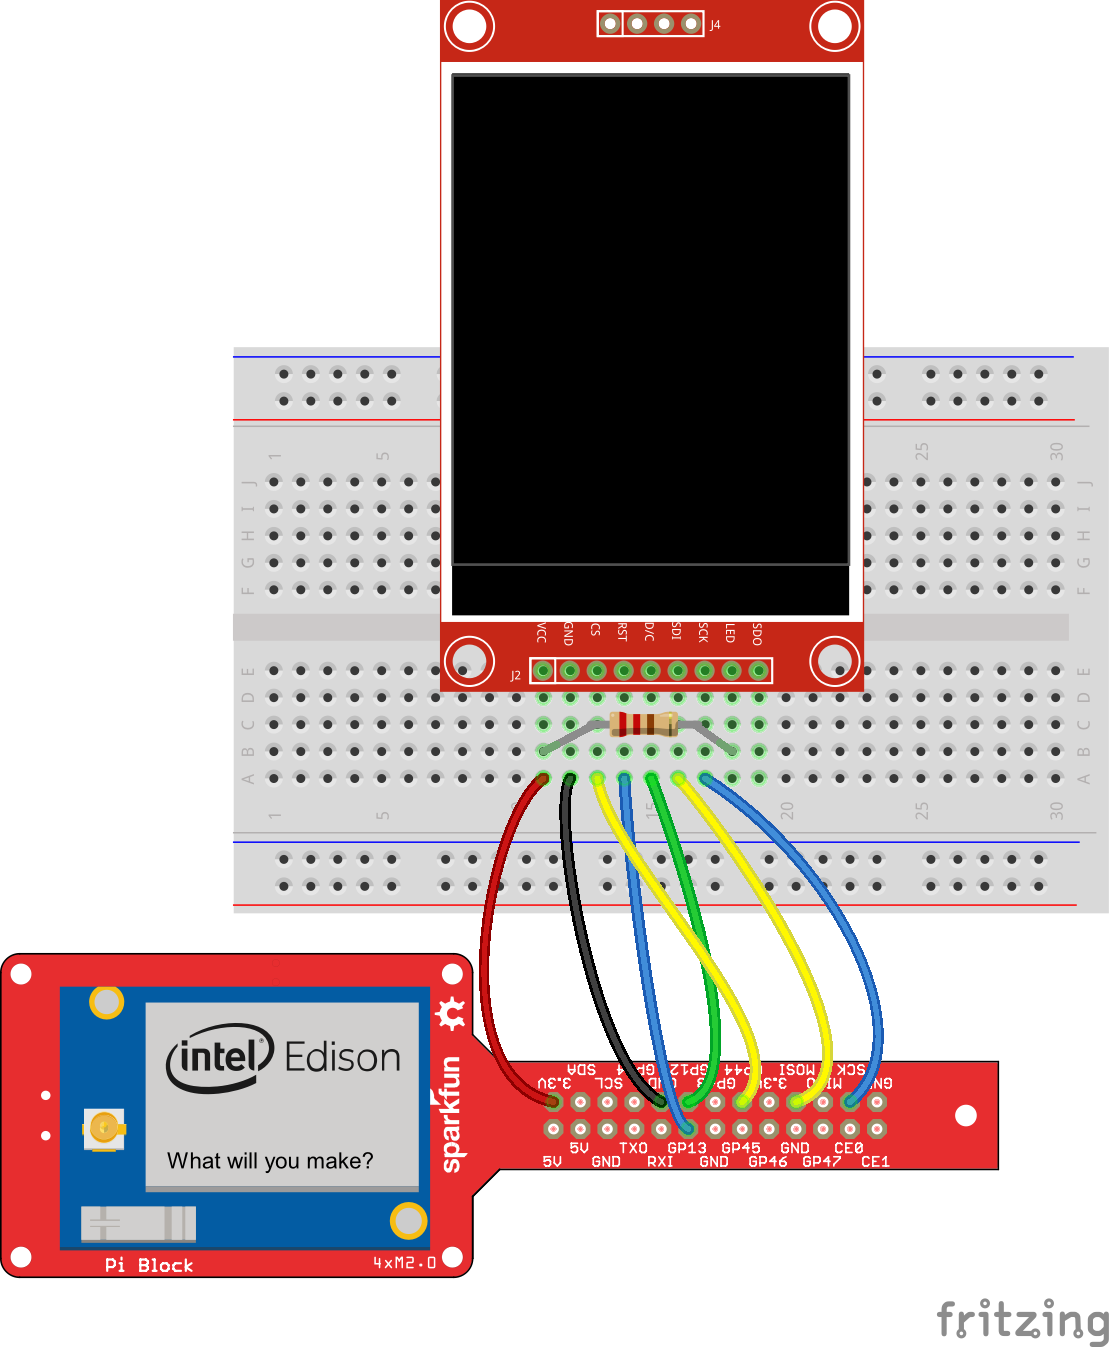
Connect the LCD
We need to connect the LCD to the Edison via the Pi Block. Solder headers to the LCD (if necessary), and follow the Fritzing diagram below to connect it to the Edison.
Install the ILI9341 Module
Flash and Configure the Edison
If this is your first time using the Edison, it is recommended that you update to the latest firmware and connect to WiFi.
Build MRAA
MRAA is Intel's set of libraries used to control the low-level hardware. Because UPM relies on MRAA, we need to install it first.
Connect to the Edison over Serial or SSH. Once logged in, enter the following commands to download MRAA:
wget https://github.com/intel-iot-devkit/mraa/archive/master.zip
unzip master.zip
mv mraa-master mraa
Then, build MRAA with:
cd mraa
mkdir build
cd build
cmake ..
make
Install the newly built libraries, and update the pkg-config path, which is needed by UPM.
make install
export PKG_CONFIG_PATH=$PKG_CONFIG_PATH:/usr/local/lib/pkgconfig
Build ili9341 in UPM
Next, we need to download the latest version of UPM and install the ili9341 module. Download UPM with:
cd ~
rm master.zip
wget https://github.com/intel-iot-devkit/upm/archive/master.zip
unzip master.zip
mv upm-master upm
Prepare to build:
cd upm
mkdir build
cd build
cmake ..
Build and install the ili9341 module:
make ili9341
cd src/ili9341
make install
And that's it! We'll use this installed library to make an example program that draws some basic shapes on the LCD. Choose whether you want to write the example program in C++, JavaScript, or Python, and skip to that section below.
Example Program: C++
If you are used to writing C/C++, then this is the way to go. Go back to your home directory and create a C++ file:
cd ~
vi ili9341.cpp
Press 'i' to type text. Copy and paste the code below into vi (if you are using an SSH client like PuTTY, simply right-click in the window to paste).
language:cpp
#include <unistd.h>

#include "ili9341.h"

int main(int argc, char **argv) {

    // Pins (Edison)
    // CS_LCD   GP44 (MRAA 31)
    // CS_SD    GP43 (MRAA 38) unused
    // DC       GP12 (MRAA 20)
    // RESEST   GP13 (MRAA 14)
    upm::ILI9341 * lcd = new upm::ILI9341(31, 38, 20, 14);

    // Fill the screen with a solid color
    lcd->fillScreen(lcd->color565(0, 40, 16));

    // Draw some shapes
    lcd->drawFastVLine(10, 10, 100, ILI9341_RED);
    lcd->drawFastHLine(20, 10, 50, ILI9341_CYAN);
    lcd->drawLine(160, 30, 200, 60, ILI9341_GREEN);
    lcd->fillRect(20, 30, 75, 60, ILI9341_ORANGE);
    lcd->drawCircle(70, 50, 20, ILI9341_PURPLE);
    lcd->fillCircle(120, 50, 20, ILI9341_PURPLE);
    lcd->drawTriangle(50, 100, 10, 140, 90, 140, ILI9341_YELLOW);
    lcd->fillTriangle(150, 100, 110, 140, 190, 140, ILI9341_YELLOW);
    lcd->drawRoundRect(20, 150, 50, 30, 10, ILI9341_RED);
    lcd->drawRoundRect(130, 150, 50, 30, 10, ILI9341_RED);
    lcd->fillRoundRect(75, 150, 50, 30, 10, ILI9341_RED);

    // Write some text
    lcd->setCursor(0, 200);
    lcd->setTextColor(ILI9341_LIGHTGREY);
    lcd->setTextWrap(true);
    lcd->setTextSize(1);
    lcd->print("Text 1\n");
    lcd->setTextSize(2);
    lcd->print("Text 2\n");
    lcd->setTextSize(3);
    lcd->print("Text 3\n");
    lcd->setTextSize(4);
    lcd->print("Text 4\n");

    // Test screen rotation
    for(int r = 0; r < 4; r++) {
        lcd->setRotation(r);
        lcd->fillRect(0, 0, 5, 5, ILI9341_WHITE);
        sleep(1);
    }

    // Invert colors, wait, then revert back
    lcd->invertDisplay(true);
    sleep(2);
    lcd->invertDisplay(false);

    // Don't forget to free up that memory!
    delete lcd;

    return 0;
}
Save and exit ('esc', type ':wq', and press 'enter'). Append the UPM modules location to our linker PATH, and compile the program:
export LD_LIBRARY_PATH=$LD_LIBRARY_PATH:/usr/local/lib
g++ ili9341.cpp -o ili9341 -lupm-ili9341 -lmraa -I/usr/local/include/upm
Run the program:
./ili9341
The screen will fill with a color and draw some basic shapes!
Example Program: JavaScript
If you would like to write a Node.JS program that uses the ILI9341 module, you can do that, too!
cd ~
vi ili9341.js
Press ‘i’ to type text. Copy and paste the code below into vi (if you are using an SSH client like PuTTY, simply right-click in the window to paste).
language:javascript
var ili9341 = require('jsupm_ili9341');

// Pins (Edison)
// CS_LCD   GP44 (MRAA 31)
// CS_SD    GP43 (MRAA 38) unused
// DC       GP12 (MRAA 20)
// RESEST   GP13 (MRAA 14)
var lcd = new ili9341.ILI9341(31, 38, 20, 14);

// Fill the screen with a solid color
lcd.fillScreen(lcd.color565(0, 40, 16));

// Draw some shapes
lcd.drawFastVLine(10, 10, 100, ili9341.ILI9341_RED);
lcd.drawFastHLine(20, 10, 50, ili9341.ILI9341_CYAN);
lcd.drawLine(160, 30, 200, 60, ili9341.ILI9341_GREEN);
lcd.fillRect(20, 30, 75, 60, ili9341.ILI9341_ORANGE);
lcd.drawCircle(70, 50, 20, ili9341.ILI9341_PURPLE);
lcd.fillCircle(120, 50, 20, ili9341.ILI9341_PURPLE);
lcd.drawTriangle(50, 100, 10, 140, 90, 140, ili9341.ILI9341_YELLOW);
lcd.fillTriangle(150, 100, 110, 140, 190, 140, ili9341.ILI9341_YELLOW);
lcd.drawRoundRect(20, 150, 50, 30, 10, ili9341.ILI9341_RED);
lcd.drawRoundRect(130, 150, 50, 30, 10, ili9341.ILI9341_RED);
lcd.fillRoundRect(75, 150, 50, 30, 10, ili9341.ILI9341_RED);

// Write some text
lcd.setCursor(0, 200);
lcd.setTextColor(ili9341.ILI9341_LIGHTGREY);
lcd.setTextWrap(true);
lcd.setTextSize(1);
lcd.print("Text 1\n");
lcd.setTextSize(2);
lcd.print("Text 2\n");
lcd.setTextSize(3);
lcd.print("Text 3\n");
lcd.setTextSize(4);
lcd.print("Text 4\n");

// Test screen rotation
function rotateScreen(r) {
    lcd.setRotation(r);
    lcd.fillRect(0, 0, 5, 5, ili9341.ILI9341_WHITE);
    if (r < 4) {
        r++;
        setTimeout(function() { rotateScreen(r); }, 1000);
    }
}
rotateScreen(0);

// Invert colors, wait, then revert back
setTimeout(function() { lcd.invertDisplay(true); }, 4000);
setTimeout(function() { lcd.invertDisplay(false); }, 6000);
Save and exit (‘esc’, type ‘:wq’, and press ‘enter’). Append the UPM modules location to our Node PATH:
export NODE_PATH=$NODE_PATH:/usr/local/lib/node_modules/
Run the program:
node ili9341.js
The screen will fill with a color and draw some basic shapes!
Example Program: Python
We can also use Python to make calls to the UPM module. Create a Python script:
cd ~
vi ili9341.py
Press ‘i’ to type text. Copy and paste the code below into vi (if you are using an SSH client like PuTTY, simply right-click in the window to paste).
language:python
#!/usr/bin/python

import time
import pyupm_ili9341 as ili9341

# Pins (Edison)
# CS_LCD   GP44 (MRAA 31)
# CS_SD    GP43 (MRAA 38) unused
# DC       GP12 (MRAA 20)
# RESEST   GP13 (MRAA 14)
lcd = ili9341.ILI9341(31, 38, 20, 14)

# Fill the screen with a solid color
lcd.fillScreen(lcd.color565(0, 40, 16))

# Draw some shapes
lcd.drawFastVLine(10, 10, 100, ili9341.ILI9341_RED)
lcd.drawFastHLine(20, 10, 50, ili9341.ILI9341_CYAN)
lcd.drawLine(160, 30, 200, 60, ili9341.ILI9341_GREEN)
lcd.fillRect(20, 30, 75, 60, ili9341.ILI9341_ORANGE)
lcd.drawCircle(70, 50, 20, ili9341.ILI9341_PURPLE)
lcd.fillCircle(120, 50, 20, ili9341.ILI9341_PURPLE)
lcd.drawTriangle(50, 100, 10, 140, 90, 140, ili9341.ILI9341_YELLOW)
lcd.fillTriangle(150, 100, 110, 140, 190, 140, ili9341.ILI9341_YELLOW)
lcd.drawRoundRect(20, 150, 50, 30, 10, ili9341.ILI9341_RED)
lcd.drawRoundRect(130, 150, 50, 30, 10, ili9341.ILI9341_RED)
lcd.fillRoundRect(75, 150, 50, 30, 10, ili9341.ILI9341_RED)

# Write some text
lcd.setCursor(0, 200)
lcd.setTextColor(ili9341.ILI9341_LIGHTGREY)
lcd.setTextWrap(True)
lcd.setTextSize(1)
lcd._print("Text 1\n")
lcd.setTextSize(2)
lcd._print("Text 2\n")
lcd.setTextSize(3)
lcd._print("Text 3\n")
lcd.setTextSize(4)
lcd._print("Text 4\n")

# Test screen rotation
for r in range(0, 4):
    lcd.setRotation(r)
    lcd.fillRect(0, 0, 5, 5, ili9341.ILI9341_WHITE)
    time.sleep(1)

# Invert colors, wait, then revert back
lcd.invertDisplay(True)
time.sleep(2)
lcd.invertDisplay(False)

# Don't forget to free up that memory!
del lcd
Save and exit (‘esc’, type ‘:wq’, and press ‘enter’). Append the UPM modules location to our Python PATH:
export PYTHONPATH=$PYTHONPATH:/usr/local/lib/python2.7/site-packages/
Run the script with:
python ili9341.py
The screen will fill with a color and draw some basic shapes!
Resources and Going Further
If you successfully ran one of the example programs, your LCD should look like this:
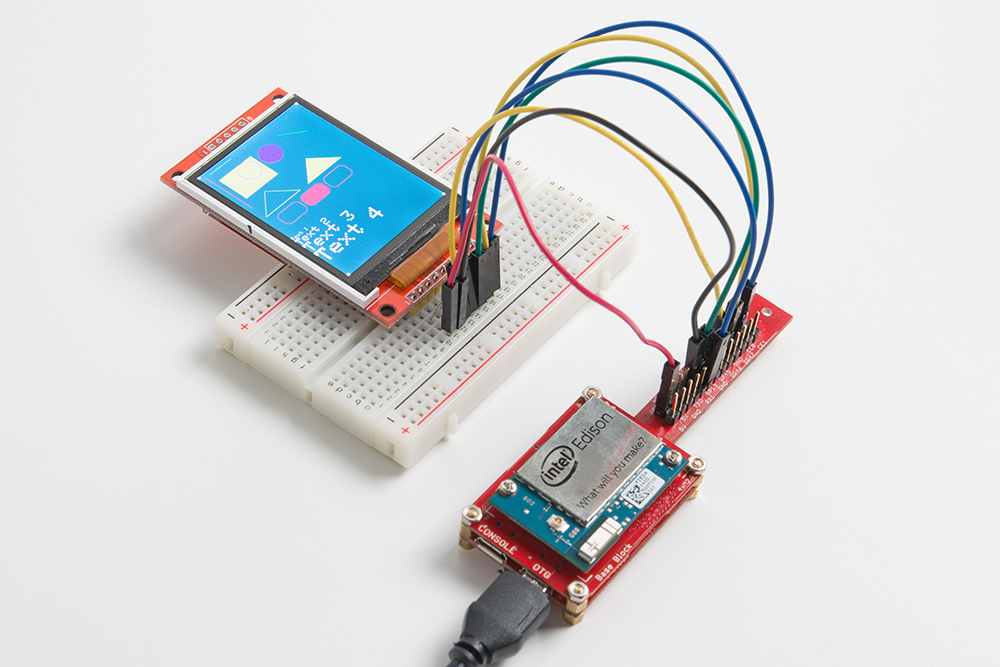
Feel free to take a closer look at the examples, as they will show you how to draw basic shapes on the LCD.
Resources
Want to make a smart mirror using the Edison and an LCD? Check out the following tutorial: