Tiny AVR Programmer Hookup Guide
 jimblom
Driver Installation
Before you can start using the Tiny AVR Programmer, you may need to set it up on your computer. If you're using a Mac or Linux machine, you don't need to install drivers. Just plug the board in, and skip to the Programming in Arduino page.
If you're using any version of Windows, you've got a few steps to follow before you can join your Mac/Linux comrades. There are two sets of instruction for driver installation on this page. The first is the easiest, quickest method, and should work for most everyone. The second installation process is only required if the first one fails -- it takes a more manual approach to the driver installation.
Automatically Install the Drivers with Zadig
To begin, plug the Tiny AVR Programmer into your computer. Upon initially connecting the board, Windows will try to automatically install the drivers. Some computers may be lucky, but most will turn up with a message notifying you that the driver install failed.
Click the link below to download the Zadig software and drivers:
Use your favorite unzipper to extract the ZIP file. Don't forget where you put the extracted folder!
After you've plugged the Tiny AVR Programmer into your computer and your machine has run through the process of checking for and failing to install drivers, proceed to the "zadig_v2.0.1.160" folder you just unzipped. Then Run zadig.exe software.
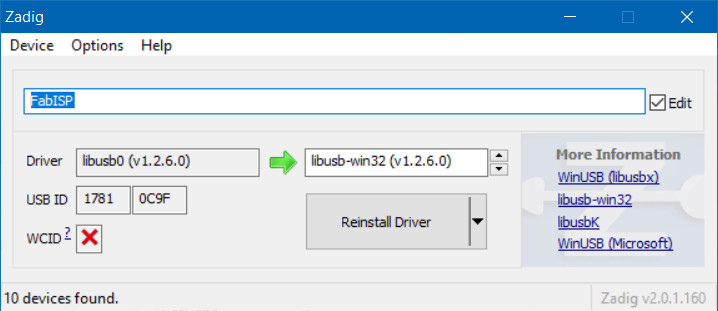
Zadig is a wonderful tool that can install the drivers on just about any Windows platform out there. Upon opening the program, you should be greeted with a window like this:
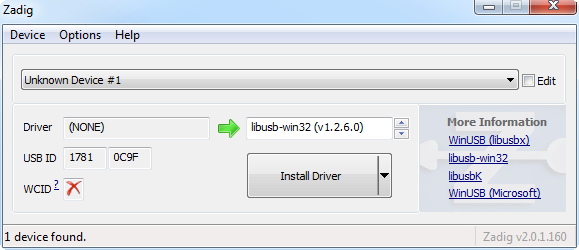
There are a few options to verify before installing the driver:
- Select the device -- The top dropbox controls which device you want to install the driver for. Hopefully you only have one option here, something like "Unknown Device #1". If you have more than one option, check your device manager to see if you can make sense of which is which (plugging and unplugging a device usually helps).
- Select the driver -- Click the arrows in this box until you happen upon libusb-win32 (vx.x.x.x), that's the driver we want to install.
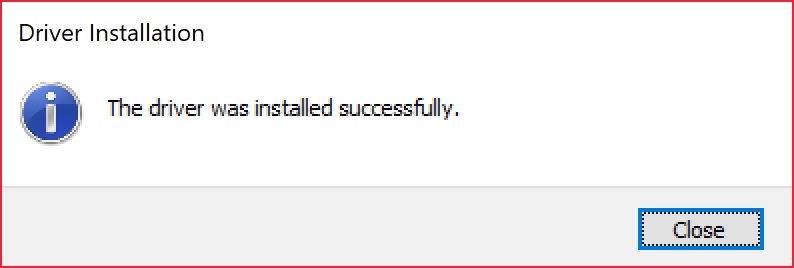
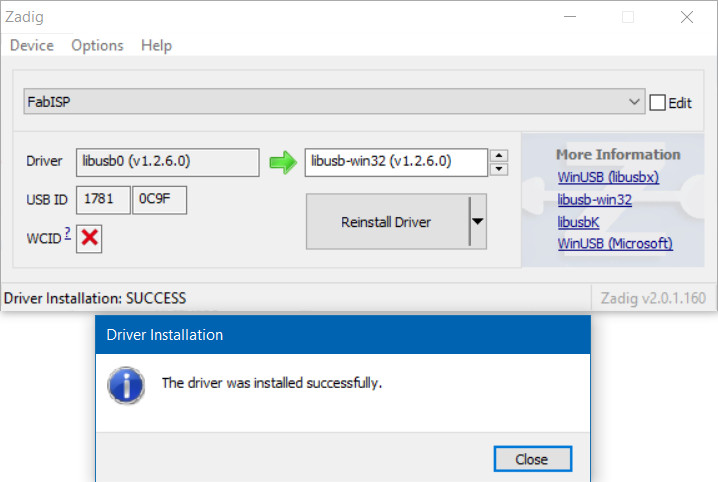
After verifying those two selections, click "Install Driver". The installation process can take a few minutes, but after you've watched the scroll bar zoom by countless times, you should be greeted with a "The driver was installed successfully" message.
Zadig Driver Installation Issues
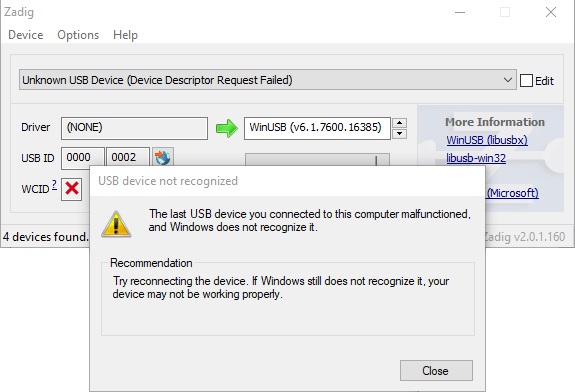
After installing the drivers, your computer may respond by indicating that the device was not installed correctly. Here are two methods of troubleshooting driver issues when installing with Zadig.📌 Troubleshooting Tip: In this case, the WinUSB drivers were selected instead of the libusb-win32 drivers. To remedy the issue, simply go through the guide again to reinstall the correct libusb-win32 drivers.
📌 Troubleshooting Tip: In other cases, it may also initialize somewhere in your device manager as an Unknown USB Device (Device Descriptor Request Failed) even if you installed the correct drivers:
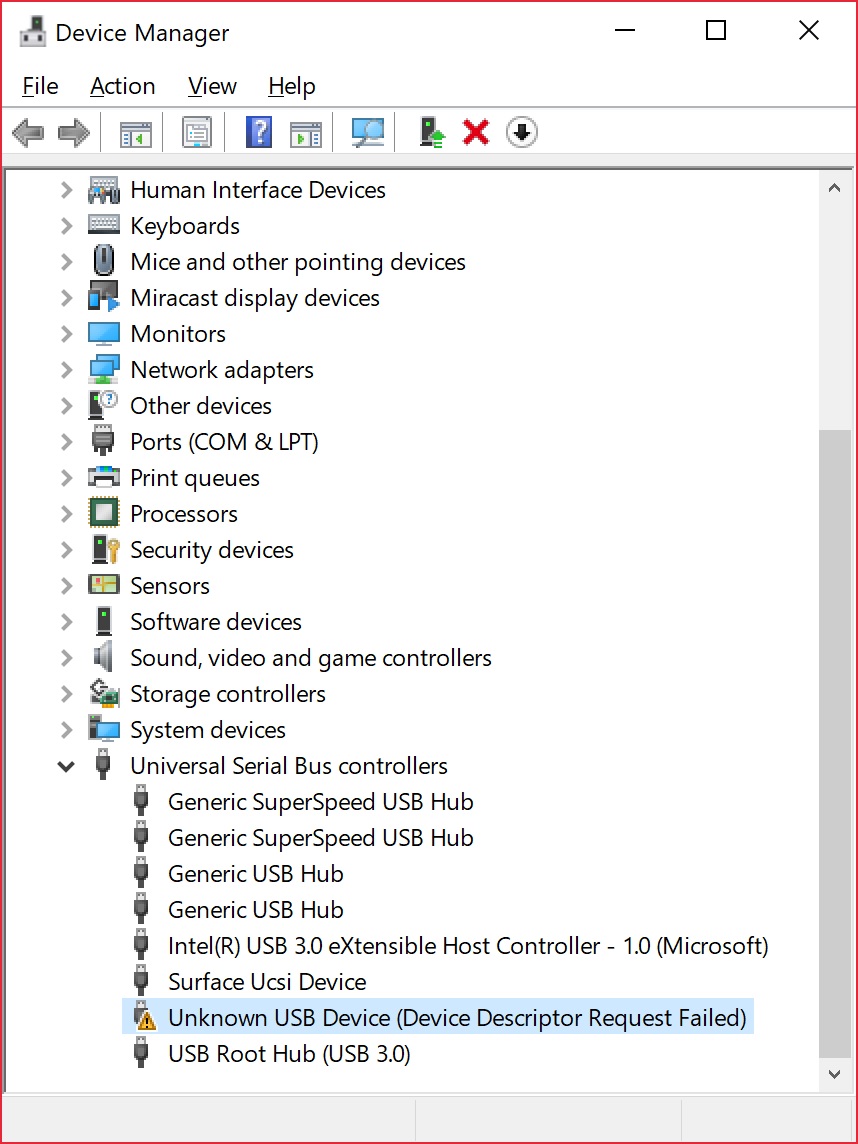
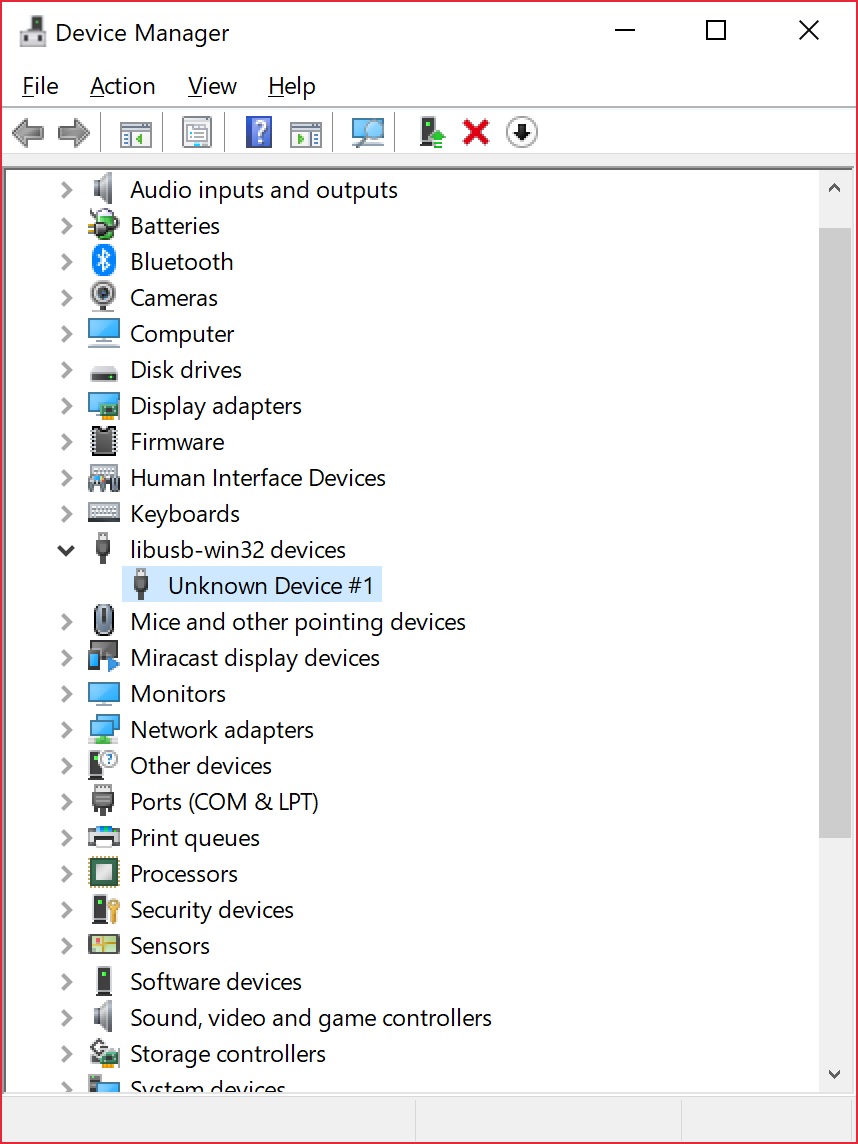
Try unplugging and replugging the Tiny AVR Programmer back into your USB port. Or switch out your USB extension cable for a known good. In some cases, your Tiny AVR Programmer may shows up under the libusb-win32 devices as an Unknown Device #1. If that is the case you should be good to go!
Type in the name for your port. It can be "USBtiny" or in this case. Make sure that the correct driver is selected.

Click Reinstall Driver. The driver will reinstall and you should see the same message that indicates that the drivers were successfully installed. You may need to unplug and replug the programmer to your computer to give it a second to refresh again.
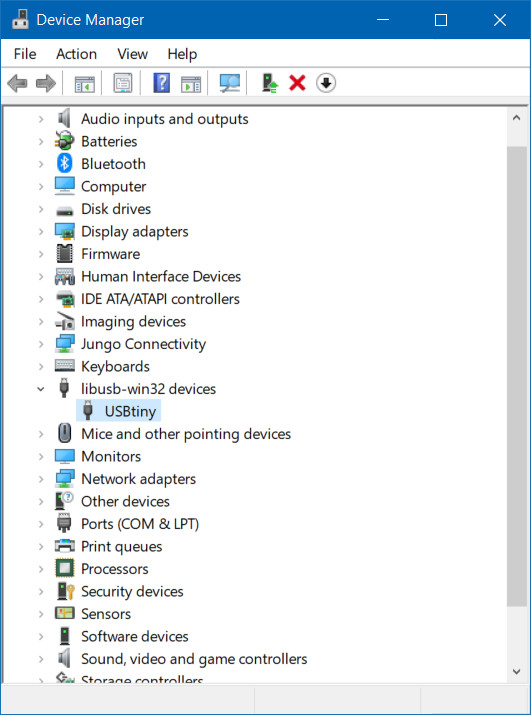
Open up your device manager and you should see the device renamed!
If you were successful, close out of the Zadig program and proceed to the next section!
If Zadig didn't work for you, check out the instructions below for help manually installing the drivers.
Manually Installing the libUSB Drivers
Step 1: Plug the Programmer In
To begin, locate an empty USB port on your computer, and plug the Tiny AVR Programmer into it. You'll probably want to have the programmer close by. If you're using a PC, or your USB ports aren't close by, a USB Extension Cable might help get the programmer into a more convenient spot on your desk.
Step 2: Wait for Windows to Automatically Fail/Succeed
After plugging in your Tiny AVR Programmer, Windows will try to look for a driver that matches it. Keep an eye on the notification area in the bottom-right corner. Wait for Windows to try to install the driver on its own. There's a chance that, after searching, Windows will find the driver. If you get a Device driver software installed successfully notification (lucky you!), you can ignore the next few steps. But, if you got something like this:

Continue on to step 3...
Step 3: Download the Driver
If Windows couldn't find the driver for you, you'll need to download it. You can head over to the Tiny AVR Programmer GitHub repository and grab what you need there, or you can click the link below to download the zip file directly.
After downloading your driver, extract it from the zip folder. Don't forget where you put it!
Step 4: Open the Device Manager
To install the driver, you'll need to first open up the Device Manager. From the Control Panel, go to the System and Security section, click System, and click on Device Manager. (Alternatively you can Run devmgmt.msc).
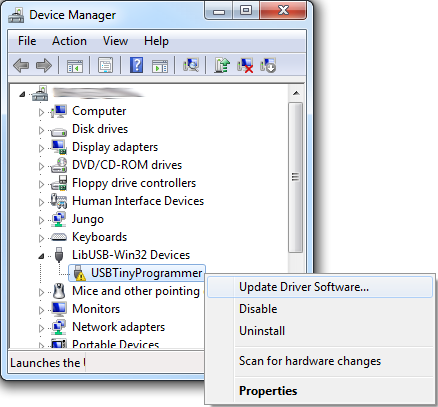
In the Device Manager, open up the LibUSB-Win32 Devices tree and you should find a USBTinyProgrammer with a yellow warning triangle hovering over the icon. This also may be located in "Other devices > Unknown device.
Right-click on the USBTinyProgrammer device, and select Update Driver Software...
Step 5: Driver Pointing
On the Update Driver Software window that appears, select Browse my computer for driver software.
On the next window, Browse for driver software on your computer, set the driver search location to the folder you downloaded and unzipped in step 3.
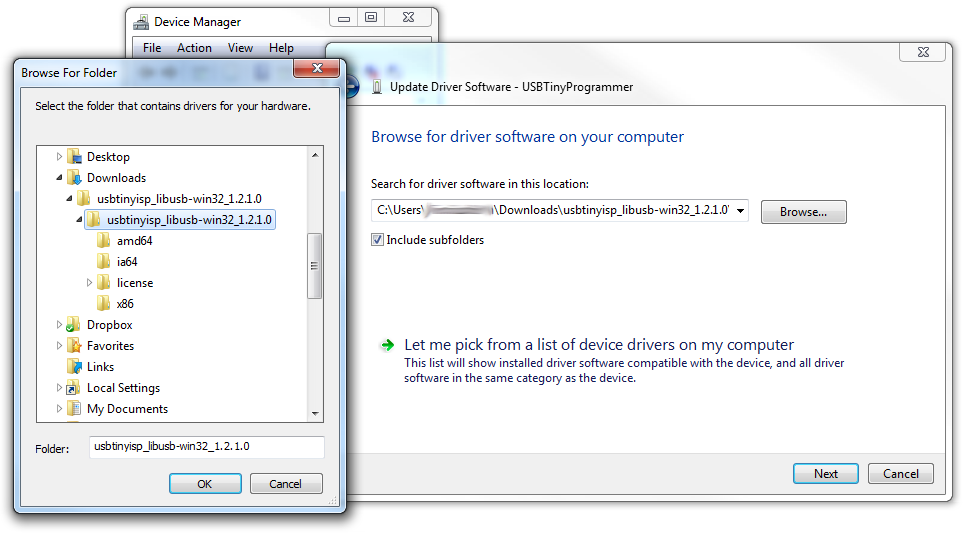
Then click Next, and the driver will begin updating. Shortly after that, though, a Windows Security window should pop up to let you know the driver isn't "signed". Click Install this driver software anyway. We promise it won't damage your computer!
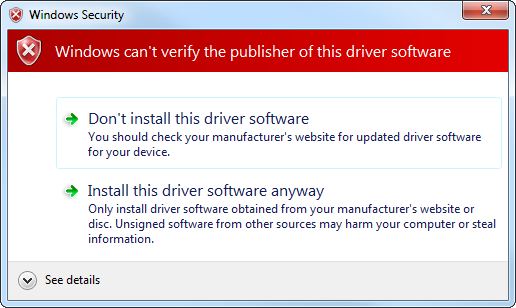
Then play the waiting game for a moment, and wait for a happy Windows has successfully updated your driver software window.
After closing that success window, your Device Manager should have an entry for USBtiny under LibUSB-Win32 Devices.

Congratulations! Proceed over to the next section, and we'll start using the Programmer!
Breathe easy now! Once you've installed the USBtiny drivers on your computer, you shouldn't ever have to do it again. Now it's time to program something!