Three Quick Tips About Using U.FL
Disconnect
Inevitably you will want to switch out your lunchbox radio kit antenna for something with a little more pizazz (who doesn't want a Yagi...) Though tempting (and definitely easy) to just rip the cable off like a band-aid we highly recommend you do not do this. Remember the dragonfly wings? Yup, those outside connectors could be bent enough to make a loose connection or the center pin of the male connector could be bend to the side making it hard to connect the next time. Or worse, the connector rips off the PCB!
There is actually a 'specialized' tool to disconnect these! Different manufacturers have different shaped tools. We will go over some of these specialized tools below and how to use them.
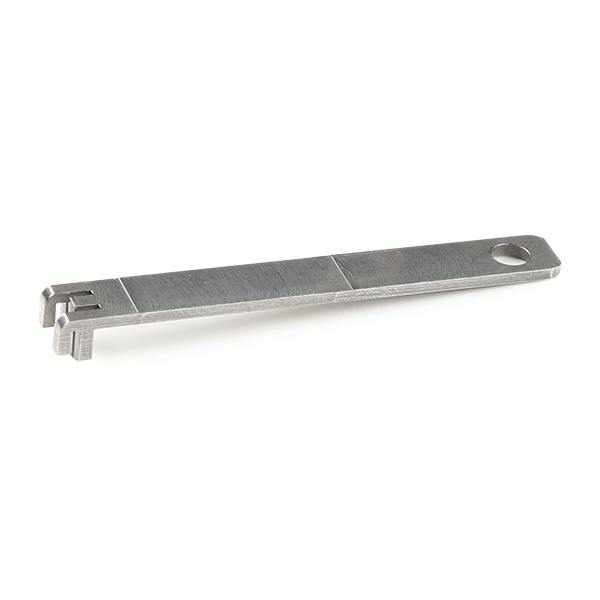
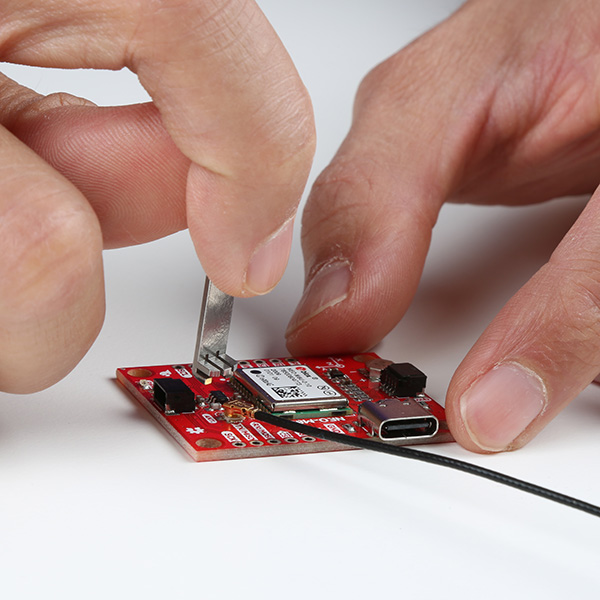
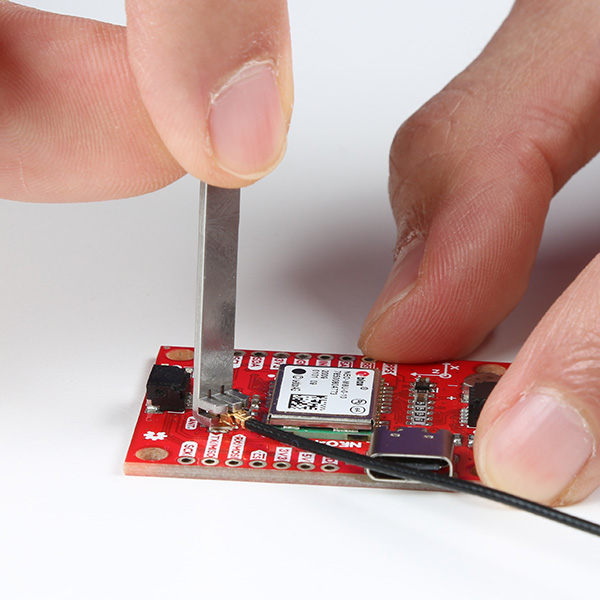
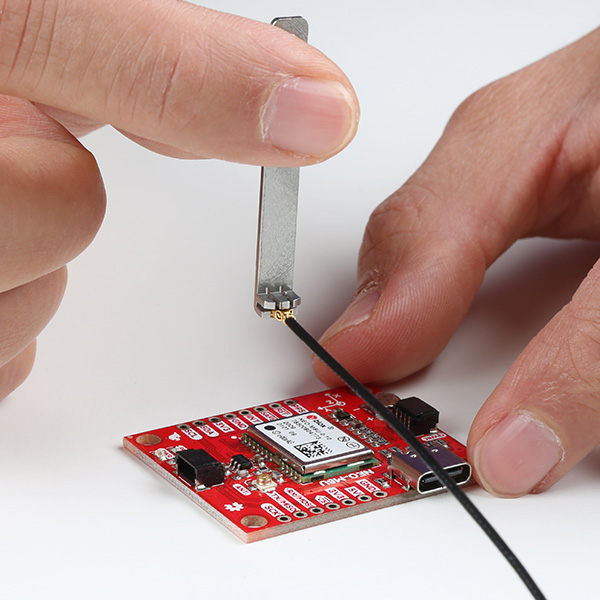
If you have the U.FL push/pull tool, the tool includes teeth that hold onto the U.FL connector. This can be used to help push in or pull out the connector. We found that it was more useful to use it to pull out the U.FL connector from the board.
With the tool, slide the end with the teeth labeled around the U.FL connector. Pull the U.FL connector up and away from the board. You will want to avoid pulling the U.FL connector at an angle like a crowbar as this can potentially bend the connector.
 |
 |
 |
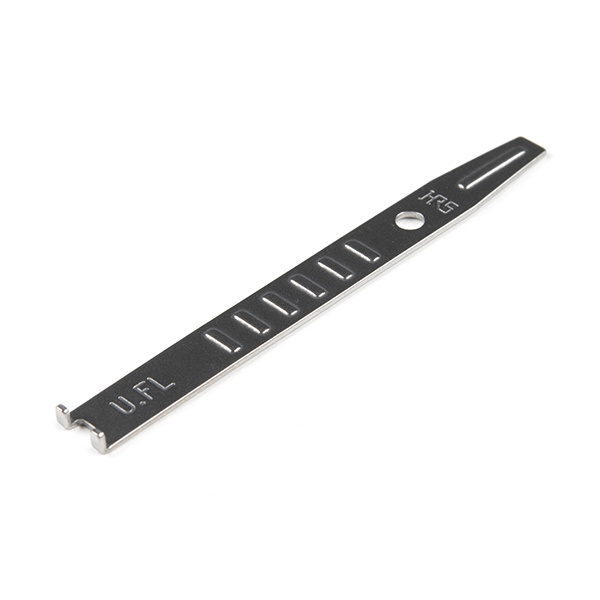
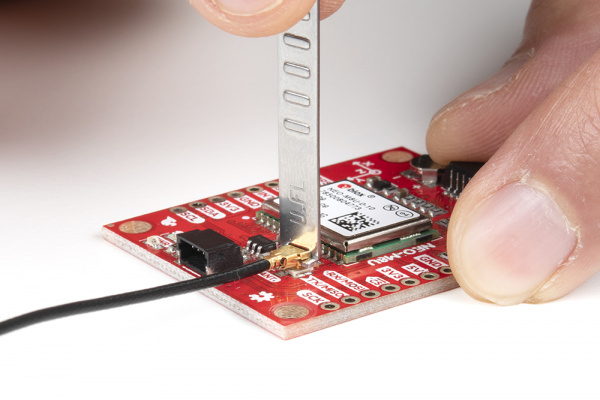
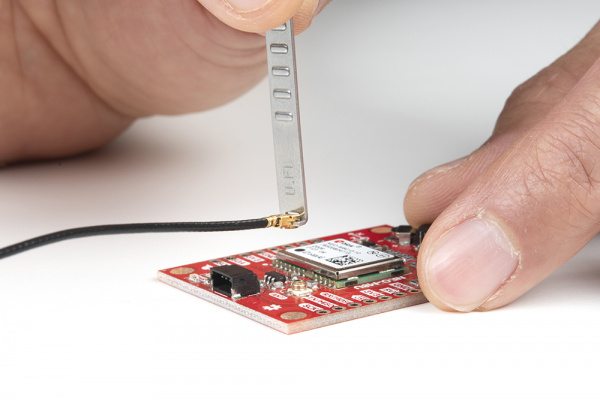
If you have the U.FL extraction tool, the tool includes teeth to hold onto the U.FL connector only from the bottom. Compared to the other U.FL tool shown above, this can only be used to help pull out the connector. The teeth are not as thick so it can slide underneath the U.FL connector better when there are a lot more SMD components in the vicinity but it does not grip onto the U.FL connector as well as well as the other tool.
U.FL Removal Tool
TOL-19929
U.FL Plug Extraction Tool with KeyChain
TOL-20060With the tool, slide the end with the two teeth labeled as "U.FL" around the U.FL connector. Pull the U.FL connector up and away from the board. You will want to avoid pulling the u.FL connector at an angle like a crowbar as this can potentially bend the connector.
 |
 |
Don't have a specialized tool to remove the U.FL? There are alternatives which include:
- A pair of tweezers
- Right angle cutters (whoa there, not too hard!)
- A flat 'spudger' like tool
- Your imagination (well not directly...)
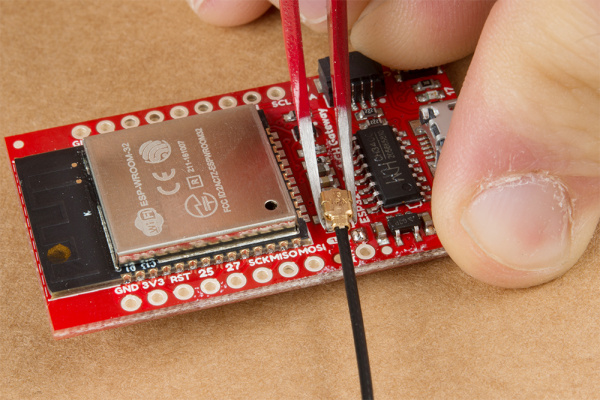
Here's a before and after image of the tweezers technique:
 |
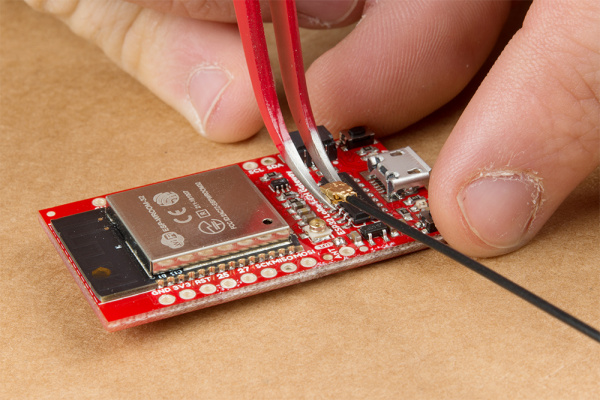 |
Just like when you connected the two halves the name of the game is "torque is lava," meaning of course that you don't want to twist the connector as it is coming off. Get a firm (but not crushing) grip on the female connector just below the thick top part (there will be a nice little lip to hold on to as you pull up). Then all you need to do is pull away from the board. When the female part is separate it no longer has the male part to keep the outside contacts from bending inward so be gentle.
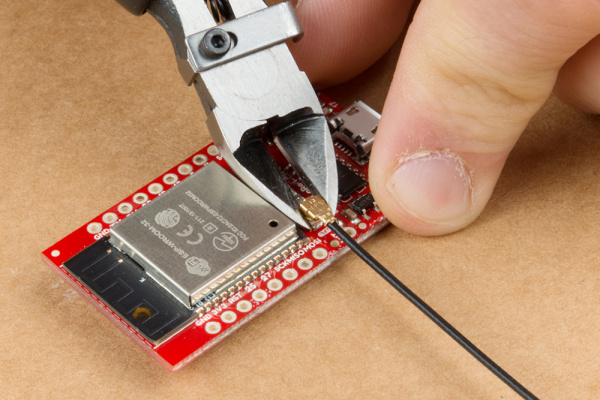
Really any tool that can catch the lip underneath the female connector will do the trick. When using these right-angle clippers I just made sure that the thick part of my palm was keeping them open so as not to crush the connector. Then I used my thumb as a fulcrum (the further from the connector the better for a straighter pull) and popped the two halves apart.
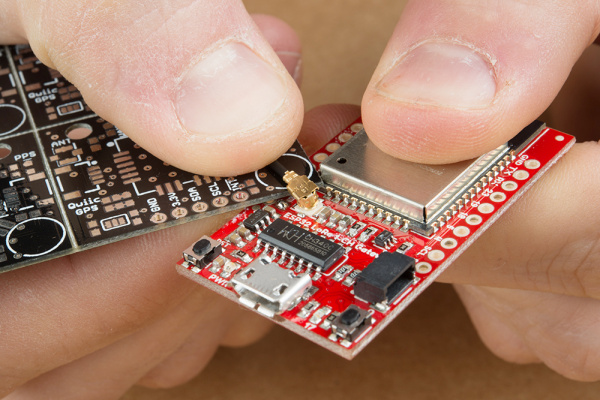
In case you don't have a two-sided tool you could also try the "spudger" technique. It's a little harder to get just right but it is also possible to minimize torque on the connector this way. To do it put something thin an rigid underneath the cable and get the tip right up against the barrel of the connector. Now hold down the cable onto the flat thing as close to the connector as possible. If you can, tug the cable directly away from the connector a little (this helps counteract the torque you generate from pulling up from one side only). Finally use your flat rigid piece to lift the connector up and away.
Now you know the basics of how to connect, protect, and disconnect a U.FL connector. Go rule the airwaves!
