SparkFun gator:UV Hookup Guide
 Englandsaurus
MakeCode Examples
Now that you have added the gator:particle extension to the Editor, lets start with some example code. Plug the micro:bit into your computer using an USB micro-B cable after you have assembled your hardware with the instructions from the previous section. The micro:bit should appear on your computer as a removable storage device.

To upload new code, this is where you will be copying the downloaded .hex file to later.
Block Functions
Initialize gator:UV sensor
This block should be pretty self explanatory, it sets the sensor up to be used. You should use this within the on start block.
get UVA Reading
This is a value block as indicated by the block's shape. The output of the block is value measured by the UV sensor.
0to65535- A 16-bit value of the UV sensor reading that can be correlated to the UV-Index.
set refresh time on UV Sensor to _____
This sets the integration time for the UV sensor. The refresh time should be adjusted for the range of values you expect to be measuring.
half- Half of the normal integration time.one- Normal integration time (default).two- Twice the normal integration time.four-Four times the normal integration time.
Note: *Although not exactly correct, it can be interpreted as the time that the sensor spends collecting a data sample.
If you are barely measuring changes between measurement values, you should try to increase the refresh time, which allows the sensor to collect more light. The relation between measured values and the reset time are linear (see table below).
UV Index
The table below maps out UV index to the correlating sensor output values and their respective refresh time (or integration time) setting. The values were extrapolated from the UV index tables provided in the VEML6070 Application Note for an RSET = 300kΩ.
| Int. Time = x0.5 | Int. Time = x1 | Int. Time = x2 | Int. Time = x4 | UVI (Value) | UV-INDEX |
|---|---|---|---|---|---|
| ≥ 1142 | ≥ 2283 | ≥ 4565 | ≥ 9130 | ≥ 11 | Extreme |
| 831 to 1141 | 1661 to 2282 | 3321 to 4464 | 6641 to 9129 | 8 to 10 | Very High |
| 623 to 830 | 1246 to 1660 | 2491 to 3320 | 4981 to 6640 | 6,7 | High |
| 312 to 622 | 623 to 1245 | 1245 to 2490 | 2490 to4980 | 3 to 5 | Moderate |
| 0 to 311 | 0 to 622 | 0 to 1244 | 0 to 2489 | 0 to 2 | Low |
Basic Reading
Below, is a simple example of how to take simple measurements from the sensor. To use this example, there are multiple options for accessing the .hex file:
- Replicate the block functions from the display below to copy the example project. Then download the
.hexfile. - Expand the display widow to pull up the example project. Then download the
.hexfile. - Use this link to pull up the example project. Then download the
.hexfile. Download the
.hexfile from the button below or the link on the bottom of the display.
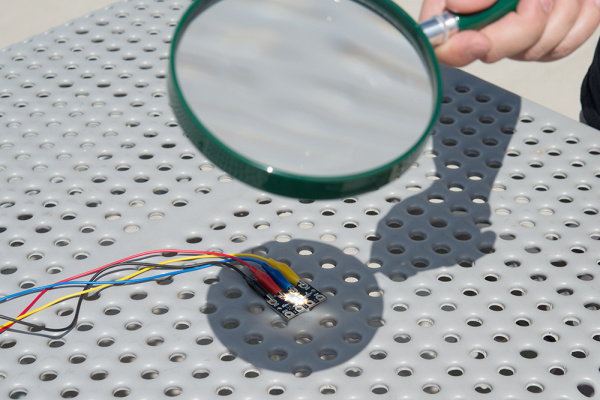
The output is redirected over the serial port to avoid conflicts on pins P0 and P1, which are also used for serial communication. To read the sensor values, pull up your favorite serial terminal emulator. Then, connect to the serial port that the micro:bit is on; the default baud rate is 115200 bps. Below, is an example of the sensor output for the example code (the sensor values are responding to the flashlight on my phone).
Do Not Try This at Home: In case you were thinking about it, do NOT try to replicate this image or attempt to max out your readings with a magnifying glass. You will burn or damaged the board. I had the magnifying glass focused on the board for less than a second for this picture and it started to burn and smolder.