SparkFun Environmental Sensor Breakout - BME68x (Qwiic) Hookup Guide
Arduino Examples
Now that the library is installed, we can move on to uploading some code. Before we discuss the individual examples, we'll cover some of the setup they perform for the BME68x.
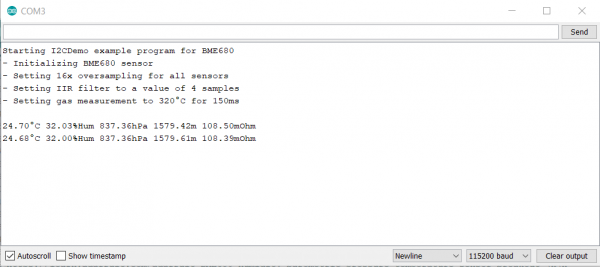
The code configures the BME68x to perform oversampling for the temperature, humidity and pressure sensors and sets an IIR (infinite impulse response) filter for these sensors. This helps smooth out environmental data from any short term outliers. Finally, the setup also configures the temperature and time settings for the hot plate on the gas sensor. If you would like to adjust any of these settings, refer to the BME680 Datasheet/BME688 Datasheet and the library source files for more information.
I2C Demo
To open this example, head to File > Examples > BME680 > I2CDemo. Next, open the Tools menu and select your board (in our case, Arduino Uno) and the correct Port your board enumerated on.
Upload the code, open the Arduino Serial Monitor and set your baud rate to 115200. You probably will see the code print out the successful initialization of the BME680 as well as the settings we discussed above and after that, you should see temperature, humidity, pressure, altitude and raw gas readings every five seconds.
Note: While the Arduino library automatically checks for the BME68x at both available addresses, users can also specify a spacific address in their code.
Users can change this line of code:
while (!BME680.begin(I2C_STANDARD_MODE)) { // Start BME680 using I2C, use first device foundwhile (!BME680.begin(I2C_STANDARD_MODE, 0x76)) { // Start BME680 using I2C, use 0x76 addressSPI Demo
This example is nearly identical to the I2C demo but instead uses SPI mode. One thing to note is, depending on which type of microcontroller you are using, you may need to adjust this line:
language:c
const uint8_t  SPI_CS_PIN   = 53;
Set the CS/SS pin to the appropriate pin on your microcontroller. In our case, the Uno uses D10 for CS so the modified version of that line for an Uno or SparkFun RedBoard Qwiic would be:
language:c
const uint8_t  SPI_CS_PIN   = 10;
With that line adjusted, upload the code and open your serial monitor. You should see a similar stream of data as the screenshot above for the I2C example.
#define Serial SerialUSB prior to your void setup(). This definition can be modified to any serial port on your chosen microcontroller. 