SparkFun Environmental Sensor Breakout - BME68x (Qwiic) Hookup Guide
Introduction
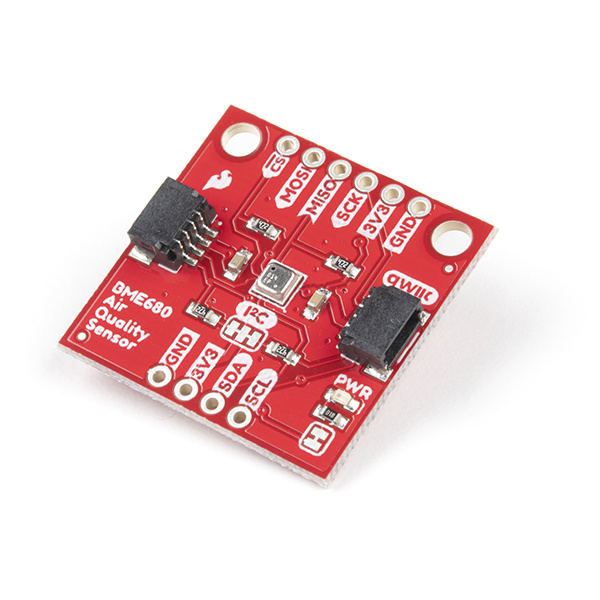
The SparkFun Environmental Sensor - BME680 (Qwiic) is a breakout for the 4-in-1 BME680 gas sensor from Bosch. The BME680 combines a gas sensor with temperature, humidity and barometric pressure sensing for a complete environmental sensor in a single package. The gas sensor on the BME680 can detect a wide variety of volatile organic compounds (or VOC for short) to monitor indoor air quality. Combine that with precise temperature, humidity and barometric pressure and the BME680 can work as a completely standalone environmental sensor all in a 1"x1" breakout! The BME680 communicates over either I2C or SPI. As you would expect from the name, the BME680's I2C pins are broken out to a Qwiic connector so integrating it into the SparkFun Qwiic System is a breeze. Simply plug it into a Qwiic-enabled microcontroller and you're well on your way to making your own weather station.
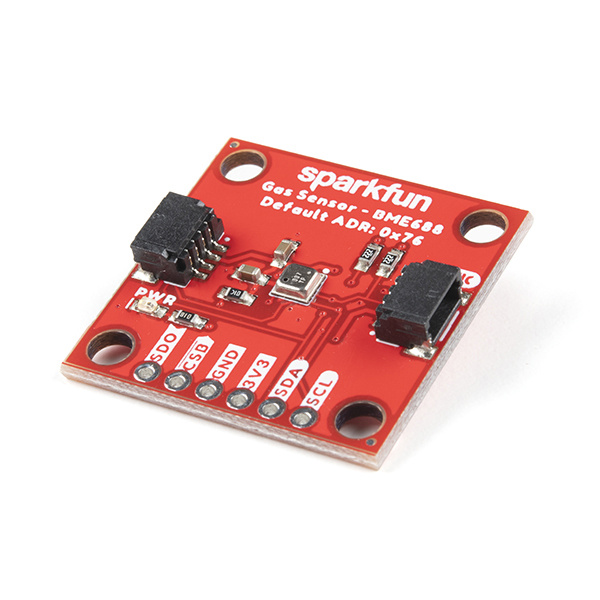
The Qwiic BME688 breakout board is an updated version of the BME680 environmental sensor from Bosch. With the same features of the original BME680, the new BME688 also includes an additional gas scanning functionality to detect the presence of VSCs (i.e. hydrogen sulfide (H2S) compounds). The gas scanner operation can be manually customized or trained with the BME AI-Studio tool to detect target samples.
- How is the BME688 different from the BME680?
- The BME680 does not support AI features.
- Can we test the AI software it with the current BME680?
- No, this is not possible, as the BME680 does not have the necessary gas scan function.
-
While the BME688 Qwiic board can be used with the BME AI-Studio and BSEC2 Arduino library, for the AI functionality, it is recommended that users purchase the BME688 Evaluation Board (Coming Soon) for ease of use.
Required Materials
Note: To get started with the BME688, a RedBoard Qwiic is more than sufficient for the basic sensor functionality covered in this tutorial. However, the more advanced BSEC2 Arduino library, with support for the BME688 AI functionality, is only compatible with some of the ESP32 microcontrollers, like the ESP32 WROOM.
*For more details, check out the tested platforms section of the Arduino library and our Getting started with the BME AI-Studio guide (coming soon).
To follow along with this guide you will need a microcontroller to communicate with the BME68x. Below are a few options that come Qwiic-enabled out of the box:
If your chosen microcontroller is not already Qwiic-enabled, you can add that functionality with one or more of the following items:
You will also want at least one Qwiic cable to connect your sensor to your microcontroller.
Qwiic Cable - 100mm
PRT-14427Qwiic Cable - 50mm
PRT-14426Qwiic Cable - 200mm
PRT-14428Qwiic Cable - 500mm
PRT-14429Suggested Reading
If you're unfamiliar with serial terminals, jumper pads, or I2C be sure to checkout some of these foundational tutorials.
Installing an Arduino Library
Serial Peripheral Interface (SPI)
Logic Levels
I2C
Serial Terminal Basics
RedBoard Qwiic Hookup Guide
The Qwiic BME68x utilizes the Qwiic connect system. We recommend familiarizing yourself with the Logic Levels and I2C tutorials (above) before using it. Click on the banner above to learn more about our Qwiic products.
Hardware Overview
The heart of these breakout boards, Bosch's BME680 Gas Sensor, integrates four sensors (gas, pressure, temperature and humidity) into a tiny package. The BME68x measures just 3mm x 3mm x 0.93 mm and was specifically designed for applications that depend on a small footprint and low power consumption. This makes the BME68x a great choice for remote or mobile environmental sensing applications. We will highlight some of the unique aspects of the BME68x in this section but for a full overview of the sensor package, check out the datasheets:
BME688 Note: The BME688 is a drop in replacement for the BME680; with the added gas scanning functionality and support for AI algorithms. The parameters in highlighted in yellow, only apply to the BME688 sensor.
How does the gas scanner work? The gas sensor takes measurements with different sensitivities during one gas scan. In doing so, it can generate a profile (or fingerprint) for different gas mixtures. This can be modified and optimized with BME AI-Studio.
| Characteristic | Description |
|---|---|
| Operating Voltage |
|
| Operational Modes |
Sleep (Default) and Forced (low power; single measurement) Parallel (Gas sensor heater operates in parallel to TPH measurement) |
| Interface | I²C and SPI |
| I²C Address |
BME680: 0x77 (Default) or 0x76 BME688: 0x76 (Default) or 0x77 |
Average current consumption |
2.1 µA at 1 Hz humidity and temperature 3.1 µA at 1 Hz pressure and temperature 3.7 µA at 1 Hz humidity, pressure and temperature 90 µA at ULP mode for p/h/T & air quality 0.9 mA at LP mode for p/h/T & air quality 3.9 mA in standard gas scan mode |
Humidity Parameters |
Range: 10 to 90 %RH Absolute Accuracy: ±3 %RH (from 20 - 80 %RH) Resolution: 0.008 %RH |
| Pressure Parameters |
Range: 300 to 1100 hPa (30,000 - 110,000 Pa or approx. 4.35 - 15.95 PSI) Absolute Accuracy: ±0.6 hPa Resolution: 0.18 Pa |
| Temperature Parameters |
Range: 0°C to 65°C (32°F to 149°F) Absolute Accuracy: ±(0.5 - 1.0)°C Resolution: 0.01°C |
| Gas Sensor Parameters |
F1 score for H₂S scanning: 0.92 Standard scan speed: 10.8 s / scan Sensor-to-sensor deviation: +/- 15% +/- 15 Output data processing:
|
Power
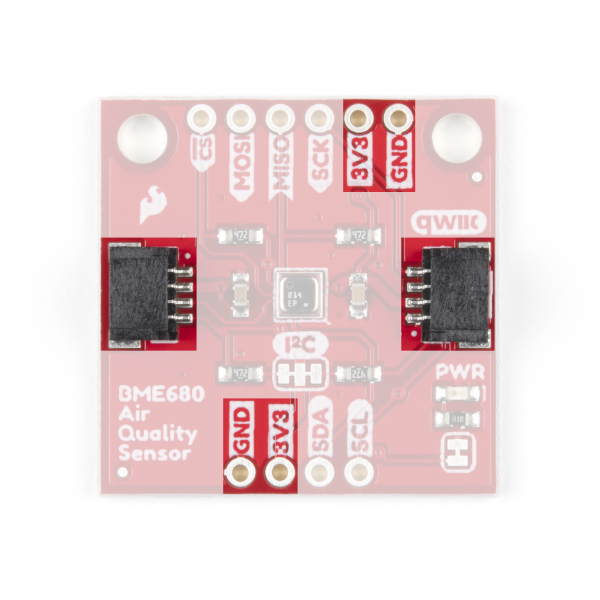
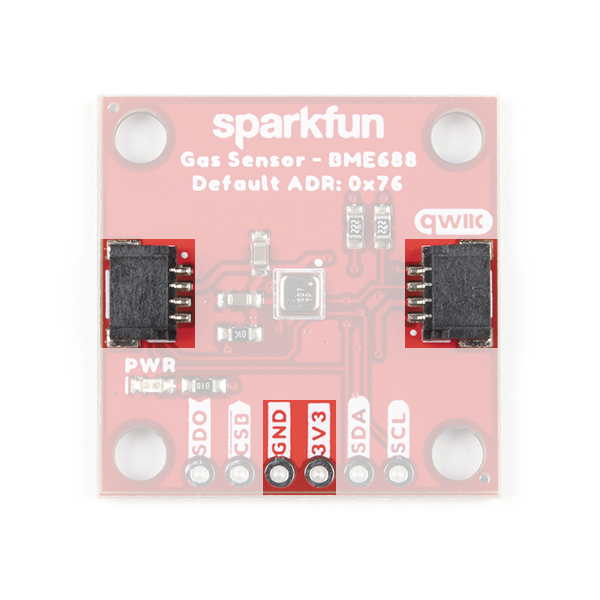
The BME68x accepts a supply voltage between 1.71 to 3.6V. Power can be supplied to the board either through one of the Qwiic connectors or the dedicated 3.3V and GND pins broken out on either side of the board.
Qwiic and I2C Interface
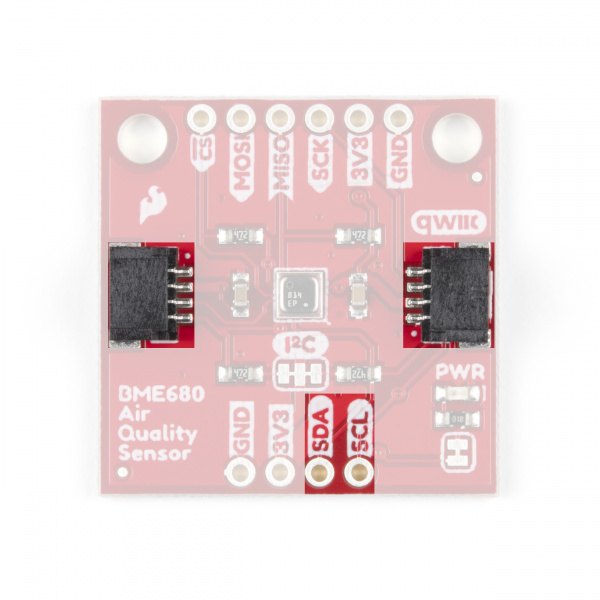
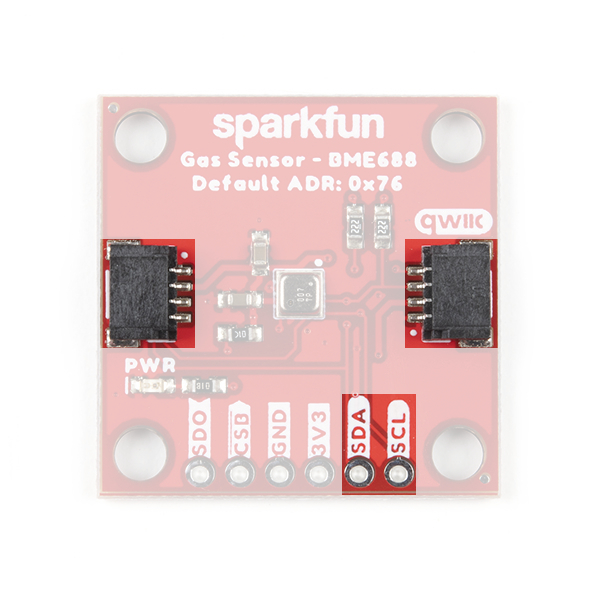
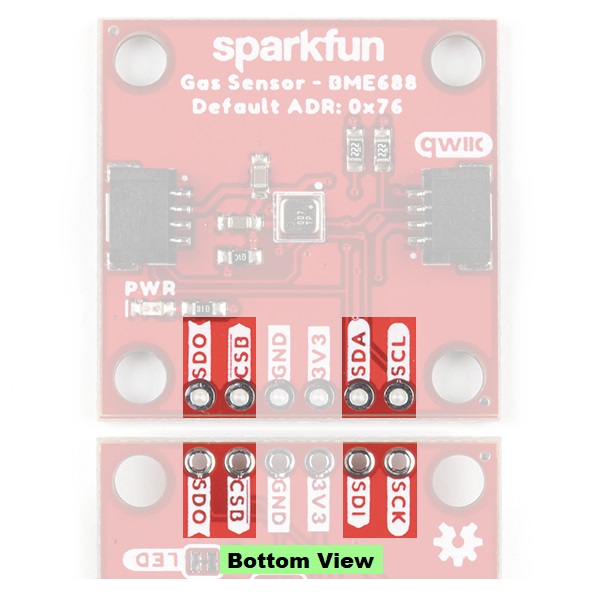
The SparkFun Environmental Sensor - BME68x (Qwiic) communicates over I2C by default. We have routed the BME68x's I2C pins to two Qwiic connectors as well as broken them out to 0.1"-spaced the header pins highlighted below.
- BME680: 0x77
- BME688: 0x76
Serial Peripheral Interface (SPI)
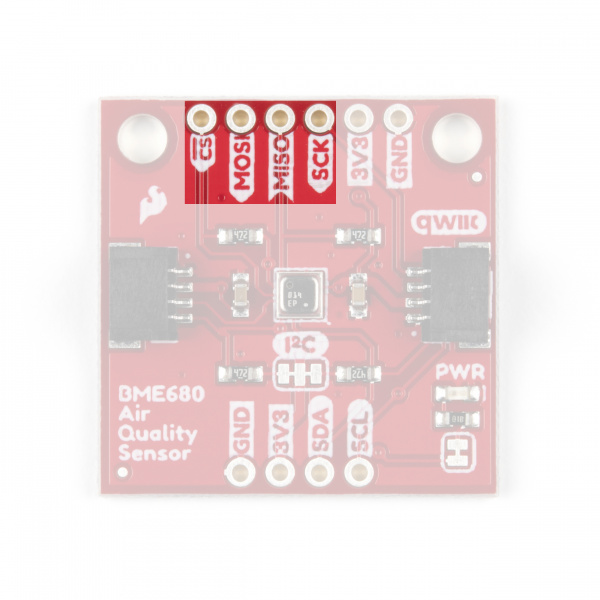
If you would prefer to communicate with your BME68x via SPI, we have broken those pins out as well to standard 0.1"-spade header pins. Communicating over SPI requires more connections than I2C but is more versatile and can be faster. It is particularly helpful if you need to use more than two BME68x's in your circuit or if you have other devices using the same I2C addresses.
CSB and ADR (leave floating) jumpers. *See the CSB Jumper section, below, for more information.COPI/CIPO or SDI/SDO labels for SPI pins. SparkFun has joined with other members of OSHWA in a resolution to move away from using "Master" and "Slave" to describe signals between the controller and the peripheral. Check out this page for more on our reasoning behind this change. You can also see OSHWA's resolution here.
On the BME688 Qwiic board, the CS (chip select) pin is labeled with a CSB silkscreen, as annotated in the BME688 datasheet.
Solder Jumpers
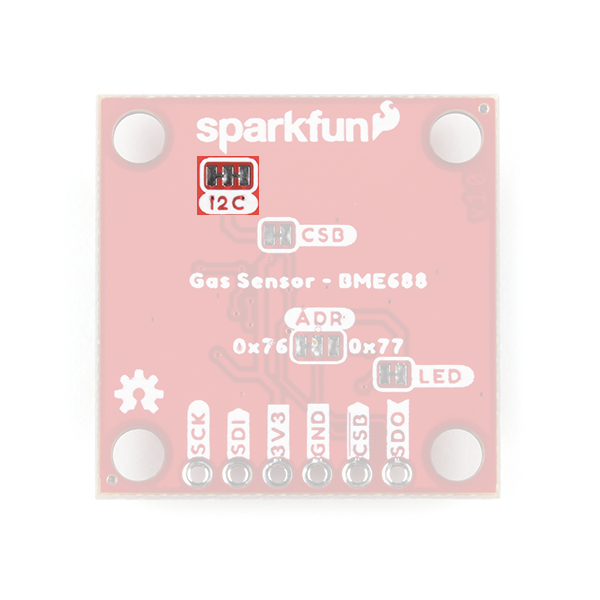
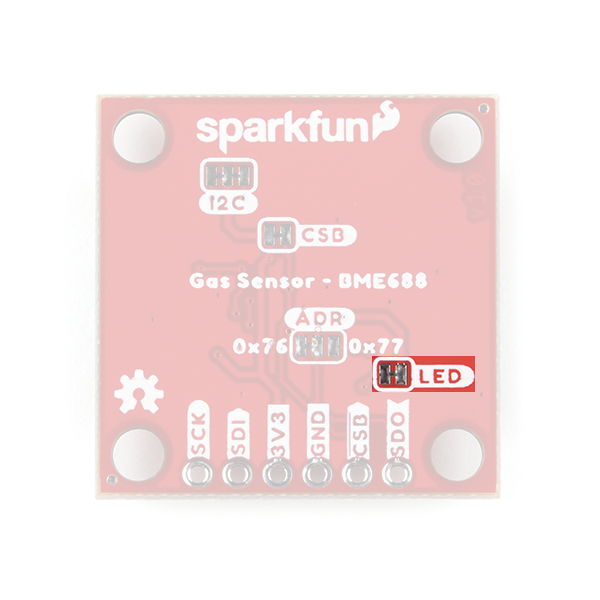
The SparkFun Environmental Sensor - BME680 (Qwiic) has three solder jumpers which can be modified to alter the functionality of the sensor. While, the SparkFun Environmental Sensor - BME688 (Qwiic) has four solder jumpers which can be modified to alter the functionality of the sensor.
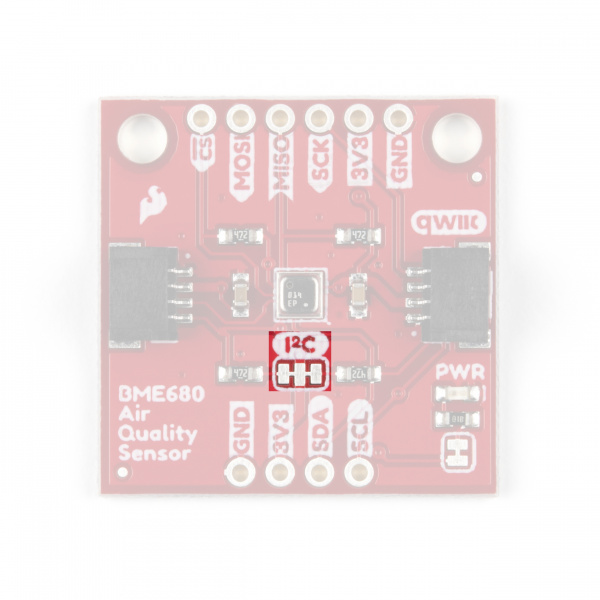
I2C Pull-Up Jumper
On the BME680 Qwiic board, the SDA/SDI and SCL/SCK pins are pulled to VDDIO (3.3V) through a pair of 4.7kΩ (2.2kΩ on the BME688) resistors. The jumper is normally closed so to disable the pull-up resistors, simply sever the traces between the three pads using a hobby knife.
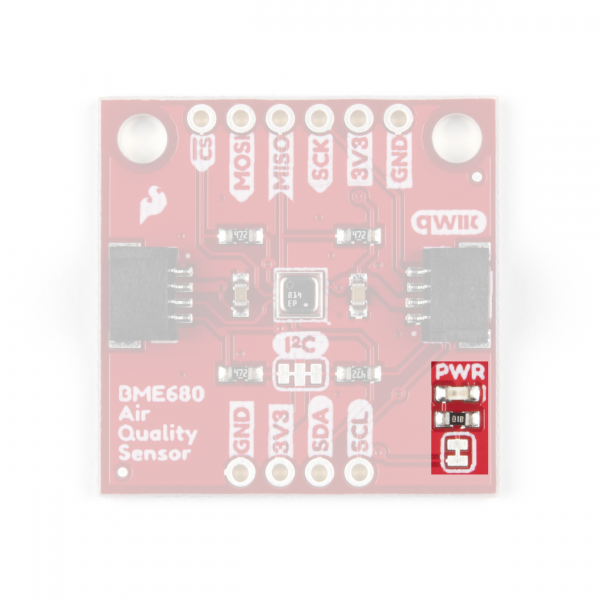
Power LED Jumper
This jumper connects the power LED to 3.3V via a 1K Ohm resistor. This jumper is normally closed so to disable the power LED, sever the trace between the two pads. This is particularly helpful for reducing the total current draw of your breakout for low-power applications.
I2C Address Jumper
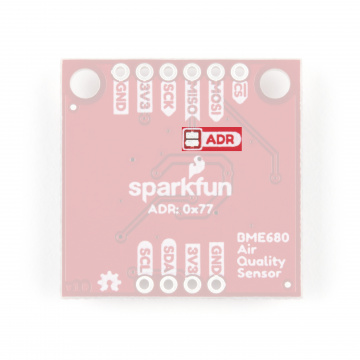
This jumper sets the 7-Bit unshifted I2C address of the BME680 and is open by default. The default address is 0x77 and can be adjusted to 0x76 by closing this jumper.
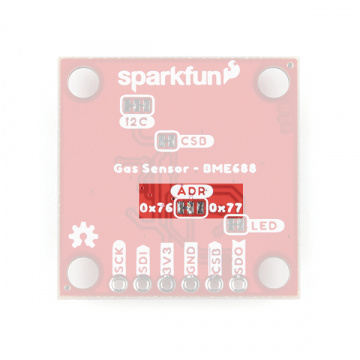
This jumper sets the 7-Bit unshifted I2C address of the BME688 and sets the default address to 0x76 and can be adjusted to 0x77 by cutting and soldering the jumper over to the 0x77 pad.
CSB Jumper
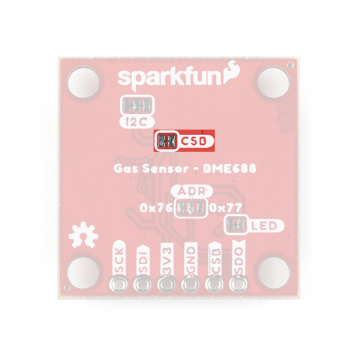
This jumper only applies to the BME688 Qwiic board. The CSB pin is pulled up to VDDIO in order to configure the board for I2C communication by default. In order to communicate with the sensor over SPI, the CSB jumper must be cut along with the ADR jumper (leave floating). Once the CSB pin has been pulled low during SPI communication, the sensor will communicate over SPI until there is a power reset.
Board Dimensions
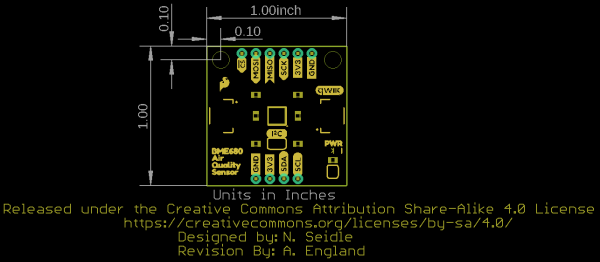
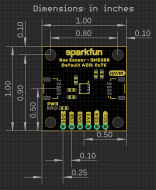
This breakout fits the Qwiic standard sizing for breakouts. It is a 1"x1" square with two mounting holes that fit a 4-40 screw.
Now that we have a thorough understanding of the hardware and features on the Environmental Sensor - BME680 (Qwiic), it's time to hook it up and start taking measurements.
Hardware Assembly
- In order to avoid contamination of its gas scanning capabilities, DO NOT touch the metallic casing of the BME688 sensor.
- At first sensor usage, minimum 48 hours of "burn in" should be made. Later, at each usage, 30 min. of functioning should passed before sensor data may be considered as valid.
- To "burn in" the sensor, users just need to power the sensor for 48 hrs.
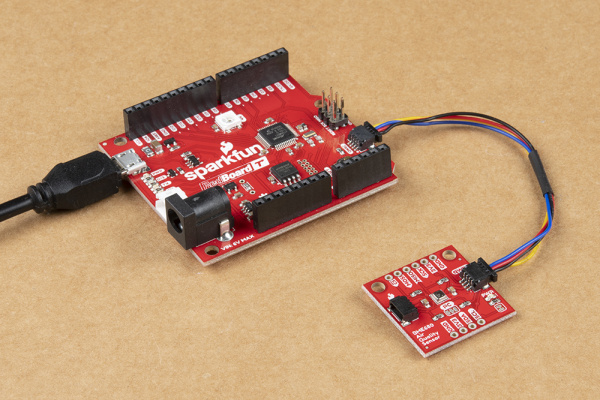
Using the Qwiic system, assembling the hardware is simple. All you need to do is connect your Environmental Sensor - BME68x (Qwiic) to your chosen development board with a Qwiic cable or adapter cable. Otherwise, you can use the I2C pins broken out if you do not have a Qwiic connector on your development board or if you do not want to use a Qwiic connection. If you are not using a Qwiic-enabled board, make sure your input voltage and logic are either running at 3.3V or you are shifting the logic level from whatever logic your controller runs at to 3.3V for the BME680.
If you would prefer to communicate with the BME680 via SPI, you will need to connect to the SPI pins broken out on this board and route them to the respective pins for SPI communication on your development board (CIPO, COPI, SCK and CS). Also note that this breakout defaults to I2C mode so your code will need to toggle the CS pin LOW once on power up to enable SPI mode. The BME680 will remain in SPI mode until the next power cycle. The SPI examples further on in this guide do that automatically so it's only necessary to note for writing your own code.
ADR and CSB jumpers to enable SPI communication. (*See the Hardware Overview section for more information.)Soldering to the pins is the best option for a secure connection but you can also create temporary connections to those pins for prototyping using something like these IC Hooks. If you are not familiar with through-hole soldering, take a look at this tutorial:
How to Solder: Through-Hole Soldering
With everything connected properly, we're ready to move on to uploading a sketch and start monitoring your environment!
BME680 Arduino Library
For the scope of tutorial, we are going to use the BME680 Arduino Library created by SV-Zanshin. You can download it with the Arduino Library Manager by searching 'BME680' and selecting the one authored by SV-Zanshin. Alternatively, you can grab the zip of the latest release (v1.0.3 as of this writing) below or you can download the most up to date version of the library from the GitHub repository.
Once you have the library installed you can move on to uploading the examples and gathering environmental data.
Note: Users that are interested in the AI functionality of the BME688 sensor can check out the software available from the Bosch website.
While the BME688 Qwiic board can be used with the BME AI-Studio and BSEC2 Arduino library, for the AI functionality, it is recommended that users purchase the BME688 Evaluation Board (Coming Soon) for ease of use.
Arduino Examples
Now that the library is installed, we can move on to uploading some code. Before we discuss the individual examples, we'll cover some of the setup they perform for the BME68x.
The code configures the BME68x to perform oversampling for the temperature, humidity and pressure sensors and sets an IIR (infinite impulse response) filter for these sensors. This helps smooth out environmental data from any short term outliers. Finally, the setup also configures the temperature and time settings for the hot plate on the gas sensor. If you would like to adjust any of these settings, refer to the BME680 Datasheet/BME688 Datasheet and the library source files for more information.
I2C Demo
To open this example, head to File > Examples > BME680 > I2CDemo. Next, open the Tools menu and select your board (in our case, Arduino Uno) and the correct Port your board enumerated on.
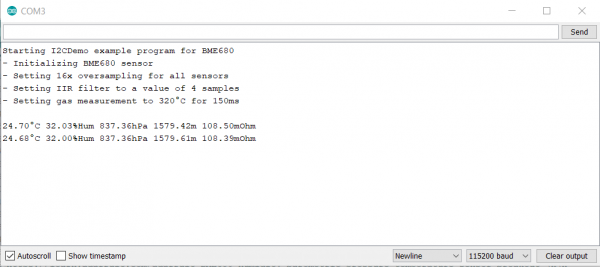
Upload the code, open the Arduino Serial Monitor and set your baud rate to 115200. You probably will see the code print out the successful initialization of the BME680 as well as the settings we discussed above and after that, you should see temperature, humidity, pressure, altitude and raw gas readings every five seconds.
Note: While the Arduino library automatically checks for the BME68x at both available addresses, users can also specify a spacific address in their code.
Users can change this line of code:
while (!BME680.begin(I2C_STANDARD_MODE)) { // Start BME680 using I2C, use first device foundwhile (!BME680.begin(I2C_STANDARD_MODE, 0x76)) { // Start BME680 using I2C, use 0x76 addressSPI Demo
This example is nearly identical to the I2C demo but instead uses SPI mode. One thing to note is, depending on which type of microcontroller you are using, you may need to adjust this line:
language:c
const uint8_t  SPI_CS_PIN   = 53;
Set the CS/SS pin to the appropriate pin on your microcontroller. In our case, the Uno uses D10 for CS so the modified version of that line for an Uno or SparkFun RedBoard Qwiic would be:
language:c
const uint8_t  SPI_CS_PIN   = 10;
With that line adjusted, upload the code and open your serial monitor. You should see a similar stream of data as the screenshot above for the I2C example.
#define Serial SerialUSB prior to your void setup(). This definition can be modified to any serial port on your chosen microcontroller. Troubleshooting
In this section we'll cover a few tips and tricks for troubleshooting common questions with the Environmental Sensor Breakout - BME68x.
Using the BME68x
At first sensor usage, minimum 48 hours of "burn in" should be made. Later, at each usage, 30 min. of functioning should passed before sensor data may be considered as valid. (*In their video for the BME688 evaluation board, Bosch recommends at least 24 hrs. to stabilize the sensors.)
In order to avoid contamination of its gas scanning capabilities, DO NOT touch the metallic casing of the BME688 sensor. Unfortunately, at this time, there are no recommendations or instructions for decontaminating the sensor once it has been touched.
Gas Readings Interpretation
The library used in this tutorial only prints out the raw resistance values from the gas sensor on the BME680. You can use these values as a rough estimate of air quality where lower resistance values equate to a higher concentration of gases measured (and vice versa). If you want to get true Indoor Air Quality (IAQ) measurements from the BME680, we recommend taking a look at Bosch's BSEC Arduino Library which includes an algorithm to convert the resistance value to an IAQ value. For more information, refer to that library as well as sections 1.2 and 4.2 in the BME680 Datasheet. Calculated IAQ measurements are beyond the scope of this tutorial.
BME688 AI and Gas Scanning Features
In order to avoid contamination of its gas scanning capabilities, DO NOT touch the metallic casing of the BME688 sensor. Unfortunately, at this time, there are no recommendations or instructions for decontaminating the sensor once it has been touched.
At first sensor usage, minimum 48 hours of "burn in" should be made. Later, at each usage, 30 min. of functioning should passed before sensor data may be considered as valid. (*In their video for the BME688 evaluation board, Bosch recommends at least 24 hrs. to stabilize the sensors.)
IAQ (Air quality index), target gas scanner selectivity, VOC, VSC data and other BME688 features may be accessed using the Bosch Sensortec Arduino libraries:
The BME AI-Studio is only available for Win and Mac OS computers and the accompanying Bluetooth app is only available for Android phones. *For more information on the available software, please refer to the Bosch's BME688 software page.
*For more information on these features, users can also reference the FAQ page for the BME688 on Bosch's forum.
Incorrect Temperature Data
You may notice some deviation from the true ambient temperature in your data as residual heat from the hot plate for the gas sensor in the BME68x0 can cause minor fluctuations in the observed temperature. The heating phase starts after temperature, pressure and humidity measurements are complete so there should be no heating during those measurements but subsequent readings may be skewed. The IIR filters can help here but if needed, you can compensate for this by measuring the average deviation and subtracting that from your temperature data.
Incorrect Altitude Data
The altitude data is collected by converting the barometric pressure. This is a great tool for approximate altitude readings but things like weather patterns can affect the accuracy of the altitude. The examples use the standard measurement for pressure at sea level (1013.25 hPa) in the calculation so you may wish to adjust that with a corrected value for a more accurate altitude data. Refer to this Wikipedia page and this section of our MPL3115 Pressure Sensor Hookup Guide for more information.
Chip Select Definition
As we covered in the previous section, if you choose to communicate with the BME68x via SPI, make sure you are connecting to the correct pins on your development board (COPI, CIPO, SCK and CS) as well as modifying the Chip Select definition to the appropriate I/O pin used for CS on your controller. If you are not certain which pin is used for CS, refer to documentation for your particular development board.
CSB and ADR (leave floating) jumpers. *See the CSB Jumper section in the Hardware Overview page, for more information.Need Assistance?
If your product is not working as you expected or you need technical assistance or information, head on over to the SparkFun Technical Assistance page for some initial troubleshooting.
If you don't find what you need there, the SparkFun Forums are a great place to find and ask for help. If this is your first visit, you'll need to create a Forum Account to search product forums and post questions.
Resources and Going Further
Now that your BME68x is integrated in your circuit and sending data it's time to start tracking some weather! For more information about these breakout boards and the BME68x, take a look at the links below:
Qwiic BME680
Qwiic BME688
- Qwiic BME688 Schematic (PDF)
- Qwiic BME688 Eagle Files (ZIP)
- Qwiic BME688 Board Dimensions (PDF)
- BME688 Datasheet (PDF)
- BME AI-Studio Manual (PDF)
- Qwiic BME688 Hardware GitHub Repository
- Bosch Software Page:
- BME AI-Studio (Mac/Windows) (Download from software page)
- Bosch-BME68x-Library - Bosch BME68x Arduino Library
- Bosch-BSEC2-Library - Bosch Sensortec Environmental Cluster (BSEC) Arduino Library
- BME68x API
- BSEC2 API (Download from software page)
- BSEC2 Integration Guide
Need some inspiration for your next project? Check out some of these weather sensing related tutorials:
