Soil Moisture Sensor Hookup Guide
 Sarah Al-Mutlaq,
  Joel_E_B, Ell C
Soil Moisture Sensing Project
For this next example, we're going to make a portable soil moisture sensor that will print the current moisture value to an LCD screen. We'll use the circuit from the previous example. This time we just need to add a Serial Enabled LCD Screen and portable power.
Hook up your circuit as pictured below:
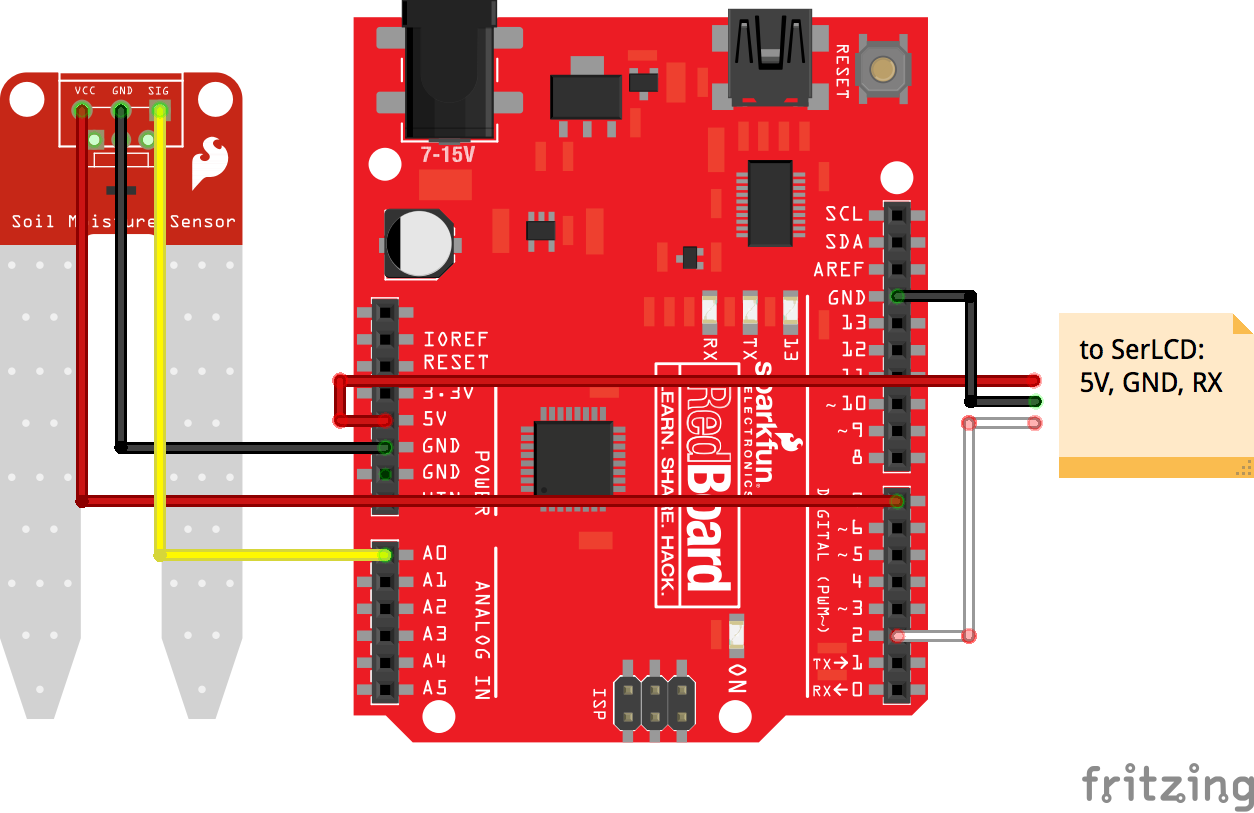
Along with the soil moisture sensor, we have connected the LCD screen to 5V, GND, and digital pin 2 (D2) for serial communication (also can be changed in the code).
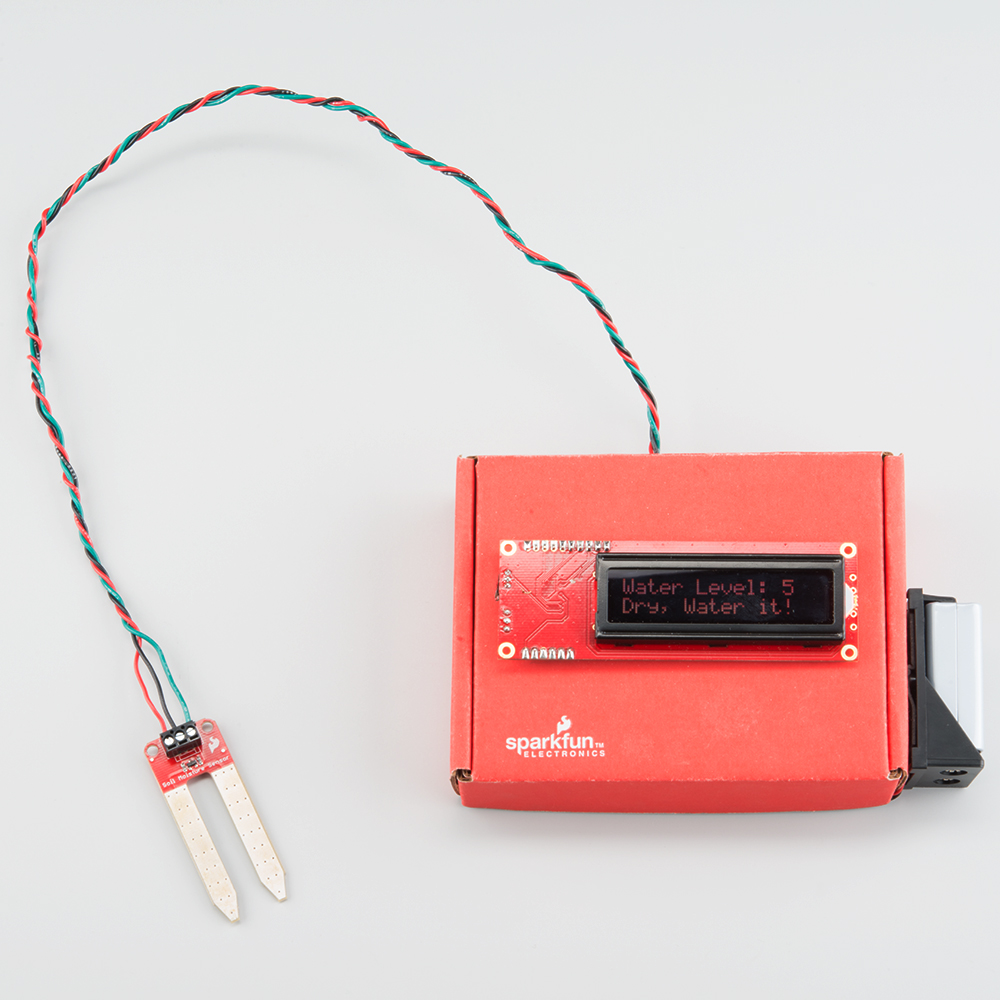
Feel free to put your circuit in an enclosure of some sort. A SparkFun red box makes for a great project box. For this project, we are powering the ReadBoard with a 9V battery and 9V battery holder to make it portable.
The code for this is fairly straightforward. You will need the Software Serial library to interact with the serial LCD screen. If you do not have this library you can get it from the Arduino GitHub here. If you have never uploaded a library or want a quick refresher on how to do that, check out our tutorial here. Installation should not be necessary, as this library now comes with the Arduino IDE by default.
For more specific information about the code, you can read the comments in the code itself:
language:c
// SparkFun Soil Moisture Sensor and Serial LCD example 1
// By Sarah Al-Mutlaq 2015
// Sketch reads sensor and desplays level and whether soil is wet or dry

// Use the softwareserial library to create a new "soft" serial port
// for the display. This prevents display corruption when uploading code.
#include <SoftwareSerial.h>

// Attach the serial display's RX line to digital pin 2
SoftwareSerial mySerial(3,2); // pin 2 = TX, pin 3 = RX (unused)


// Here we are setting up some water thersholds that we will
// use later. Note that you will need to change these to match
// your soil type and environment.

/********************************************************
 * Change these values based on your calibration values
 *******************************************************/
int thresholdUp = 400;
int thresholdDown = 250;

// We are setting up the pin A0 on the redboard to be our sensor
// pin input:

int soilPin = A0;
int soilPower = 7;//Variable for Soil moisture Power

void setup(){
  mySerial.begin(9600); // set up serial port for 9600 baud (speed)
  delay(500); // wait for display to boot up

  pinMode(soilPower, OUTPUT);//Set D7 as an OUTPUT
  digitalWrite(soilPower, LOW);//Set to LOW so no power is flowing through the sensor
}

void loop(){
  // Here we are declaring a string, which are lines of words,
  // and we want DisplayWords to be the words displayed on
  // the LCD screen, which will change based on whether the soil
  // wet or dry based on our threshold values above.
  String DisplayWords;

  // We need to set up a pin to get the value that the soil
  // moisture sensor is outputting, so sensorValue will get the
  // analog value from the sensor pin A0 on the redboard that we
  // set up earlier.

  int sensorValue;
  sensorValue = readSoil();

  // move cursor to beginning of first line on LCD:
  mySerial.write(254);
  mySerial.write(128);

  // clear display:
  mySerial.write("                ");
  mySerial.write("                ");

  // move cursor to beginning of first line of the LCD screen:
  mySerial.write(254);
  mySerial.write(128);

  //Write what we want to desplay on the screen:
  mySerial.write("Water Level: ");
  mySerial.print(sensorValue); //Using .print instead of .write for values

  // Now we are going to check if the water level is below a
  // out thresholdDown value we set earlier, and if it is have
  // words "Dry, Water it!" display one column over on the first
  // row:

  if (sensorValue <= thresholdDown){
    // move cursor to beginning of second line on LCD:
    mySerial.write(254);
    mySerial.write(192);

    DisplayWords = "Dry, Water it!";
    mySerial.print(DisplayWords);

  // If the value is not below our thresholdDown value we want to
  // check if it is above our thresholdUp value, and if it is
  // change the display words to "Wet, Leave it!":


  } else if (sensorValue >= thresholdUp){
    // move cursor to beginning of second line on LCD:
    mySerial.write(254);
    mySerial.write(192);

    DisplayWords = "Wet, Leave it!";
    mySerial.print(DisplayWords);

  // Otherwise if it is inbetween the two values we want it to
  // the display it had, so if our soil was really wet and drying
  // the words would only change to "Dry, Water it!" when it got to the lower threshold
  // (thresholdDown), but if it was dry and getting wetter the words
  // would only change to "Wet, Leave it!" when it got to the upper
  // threshold (thresholdUp_):

  } else {
    // move cursor to beginning of second line on LCD:
    mySerial.write(254);
    mySerial.write(192);

    mySerial.print(DisplayWords);
  }

  delay(500); //wait for half a second, so it is easier to read
}

//This is a function used to get the soil moisture content
int readSoil()
{
    digitalWrite(soilPower, HIGH);//turn D7 "On"
    delay(10);//wait 10 milliseconds
    int val = analogRead(soilPin);//Read the SIG value form sensor
    digitalWrite(soilPower, LOW);//turn D7 "Off"
    return val;//send current moisture value
}
This code has different values for an upper threshold and a lower one, so you have a middle zone that could either be wet or dry depending on whether the soil is drying out (coming down from being wet) or getting wet (coming up from being dry). If you don't want this middle zone, you can set both thresholds to the same value, but I have found that having this middle area is more similar to how soil actually works; there really isn't a point at which soil goes from being wet to dry. If you are interested in soil and how it reacts to water, you should read up on it; it can be very complicated and interesting.
You will need to adjust the code variables anyway, since this will be unique to your setup, soil type, and how wet you actually want your soil to be. Using the calibration techniques mentioned above, test out the reading and play around with the values until you find some that fit your needs.