Serial Graphic LCD Hookup
 Joel_E_B
Troubleshooting
Display Issues
- If you don't see any letters, make sure the contrast potentiometer on the backpack is adjusted accordingly. You'll need a fine-tipped screwdriver to adjust it. Be careful when adjusting this trimpot as turning it too far or too hard can result in the trimpot breaking.
- Make sure you are giving the backpack at least 5V. Any lower and you may have an issue with contrast. Some USB ports run around 4.7-4.8V and may not have enough voltage to fully power the LCD and backpack. We recommend powering the LCD with 6-7V.
- If you can't see any letters, even when the contrast is adjusted accordingly, then there may be a baud rate issue. If you changed the baud rate and forgot to what you changed it, you can use the
restoreDefaultBaud()command in the Arduino library to restore the baud rate to its default of 115200bps. Simply create a sketch that imports the Graphic Serial LCD library and then call the restore function in Setup.
Copy and paste this code in to Arduino, make sure the LCD's RX pin is connected to digital pin 3 on the Arduino, and then upload. You should see the screen print "Baud restored to 115200!"
language:c
#include <SparkFunSerialGraphicLCD.h>//inculde the Serial Graphic LCD library
#include <SoftwareSerial.h>
LCD LCD;
void setup()
{
delay(1200);///wait for the one second splash screen
LCD.restoreDefaultBaud();
}
void loop()
{
//nothing in loop
}
Reflashing the Firmware
If you are experiencing odd behavior from your backpack, it may be the firmware. If this happens, we recommend updating the backpack with the latest firmware. We'll briefly describe how to do this yourself if you have the proper tools.
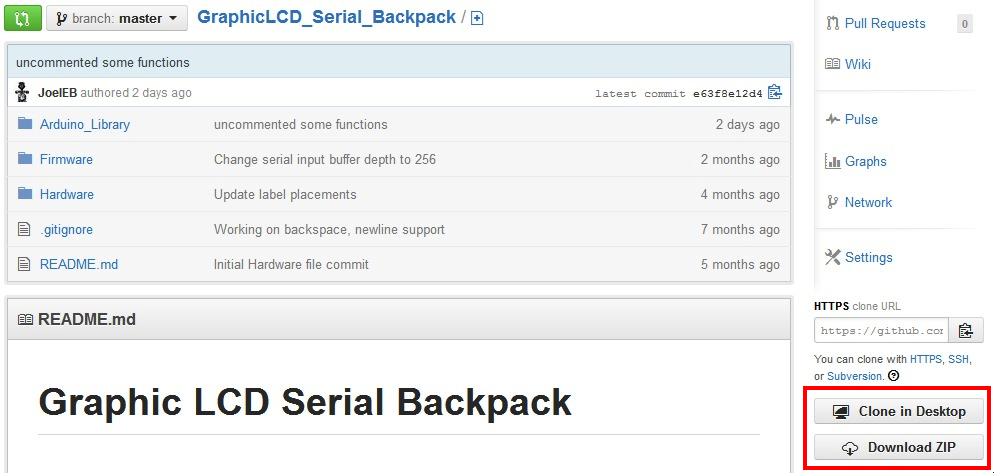
The latest version of the firmware can be found on GitHub. Visit the link to the repository. Clone the repository, or download the zip file. Remember the location of this file.
You're going to need some way to upload the firmware to the backpack. We recommend using an Atmel AVR MKII programmer. If you don't have an MKII, you could use something similar such as the Pocket AVR Programmer. Plug your programmer into your computer. You can also use an Arduino board as a programmer. For more info on this and general reflashing firmware information, please see our Installing an Arduino Bootloader tutorial.
In this example, I'm going to use Atmel AVR Studio (v4.18) to upload the .hex file to the backpack. You can also use AVRDude to accomplish the same task in the command line. If you are running Mac or Linux, you'll either need to look into uploading AVR code on your particular OS, or use a virtual machine such as Wine or VMWare to run AVR Studio in Windows.
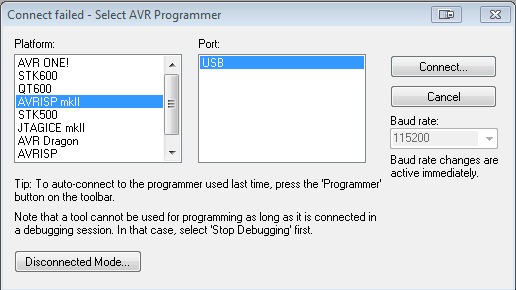
Once you've figured out how to get AVR studio up and running, go ahead and start the program. You should be greeted with a prompt asking you to choose which programmer you're using. Select AVR MKII, or whichever programmer you're using.
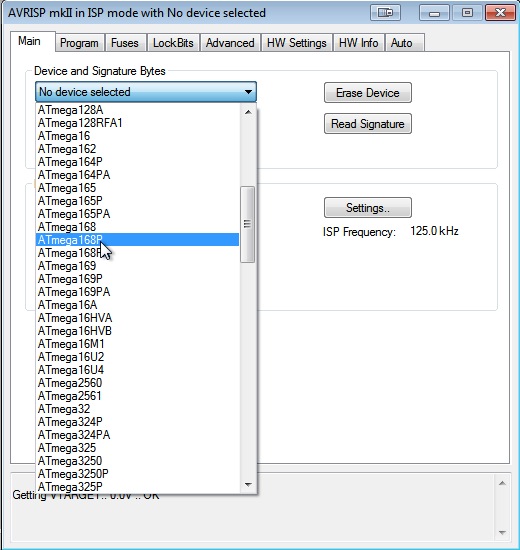
Now, you're going to want to select to which chip you plan to upload. Select ATmega168P.
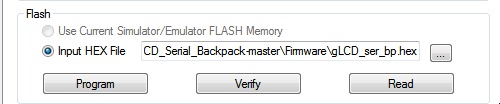
Click on the Program tab. In the 'Flash' section, click the button with three dots on it to browse for the hex file you downloaded from GitHub.
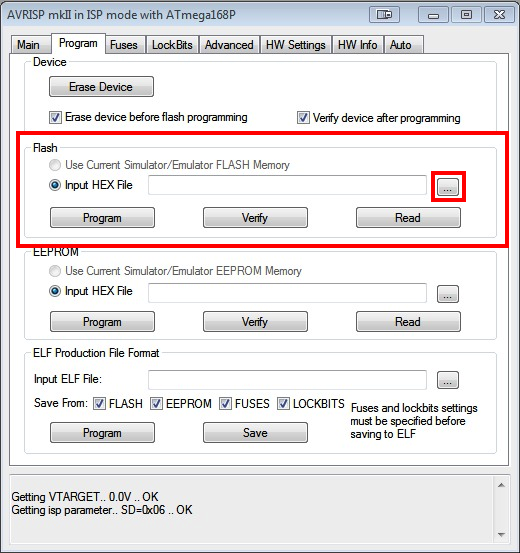
Browse for the .hex file that come with the GitHub download.

Once you have pointed AVR Studio to the hex file, connect the programmer to the ISP header on the backpack, and click 'Program.'
You should see a success message in the bottom of the program. If so, the new firmware should be on the backpack and ready to go!