Rotary Switch Potentiometer Hookup Guide
Assembly
Assembly of the Rotary Switch Potentiometer board is fairly straightforward.
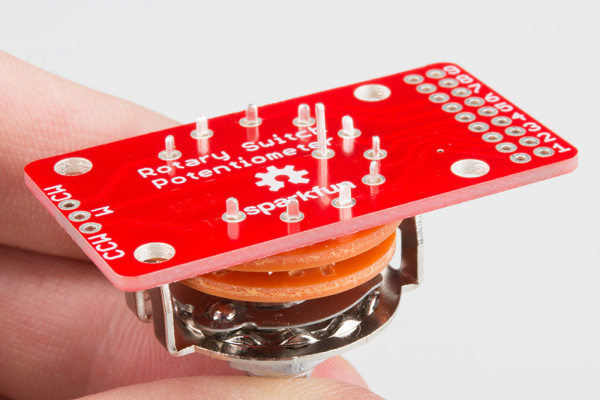
First, solder the rotary switch inside the outline on the top of the board.
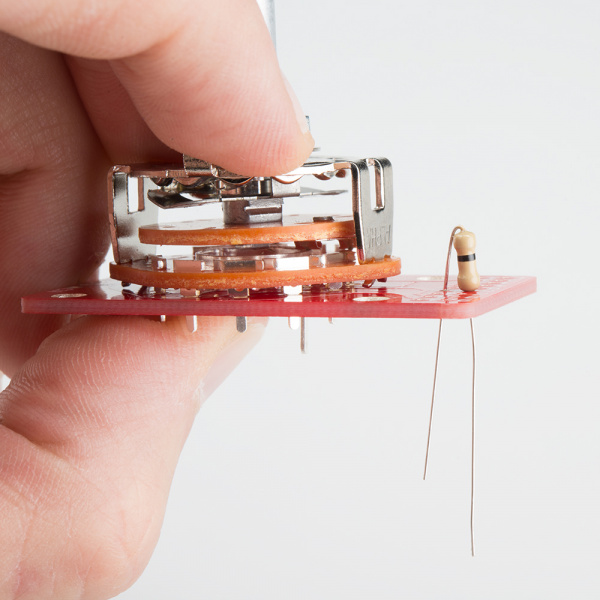
Next, solder your resistors in the positions marked 1 through 9. These resistors are bent like a hair pin, and soldered in place "standing up."
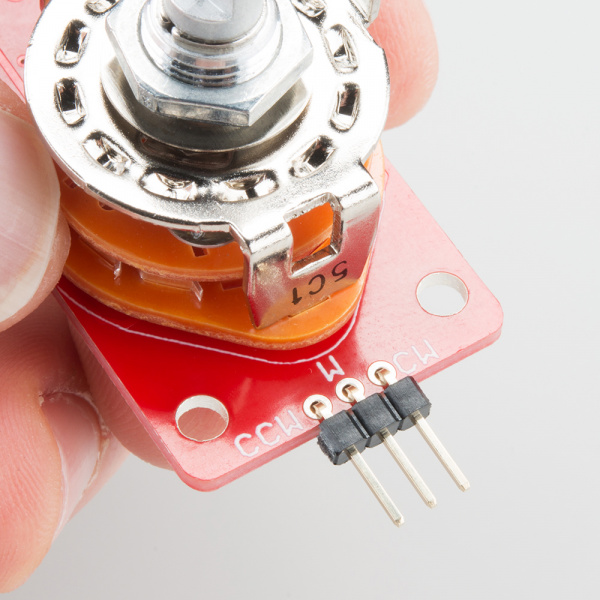
Next, attach leads or a connector to the three pins on the other end of the board. For this hookup guide, we'll be using three pins from snappable headers. These solder pads are labeled with their function:
CCWCounterclockwise end of resistor string.WWiper.CWClockwise end of resistor string.
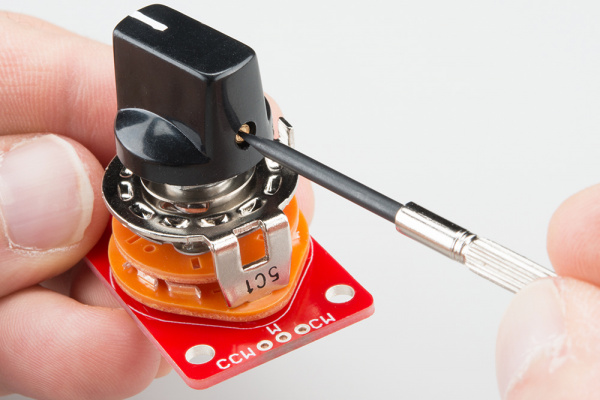
Finally, top it off with a knob of your choice.
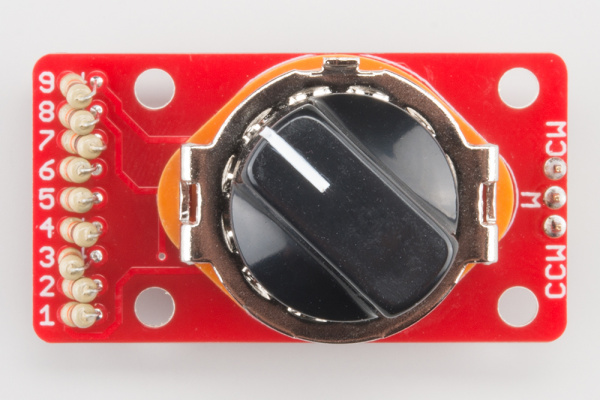
When it's complete, it will look something like this
You'll notice that we haven't explained exactly which resistors you'll want to use. That's really the purpose of this board! You can select resistors that fit your needs, and you'll select different resistors depending on what you're trying to do.
The "Cheat Sheet"
To help with the math involved in deploying the Rotary Switch Potentiometer, we have developed a spreadsheet that helps calculate resistor values. It's in the "theory" subdirectory on the GitHub Repo.
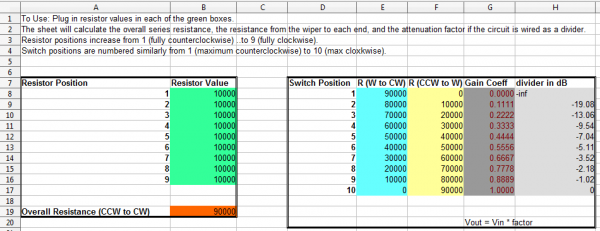
You enter the resistor values in the green cells, and the sheet calculates the resulting circuits. For purposes of discussion, we've simply plugged in 10KΩ for each resistor, above.
- The orange cell contains the total series resistance -- this is the value of an equivalent regular potentiometer. The nine 10K resistors add up to 90K total.
- The blue and yellow cells calculate the resistance from the wiper (
wterminal) to each end contact (ccwis counterclockwise end,cwis clockwise). These are the values the describe the circuit if you're using it as a variable resistance. - The dark grey cells show the arithmetic gain coefficient if the circuit is wired as a voltage divider. For instance, if the switch it at the 4th position, the output voltage will be the input voltage multiplied by 0.333.
- The light grey cells express the gain coefficient in decibels. For the moment, just notice that it changes very quickly between positions 1 to 4, then more slowly from 4 to 10. We'll explore the reasons why, and present a solution in a later section.
Spreadsheet Numbering
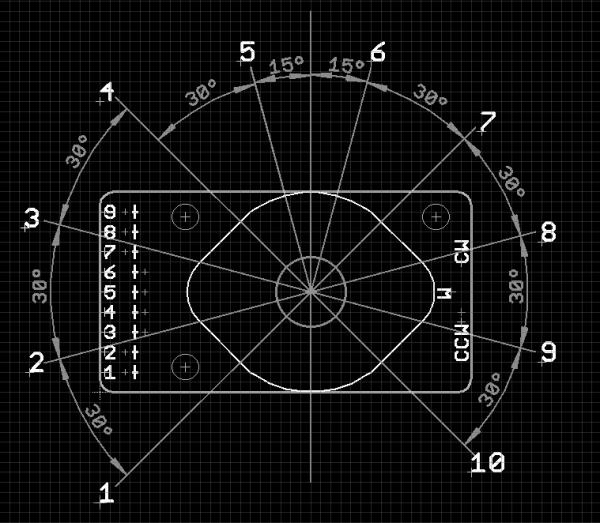
The board uses a ten position switch, which has nine locations in between the stops where resistors are installed. The resistor positions are all aligned on the edge of the board, and labeled 1 through 9. When you're working with the spreadsheet, notice that the box on the left side denotes the nine resistor locations, while the box on the right side corresponds to the ten switch positions. Both sets of numbers increase with the clockwise rotation of the switch. One is the furthest counterclockwise, ten is the furthest clockwise, an depicted below.
Some Notes About Installation
If you're building the Rotary Switch Potentiometer into some device, you'll want to consider how you mount it.
To put the switch in a control panel, you can drill a 3/8" (9.5mm) diameter hole, and use the hex nut to secure the switch to the panel. The PCB is 1 inch wide, the same width as the body of the switch itself. This allows it to fit behind control panels, such as the 1.75" vertical unit used by 19" telecom racks, or the 1.5" width of an API 200 or 500 series module.
If you're designing a front panel, you might want to put numbers or tick marks around the switch. In order to get those marks in the right place, it's important to know the angles of the switch positions. On a regular control knob, the indicator line is opposite the setscrew, and the knob is usually installed with the setscrew on the flat side of the switch shaft. With the knob installed this way, and viewing the board with the resistors on the left edge, the pointer on the knob will point to the "half-hour" spaces on the clock face, from 7:30, around to 4:30 (or, said differently, in 30° increments, starting + and - 15° away from vertical).
If you don't have a panel, but want secure the board, it also has four mounting holes that accept 4-40 machine screws. And, of course, there are always the old standby solutions of two-sided foam tape, or hot-melt glue!
Understanding how to mount the board, and with the spreadsheet in hand, let's examine some applications that use the Rotary Switch Potentiometer.
