RedBoard Plus Hookup Guide
 bboyho, santaimpersonator
 Introduction
The SparkFun RedBoard Plus is an Arduino-compatible development board that combines the design from the classic RedBoard and RedBoard Qwiic. The RedBoard Plus incorporates a few key improvements over its predecessors (see Hardware Overview). However, like the original RedBoard, it is designed to be an easy-to-use learning platform for coding, physical computing, and project prototyping. These skills are becoming increasingly significant in today's education and the technological community.
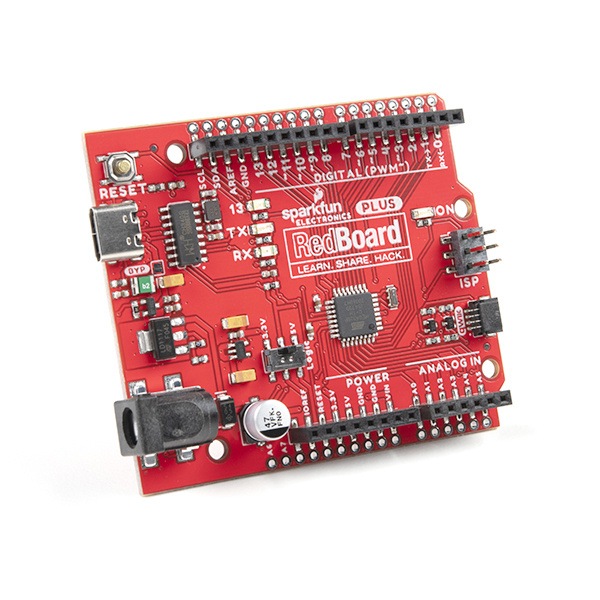
This tutorial aims to familiarize you with the RedBoard Plus and help you get started using it. To begin, we'll guide you through the installation of the Arduino IDE (Integrated Development Environment) software, the main user interface for programming the board. Next, we will go over the hardware and features of the board. Finally, we will walk you through a few examples using the Arduino IDE.
The RedBoard Plus can interact with real-world sensors, control motors, display information, and perform near-instantaneous calculations. It enables anyone to create unique, nifty projects from something as simple as displaying characters on an LCD display or detecting changes in light to vastly more complicated projects like an IoT cellular device (Not recommend for beginners... start with something simpler and work your way up.). If you're familiar with how the original RedBoard and RedBoard Qwiic worked, you may want to skim over parts of this tutorial.
Required Materials
To get started, all you need is a few things. You may not need everything though depending on what you have. Add it to your cart, read through the guide, and adjust the cart as necessary.
- RedBoard Plus - You'll definitely need this; otherwise, you might be on the wrong tutorial (wink-wink).
- Reversible USB A to C Cable - 2m - The USB interface serves two purposes: it powers the board and allows you to upload programs to it.


Required Software
You will also need a computer with the Arduino IDE installed on it - That is how we will program the board and interface with it.
Suggested Tools and Peripherals
That is ALL... pretty simple right? Now you won't be able to do much since there are no additional sensors to interact with the physical world. However, you can at least blink an LED and do some math calculations.
Jumper Modification Qwiic Example
wish to perform. Feel free to modify the items in your cart to fit your needs.
Jumper Modification
If you would like to modify the A4/A5 Qwiic connector jumpers, you will need soldering equipment and/or a knife.


Weller WLC100 Soldering Station
TOL-14228Qwiic Example
If you would like to follow along with the examples below to interact with the physical world, you will also need the following items:

Qwiic Cable - 100mm
PRT-14427Suggested Reading
The RedBoard Plus aims to be a beginner-friendly microcontroller platform. You can get started without an innate knowledge of Ohm's Law or How Electricity Works (but a little understanding wouldn't hurt!). The following are some subjects you should be familiar with; however, to use the more advanced features of the board, it is recommended that you read up on the Logic Levels and I2C tutorials.
What is a Circuit?
What is an Arduino?
Logic Levels
I2C
One of the new, advanced features of the board is that it takes advantage of the Qwiic connect system. We recommend familiarizing yourself with the Logic Levels and I2C tutorials (above) before using it, as all Qwiic sensors utilize an I2C communication protocol. Click on the banner above to learn more about Qwiic products.