Red Hat Co.Lab Conversation Machine Kit Experiment Guide
 D___Run___
Before You Start
Before you start assembling your kit, there are some things you can do ahead of time to ensure your project will be a success. The information below will tell you how much time you can expect to spend on each part, what tools and materials you'll need, and what you can do before you start your project that will make it easier.
Recommended Age and Prerequisite Skills
This activity is best suited for ages 10-13.
There are no specific skills required to complete the project, and no prior knowledge of circuits is assumed. Because some of the components are small and making connections requires a bit of dexterity, younger students may need adult assistance.
Time Requirements
● Part One: Breadboarding, Push Buttons, and LEDs - 30 minutes
● Part Two: Designing a Device and Communicating Ideas - 30 minutes
Tools and Materials
- The Red Hat Co.Lab Conversation Machine kit (Make sure you keep the box it comes in. We’ll use it later.)
- Resistors (3)
- LEDS (3)
- Push Button (3)
- 9V battery
- 9V snap connector
- Jumper wires
- Breadboard
- Paper: For organizing and taking notes
- Colored sticky notes: For wrapping around the LEDs
- Tape: For securing the sticky notes
- Scissors: For modifying the case for your experiment (cutting cardboard)
Identify the Parts
It’s always helpful to know the parts you’ll be using before diving into the build. Go ahead and lay the parts out in front of you on a piece of paper. As you lay them out, pick them up and explore each one. How many pins does it have? What colors are on it? Is each leg of the component the same length? Do you have a guess as to what it does based on how it looks or what it's called? You should write these observations down next to each part. It will help you organize the pieces as we begin to explore and build.
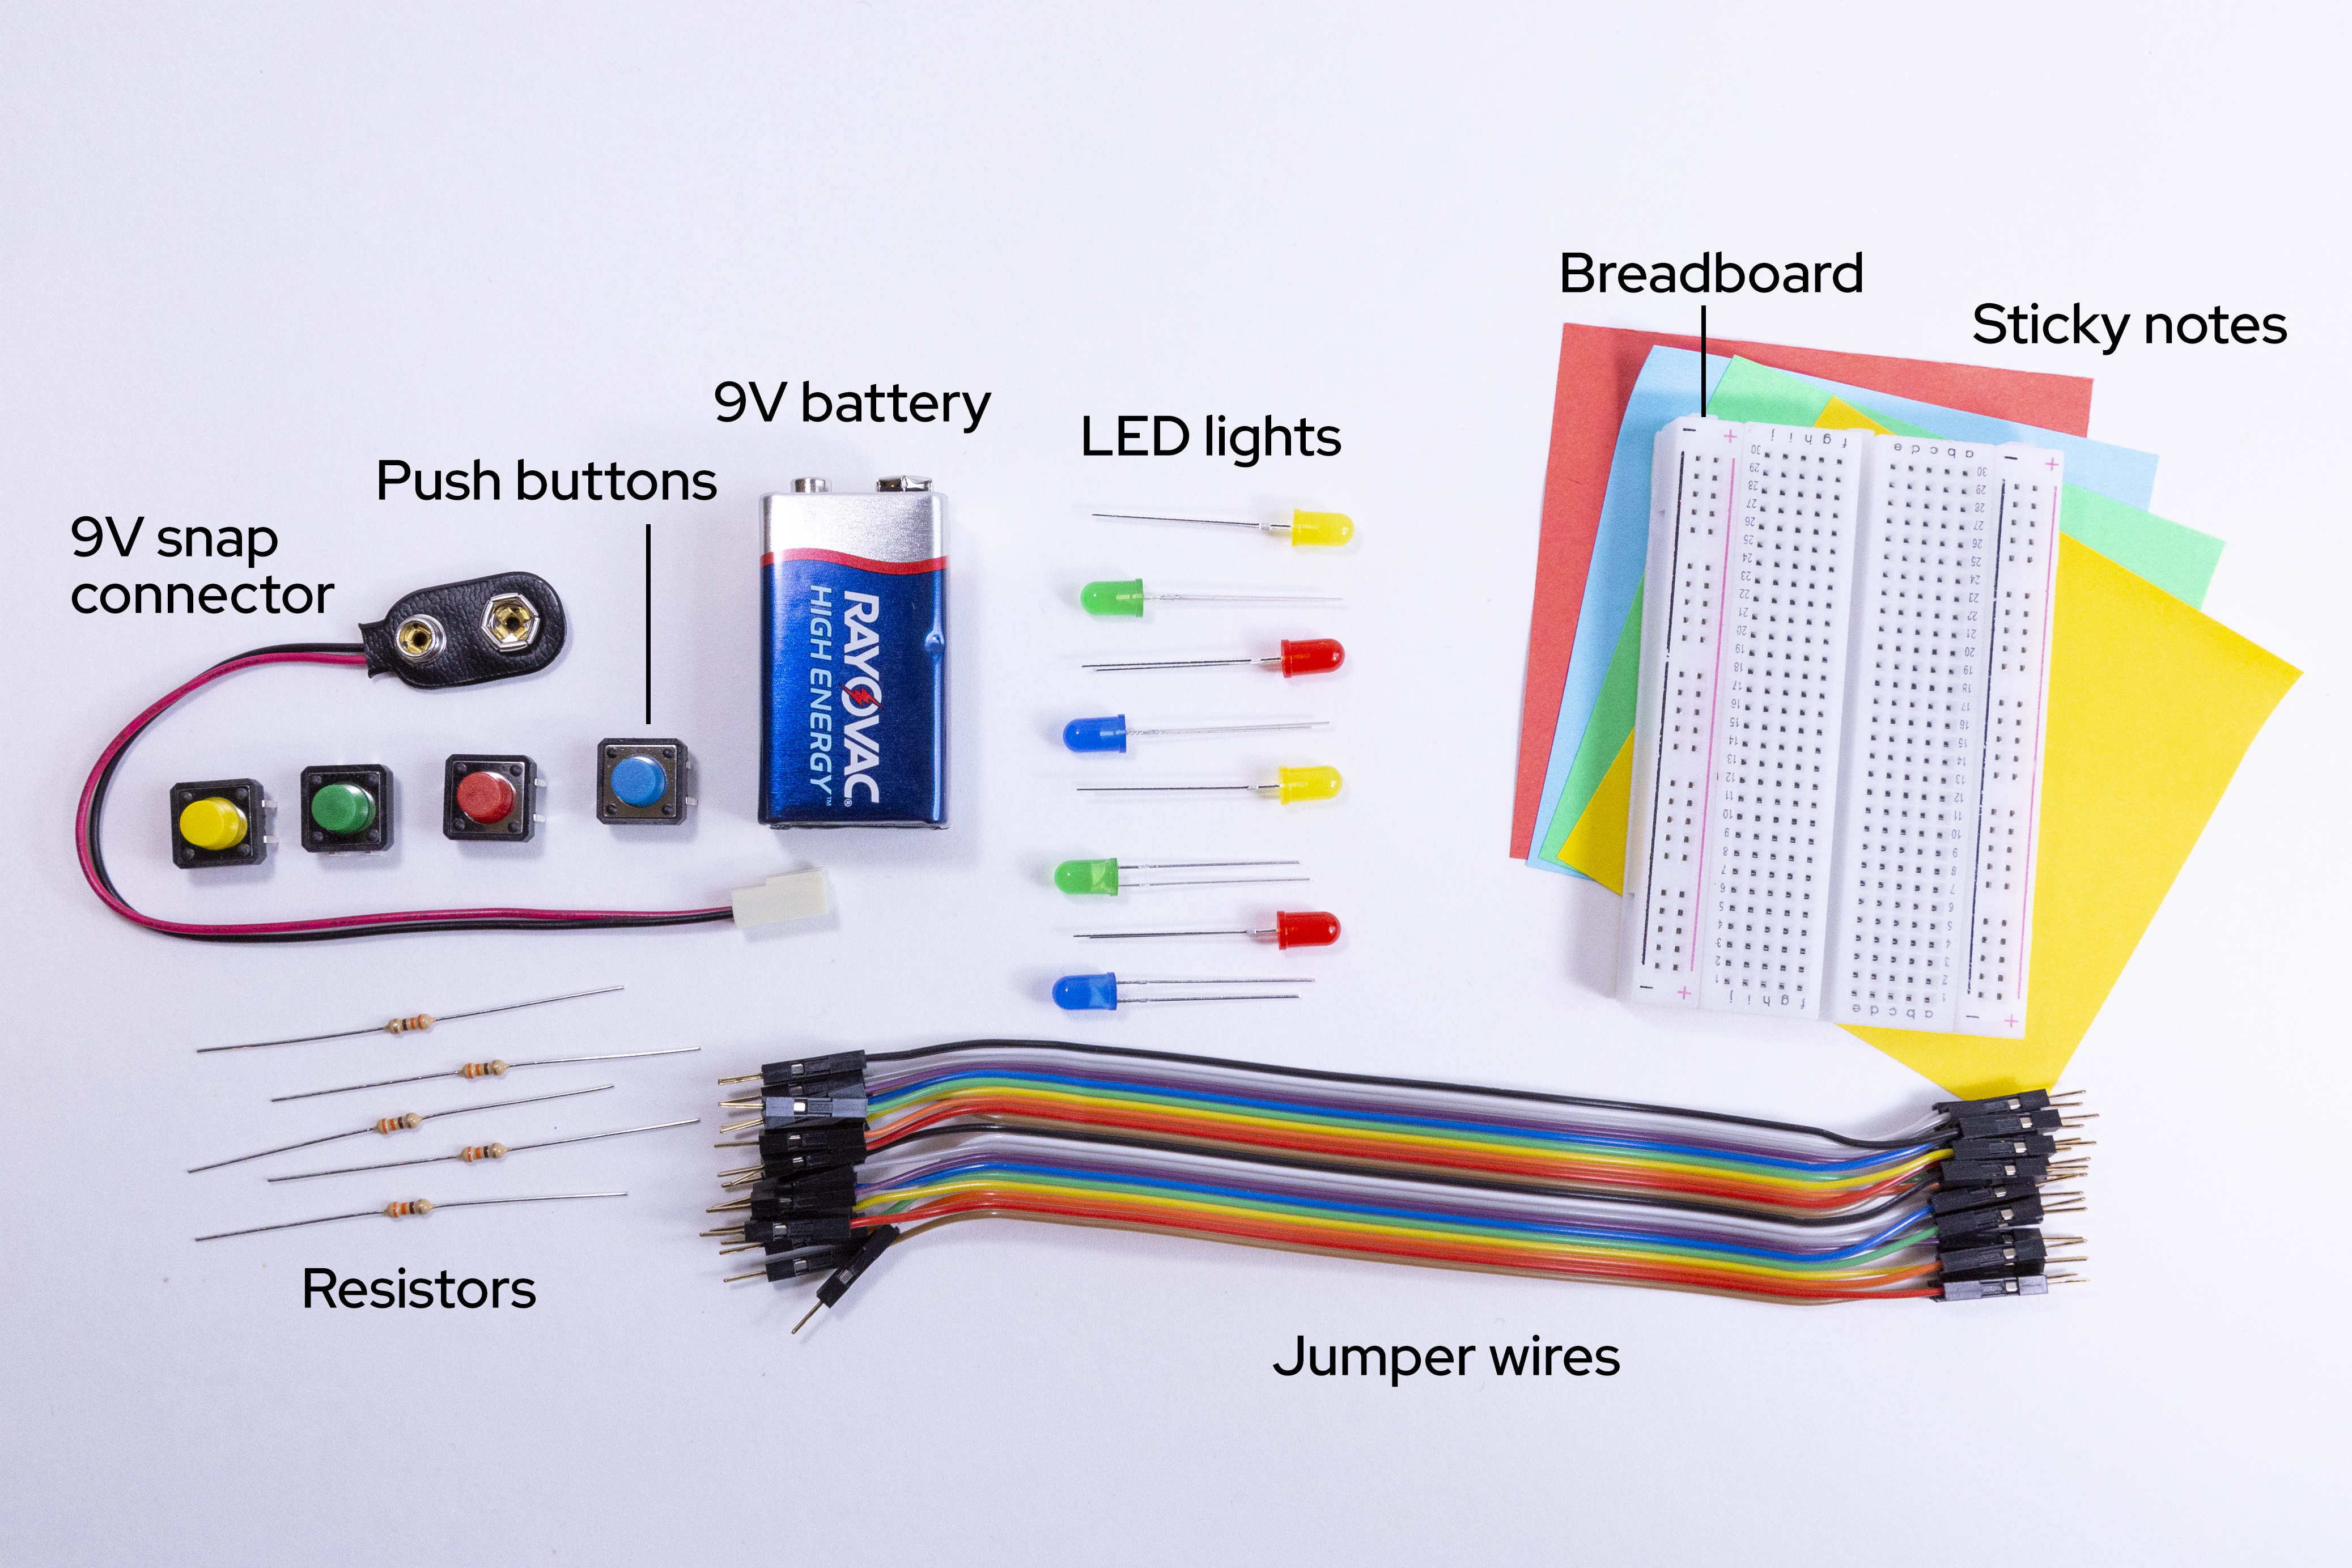
While you are laying out the parts for your project, it also helps to make sure that you have the other required materials that didn’t come with your kit (paper, sticky notes, tape, and a pair of scissors). By this point we have:
- Identified each part (and labeled it so it’s easier to find).
- Counted each part to make sure that we have the correct number.
- Examined each part to make sure it's not obviously broken.
Now that we have taken care of the setup, we can start to build and experiment!
Resources
Below, you’ll find in-depth explorations of parts in this kit.
- Circuits: The basics of how circuits work, as well as links to more in-depth information
- LEDs: What does LED stand for and what exactly are they
- Buttons and Switches: The basics of buttons and switches
- Breadboards: A deeper dive into the interior mechanics of the breadboard