Re-Programming the LilyTiny / LilyTwinkle
 bri_huang
Test Code - "Hello World!"
As with nearly every introductory Arduino project, we test our system with a "blink" program -- the equivalent to "Hello World!" in most other programming environments. First, we need to make sure the configuration is set properly in the Arduino IDE.
Step 0 - Open up the Arduino IDE
Open the Arduino IDE if you have not already.
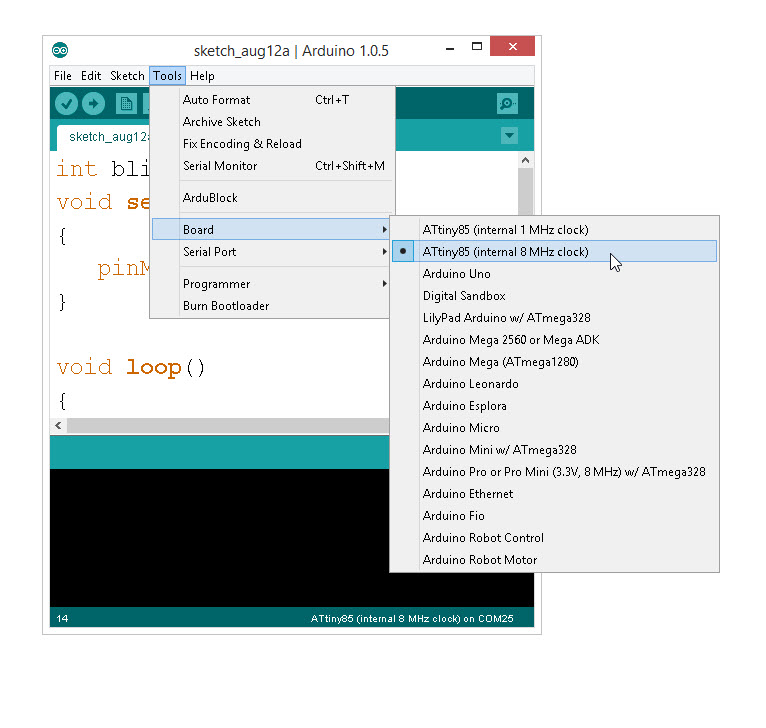
Step 1 - Setting the Board Type
The LilyTiny has an ATtiny85 microcontroller on it. Change the board type in the Arduino IDE to correspond with this. The ATtiny85 can be set with either a 1 MHz internal clock or an 8 MHz internal clock. Be sure to select 8 MHz. Select: Tools --> Board --> ATtiny85 (internal 8 MHz clock)
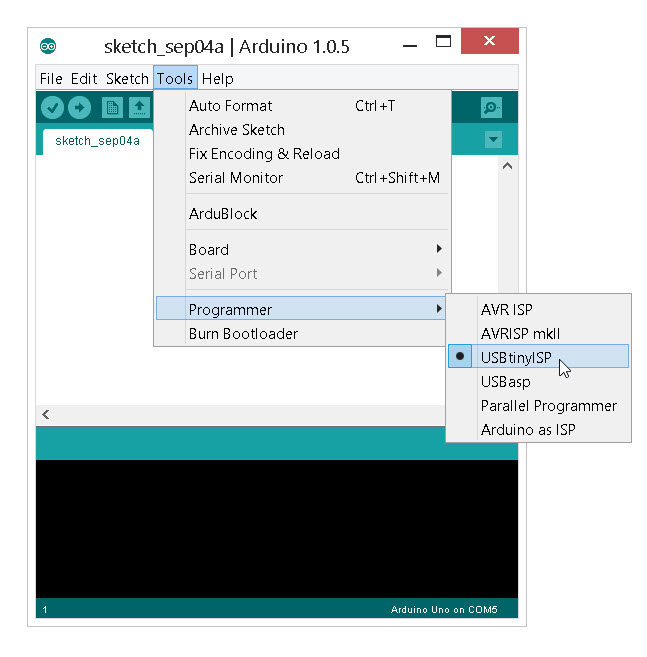
Step 2 - Setting the Programmer
Because we are using the Tiny AVR as our programmer, we need the change the default programmer. This settings is also under the Tools > Programmer > USBtinyISP.
Step 3 - Upload Code
Copy the code below and paste this into your Arduino window.
language:c
int blinkPin = 0;
void setup()
{
   pinMode(blinkPin, OUTPUT);
}

void loop()
{
    digitalWrite(blinkPin, HIGH);
    delay(500);
    digitalWrite(blinkPin, LOW);
    delay(500);
}
Click the upload button. You may see a few warning messages such as:
language:bash
avrdude: please define PAGEL and BS2 signals in the configuration file for part ATtiny85
You can ignore this one. If everything is working, you should be able to see a blinking LED on GPIO 0 (pin 5 of the ATtiny). This can be on the Tiny AVR Programmer, the ProtoSnap LilyTwinkle Kit, or an LED that is attached to the ATtiny 85.