Qwiic SHIM for Raspberry Pi Hookup Guide
 El Duderino, Ell C
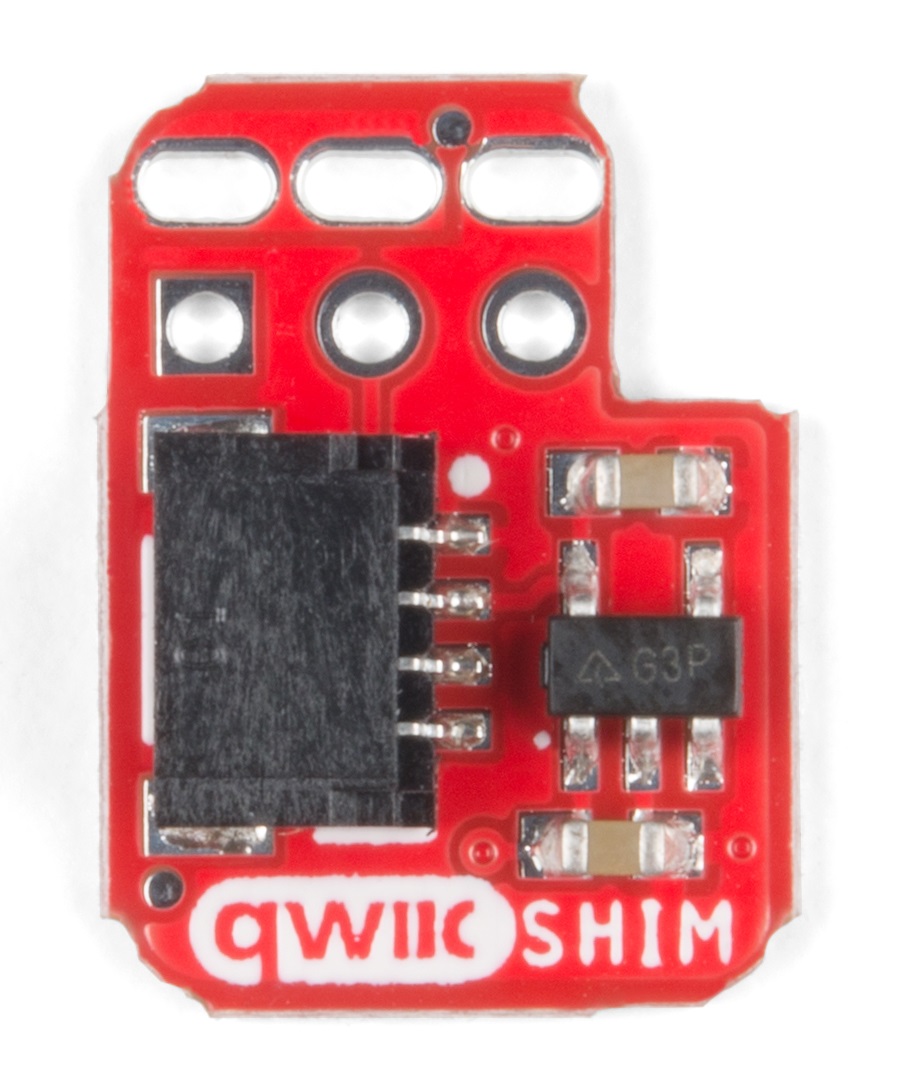
Hardware Overview
The Qwiic SHIM uses a unique friction-based connector that wedges itself onto the GPIO header for a secure, solderless connection. As you would expect, it has a single Qwiic connector that connects to your Pi's I2C bus (SDA, SCL, 5V and Ground). The SHIM also has a 3.3V regulator so it will work with all Qwiic devices.
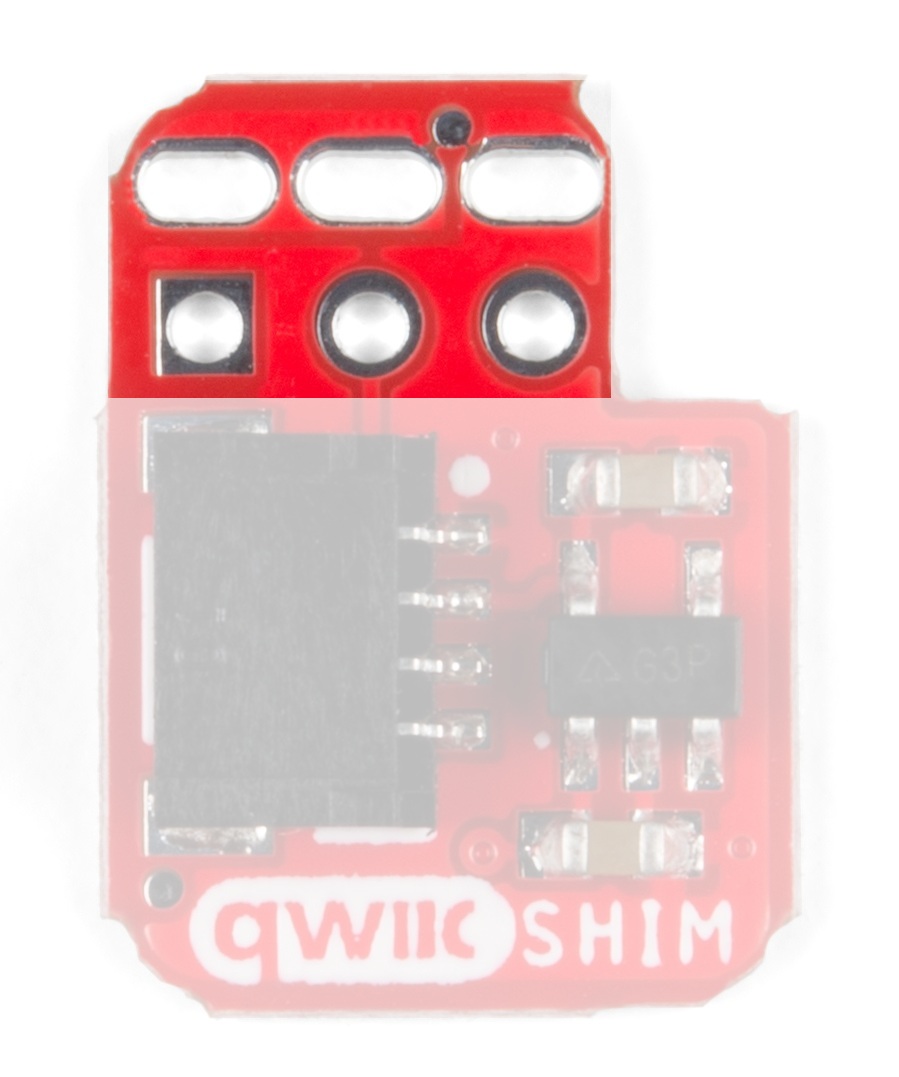
Press Fit Header
The Press Fit Header on the Qwiic SHIM allows you to easily place the Qwiic SHIM on to your Pi (or other Single-Board Computer with the Pi GPIO) aligning the square pin on the Qwiic SHIM with Pin 1 of your GPIO. Pin one on the GPIO can be identified by the square pin or the beveled corner on the silkscreen. We will cover that in more detail in the Hardware Hookup section.
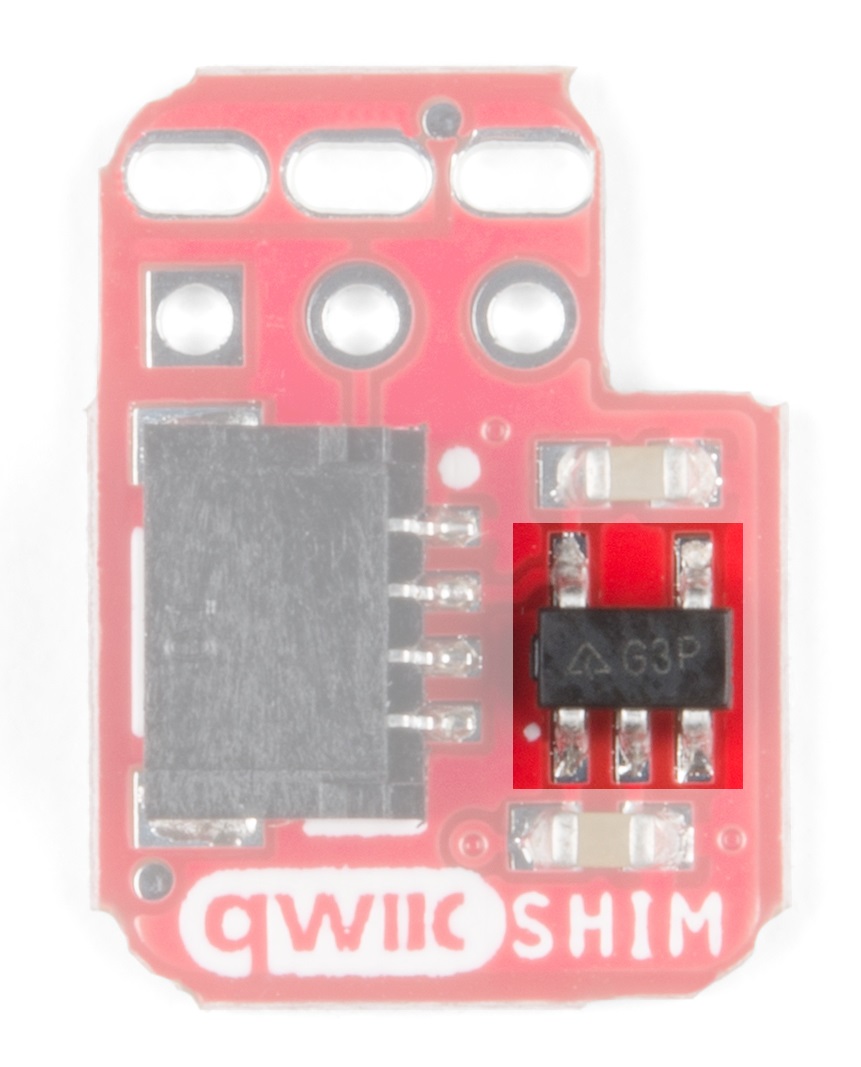
Voltage Regulator
For you savvy readers out there, you may wonder why not just connect directly to the 3.3V rail on the Pi GPIO? A simple answer is the Pi's 5V rail is able to source more current than the 3.3V rail so the regulator allows you to connect more devices to the I2C bus without needing to worry about overtaxing your Pi.The on board AP2112K 3.3V regulator provides a clean 3.3V out for all attached Qwiic devices and can source up to 600mA@3.3V so you should have plenty of available current for your Qwiic project.
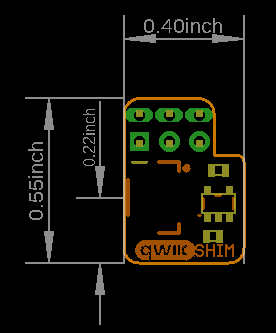
Board Dimensions