Qwiic Micro OLED Hookup Guide
 Englandsaurus
 Introduction
The Qwiic Micro OLED is a Qwiic enabled version of our micro OLED display! This small monochrome, blue-on-black OLED display displays incredibly clear images

This hookup guide will show you how to get started drawing objects and characters on your OLED.
Required Materials
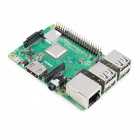
To get started, you'll need a microcontroller or a single board computer to, well, control everything.

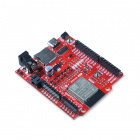
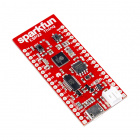
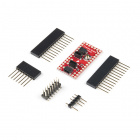
Now to get into the Qwiic ecosystem, the key will be one of the following Qwiic shields to match your preference of microcontroller:


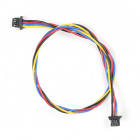
You will also need a Qwiic cable to connect the shield to your OLED, choose a length that suits your needs.

Qwiic Cable - 50mm
PRT-14426
Qwiic Cable - 100mm
PRT-14427
Qwiic Cable - 500mm
PRT-14429Suggested Reading
If you aren't familiar with the Qwiic system, we recommend reading here for an overview.
| Qwiic Connect System |
We would also recommend taking a look at the following tutorials if you aren't familiar with them.
I2C
Qwiic Shield for Arduino & Photon Hookup Guide
Hardware Overview
Listed below are some of the operating ranges and characteristics of the Qwiic Micro OLED.
| Characteristic | Range |
|---|---|
| Voltage | 3.3V |
| Temperature | -40°C to 85°C |
| I2C Address | 0X3D (Default) or 0X3C (Closed Jumper) |
Pins
Power and I2C pins are broken out to the 1x4 PTH pins as well as the two horizontal Qwiic connectors.
| Pin | Description | Direction |
|---|---|---|
| GND | Ground | In |
| 3.3V | Power | In |
| SDA | Data | In |
| SCL | Clock | In |
Jumpers
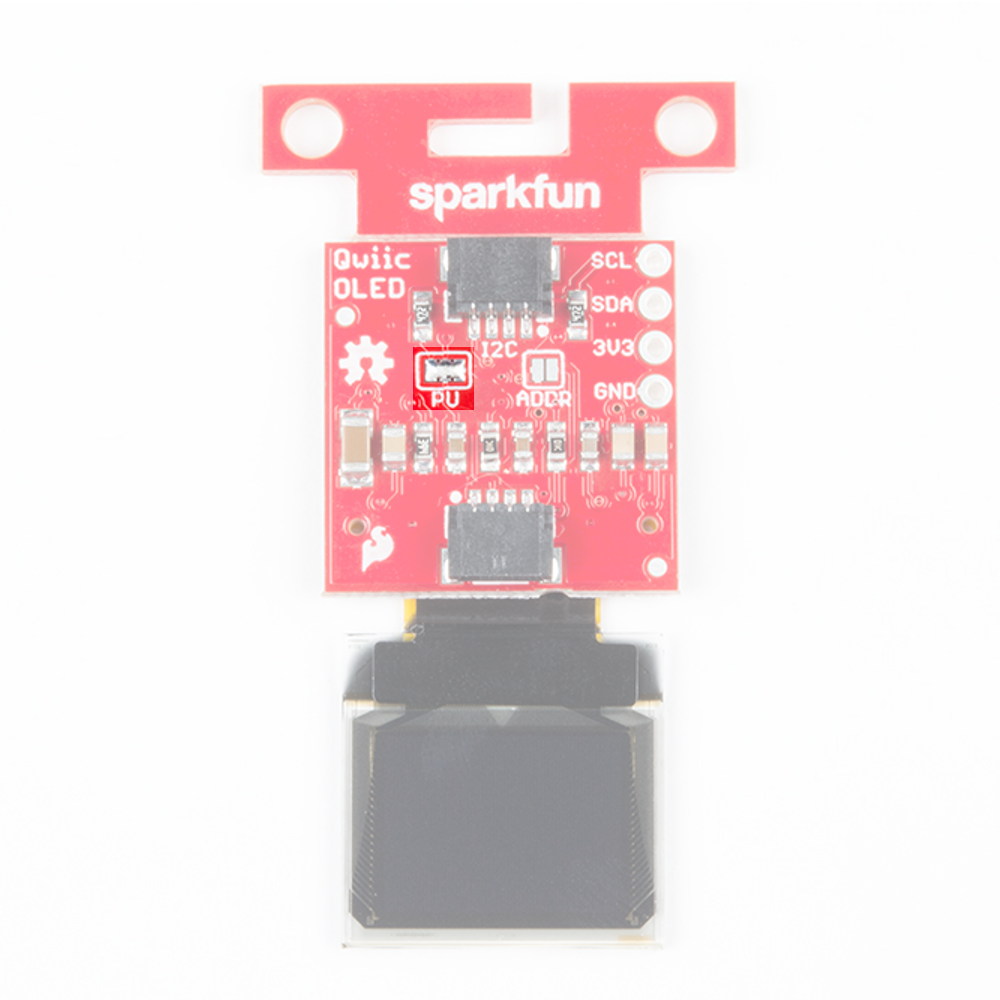
There are several jumpers on board that can be changed to facilitate several different functions. The first of which is the I2C pull-up jumper to disable the 2.2kΩ pull up resistors on the I2C data and clock lines, highlighted below. If multiple boards are connected to the I2C bus, the equivalent resistance goes down, increasing your pull up strength. If multiple boards are connected on the same bus, make sure only one board has the pull-up resistors connected.
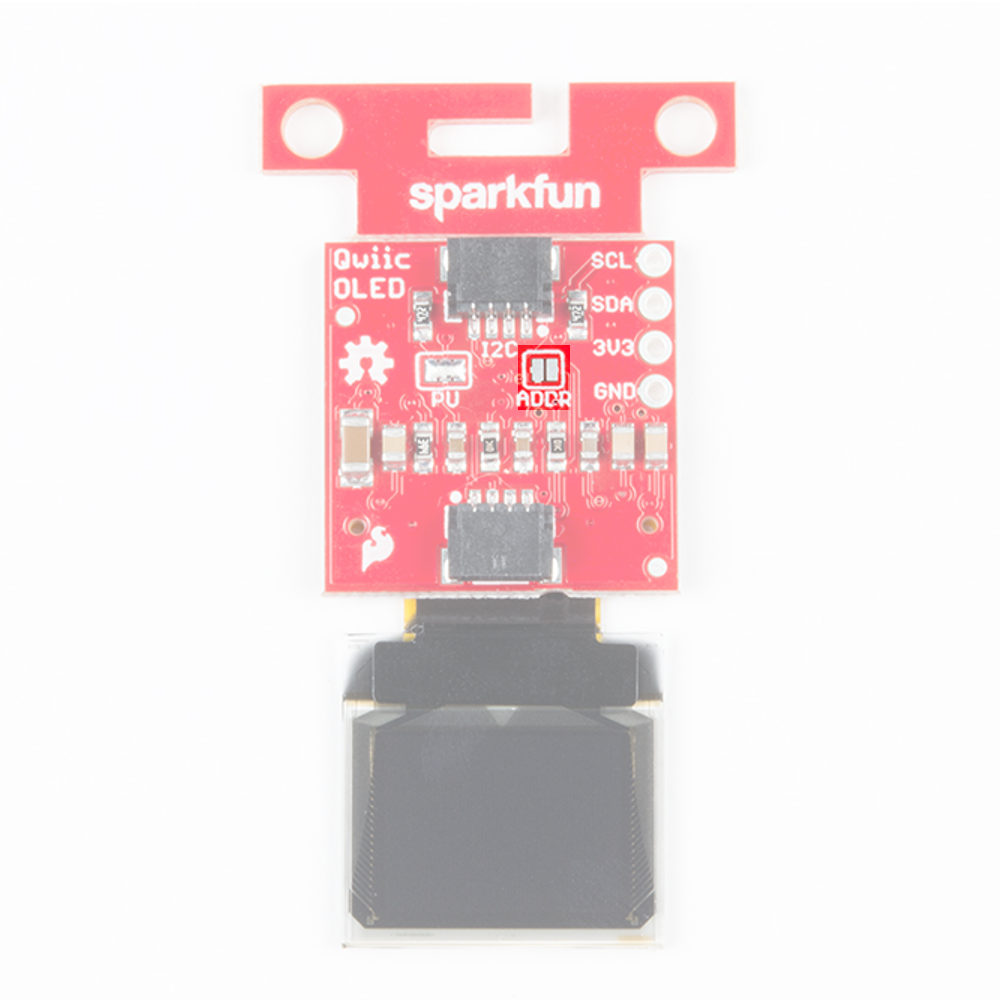
The ADDR jumper (highlighted below) can be used to change the I2C address of the board. The default jumper is open by default, pulling the address pin high and giving us an I2C address of 0X3D. Closing this jumper will ground the address pin, giving us an I2C address of 0X3C.
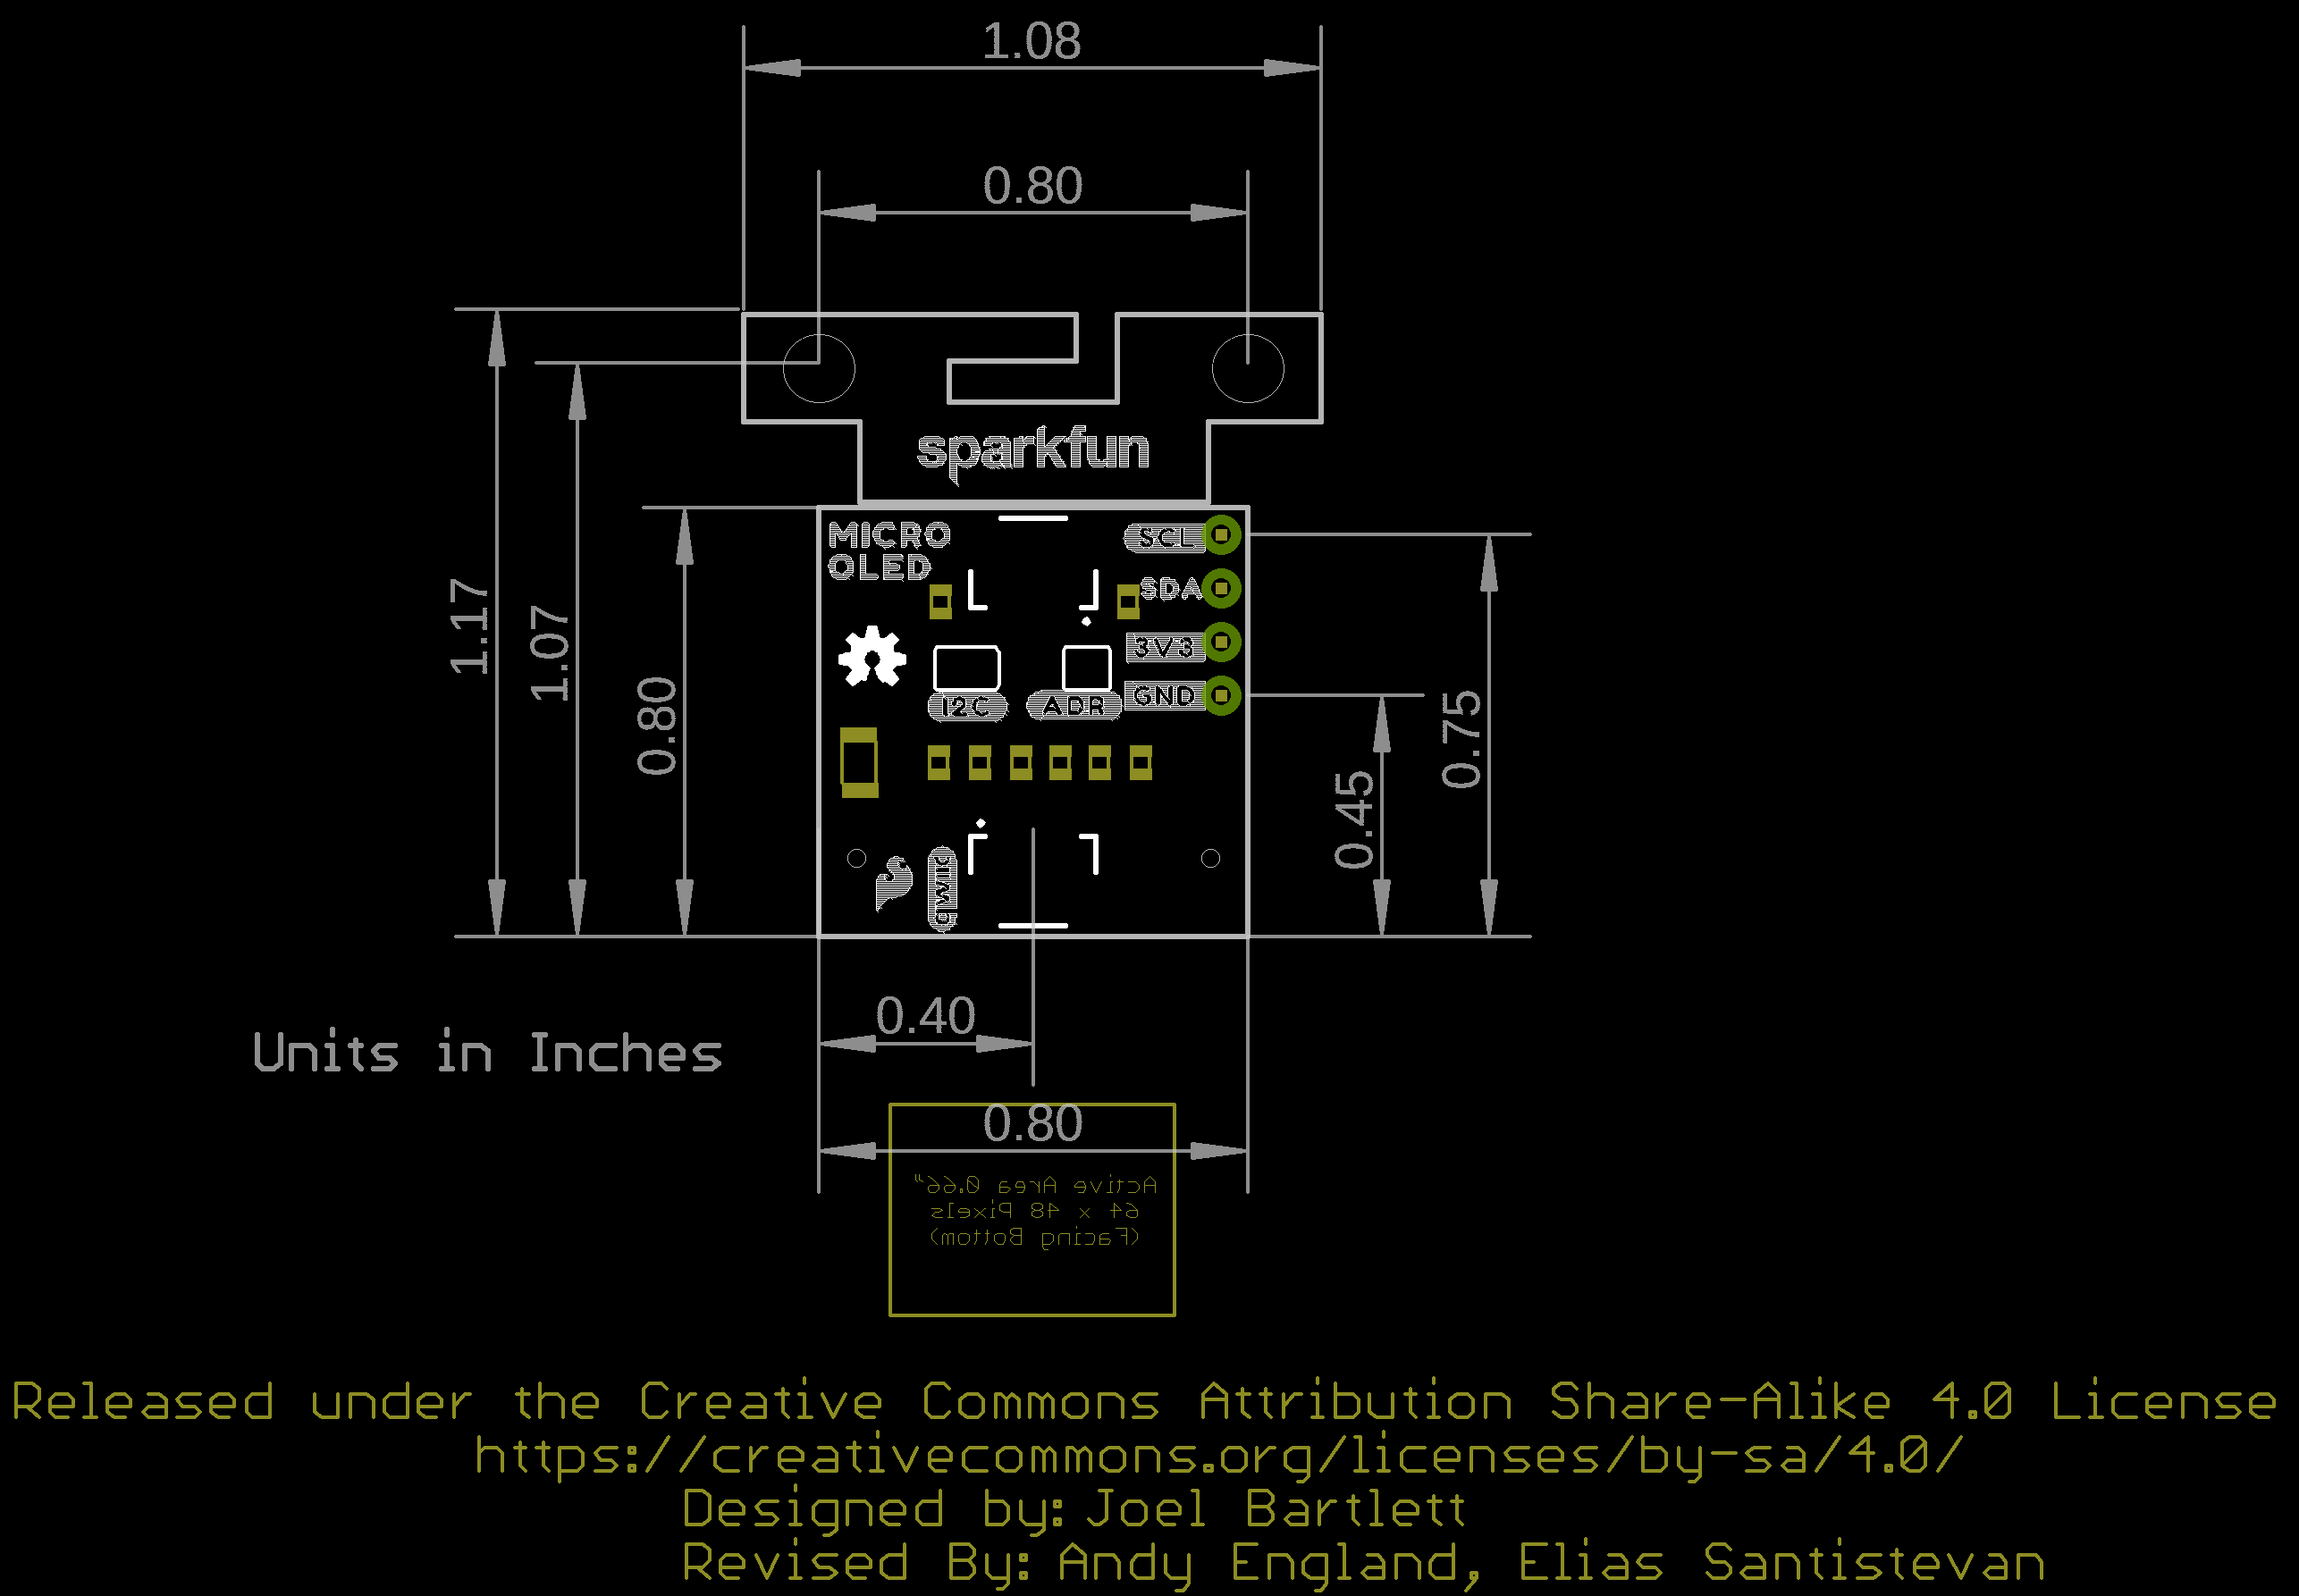
Board Dimensions
The overall board size is 1.08" x 1.17". There is a v-score for users that want to remove the mounting holes.
Hardware Assembly
If you haven't yet assembled your Qwiic Shield, now would be the time to head on over to that tutorial. With the shield assembled, SparkFun's Qwiic environment means that connecting the screen could not be easier. Just plug one end of the Qwiic cable into the OLED display, the other into the Qwiic Shield and you'll be ready to start displaying images on your little display.
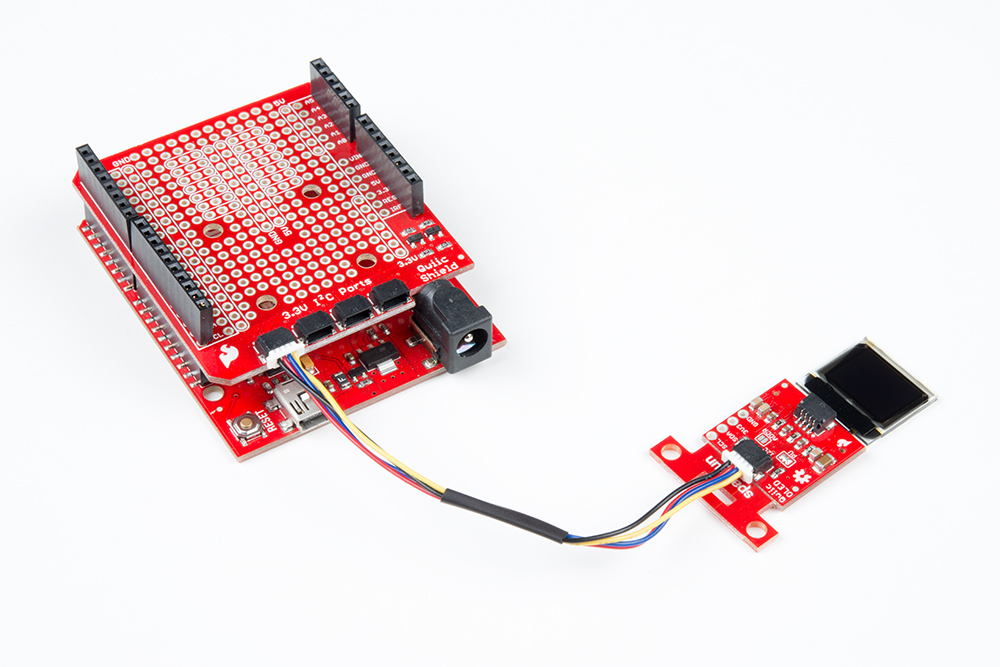
If you have a built-in Qwiic connector, you can skip the hardware assembly of the Qwiic Shield and simply insert a Qwiic cable between the two boards. Have more than one Qwiic-enabled device? You can daisy chain it to the board as well! Below is an example with the RedBoard Qwiic, SAM-M8Q, and the Qwiic Micro OLED daisy chained together.

The current production of the boards includes the double sided foam tape.
SparkFun Micro OLED Arduino Library Overview
Note: This example assumes you are using the latest version of the Arduino IDE on your desktop. If this is your first time using Arduino, please review our tutorial on installing the Arduino IDE. If you have not previously installed an Arduino library, please check out our installation guide.
First, you'll need to download and install the SparkFun Micro OLED library. You can install this library automatically in the Arduino IDE's Library Manager by searching for "Micro OLED Breakout". Or you can manually download it from the GitHub repository.
Also, make sure to download the Qwiic example sketches, which we will be reviewing in this tutorial.
Arduino Library Overview
Before we get started developing a sketch, let's look at the available functions of the library.
void command(uint8_t c);--- Sends the display a command byte.void data(uint8_t c);--- Sends the display a data byte.void setColumnAddress(uint8_t add);--- Sets the column address.void setPageAddress(uint8_t add);--- Sets the page address.
LCD Drawing Functions
void clear(uint8_t mode):--- Clears the screen buffer in the OLED's memory, pass in mode = ALL to clear GDRAM in the OLED controller. Pass in mode = PAGE to clear the screen page buffer.void clear(uint8_t mode, uint8_t c);--- clears the screen buffer in the OLED's memory, replaces it with a character 'c'.void invert(boolean inv);--- Turns every black pixel white, turns all white pixels black.void contrast(uint8_t contrast);--- Changes the contrast value anywhere between 0 and 255.void display(void);--- Moves display memory to the screen to draw the image in memory.void setCursor(uint8_t x, uint8_t y);--- Set cursor position to (x, y).void pixel(uint8_t x, uint8_t y);--- Draw a pixel using the current fore color and current draw mode in the screen buffer's x,y position.void pixel(uint8_t x, uint8_t y, uint8_t color, uint8_t mode);--- Draw a pixel with NORM or XOR draw mode in the screen buffer's x,y position.void line(uint8_t x0, uint8_t y0, uint8_t x1, uint8_t y1);--- Draw line using current fore color and current draw mode from x0,y0 to x1,y1 of the screen buffer.void line(uint8_t x0, uint8_t y0, uint8_t x1, uint8_t y1, uint8_t color, uint8_t mode);--- Draw line using color and mode from x0,y0 to x1,y1 of the screen buffer.void lineH(uint8_t x, uint8_t y, uint8_t width);--- Draw horizontal line using current fore color and current draw mode from x,y to x+width,y of the screen buffer.void lineH(uint8_t x, uint8_t y, uint8_t width, uint8_t color, uint8_t mode);--- Draw horizontal line using color and mode from x,y to x+width,y of the screen buffer.void lineV(uint8_t x, uint8_t y, uint8_t height);--- Draw vertical line using current fore color and current draw mode from x,y to x,y+height of the screen buffer.void lineV(uint8_t x, uint8_t y, uint8_t height, uint8_t color, uint8_t mode);--- Draw vertical line using color and mode from x,y to x,y+height of the screen buffer.void rect(uint8_t x, uint8_t y, uint8_t width, uint8_t height);--- Draw rectangle using current fore color and current draw mode from x,y to x+width,y+height of the screen buffer.void rect(uint8_t x, uint8_t y, uint8_t width, uint8_t height, uint8_t color , uint8_t mode);---Draw rectangle using color and mode from x,y to x+width,y+height of the screen buffer.void rectFill(uint8_t x, uint8_t y, uint8_t width, uint8_t height);--- Draw filled rectangle using current fore color and current draw mode from x,y to x+width,y+height of the screen buffer.void rectFill(uint8_t x, uint8_t y, uint8_t width, uint8_t height, uint8_t color , uint8_t mode);--- Draw filled rectangle using color and mode from x,y to x+width,y+height of the screen buffer.void circle(uint8_t x, uint8_t y, uint8_t radius);--- Draw circle with radius using current fore color and current draw mode with center at x,y of the screen buffer.void circle(uint8_t x, uint8_t y, uint8_t radius, uint8_t color, uint8_t mode);--- Draw circle with radius using color and mode with center at x,y of the screen buffer.void circleFill(uint8_t x0, uint8_t y0, uint8_t radius);--- Draw filled circle with radius using current fore color and current draw mode with center at x,y of the screen buffer.void circleFill(uint8_t x0, uint8_t y0, uint8_t radius, uint8_t color, uint8_t mode);--- Draw filled circle with radius using color and mode with center at x,y of the screen buffer.void drawChar(uint8_t x, uint8_t y, uint8_t c);--- Draws a character at position (x, y).void drawChar(uint8_t x, uint8_t y, uint8_t c, uint8_t color, uint8_t mode);--- Draws a character using a color and mode at position (x, y)void drawBitmap(uint8_t * bitArray);--- Draws a preloaded bitmap.uint8_t getLCDWidth(void);--- Gets the width of the LCD as a byte.uint8_t getLCDHeight(void);--- Gets the height of the LCD as a byte.
Font Settings
uint8_t getFontWidth(void);--- Gets the current font width as a byte.uint8_t getFontHeight(void);--- Gets the current font height as a byte.uint8_t getTotalFonts(void);--- Return the total number of fonts loaded into the MicroOLED's flash memory.uint8_t getFontType(void);--- Returns the font type number of the current font (Font types shown below).uint8_t setFontType(uint8_t type);--- Sets the font type (Font types shown below).
| Font Type | Maximum Columns | Maximum Rows | Description |
|---|---|---|---|
| 0 | 10 | 6 | Smallest, 5x7-pixel characters. |
| 1 | 6 | 3 | Medium, 8x16-pixel characters. |
| 2 | 5 | 3 | 7-segment display style characters, 10x16-pixels each. |
| 3 | 5 | 1 | Large, 12x48 (the entire screen height) characters. |
uint8_t getFontStartChar(void);--- Returns the starting ASCII character of the current font.uint8_t getFontTotalChar(void);--- Return the total characters of the current font.
Rotation and Scrolling
The following functions will scroll the screen in the various specified directions of each function. Start and Stop indicate the range of rows/columns that will be scrolling.
void scrollRight(uint8_t start, uint8_t stop);--- Scrolls rightvoid scrollLeft(uint8_t start, uint8_t stop);void scrollVertRight(uint8_t start, uint8_t stop);void scrollVertLeft(uint8_t start, uint8_t stop);void scrollStop(void);The following two functions are pretty self explanatory, they will flip the graphics ifflipis true.void flipVertical(boolean flip);void flipHorizontal(boolean flip);
Micro OLED Examples
Example: Feature Demo
This first example demonstrates many of the available features of the screen through several applications. Keep in mind when looking at this example that drawing anything takes two steps. You must first write what you want the screen to display into the screens memory, then you must tell the screen to display what is in its memory.
To begin, we must include our Wire library to use I2C, and the SFE_MicroOLED library to control the screen. The code also includes modular functions to tell the microcontroller how to print each example. This is a good place to look to see examples of how the functions discussed earlier are implemented. The example code will then loop between all of the examples. This is a good way to see exactly what your code looks like on the screen.
language:c
/*
  SFE_MicroOLED Library Demo
  Paul Clark @ SparkFun Electronics
  Original Creation Date: December 11th, 2020

  This sketch uses the MicroOLED library to show all the functionality built into the library
  using the begin function defined in version v1.3 of the library - which allows different
  TwoWire ports and custom I2C addresses to be used.

  If you are using the standard Micro OLED display, its I2C address will be 0x3D or 0x3C
  depending on how you have the D/C or ADDR jumper configured.

  Hardware Connections:
    This example assumes you are using Qwiic. See the SPI examples for
    a detailed breakdown of connection info.

  Want to support open source hardware? Buy a board from SparkFun!
  https://www.sparkfun.com/products/13003
  https://www.sparkfun.com/products/14532

  This code is beerware; if you see me (or any other SparkFun employee) at the
  local, and you've found our code helpful, please buy us a round!

  Distributed as-is; no warranty is given.
*/

#include <Wire.h>
#include <SFE_MicroOLED.h> //Click here to get the library: http://librarymanager/All#SparkFun_Micro_OLED

#define PIN_RESET 4

/*
// This is the old way of instantiating oled. You can still do it this way if you want to.
#define DC_JUMPER 1
MicroOLED oled(PIN_RESET, DC_JUMPER); // I2C declaration
*/

// From version v1.3, we can also instantiate oled like this (but only for I2C)
MicroOLED oled(PIN_RESET); // The TwoWire I2C port is passed to .begin instead

void setup()
{
  delay(100);
  Wire.begin(); // <-- Change this to (e.g.) Qwiic.begin(); as required
  //Wire.setClock(400000); // Uncomment this line to increase the I2C bus speed to 400kHz


/*
  // This is the old way of initializing the OLED.
  // You can still do it this way if you want to - but only
  // if you instantiated oled using: MicroOLED oled(PIN_RESET, DC_JUMPER)
  oled.begin();    // Initialize the OLED
*/


  // This is the new way of initializing the OLED.
  // We can pass a different I2C address and TwoWire port
  oled.begin(0x3D, Wire);    // Initialize the OLED


/*
  // This is the new way of initializing the OLED.
  // We can pass a different I2C address and TwoWire port
  oled.begin(0x3C, Qwiic);    // Initialize the OLED
*/


  oled.clear(ALL); // Clear the display's internal memory
  oled.display();  // Display what's in the buffer (splashscreen)

  delay(1000); // Delay 1000 ms

  oled.clear(PAGE); // Clear the buffer.

 randomSeed(analogRead(A0) + analogRead(A3));
}

void pixelExample()
{
  printTitle("Pixels", 1);

  for (int i = 0; i < 512; i++)
  {
    oled.pixel(random(oled.getLCDWidth()), random(oled.getLCDHeight()));
    oled.display();
  }
}

void lineExample()
{
  int middleX = oled.getLCDWidth() / 2;
  int middleY = oled.getLCDHeight() / 2;
  int xEnd, yEnd;
  int lineWidth = min(middleX, middleY);

  printTitle("Lines!", 1);

  for (int i = 0; i < 3; i++)
  {
    for (int deg = 0; deg < 360; deg += 15)
    {
      xEnd = lineWidth * cos(deg * PI / 180.0);
      yEnd = lineWidth * sin(deg * PI / 180.0);

      oled.line(middleX, middleY, middleX + xEnd, middleY + yEnd);
      oled.display();
      delay(10);
    }
    for (int deg = 0; deg < 360; deg += 15)
    {
      xEnd = lineWidth * cos(deg * PI / 180.0);
      yEnd = lineWidth * sin(deg * PI / 180.0);

      oled.line(middleX, middleY, middleX + xEnd, middleY + yEnd, BLACK, NORM);
      oled.display();
      delay(10);
    }
  }
}

void shapeExample()
{
  printTitle("Shapes!", 0);

  // Silly pong demo. It takes a lot of work to fake pong...
  int paddleW = 3;  // Paddle width
  int paddleH = 15; // Paddle height
  // Paddle 0 (left) position coordinates
  int paddle0_Y = (oled.getLCDHeight() / 2) - (paddleH / 2);
  int paddle0_X = 2;
  // Paddle 1 (right) position coordinates
  int paddle1_Y = (oled.getLCDHeight() / 2) - (paddleH / 2);
  int paddle1_X = oled.getLCDWidth() - 3 - paddleW;
  int ball_rad = 2; // Ball radius
  // Ball position coordinates
  int ball_X = paddle0_X + paddleW + ball_rad;
  int ball_Y = random(1 + ball_rad, oled.getLCDHeight() - ball_rad); //paddle0_Y + ball_rad;
  int ballVelocityX = 1;                                             // Ball left/right velocity
  int ballVelocityY = 1;                                             // Ball up/down velocity
  int paddle0Velocity = -1;                                          // Paddle 0 velocity
  int paddle1Velocity = 1;                                           // Paddle 1 velocity

  //while(ball_X >= paddle0_X + paddleW - 1)
  while ((ball_X - ball_rad > 1) &&
         (ball_X + ball_rad < oled.getLCDWidth() - 2))
  {
    // Increment ball's position
    ball_X += ballVelocityX;
    ball_Y += ballVelocityY;
    // Check if the ball is colliding with the left paddle
    if (ball_X - ball_rad < paddle0_X + paddleW)
    {
      // Check if ball is within paddle's height
      if ((ball_Y > paddle0_Y) && (ball_Y < paddle0_Y + paddleH))
      {
        ball_X++;                       // Move ball over one to the right
        ballVelocityX = -ballVelocityX; // Change velocity
      }
    }
    // Check if the ball hit the right paddle
    if (ball_X + ball_rad > paddle1_X)
    {
      // Check if ball is within paddle's height
      if ((ball_Y > paddle1_Y) && (ball_Y < paddle1_Y + paddleH))
      {
        ball_X--;                       // Move ball over one to the left
        ballVelocityX = -ballVelocityX; // change velocity
      }
    }
    // Check if the ball hit the top or bottom
    if ((ball_Y <= ball_rad) || (ball_Y >= (oled.getLCDHeight() - ball_rad - 1)))
    {
      // Change up/down velocity direction
      ballVelocityY = -ballVelocityY;
    }
    // Move the paddles up and down
    paddle0_Y += paddle0Velocity;
    paddle1_Y += paddle1Velocity;
    // Change paddle 0's direction if it hit top/bottom
    if ((paddle0_Y <= 1) || (paddle0_Y > oled.getLCDHeight() - 2 - paddleH))
    {
      paddle0Velocity = -paddle0Velocity;
    }
    // Change paddle 1's direction if it hit top/bottom
    if ((paddle1_Y <= 1) || (paddle1_Y > oled.getLCDHeight() - 2 - paddleH))
    {
      paddle1Velocity = -paddle1Velocity;
    }

    // Draw the Pong Field
    oled.clear(PAGE); // Clear the page
    // Draw an outline of the screen:
    oled.rect(0, 0, oled.getLCDWidth() - 1, oled.getLCDHeight());
    // Draw the center line
    oled.rectFill(oled.getLCDWidth() / 2 - 1, 0, 2, oled.getLCDHeight());
    // Draw the Paddles:
    oled.rectFill(paddle0_X, paddle0_Y, paddleW, paddleH);
    oled.rectFill(paddle1_X, paddle1_Y, paddleW, paddleH);
    // Draw the ball:
    oled.circle(ball_X, ball_Y, ball_rad);
    // Actually draw everything on the screen:
    oled.display();
    delay(25); // Delay for visibility
  }
  delay(1000);
}

void textExamples()
{
  printTitle("Text!", 1);

  // Demonstrate font 0. 5x8 font
  oled.clear(PAGE);     // Clear the screen
  oled.setFontType(0);  // Set font to type 0
  oled.setCursor(0, 0); // Set cursor to top-left
  // There are 255 possible characters in the font 0 type.
  // Lets run through all of them and print them out!
  for (int i = 0; i <= 255; i++)
  {
    // You can write byte values and they'll be mapped to
    // their ASCII equivalent character.
    oled.write(i);  // Write a byte out as a character
    oled.display(); // Draw on the screen
    delay(10);      // Wait 10ms
    // We can only display 60 font 0 characters at a time.
    // Every 60 characters, pause for a moment. Then clear
    // the page and start over.
    if ((i % 60 == 0) && (i != 0))
    {
      delay(500);           // Delay 500 ms
      oled.clear(PAGE);     // Clear the page
      oled.setCursor(0, 0); // Set cursor to top-left
    }
  }
  delay(500); // Wait 500ms before next example

  // Demonstrate font 1. 8x16. Let's use the print function
  // to display every character defined in this font.
  oled.setFontType(1);  // Set font to type 1
  oled.clear(PAGE);     // Clear the page
  oled.setCursor(0, 0); // Set cursor to top-left
  // Print can be used to print a string to the screen:
  oled.print(" !\"#$%&'()*+,-./01234");
  oled.display(); // Refresh the display
  delay(1000);    // Delay a second and repeat
  oled.clear(PAGE);
  oled.setCursor(0, 0);
  oled.print("56789:;<=>?@ABCDEFGHI");
  oled.display();
  delay(1000);
  oled.clear(PAGE);
  oled.setCursor(0, 0);
  oled.print("JKLMNOPQRSTUVWXYZ[\\]^");
  oled.display();
  delay(1000);
  oled.clear(PAGE);
  oled.setCursor(0, 0);
  oled.print("_`abcdefghijklmnopqrs");
  oled.display();
  delay(1000);
  oled.clear(PAGE);
  oled.setCursor(0, 0);
  oled.print("tuvwxyz{|}~");
  oled.display();
  delay(1000);

  // Demonstrate font 2. 10x16. Only numbers and '.' are defined.
  // This font looks like 7-segment displays.
  // Lets use this big-ish font to display readings from the
  // analog pins.
  for (int i = 0; i < 25; i++)
  {
    oled.clear(PAGE);           // Clear the display
    oled.setCursor(0, 0);       // Set cursor to top-left
    oled.setFontType(0);        // Smallest font
    oled.print("A0: ");         // Print "A0"
    oled.setFontType(2);        // 7-segment font
    oled.print(analogRead(A0)); // Print a0 reading
    oled.setCursor(0, 16);      // Set cursor to top-middle-left
    oled.setFontType(0);        // Repeat
    oled.print("A3: ");
    oled.setFontType(2);
    oled.print(analogRead(A3));
    oled.setCursor(0, 32);
    oled.setFontType(0);
    oled.print("A6: ");
    oled.setFontType(2);
    oled.print(analogRead(A6));
    oled.display();
    delay(100);
  }

  // Demonstrate font 3. 12x48. Stopwatch demo.
  oled.setFontType(3); // Use the biggest font
  int ms = 0;
  int s = 0;
  while (s <= 5)
  {
    oled.clear(PAGE);     // Clear the display
    oled.setCursor(0, 0); // Set cursor to top-left
    if (s < 10)
      oled.print("00"); // Print "00" if s is 1 digit
    else if (s < 100)
      oled.print("0"); // Print "0" if s is 2 digits
    oled.print(s);     // Print s's value
    oled.print(":");   // Print ":"
    oled.print(ms);    // Print ms value
    oled.display();    // Draw on the screen
    ms++;              // Increment ms
    if (ms >= 10)      // If ms is >= 10
    {
      ms = 0; // Set ms back to 0
      s++;    // and increment s
    }
  }
}

void loop()
{
  pixelExample();  // Run the pixel example function
  lineExample();  // Then the line example function
  shapeExample(); // Then the shape example
  textExamples(); // Finally the text example
}

// Center and print a small title
// This function is quick and dirty. Only works for titles one
// line long.
void printTitle(String title, int font)
{
  int middleX = oled.getLCDWidth() / 2;
  int middleY = oled.getLCDHeight() / 2;

  oled.clear(PAGE);
  oled.setFontType(font);
  // Try to set the cursor in the middle of the screen
  oled.setCursor(middleX - (oled.getFontWidth() * (title.length() / 2)),
                 middleY - (oled.getFontHeight() / 2));
  // Print the title:
  oled.print(title);
  oled.display();
  delay(1500);
  oled.clear(PAGE);
}
The example code will look something like the GIF below.
Example: Drawing Bitmaps
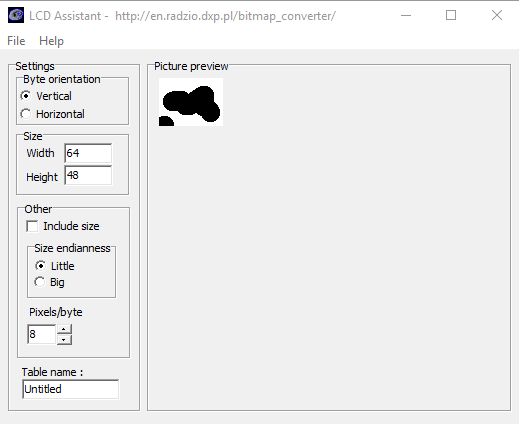
It is also possible to load bitmaps of your own custom images into the screen. This can be done using this Bitmap generator. The tool is pretty self explanatory, just load in an image, tell the tool that your screen is 64x48, go to File, and Save the output.
Open the file generated as a text file, it should look something like the below image.
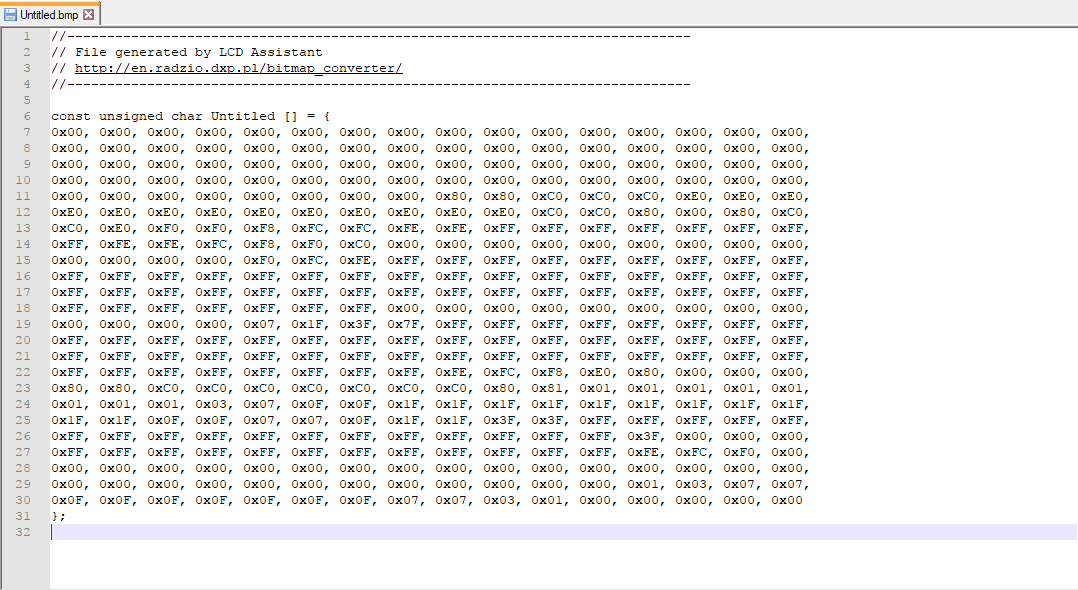
This array is the image that will be displayed by the screen, so now we just have to paste it into the bitmaps.h header file as the correct data type so our compiler is able to find the image. Make sure you change the array to a uint8_t. The pasted bitmap should look something like the below image, with the variable type changed to uint8_t.

You will also need to change the name of the array when referencing them in the example code. In this case, we named it rick and morty.
language:c
uint8_t rick [] = {
0xFF, 0xFF, 0xFF, 0xFF, 0xFF, 0xFF, 0xFF, 0xFF, 0xFF, 0xFF, 0xFF, 0xFF, 0xFF, 0xFF, 0xFF, 0xFF,
0xFF, 0xFF, 0xFF, 0xFF, 0xFF, 0x7F, 0x01, 0xFD, 0xFB, 0xF7, 0xE7, 0xCF, 0xBF, 0x3F, 0x7F, 0xFF,
0xFF, 0xFF, 0xFF, 0xFF, 0xFF, 0xFF, 0x7F, 0xBF, 0x9F, 0xDF, 0xEF, 0xF7, 0x03, 0xFF, 0xFF, 0xFF,
0xFF, 0xFF, 0xFF, 0xFF, 0xFF, 0xFF, 0xFF, 0xFF, 0xFF, 0xFF, 0xFF, 0xFF, 0xFF, 0xFF, 0xFF, 0xFF,
0xFF, 0xFF, 0xFF, 0xFF, 0xFF, 0xFF, 0xFF, 0xF9, 0xE5, 0xDD, 0x3B, 0x7B, 0xFB, 0xFB, 0xF7, 0xF7,
0xF7, 0xF7, 0xF7, 0xF7, 0xEF, 0xE0, 0xFF, 0x7F, 0x3F, 0xBF, 0xBF, 0xBF, 0xBF, 0xBF, 0xBE, 0xBC,
0xBD, 0xBB, 0xBB, 0xBD, 0xBC, 0xBE, 0xBF, 0x3F, 0x7F, 0xFF, 0xFF, 0xFF, 0xF0, 0x87, 0xBF, 0xDF,
0xDF, 0xEF, 0xEF, 0xE7, 0xF7, 0xF7, 0xFB, 0x3D, 0x85, 0xF9, 0xFF, 0xFF, 0xFF, 0xFF, 0xFF, 0xFF,
0xFF, 0xFF, 0xFF, 0xFF, 0xFF, 0xCF, 0x8F, 0xAF, 0x6F, 0x6F, 0xEF, 0xEE, 0xED, 0xE1, 0xFF, 0xFF,
0xFF, 0xFF, 0xFF, 0x07, 0xFB, 0x8D, 0xAE, 0xAF, 0xAF, 0xAF, 0x6F, 0x4F, 0x4F, 0x5F, 0x5F, 0x5F,
0x5F, 0x5F, 0x5F, 0x4F, 0x6F, 0x6F, 0xAF, 0xAF, 0xAF, 0xAE, 0x8D, 0xFB, 0x07, 0xFF, 0xFF, 0xFF,
0xFF, 0xFF, 0xFF, 0xE7, 0xE3, 0xE9, 0x6C, 0x6E, 0xAF, 0xCF, 0xEF, 0xFF, 0xFF, 0xFF, 0xFF, 0xFF,
0xFF, 0xFF, 0xFF, 0xFF, 0xFF, 0xFF, 0xFF, 0xFF, 0xFF, 0xBE, 0x9E, 0xAD, 0x35, 0x73, 0xFF, 0x3F,
0xDF, 0xDF, 0xDF, 0x00, 0xFF, 0x41, 0xB8, 0xBA, 0xBA, 0xB2, 0xB2, 0xBA, 0xBA, 0xB8, 0xC1, 0xFF,
0xFF, 0xC1, 0xB8, 0xBA, 0xBA, 0xB2, 0xB2, 0xBA, 0xBA, 0xB8, 0x41, 0xFF, 0x00, 0xDF, 0xDF, 0xDF,
0x3F, 0xFF, 0xF1, 0x6D, 0x5E, 0x5E, 0x3F, 0x7F, 0xFF, 0xFF, 0xFF, 0xFF, 0xFF, 0xFF, 0xFF, 0xFF,
0xFF, 0xFF, 0xFF, 0xFF, 0xFF, 0xFF, 0xFF, 0xFF, 0xFF, 0xEF, 0xE7, 0xE3, 0xE9, 0xEC, 0x2F, 0xCE,
0x7D, 0x7B, 0x3B, 0x80, 0x3F, 0xFF, 0x1E, 0xEE, 0xBE, 0xBE, 0xBE, 0xBE, 0xBF, 0xBF, 0x30, 0xAF,
0xAF, 0xB0, 0xBF, 0xBF, 0x3F, 0xBE, 0xBE, 0xBE, 0xEE, 0x1E, 0xFF, 0x3F, 0x80, 0x3B, 0x7B, 0x7D,
0xCE, 0x2F, 0xEC, 0xE9, 0xEB, 0xE7, 0xFF, 0xFF, 0xFF, 0xFF, 0xFF, 0xFF, 0xFF, 0xFF, 0xFF, 0xFF,
0xFF, 0xFF, 0xFF, 0xFF, 0xFF, 0xFF, 0xFF, 0xFF, 0xFF, 0xFF, 0xFF, 0xFF, 0xFF, 0xFF, 0xFE, 0xFE,
0xFF, 0xFF, 0xFF, 0xFF, 0xFC, 0xF9, 0xF3, 0xF6, 0xE7, 0xEF, 0xCF, 0xDF, 0xDF, 0xDF, 0xDF, 0xDE,
0xDC, 0xD1, 0xD7, 0xD8, 0xCE, 0xEF, 0xE7, 0xF7, 0xF2, 0xFB, 0xF9, 0xFC, 0xFF, 0xFF, 0xFF, 0xFF,
0xFE, 0xFE, 0xFF, 0xFF, 0xFF, 0xFF, 0xFF, 0xFF, 0xFF, 0xFF, 0xFF, 0xFF, 0xFF, 0xFF, 0xFF, 0xFF
};

uint8_t morty [] = {
0xFF, 0xFF, 0xFF, 0xFF, 0xFF, 0xFF, 0xFF, 0xFF, 0xFF, 0xFF, 0x3F, 0x1F, 0x0F, 0x07, 0x07, 0x03,
0x03, 0x03, 0x03, 0x01, 0x01, 0x01, 0x00, 0x00, 0x00, 0x00, 0x00, 0x00, 0x00, 0x00, 0x00, 0x00,
0x00, 0x00, 0x00, 0x00, 0x00, 0x01, 0x03, 0x03, 0x03, 0x07, 0x07, 0x07, 0x0F, 0x1F, 0x1F, 0x3F,
0x7F, 0xFF, 0xFF, 0xFF, 0xFF, 0xFF, 0xFF, 0xFF, 0xFF, 0xFF, 0xFF, 0xFF, 0xFF, 0xFF, 0xFF, 0xFF,
0xFF, 0xFF, 0xFF, 0xFF, 0x7F, 0x1F, 0x07, 0x07, 0x01, 0x00, 0x00, 0x00, 0x00, 0x00, 0x00, 0x00,
0x00, 0x00, 0x00, 0x80, 0x80, 0xC0, 0xE0, 0xF0, 0xF8, 0xF8, 0xF8, 0x78, 0x7C, 0x7C, 0x7C, 0x3F,
0x9F, 0xCF, 0xEF, 0xFF, 0xFF, 0xFF, 0xFF, 0xFF, 0xFF, 0xFF, 0xF4, 0xE4, 0xEC, 0x6C, 0x28, 0x90,
0xD4, 0xCF, 0xDF, 0xDF, 0xDF, 0xDF, 0xDF, 0xBF, 0x7F, 0xFF, 0xFF, 0xFF, 0xFF, 0xFF, 0xFF, 0xFF,
0xFF, 0xFF, 0x07, 0x00, 0x00, 0x00, 0x00, 0x00, 0x00, 0x00, 0x00, 0x00, 0x00, 0x00, 0xF0, 0xFC,
0xFC, 0xFE, 0xFF, 0xFF, 0xFF, 0xFF, 0xFF, 0xFF, 0xFF, 0x07, 0xF3, 0xF9, 0xFD, 0xFC, 0xFE, 0xFE,
0xFE, 0xFE, 0xFE, 0xFE, 0xFC, 0xF9, 0xF3, 0x07, 0xFF, 0xFF, 0xFF, 0xFF, 0xC0, 0x3E, 0x7F, 0xFF,
0xFF, 0xFF, 0xFF, 0xFF, 0xFF, 0xF9, 0xF9, 0xFF, 0x3C, 0xC1, 0xFF, 0xFF, 0xFF, 0xFF, 0xFF, 0xFF,
0xFF, 0xFF, 0xF8, 0xC0, 0x00, 0x00, 0x00, 0x00, 0x00, 0x00, 0x00, 0x00, 0x00, 0x00, 0xFF, 0xFF,
0xFF, 0xFF, 0xFF, 0xFF, 0xFF, 0xFF, 0xFF, 0xFF, 0xFF, 0xFC, 0xFB, 0xF7, 0xEF, 0xDC, 0xDC, 0xDF,
0xDF, 0xDF, 0xDF, 0xDF, 0xEF, 0xF7, 0xFB, 0xFC, 0xFF, 0xFF, 0xFF, 0xFF, 0xDF, 0xDF, 0xDF, 0xD6,
0xD6, 0xED, 0xFD, 0xFD, 0xFD, 0xFD, 0xFE, 0xFE, 0x00, 0xFF, 0xFF, 0xFF, 0xFF, 0xFF, 0xFF, 0xFF,
0xFF, 0xFF, 0xFF, 0xFF, 0xFF, 0xFE, 0xFC, 0xFC, 0xF8, 0xF0, 0xE0, 0xE0, 0xC0, 0xC0, 0xC1, 0x9C,
0x1E, 0x7E, 0x7E, 0x7F, 0x3F, 0xBF, 0xDF, 0xFF, 0xFF, 0xFF, 0xFF, 0xFF, 0xFF, 0xFF, 0xFF, 0xFF,
0xFF, 0xFF, 0xFF, 0xFF, 0xFF, 0xFF, 0xFF, 0xFF, 0xFF, 0xFF, 0xCF, 0x8F, 0xBF, 0x85, 0xE5, 0xF3,
0xF3, 0xFF, 0x7F, 0x7F, 0xBF, 0xDF, 0xC7, 0xF3, 0xF8, 0xFF, 0xFF, 0xFF, 0xFF, 0xFF, 0xFF, 0xFF,
0xFF, 0xFF, 0xFF, 0xFF, 0xFF, 0xFF, 0xFF, 0xFF, 0xFF, 0xFF, 0xFF, 0xFF, 0xFF, 0xFF, 0xFF, 0xFF,
0xFF, 0xFF, 0xFF, 0xFE, 0xF8, 0xF9, 0xF3, 0xF7, 0xF7, 0xE7, 0xEF, 0xEF, 0xDF, 0xDF, 0xDF, 0xDF,
0xDF, 0xDF, 0xDF, 0xDF, 0xDF, 0xDF, 0xDF, 0xDF, 0xDF, 0xDF, 0xCF, 0xCF, 0xEF, 0xE7, 0xF7, 0xF3,
0xFB, 0xF8, 0xFE, 0xFE, 0xFF, 0xFF, 0xFF, 0xFF, 0xFF, 0xFF, 0xFF, 0xFF, 0xFF, 0xFF, 0xFF, 0xFF
};
Now we will be able to call drawBitmap(Untitled) to draw our image. Some example code showing how to display some Rick and Morty bitmaps is shown below.
language:c
/******************************************************************************
 * MicroOLED_Demo.ino
 * SFE_MicroOLED Library Demo
 * Jim Lindblom @ SparkFun Electronics
 * Original Creation Date: October 27, 2014
 *
 * This sketch uses the MicroOLED library to draw bitmaps to the OLED
 *
 * This example was modified for the Qwiic Micro OLED
 * Joel Bartlett
 * 04/12/17
 *
 * Development environment specifics:
 *  Arduino 1.0.5
 *  Arduino Pro 3.3V
 *  Micro OLED Breakout v1.0
 *
 * This code is beerware; if you see me (or any other SparkFun employee) at the
 * local, and you've found our code helpful, please buy us a round!
 *
 * Distributed as-is; no warranty is given.
 ******************************************************************************/
#include <Wire.h>           // Include Wire if you're using I2C
#include <SFE_MicroOLED.h>  // Include the SFE_MicroOLED library
#include "bitmaps.h"

#define PIN_RESET 4

/*
// This is the old way of instantiating oled. You can still do it this way if you want to.
#define DC_JUMPER 1
MicroOLED oled(PIN_RESET, DC_JUMPER); // I2C declaration
*/

// From version v1.3, we can also instantiate oled like this (but only for I2C)
MicroOLED oled(PIN_RESET);  // The TwoWire I2C port is passed to .begin instead

void setup() {
  delay(100);

  Wire.begin();  // <-- Change this to (e.g.) Qwiic.begin(); as required
  //Wire.setClock(400000); // Uncomment this line to increase the I2C bus speed to 400kHz


  /*
  // This is the old way of initializing the OLED.
  // You can still do it this way if you want to - but only
  // if you instantiated oled using: MicroOLED oled(PIN_RESET, DC_JUMPER)
  oled.begin();    // Initialize the OLED
*/


  // This is the new way of initializing the OLED.
  // We can pass a different I2C address and TwoWire port
  oled.begin(0x3D, Wire);  // Initialize the OLED


  /*
  // This is the new way of initializing the OLED.
  // We can pass a different I2C address and TwoWire port
  oled.begin(0x3C, Qwiic);    // Initialize the OLED
*/

  oled.clear(ALL);   // Clear the display's internal memory
  oled.display();    // Display what's in the buffer (splashscreen)
  delay(1000);       // Delay 1000 ms
  oled.clear(PAGE);  // Clear the buffer.
}
//---------------------------------------------------------------
void loop() {
  drawRick();
  delay(5000);
  drawMorty();
  delay(5000);
}
//---------------------------------------------------------------
void drawRick() {
  oled.clear(ALL);
  oled.clear(PAGE);
  oled.drawBitmap(rick);  //Display Logo
  oled.display();
}
//---------------------------------------------------------------

void drawMorty() {
  oled.clear(ALL);
  oled.clear(PAGE);
  oled.drawBitmap(morty);  //Display Logo
  oled.display();
}
The output of this code will look something like the GIF below.
Qwiic OLED Arduino Library
First, you'll need to download and install the SparkFun Qwiic OLED library. You can install this library automatically in the Arduino IDE's Library Manager by searching for "Qwiic OLED". Or you can manually download it from the GitHub repository.
Also, make sure to download the Qwiic example sketches, which we will be reviewing in this tutorial.
Arduino Library Overview
For more information about the available functions of the library, check out the API Reference on GitHub Pages.
Qwiic OLED Examples
Example: Feature Demo
The demo in this part of the tutorial is similar to the micro OLED Arduino Library. However, the setup is slightly different. While we display the pixels, line, shapes (e.g. pong), and text, you will noticed differences in the functions and methods. Note that the output of the text is also slightly different.
language:c
/*
  Example_Multi_Mod.ino

  This demo performs multiple examples from the library. Note that
  this example is similar to example 8. The difference is that it prints the
  text of the graphic before the animiation. The example also includes example 4
  as part of the demo.

  This library configures and draws graphics to OLED boards that use the
  SSD1306 display hardware. The library only supports I2C.

  SparkFun sells these at its website: www.sparkfun.com

  Do you like this library? Help support SparkFun. Buy a board!

   Qwiic Micro OLED      https://www.sparkfun.com/products/22495

  Updated from example written by Paul Clark @ SparkFun Electronics

  Original Creation Date: December 11th, 2020

  Repository:
     https://github.com/sparkfun/SparkFun_Qwiic_OLED_Arduino_Library

  Documentation:
     https://sparkfun.github.io/SparkFun_Qwiic_OLED_Arduino_Library/

  SparkFun code, firmware, and software is released under the MIT License(http://opensource.org/licenses/MIT).
*/

#include <SparkFun_Qwiic_OLED.h>  //http://librarymanager/All#SparkFun_Qwiic_Graphic_OLED

// The Library supports three different types of SparkFun boards. The demo specifically
// was modified for the Qwiic Micro OLED.

QwiicMicroOLED myOLED;

// Fonts
#include <res/qw_fnt_5x7.h>
#include <res/qw_fnt_8x16.h>
#include <res/qw_fnt_31x48.h>
#include <res/qw_fnt_7segment.h>
#include <res/qw_fnt_largenum.h>

// An array of fonts to loop over
QwiicFont *demoFonts[] = {
  &QW_FONT_5X7,
  &QW_FONT_8X16,
  &QW_FONT_31X48,
  &QW_FONT_LARGENUM,
  &QW_FONT_7SEGMENT
};

int nFONTS = sizeof(demoFonts) / sizeof(demoFonts[0]);
int iFont = 0;

// Some vars for the title.
String strTitle = "<<Font>>";
QwiicFont *pFntTitle = &QW_FONT_5X7;

int width;
int height;

void setup() {
  Serial.begin(115200);
  Serial.println("Running OLED example");

  Wire.begin();
  // Wire.setClock(400000); //Optionally increase I2C bus speed to 400kHz

  // Initalize the OLED device and related graphics system
  if (myOLED.begin() == false) {
    Serial.println("Device begin failed. Freezing...");
    while (true)
      ;
  }
  Serial.println("Begin success");

  width = myOLED.getWidth();
  height = myOLED.getHeight();

  // Not all platforms have A0
#ifdef A0
  randomSeed(analogRead(A0));
#endif
}

void loop() {
  pixelExample();
  lineExample();
  shapeExample();
  textExamples();
}

void pixelExample() {

  String pixel = "Pixels!";

  // Center our message on the screen. Get the screen size of the "hello" string,
  // calling the getStringWidth() and getStringHeight() methods on the oled

  // starting x position - screen width minus string width  / 2
  int x0 = (myOLED.getWidth() - myOLED.getStringWidth(pixel)) / 2;

  // starting y position - screen height minus string height / 2
  int y0 = (myOLED.getHeight() - myOLED.getStringHeight(pixel)) / 2;


  myOLED.erase();

  myOLED.setFont(demoFonts[1]);

  // Draw the text - color of black (0)
  myOLED.text(x0, y0, pixel);

  // There's nothing on the screen yet - Now send the graphics to the device
  myOLED.display();
  delay(1000);


  myOLED.erase();
  for (int i = 0; i < 512; i++) {
    myOLED.pixel(random(width), random(height));
    myOLED.display();
    delay(10);
  }
}

void lineExample() {

  String line = "Lines!";

  // Center our message on the screen. Get the screen size of the "hello" string,
  // calling the getStringWidth() and getStringHeight() methods on the oled

  // starting x position - screen width minus string width  / 2
  int x0 = (myOLED.getWidth() - myOLED.getStringWidth(line)) / 2;

  // starting y position - screen height minus string height / 2
  int y0 = (myOLED.getHeight() - myOLED.getStringHeight(line)) / 2;

  myOLED.erase();

  myOLED.setFont(demoFonts[1]);

  // Draw the text
  myOLED.text(x0, y0, line);

  // There's nothing on the screen yet - Now send the graphics to the device
  myOLED.display();
  delay(1000);


  int middleX = width / 2;
  int middleY = height / 2;
  int xEnd, yEnd;
  int lineWidth = min(middleX, middleY);

  myOLED.erase();
  int deg;

  for (int i = 0; i < 3; i++) {

    for (deg = 0; deg < 360; deg += 15) {

      xEnd = lineWidth * cos(deg * PI / 180.0);
      yEnd = lineWidth * sin(deg * PI / 180.0);

      myOLED.line(middleX, middleY, middleX + xEnd, middleY + yEnd);
      myOLED.display();
      delay(10);
    }

    for (deg = 0; deg < 360; deg += 15) {

      xEnd = lineWidth * cos(deg * PI / 180.0);
      yEnd = lineWidth * sin(deg * PI / 180.0);

      myOLED.line(middleX, middleY, middleX + xEnd, middleY + yEnd, 0);
      myOLED.display();
      delay(10);
    }
  }
}

void shapeExample() {

  String shape = "Shapes!";

  // Center our message on the screen. Get the screen size of the "hello" string,
  // calling the getStringWidth() and getStringHeight() methods on the oled

  // starting x position - screen width minus string width  / 2
  int x0 = (myOLED.getWidth() - myOLED.getStringWidth(shape)) / 2;

  // starting y position - screen height minus string height / 2
  int y0 = (myOLED.getHeight() - myOLED.getStringHeight(shape)) / 2;

  myOLED.erase();

  myOLED.setFont(demoFonts[0]);

  // Draw the text
  myOLED.text(x0, y0, shape);

  // There's nothing on the screen yet - Now send the graphics to the device
  myOLED.display();
  delay(1000);


  // Silly pong demo. It takes a lot of work to fake pong...
  int paddleW = 3;   // Paddle width
  int paddleH = 15;  // Paddle height

  // Paddle 0 (left) position coordinates
  int paddle0_Y = (height / 2) - (paddleH / 2);
  int paddle0_X = 2;

  // Paddle 1 (right) position coordinates
  int paddle1_Y = (height / 2) - (paddleH / 2);
  int paddle1_X = width - 3 - paddleW;
  int ball_rad = 4;  // Ball radius

  // Ball position coordinates
  int ball_X = paddle0_X + paddleW + ball_rad;
  int ball_Y = random(1 + ball_rad, height - ball_rad);  // paddle0_Y + ball_rad;
  int ballVelocityX = 1;                                 // Ball left/right velocity
  int ballVelocityY = 1;                                 // Ball up/down velocity
  int paddle0Velocity = -1;                              // Paddle 0 velocity
  int paddle1Velocity = 1;                               // Paddle 1 velocity

  // Draw the Pong Field
  myOLED.erase();

  // Draw an outline of the screen:
  myOLED.rectangle(0, 0, width - 1, height);

  // Draw the center line
  myOLED.rectangleFill(width / 2 - 1, 0, 2, height);

  bool firstLoop = true;

  while ((ball_X - ball_rad > 1) && (ball_X + ball_rad < width - 2)) {

    if (!firstLoop) {

      // Erase the old ball. In XOR mode, so just draw old values again!
      // Draw the Paddles:
      myOLED.rectangleFill(paddle0_X, paddle0_Y, paddleW, paddleH);
      myOLED.rectangleFill(paddle1_X, paddle1_Y, paddleW, paddleH);
      // Draw the ball: - use rect - xor and circle fails b/c of circle algorithm overdraws
      myOLED.rectangleFill(ball_X, ball_Y, ball_rad, ball_rad);
    }
    // Increment ball's position
    ball_X += ballVelocityX;
    ball_Y += ballVelocityY;

    // Check if the ball is colliding with the left paddle
    if (ball_X - ball_rad < paddle0_X + paddleW) {

      // Check if ball is within paddle's height
      if ((ball_Y > paddle0_Y) && (ball_Y < paddle0_Y + paddleH)) {

        ball_X++;                        // Move ball over one to the right
        ballVelocityX = -ballVelocityX;  // Change velocity
      }
    }

    // Check if the ball hit the right paddle
    if (ball_X + ball_rad > paddle1_X) {

      // Check if ball is within paddle's height
      if ((ball_Y > paddle1_Y) && (ball_Y < paddle1_Y + paddleH)) {

        ball_X--;                        // Move ball over one to the left
        ballVelocityX = -ballVelocityX;  // change velocity
      }
    }

    // Check if the ball hit the top or bottom
    if ((ball_Y <= 1) || (ball_Y >= (height - ball_rad - 1))) {

      // Change up/down velocity direction
      ballVelocityY = -ballVelocityY;
    }

    // Move the paddles up and down
    paddle0_Y += paddle0Velocity;
    paddle1_Y += paddle1Velocity;

    // Change paddle 0's direction if it hit top/bottom
    if ((paddle0_Y <= 1) || (paddle0_Y > height - 2 - paddleH))
      paddle0Velocity = -paddle0Velocity;

    // Change paddle 1's direction if it hit top/bottom
    if ((paddle1_Y <= 1) || (paddle1_Y > height - 2 - paddleH))
      paddle1Velocity = -paddle1Velocity;

    // Draw the Paddles:
    myOLED.rectangleFill(paddle0_X, paddle0_Y, paddleW, paddleH);
    myOLED.rectangleFill(paddle1_X, paddle1_Y, paddleW, paddleH);

    // Draw the ball:
    myOLED.rectangleFill(ball_X, ball_Y, ball_rad, ball_rad);

    // Actually draw everything on the screen:
    myOLED.display();

    // Once the first loop is done, switch to XOR mode. So we just update our
    // moving parts
    if (firstLoop) {
      firstLoop = false;
      myOLED.setDrawMode(grROPXOR);
    }

    delay(25);  // Delay for visibility
  }
  delay(1000);
  myOLED.setDrawMode(grROPCopy);
}

void textExamples() {

  // next font for display
  iFont = (iFont + 1) % nFONTS;
  myOLED.setFont(demoFonts[iFont]);

  // Write font name to screen
  writeTitle();

  delay(1000);

  // Write out the full font char set
  writeFontChars();

  delay(2000);
}

// For the current font, write out all its characters
void writeFontChars() {
  // get the font
  QwiicFont *currFont = myOLED.getFont();

  // how many chars can a screen handle? (x * y)
  uint16_t screenChars = myOLED.getWidth() / (currFont->width + 1);  // X
  uint8_t nY = myOLED.getHeight() / currFont->height;                // Y

  screenChars *= (nY == 0 ? 1 : nY);  // need at least 1 row

  // Loop over the characters in the font.
  for (int i = 0; i < currFont->n_chars; i++) {

    if (i % screenChars == 0) {  // next page
      delay(400);
      myOLED.erase();
      myOLED.setCursor(0, 0);
    }

    // if the character is a carriage return, send a blank - otherwise the
    // write routine will perform a CR and lead to a confusing display.
    myOLED.write((i + currFont->start != '\n') ? i + currFont->start : ' ');

    myOLED.display();  // show the added char

    delay(10);
  }
}

// Simple title for a font
void writeTitle() {

  // Get the current font name
  String strTitle = myOLED.getFontName();

  // save our current font, then switch to font for title
  QwiicFont *currFont = myOLED.getFont();

  // Set title font font
  myOLED.setFont(pFntTitle);

  // Position to use for the time/banner displayed before each font

  // Get the width of the title in screen size
  int width = myOLED.getStringWidth(strTitle);

  // if the string is wider than the screen, set x at 0, otherwise center text

  int xTitle = (width >= myOLED.getWidth() ? 0 : (myOLED.getWidth() - width) / 2);

  // starting y position - width minus string height / 2. No need to chech height, 5x7 font fits everything
  int yTitle = (myOLED.getHeight() - myOLED.getStringHeight(strTitle)) / 2;

  myOLED.erase();

  // Draw the text
  myOLED.text(xTitle, yTitle, strTitle);

  // There's nothing on the screen yet - Now send the graphics to the device
  myOLED.display();

  myOLED.setFont(currFont);
}
Example: Drawing Bitmaps
Similar to the Micro OLED bitmap example, it is also possible to load bitmaps of your own custom images into the screen using the Qwiic OLED Arduino Library. This can be done using this Bitmap generator. The tool is pretty self explanatory, just load in an image, tell the tool that your screen is 64x48, go to File, and Save the output.
Open the file generated as a text file, it should look something like the below image.
This array is the image that will be displayed by the screen, so now we just have to paste it into the bitmaps.h header file as the correct data type so our compiler is able to find the image. Make sure you change the array to a uint8_t. The pasted bitmap should look something like the below image, with the variable type changed to uint8_t.
With the Qwiic OLED Arduino Library, we will need to know the size of the bitmap image so we have included a few variables below the arrays to indicate the width and height of the image. You will also need to change the name of the array when referencing them in the example code. In this case, we named it rick and morty. The pasted bitmap should look something similar to the following.
language:c
uint8_t rick[] = {
  0xFF, 0xFF, 0xFF, 0xFF, 0xFF, 0xFF, 0xFF, 0xFF, 0xFF, 0xFF, 0xFF, 0xFF, 0xFF, 0xFF, 0xFF, 0xFF,
  0xFF, 0xFF, 0xFF, 0xFF, 0xFF, 0x7F, 0x01, 0xFD, 0xFB, 0xF7, 0xE7, 0xCF, 0xBF, 0x3F, 0x7F, 0xFF,
  0xFF, 0xFF, 0xFF, 0xFF, 0xFF, 0xFF, 0x7F, 0xBF, 0x9F, 0xDF, 0xEF, 0xF7, 0x03, 0xFF, 0xFF, 0xFF,
  0xFF, 0xFF, 0xFF, 0xFF, 0xFF, 0xFF, 0xFF, 0xFF, 0xFF, 0xFF, 0xFF, 0xFF, 0xFF, 0xFF, 0xFF, 0xFF,
  0xFF, 0xFF, 0xFF, 0xFF, 0xFF, 0xFF, 0xFF, 0xF9, 0xE5, 0xDD, 0x3B, 0x7B, 0xFB, 0xFB, 0xF7, 0xF7,
  0xF7, 0xF7, 0xF7, 0xF7, 0xEF, 0xE0, 0xFF, 0x7F, 0x3F, 0xBF, 0xBF, 0xBF, 0xBF, 0xBF, 0xBE, 0xBC,
  0xBD, 0xBB, 0xBB, 0xBD, 0xBC, 0xBE, 0xBF, 0x3F, 0x7F, 0xFF, 0xFF, 0xFF, 0xF0, 0x87, 0xBF, 0xDF,
  0xDF, 0xEF, 0xEF, 0xE7, 0xF7, 0xF7, 0xFB, 0x3D, 0x85, 0xF9, 0xFF, 0xFF, 0xFF, 0xFF, 0xFF, 0xFF,
  0xFF, 0xFF, 0xFF, 0xFF, 0xFF, 0xCF, 0x8F, 0xAF, 0x6F, 0x6F, 0xEF, 0xEE, 0xED, 0xE1, 0xFF, 0xFF,
  0xFF, 0xFF, 0xFF, 0x07, 0xFB, 0x8D, 0xAE, 0xAF, 0xAF, 0xAF, 0x6F, 0x4F, 0x4F, 0x5F, 0x5F, 0x5F,
  0x5F, 0x5F, 0x5F, 0x4F, 0x6F, 0x6F, 0xAF, 0xAF, 0xAF, 0xAE, 0x8D, 0xFB, 0x07, 0xFF, 0xFF, 0xFF,
  0xFF, 0xFF, 0xFF, 0xE7, 0xE3, 0xE9, 0x6C, 0x6E, 0xAF, 0xCF, 0xEF, 0xFF, 0xFF, 0xFF, 0xFF, 0xFF,
  0xFF, 0xFF, 0xFF, 0xFF, 0xFF, 0xFF, 0xFF, 0xFF, 0xFF, 0xBE, 0x9E, 0xAD, 0x35, 0x73, 0xFF, 0x3F,
  0xDF, 0xDF, 0xDF, 0x00, 0xFF, 0x41, 0xB8, 0xBA, 0xBA, 0xB2, 0xB2, 0xBA, 0xBA, 0xB8, 0xC1, 0xFF,
  0xFF, 0xC1, 0xB8, 0xBA, 0xBA, 0xB2, 0xB2, 0xBA, 0xBA, 0xB8, 0x41, 0xFF, 0x00, 0xDF, 0xDF, 0xDF,
  0x3F, 0xFF, 0xF1, 0x6D, 0x5E, 0x5E, 0x3F, 0x7F, 0xFF, 0xFF, 0xFF, 0xFF, 0xFF, 0xFF, 0xFF, 0xFF,
  0xFF, 0xFF, 0xFF, 0xFF, 0xFF, 0xFF, 0xFF, 0xFF, 0xFF, 0xEF, 0xE7, 0xE3, 0xE9, 0xEC, 0x2F, 0xCE,
  0x7D, 0x7B, 0x3B, 0x80, 0x3F, 0xFF, 0x1E, 0xEE, 0xBE, 0xBE, 0xBE, 0xBE, 0xBF, 0xBF, 0x30, 0xAF,
  0xAF, 0xB0, 0xBF, 0xBF, 0x3F, 0xBE, 0xBE, 0xBE, 0xEE, 0x1E, 0xFF, 0x3F, 0x80, 0x3B, 0x7B, 0x7D,
  0xCE, 0x2F, 0xEC, 0xE9, 0xEB, 0xE7, 0xFF, 0xFF, 0xFF, 0xFF, 0xFF, 0xFF, 0xFF, 0xFF, 0xFF, 0xFF,
  0xFF, 0xFF, 0xFF, 0xFF, 0xFF, 0xFF, 0xFF, 0xFF, 0xFF, 0xFF, 0xFF, 0xFF, 0xFF, 0xFF, 0xFE, 0xFE,
  0xFF, 0xFF, 0xFF, 0xFF, 0xFC, 0xF9, 0xF3, 0xF6, 0xE7, 0xEF, 0xCF, 0xDF, 0xDF, 0xDF, 0xDF, 0xDE,
  0xDC, 0xD1, 0xD7, 0xD8, 0xCE, 0xEF, 0xE7, 0xF7, 0xF2, 0xFB, 0xF9, 0xFC, 0xFF, 0xFF, 0xFF, 0xFF,
  0xFE, 0xFE, 0xFF, 0xFF, 0xFF, 0xFF, 0xFF, 0xFF, 0xFF, 0xFF, 0xFF, 0xFF, 0xFF, 0xFF, 0xFF, 0xFF
};

uint8_t rick_Height = 48;
uint8_t rick_Width = 64;

uint8_t morty[] = {
  0xFF, 0xFF, 0xFF, 0xFF, 0xFF, 0xFF, 0xFF, 0xFF, 0xFF, 0xFF, 0x3F, 0x1F, 0x0F, 0x07, 0x07, 0x03,
  0x03, 0x03, 0x03, 0x01, 0x01, 0x01, 0x00, 0x00, 0x00, 0x00, 0x00, 0x00, 0x00, 0x00, 0x00, 0x00,
  0x00, 0x00, 0x00, 0x00, 0x00, 0x01, 0x03, 0x03, 0x03, 0x07, 0x07, 0x07, 0x0F, 0x1F, 0x1F, 0x3F,
  0x7F, 0xFF, 0xFF, 0xFF, 0xFF, 0xFF, 0xFF, 0xFF, 0xFF, 0xFF, 0xFF, 0xFF, 0xFF, 0xFF, 0xFF, 0xFF,
  0xFF, 0xFF, 0xFF, 0xFF, 0x7F, 0x1F, 0x07, 0x07, 0x01, 0x00, 0x00, 0x00, 0x00, 0x00, 0x00, 0x00,
  0x00, 0x00, 0x00, 0x80, 0x80, 0xC0, 0xE0, 0xF0, 0xF8, 0xF8, 0xF8, 0x78, 0x7C, 0x7C, 0x7C, 0x3F,
  0x9F, 0xCF, 0xEF, 0xFF, 0xFF, 0xFF, 0xFF, 0xFF, 0xFF, 0xFF, 0xF4, 0xE4, 0xEC, 0x6C, 0x28, 0x90,
  0xD4, 0xCF, 0xDF, 0xDF, 0xDF, 0xDF, 0xDF, 0xBF, 0x7F, 0xFF, 0xFF, 0xFF, 0xFF, 0xFF, 0xFF, 0xFF,
  0xFF, 0xFF, 0x07, 0x00, 0x00, 0x00, 0x00, 0x00, 0x00, 0x00, 0x00, 0x00, 0x00, 0x00, 0xF0, 0xFC,
  0xFC, 0xFE, 0xFF, 0xFF, 0xFF, 0xFF, 0xFF, 0xFF, 0xFF, 0x07, 0xF3, 0xF9, 0xFD, 0xFC, 0xFE, 0xFE,
  0xFE, 0xFE, 0xFE, 0xFE, 0xFC, 0xF9, 0xF3, 0x07, 0xFF, 0xFF, 0xFF, 0xFF, 0xC0, 0x3E, 0x7F, 0xFF,
  0xFF, 0xFF, 0xFF, 0xFF, 0xFF, 0xF9, 0xF9, 0xFF, 0x3C, 0xC1, 0xFF, 0xFF, 0xFF, 0xFF, 0xFF, 0xFF,
  0xFF, 0xFF, 0xF8, 0xC0, 0x00, 0x00, 0x00, 0x00, 0x00, 0x00, 0x00, 0x00, 0x00, 0x00, 0xFF, 0xFF,
  0xFF, 0xFF, 0xFF, 0xFF, 0xFF, 0xFF, 0xFF, 0xFF, 0xFF, 0xFC, 0xFB, 0xF7, 0xEF, 0xDC, 0xDC, 0xDF,
  0xDF, 0xDF, 0xDF, 0xDF, 0xEF, 0xF7, 0xFB, 0xFC, 0xFF, 0xFF, 0xFF, 0xFF, 0xDF, 0xDF, 0xDF, 0xD6,
  0xD6, 0xED, 0xFD, 0xFD, 0xFD, 0xFD, 0xFE, 0xFE, 0x00, 0xFF, 0xFF, 0xFF, 0xFF, 0xFF, 0xFF, 0xFF,
  0xFF, 0xFF, 0xFF, 0xFF, 0xFF, 0xFE, 0xFC, 0xFC, 0xF8, 0xF0, 0xE0, 0xE0, 0xC0, 0xC0, 0xC1, 0x9C,
  0x1E, 0x7E, 0x7E, 0x7F, 0x3F, 0xBF, 0xDF, 0xFF, 0xFF, 0xFF, 0xFF, 0xFF, 0xFF, 0xFF, 0xFF, 0xFF,
  0xFF, 0xFF, 0xFF, 0xFF, 0xFF, 0xFF, 0xFF, 0xFF, 0xFF, 0xFF, 0xCF, 0x8F, 0xBF, 0x85, 0xE5, 0xF3,
  0xF3, 0xFF, 0x7F, 0x7F, 0xBF, 0xDF, 0xC7, 0xF3, 0xF8, 0xFF, 0xFF, 0xFF, 0xFF, 0xFF, 0xFF, 0xFF,
  0xFF, 0xFF, 0xFF, 0xFF, 0xFF, 0xFF, 0xFF, 0xFF, 0xFF, 0xFF, 0xFF, 0xFF, 0xFF, 0xFF, 0xFF, 0xFF,
  0xFF, 0xFF, 0xFF, 0xFE, 0xF8, 0xF9, 0xF3, 0xF7, 0xF7, 0xE7, 0xEF, 0xEF, 0xDF, 0xDF, 0xDF, 0xDF,
  0xDF, 0xDF, 0xDF, 0xDF, 0xDF, 0xDF, 0xDF, 0xDF, 0xDF, 0xDF, 0xCF, 0xCF, 0xEF, 0xE7, 0xF7, 0xF3,
  0xFB, 0xF8, 0xFE, 0xFE, 0xFF, 0xFF, 0xFF, 0xFF, 0xFF, 0xFF, 0xFF, 0xFF, 0xFF, 0xFF, 0xFF, 0xFF
};

uint8_t morty_Height = 48;
uint8_t morty_Width = 64;
Now we will be able to call displayBitmap() to draw our image. Some example code showing how to display some Rick and Morty bitmaps is shown below.
language:c
/******************************************************************************
 * QwiicMicroOLED_Demo.ino
 * SFE_MicroOLED Library Demo
 * Paul Clark @ SparkFun Electronics
  Original Creation Date: December 11th, 2020
 *
 * This sketch uses the MicroOLED library to draw bitmaps to the OLED
 *
 * This example was modified for the Qwiic Micro OLED
 * Ho Yun "Bobby" Chan on 11/7/2023
 * Joel Bartlett on 04/12/17
 *
 * Development environment specifics:
 *  Arduino v2.1.1
 *  ESP32 IoT RedBoard v1.0
 *  Micro OLED Breakout v1.0
 *
 * This code is beerware; if you see me (or any other SparkFun employee) at the
 * local, and you've found our code helpful, please buy us a round!
 *
 * Distributed as-is; no warranty is given.
 ******************************************************************************/
//#include <Wire.h>  // This is included in the SparkFun Qwiic OLED Arduino Library
#include <SparkFun_Qwiic_OLED.h>  //http://librarymanager/All#SparkFun_Qwiic_OLED
#include "bitmaps.h"

// The Library supports three different types of SparkFun boards. The demo uses the following
// defines for the Qwiic Micro OLED.

QwiicMicroOLED myOLED;

void setup() {

  delay(100);
  Serial.begin(115200);

  Wire.begin();
  //Wire.setClock(400000);  // Optional increase I2C to 400kHz

  // Initalize the OLED device and related graphics system
  if (myOLED.begin() == false) {
    Serial.println(F("Device begin failed. Freezing..."));
    while (true)
      ;
  }
  Serial.println(F("Begin success"));

  myOLED.erase();
  myOLED.display();
  delay(1000);  // Delay 1000 ms
}
//---------------------------------------------------------------
void loop() {
  drawRick();
  delay(5000);
  drawMorty();
  delay(5000);
}
//---------------------------------------------------------------
void drawRick() {

  myOLED.erase();
  displayBitmap(0, 0, rick_Width, rick_Height, rick);  //Display Logo
  myOLED.display();
}
//---------------------------------------------------------------
void drawMorty() {

  myOLED.erase();
  displayBitmap(0, 0, morty_Width, morty_Height, morty);  //Display Logo
  myOLED.display();
}
//---------------------------------------------------------------
//Wrapper to avoid needing to pass width/height data twice
void displayBitmap(uint8_t x, uint8_t y, uint8_t imageWidth, uint8_t imageHeight, uint8_t *imageData) {
  myOLED.bitmap(x, y, x + imageWidth, y + imageHeight, imageData, imageWidth, imageHeight);
}
The output of this code will look something like the GIF below.
Resources and Going Further
Now that you've successfully got your OLED displaying things, it's time to incorporate it into your own project!
For more on the Qwiic Micro OLED, check out the links below:
- V11
- V10
- Datasheet (PDF)
- Bitmap Generator
- Qwiic System Landing Page
- Arduino Library
- Qwiic Micro OLED Python Package
- SparkFun Qwiic Micro OLED GitHub Repository -- Board design files for the Qwiic Micro OLED.
- Product Showcase: Qwiic Presence Sensor & OLED
Need some inspiration for your next project? Check out some of these related tutorials:
Micro OLED Breakout Hookup Guide
Photon OLED Shield Hookup Guide
MicroView Hookup Guide
Qwiic Digital Indoor Thermometer
Or check out the following blogs for ideas.