Programming the LilyMini
 MikeGrusin,
  Gella
Gella 
Programming Notes
If this is your first time programming, you're in for some fun! We recommend you head over to the LilyMini Programming Guide (COMING SOON) which will walk you through simple programming lessons that you can also use in your projects.
If you've already programmed Arduino for a while, read on for tips about the LilyMini. It's very similar to other Arduinos, but has some special features and limitations you'll want to know about.
Code Space
To keep the cost as low as possible, the LilyMini uses an inexpensive SAMD11 processor. This processor does not provide a lot of programming space (after the Arduino "core" is loaded you'll have about 4KB free), but that's more than enough for the short sketches typically used by beginning programmers. You can pack a lot of simple code into the LilyMini, but we suggest you avoid libraries and floating-point math as you can quickly run out of space.
Pin Numbering
The LilyMini's I/O pins have been renumbered to simplify things for beginners. The external sewtabs are numbered 1-4 (unlike other Arduinos there is no pin "0"), and the internal RGB LED is numbered 5-7 (R,G,B respectively). All external sewtabs will work for digital in, digital out, analog in, and analog out*. Pin 13 (which doesn't physically exist on the LilyMini) and "LED_BUILTIN" (Introduced in Arduino 1.8) are tied to the built-in red LED to maintain compatibility with existing example code.
The following names are predefined in the core if you prefer using names rather than pin numbers:
LED_RED     = 5
LED_GREEN   = 6
LED_BLUE    = 7
LED_BUILTIN = 5 // Introduced in Arduino 1.8, tied to red LED
Analog Input
All four external sewtabs support analog input. The core has been hardcoded to 10 bits (0 to 1023) for compatibility with existing sketches. Several "virtual" pins are predefined for battery voltage, 1-volt reference, and temperature. Because analogRead() can fluctuate with changing battery voltage, functions have been provided to measure true volts from any pin or the battery. (To avoid floating-point numbers that require a lot of space, these return integers that are 100x the floating-point value.)
// Virtual "pins" for analogRead()
PIN_BATT    // Battery voltage (when not on USB)
PIN_1V      // 1 volt reference
PIN_TEMP    // Temperature sensor (internal to SAMD11)

// True voltage-reading macros, these return e.g. 199 for 1.99V
int analogReadVolts(pin)    // Read true voltage on any sew tab
int analogReadBattVolts()   // Read true voltage of the battery (if not on USB)
Serial Monitor
The serial monitor on the LilyMini is slightly different than other Arduinos in that activating it does not reset the processor. This means that if your sketch is already running and you activate the serial monitor, you'll see output from that point forward, but will miss whatever it may have output in the past. If you need to see serial output from the beginning of your sketch, you can keep the serial window open, or put the following statement at the end of your setup():
while (!Serial) ;
This will wait (forever if necessary) until the serial monitor window is activated before continuing.
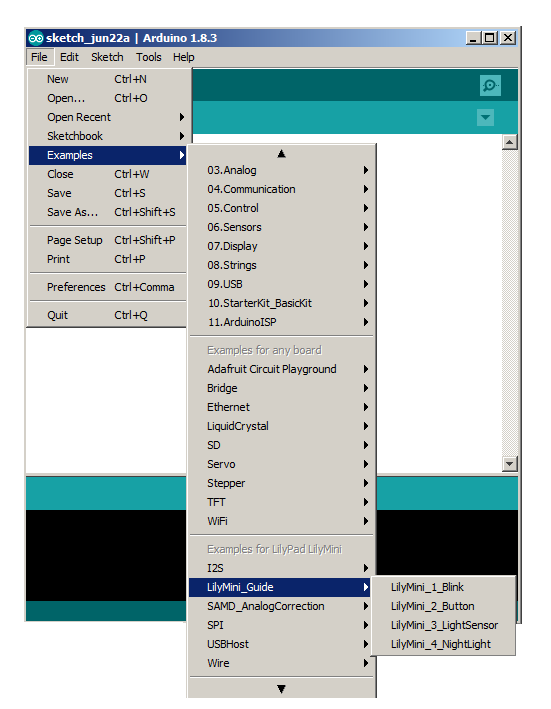
ProtoSnap Example Code
To go along with the Intro to Arduino with LilyMini ProtoSnap guide that we're working on (coming soon), we've preinstalled programming examples in the Arduino IDE. To get to them, select File > Examples > LilyMini_Guide. We'll be adding to these examples as we finish the Guide.