Pocket AVR Programmer Hookup Guide
 jimblom,
  bboyho
Using AVRDUDE via Command Line
If you're looking for more control over your AVR Pocket Programmer -- and the AVR it's connected to -- follow along below. We'll demonstrate how to use AVRDUDE, an open-source command line wonder-utility for reading, writing, and manipulating AVRs.
If you have Arduino, then you already have AVRDUDE installed -- it's the tool Arduino uses under the hood to upload sketches. If you need to install AVRDUDE separately, check out the documentation under AVRDUDE's downloads. The avrdude-doc-X.XX.pdf's (i.e. avrdude-doc-6.3.pdf) files are particularly useful when installing AVRDUDE for your operating system if you have issues using AVRDUDE commands in any directory via command line.
Sanity Check -- AVRDUDE Paths
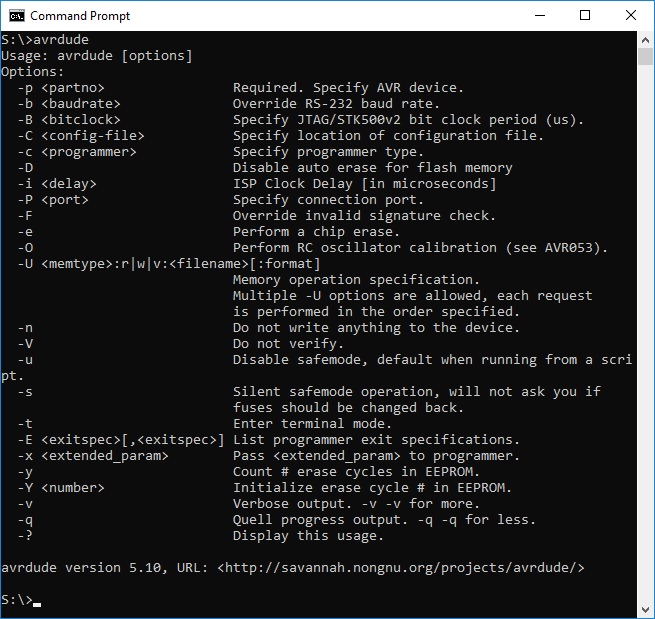
AVRDUDE is a command-line tool, so, in order to use it, you'll need to open up the "Command Prompt" (Windows) or "Terminal" (Mac/Linux). To make sure AVRDUDE is working it's good to do a little sanity check first. Open up the command line and type the following command.
language:bash
avrdude
You should see an output similar to the image below.
Sanity Check -- Device Signature Verification
To make sure AVRDUDE is working, and your AVR Pocket Programmer is connected correctly, it's good to do another little sanity check. Type this into your command prompt:
language:bash
avrdude -c usbtiny -p atmega328p
If everything is connected correctly, you should get a response like this:
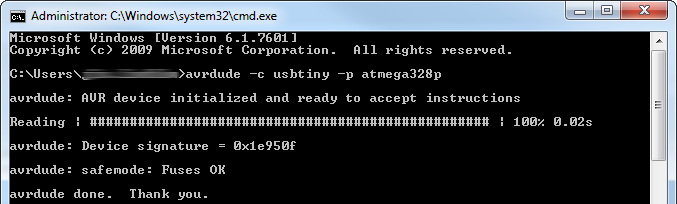
This basic command defines the programmer type you're using and the AVR it's talking to. AVRDUDE will attempt to read the Device Signature from your AVR, which is different for each AVR type out there. Every ATmega328P should have a device signature of 0x1E950F.
Flash Programming
Now that you've verified that everything is in working order, you can do all sorts of memory reading and writing with AVRDUDE. The main piece of memory you probably want to write is flash -- the non-volatile memory where the programs are stored.
This example will be using the blink.hex file as an example. Download the following files below. If you are using the blink.hex file, make sure that you unzip the folder and place it in the working directory.
This command will perform a basic write to flash using the HEX file.
language:bash
avrdude -c usbtiny -p atmega328p -U flash:w:blink.hex
Writing to flash will take a little longer than reading the signature bits. You'll see a text status bar scroll by as the device is read, written to, and verified.
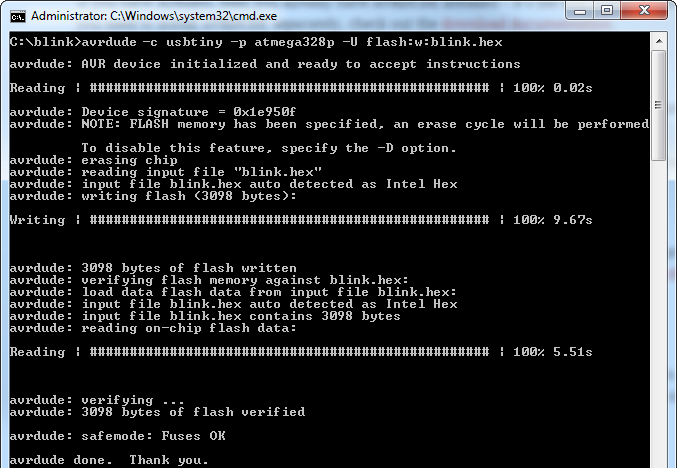
The -U option command handles all of the memory reads and writes. We tell it we want to work with flash memory, do a write with w, and then tell it the location of the hex file we want to write.
Invalid File FormatTo specify, you can by add an
:i to indicate that it is an Intel hex format:avrdude -c usbtiny -p atmega328p -U flash:w:blink.hex:iOr
:a to auto detect the format:avrdude -c usbtiny -p atmega328p -U flash:w:blink.hex:aFor more information, try checking the AVRDUDE's Online Documentation under the Option Description where it describes the command "
-U memtype:op:filename[:format]".Flash Reading
The -U command can also be used to read the memory contents of an AVR. A command like below, for example, will read the contents of your AVR and store them into a file called "mystery.hex".
language:bash
avrdude -c usbtiny -p atmega328p -U flash:r:mystery.hex:r
This is incredibly useful if you want to copy the contents of one Arduino to another. Or maybe you're a masochist, and you want to try reverse-engineering the mystery code in an AVR.
Reinstalling the RedBoard's Arduino Bootloader
Now that you have a hang of flashing hex files to your RedBoard, try reinstalling the bootloader with the following file. Download the file.
Navigate to the path where you downloaded the bootloader and enter the following command.
language:bash
avrdude -c usbtiny -p atmega328p -U flash:w:optiboot_atmega328_2012_with_1s_watchdog.hex
If all goes well, you should get a message indicating that it was written, verified, and finished uploading. You should get an output similar to the output below. In this case, the configuration file (i.e. avrdude.conf) and the bootloader (*.hex) were not located in the same working directory. Two additional commands were needed to specify where to look for the files. Additionally, the *.hex format needed to be autodetected when flashing the file by adding the :a.

Head back to the Arduino IDE, disconnect the USB cable from your programmer, and connect to the RedBoard's USB port to see if you can upload a simple blink.ino sketch back to the board via serial. Make sure to select the appropriate board definition and COM port before uploading. You should see a familiar message indicating that the Arduino IDE is "Done Uploading" when complete and the on-board LED begin to blink on pin 13.
Installing an Arduino Bootloader
Useful Options
Here are just a few last AVRDUDE tips and tricks before we turn you loose on the AVR world.
Specify Programmer and AVR Device
Two options required for using AVRDUDE are the programmer type and AVR device specification:
The programmer definition, assuming you're using the AVR Pocket Programmer, will be
-c usbtiny. If you need to use a different programmer check out this page and CTRL+F to "-c programmer-id".The AVR device type is defined with the
-poption. We've shown a few examples with the ATmega328P, but what if you're using an ATtiny85? In that case, you'll want to put-p t85instead. Check out the top of this page for an exhaustive list of compatible AVR device types.
Verbose Output
Adding one, or more -v's to your AVRDUDE command will enable various levels of verbosity to the action. This is handy if you need a summary of your configuration options, or an in-depth view into what data is being sent to your AVR.
There's plenty more where that came from. Check out the AVRDUDE Online Documentation under Option Descriptions for the entire list of commands.