MS5803-14BA Pressure Sensor Hookup Guide
 CaseyTheRobot
 Introduction
The MS5803-14BA is a pressure sensor with an I2C ("Wire") and SPI interface.
Pressure sensors measure the absolute pressure of the fluid around them. This includes air, water, and anything else that acts like a viscous fluid. Depending on how you interpret the data, you can determine altitude, water depth, or any other tasks that require an accurate pressure reading.
Covered in This Tutorial
We will show you how to connect this sensor to an Arduino microcontroller and use the included software library to get measurements out of the sensor. We'll also show you how to interpret the readings showing changes in altitude and water depth.
Suggested Reading
This part is easy to use. But before you start, we recommend the following background knowledge:
How to Solder: Through-Hole Soldering
Working with Wire
What is an Arduino?
Logic Levels
I2C
Connecting the Hardware - I2C
In this example, we will communicate with the MS5803-14BA using the I2C interface.
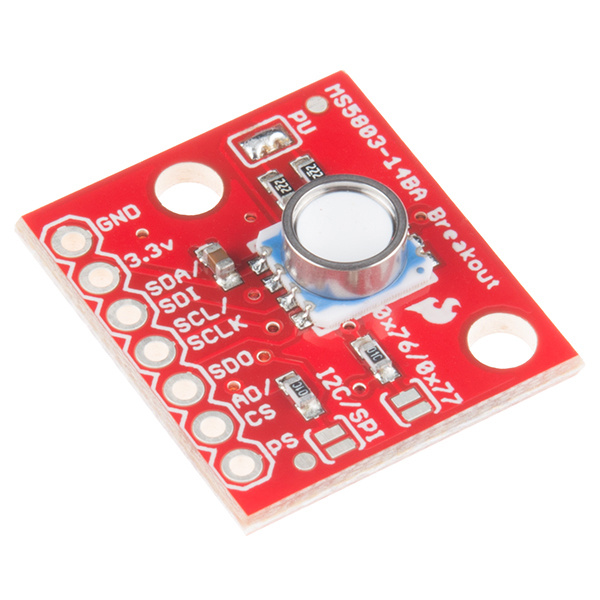
Connection Names
The MS5803-14BA Breakout Board breaks out seven connections from the IC. We traditionally call these connections "pins" because they come from the pins on the IC, but they are actually holes that you can solder wires or header pins to.
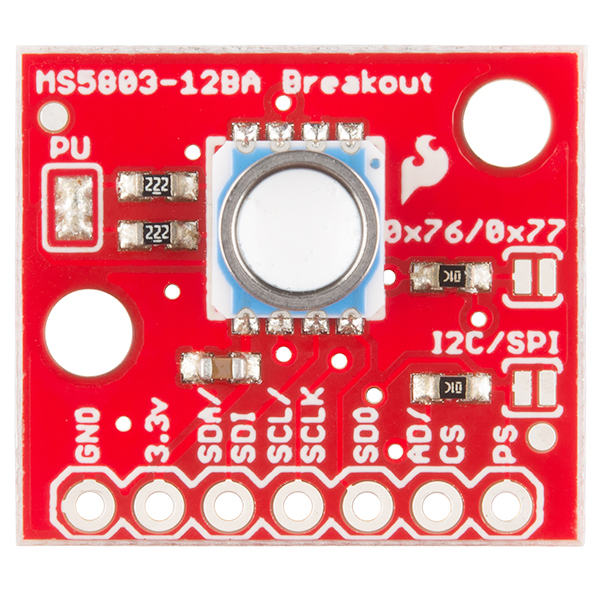
We'll connect four of the seven pins on the board to your Arduino. The four pins you need are labeled GND, VCC, SCL, and SDA.
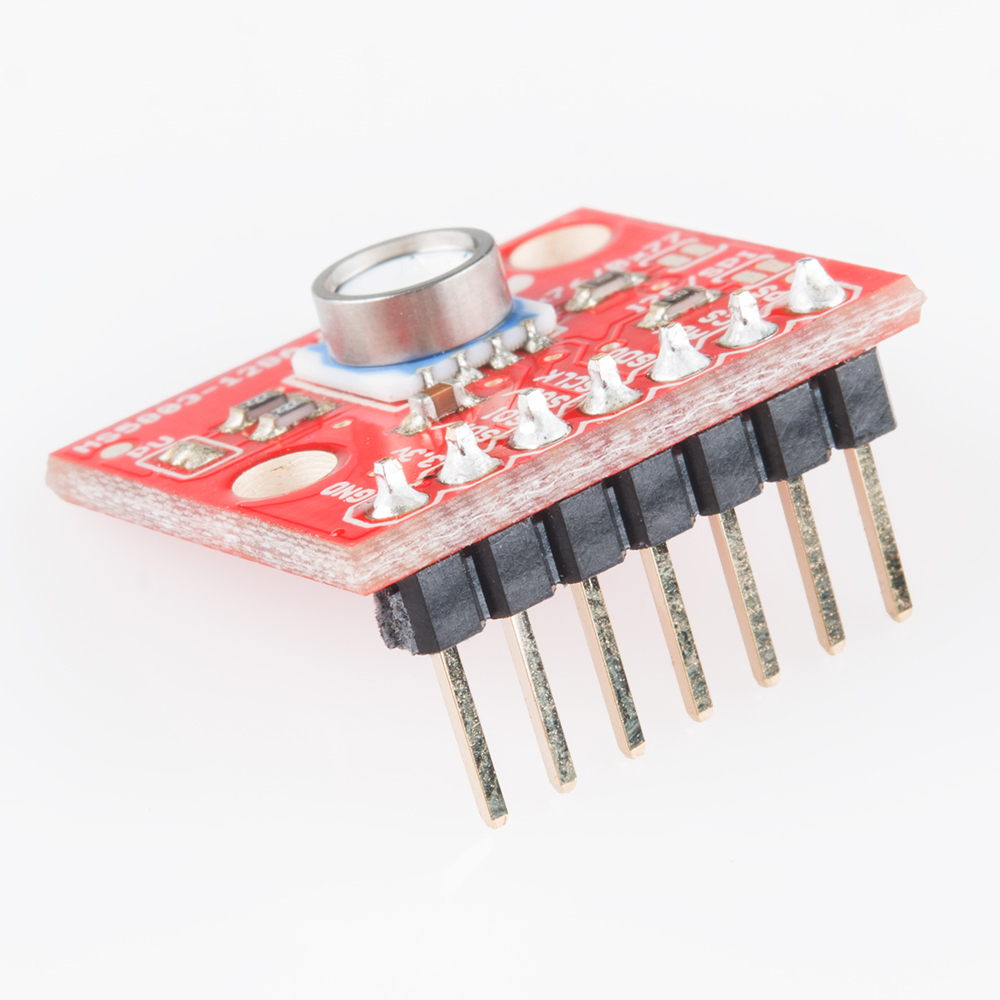
Connecting Headers to the Board
You can use any method you like to make your connections to the board. For this example, we'll solder on a seven-pin length of male-male header strip, and use male-female jumper wires to connect the MS5803-14BA to your Arduino.
Solder a 7-pin length of male-male header to the board. You can solder it to either side. The bottom is more useful for breadboards, and the top is more useful for jumper wires.
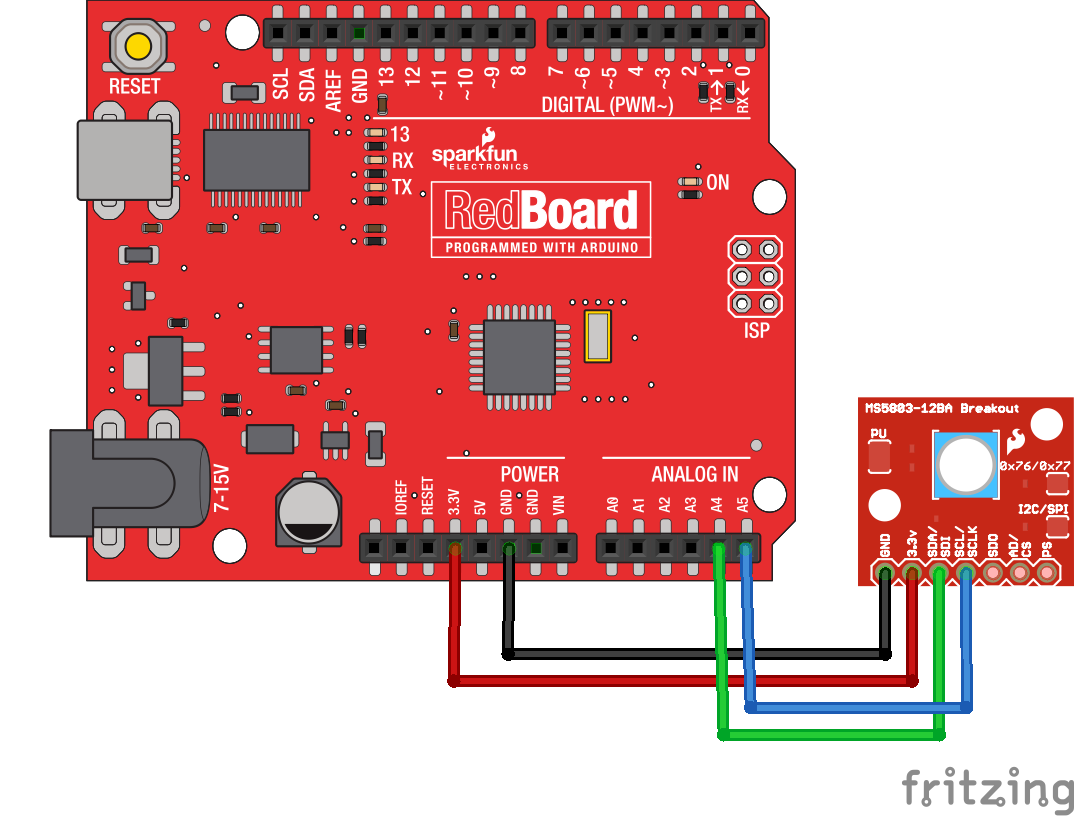
Connecting the Board to your Arduino
When you're done soldering, connect the GND, 3.3v, SDA, and SCL pins to your Arduino. Different Arduino models use different pins for the I2C interface; use the following chart to determine where to plug everything in.
IMPORTANT: Connect the power pins (3.3v and GND) ONLY to a 3.3V supply. Larger voltages will permanently damage the part. Note that because I2C uses open drain drivers, it is safe to connect the I2C pins (DA and CL) to an I2C port on a 5V microprocessor.
| MS5803-14BA label | Pin function | Arduino connection | ||||||
|---|---|---|---|---|---|---|---|---|
| GND | ground | GND | ||||||
| 3.3v | 3.3V power supply | 3.3V | ||||||
| SDA | I2C data |
Any pin labeled SDA, or:
|
||||||
| SCL | I2C clock |
Any pin labeled SCL, or:
|
Once you have the MS5803-14BA connected to your Arduino, we're ready to play with the software.
Installing the Arduino Library
If this is your first time using Arduino, please review our tutorial on installing the Arduino IDE. If you have not previously installed an Arduino library, please check out our installation guide.
Libraries are collections of software functions geared towards a single purpose, such as communicating with a specific device. Arduino comes with a number of built-in libraries that help you do advanced tasks. We've written an Arduino library called the SparkFun MS5803-14BA Breakout Arduino Library that allows you to easily talk to the MS5803 sensor. This library is not included with the stock Arduino software, but don't worry, installing new libraries is easy. You can obtain these libraries through the Arduino Library Manager. Search for SparkFun MS5803 and you should be able to install the latest version. If you prefer downloading the libraries manually, you can grab them from the GitHub repository:
If you'd like to interface the MS5803 to a microcontroller other than an Arduino, the C++ source code in the library and the information in the datasheet may be helpful when writing your own code.
Once you've installed the library, restart the Arduino IDE and you should be ready to go.
Example Sketches
Running the Example Sketch
The library you just installed includes an example sketch that show basic operation of the MS5803. This are designed to be a starting point for writing your own code.
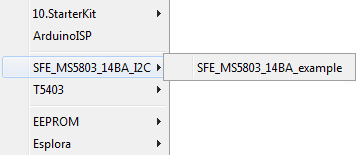
After you install the library, run the Arduino IDE, and open the following menu item: File / Examples / SFE_MS5803_14BA / SFE_MS5803_14BA_I2C_Demo.
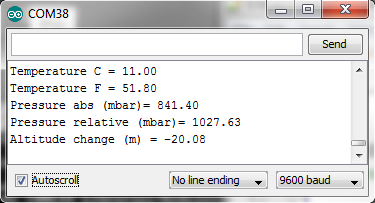
When the example opens, upload it to your Arduino (remember to select the correct board type and serial port), and open the Serial Monitor to 9600 baud. You should see some diagnostic information (if it can't find the device, double check your hardware connections) followed by measurement readings.
Writing Your Own Sketches
The comments and code in the example sketch should get you started when writing your own sketches. In many cases you should be able to copy and paste the example code into your own sketch.
Resources and Going Further
Now that you've successfully got your MS5803-14BA Pressure Sensor up and running, it's time to incorporate it into your own project! For more information, check out the resources below:
- Schematic
- Eagle Files
- Datasheet (MS5803-14BA)
- GitHub
- SFE Product Showcase
Need some inspiration for your next project? Check out some of these related tutorials:
Creating a Humidor Control Box
MPL3115A2 Pressure Sensor Hookup Guide
Qwiic Atmospheric Sensor (BME280) Hookup Guide
How to Make a Magic Mirror with Raspberry Pi
If you have any problems or questions, our technical support department can help. Please don't hesitate to contact us. We also love to hear about your projects!