MLX90614 IR Thermometer Hookup Guide
 jimblom
MLX90614 Arduino Library
Using an Arduino to interact with the sensor is almost as easy as hooking it up, thanks to our IR Thermometer Arduino library.
Download and Install the Arduino Library
Download the library from our GitHub repository, or click the button below to download a ZIP file.
To add the library to your Arduino sketchbook, open the IDE, navigate to Sketch > Include Library > Add .ZIP Library... and select the ZIP folder you just downloaded.
If you're using an older version of the IDE, or need help installing the library, check out our How To Install an Arduino Library tutorial.
Setting Up the Evaluation Board in Arduino
If you're using the SparkFun IR Thermometer Evaluation Board, set the Arduino board to Arduino Pro or Pro Mini, ATmega328 (3.3V, 8MHz).
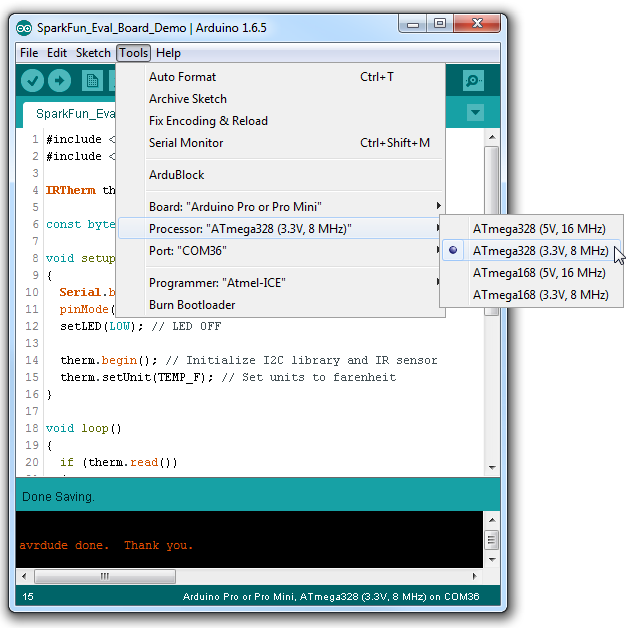
First, navigate to the Tools > Board and select Arduino Pro or Pro Mini. Then go to Tools > Processor and select ATmega328 (3.3V, 8MHz).
Run the MLX90614_Serial_Demo Example
The SparkFun MLX90614 Arduino includes a handful examples, which demonstrate everything from reading the sensor's values to adjusting emissivity, to modifying the 7-bit address.
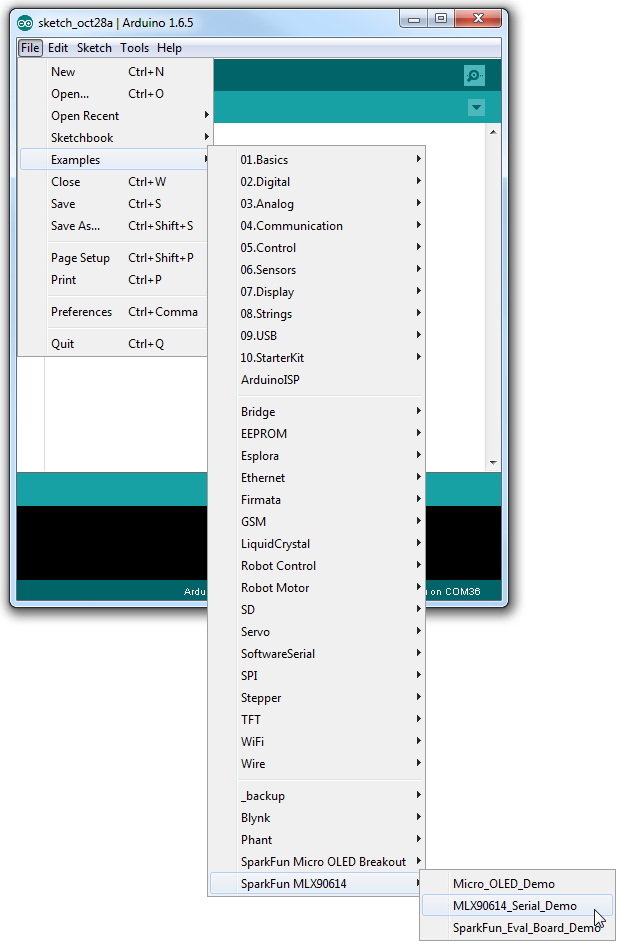
Open the most basic example by navigating to File > Examples > SparkFun MLX90614 > MLX90614_Serial_Demo.
Upload the sketch, then open your serial monitor, setting the baud rate to 9600 bps. You should see both the ambient temperature and the object temperature begin to stream by.
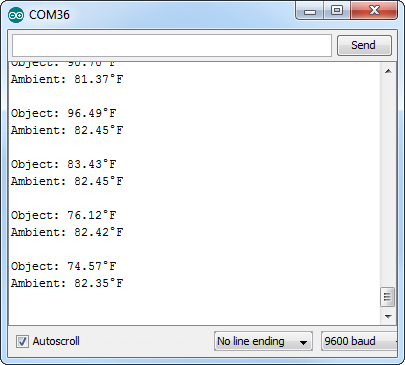
Try aiming the sensor at objects you have lying around. How hot is that soldering iron? Or shine it in your ear to make sure you don't have a fever!

Using the MLX90614 Library
There are a few lines of code you'll probably stick in every MLX90614-interfacing code you'll write. To begin, include the SparkFunMLX90614 library and Wire. In that same global area, you may want to define an IRTherm object to be used throughout the rest of the sketch.
language:c
#include <Wire.h> // Include Wire.h - Arduino I2C library
#include <SparkFunMLX90614.h> // Include IR thermometer library

IRTherm temp; // Create an IRTherm object called temp
Then, usually in the setup() function, initialize the sensor by calling begin(). This function optionally takes a parameter -- the 7-bit address of your sensor -- but if left empty it assumes the address is set to the default (0x5A). Unless you want to use the default units of Celsius, also consider calling the setUnit() function to change the units to either Kelvin or Farenheit.
language:c
temp.begin(); // Initialize I2C library and the MLX90614
temp.setUnit(TEMP_F); // Set units to Farenheit (alternatively TEMP_C or TEMP_K)
Getting values out of the sensor is a two-step process: read from the sensor then get the updated values. To read from the sensor, call the read() function, which will return 1 on success (or 0 if it fails). If the read() function succeeds, you can grab the updated ambient and object temperatures using the ambient() and object() functions:
language:c
if (temp.read()) // Read from the sensor
{ // If the read is successful:
  float ambientT = temp.ambient(); // Get updated ambient temperature
  float objectT = temp.object(); // Get updated object temperature
  Serial.println("Ambient: " + String(ambientT));
  Serial.println("Object: " + String(objectT));
  Serial.println();
}
These values will already be converted to the units you set using the setUnit() function.
To find out more about the SparkFunMLX90614 library, check out some of the other examples in the library! Or read through the (exhaustive) comments in the header file