Micro OLED Breakout Hookup Guide
 jimblom
Hardware Hookup
Now that your breakout is all soldered-to and assembled, it's time to wire it up. In this section we'll go over to example hookups, depending on whether you'd like to use SPI or I2C to control the display.
If you're not sure which interface to use, we recommend going with SPI, which will give you the fastest transfer rate and screen refresh speed.
Arduino Pro 3.3V via SPI
We'll be using the Arduino's hardware SPI pins in order to achieve the fastest data transfer speed. That means we'll need to use pins 13, 11, and 10 as the SCLK, MOSI, and CS pins. The other pins -- RST and D/C -- can be connected to any available digital pin on the Arduino.
Here's the example hookup:
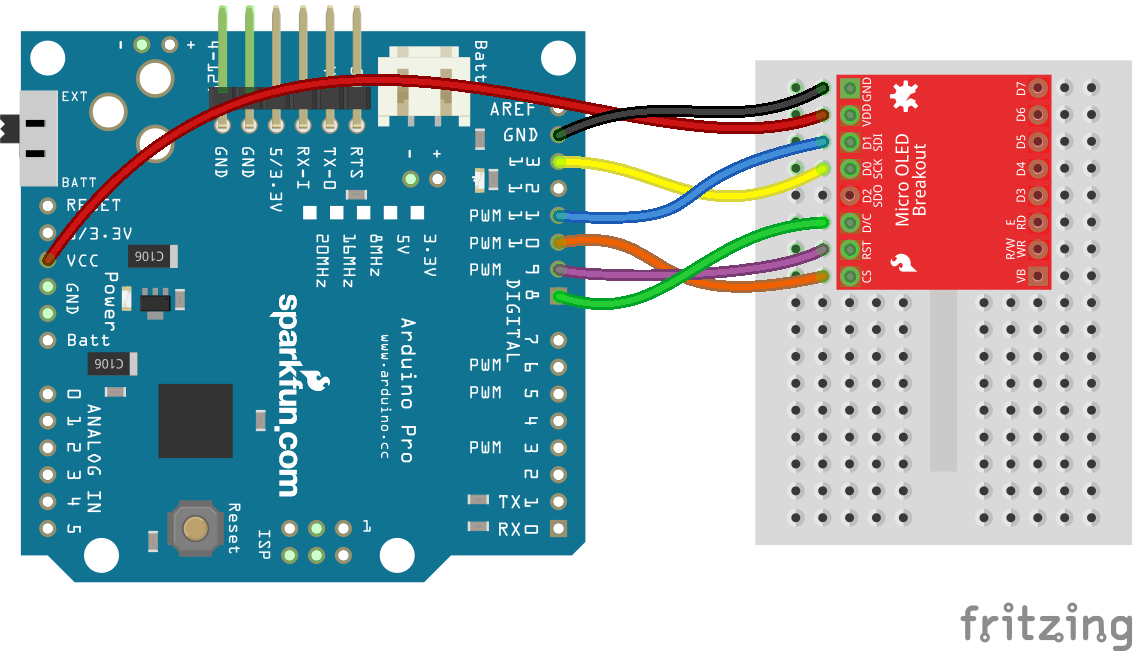
Make sure your display is powered at 3.3V and not 5V!
Arduino Pro 3.3V via Using I2C
The benefit of I2C is the lower pin count -- this hookup only requires three wires, besides power and ground -- but you do sacrifice some speed for fewer wires.
In this case, SDA and SCL must be tied to the Arduino Pro's pins A4 and A5 respectively. RST can be tied to any other digital pin, we're using 9.
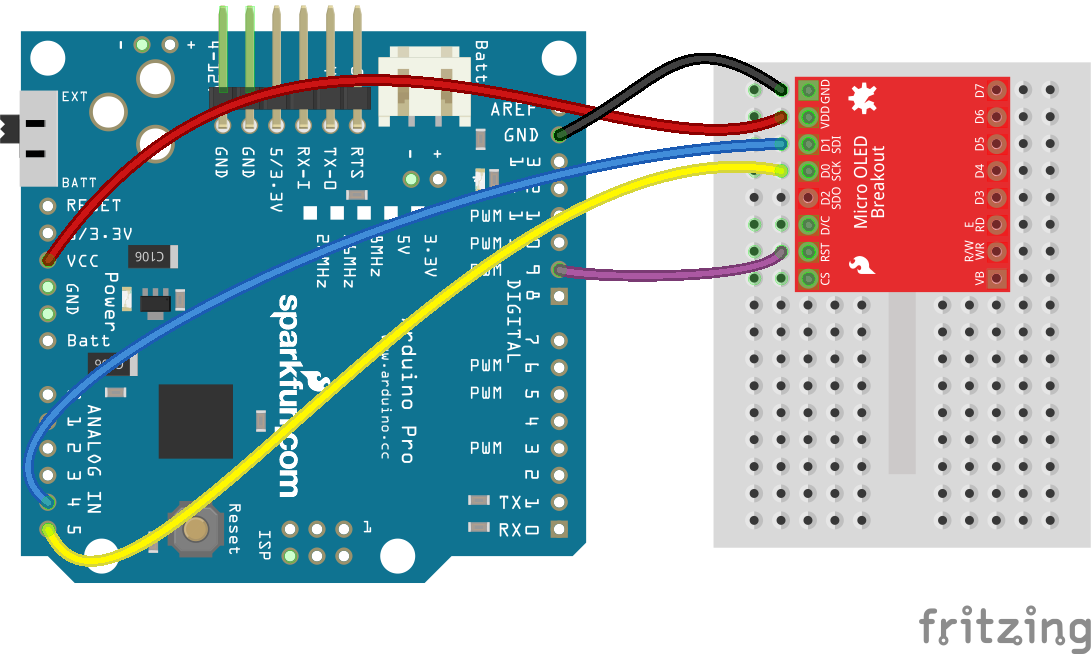
While I2C affords you a few extra available pins, it is quite a bit slower than SPI. If you don't need a fast framerate, though, I2C is a great option.