Measuring Height with Atmospheric Pressure
Introduction
It can be easy to forget that we are constantly under pressure (although Freddie and Bowie tried to tell us) from the atmosphere around us. Not only that, it’s a bit counterintuitive: the higher up you go, the less pressure there is, and vice versa. There are a few ways we encounter this in our day to day, like maintaining cabin pressure on a plane at 30,000 feet or water boiling just a little bit faster out here in the Rockies! With this project, we’re going to play around with the atmosphere around us, and do a little bit of math, to create a pressure sensor-based height measuring tool!
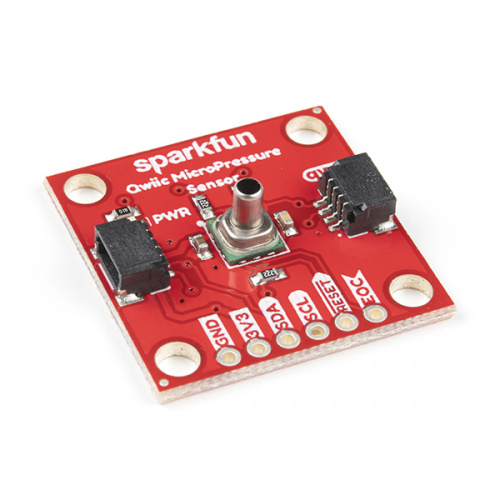
The powerhouse of this project is the Qwiic MicroPressure Sensor. This sensor has an onboard Honeywell 25psi piezoresistive silicon pressure sensor which gives the ability to measure very minute differences in absolute pressure. We'll take those pressure measurements, apply some math inside the code and translate the change in pressure from a bottom and top reading into a height measurement.
Required Materials
Here are all of the parts you’ll need to follow along with this tutorial! You can add what you need or, if you don’t have any of these parts already, you can click to the wishlist provided and purchase it all in one go!
Hardware Hookup
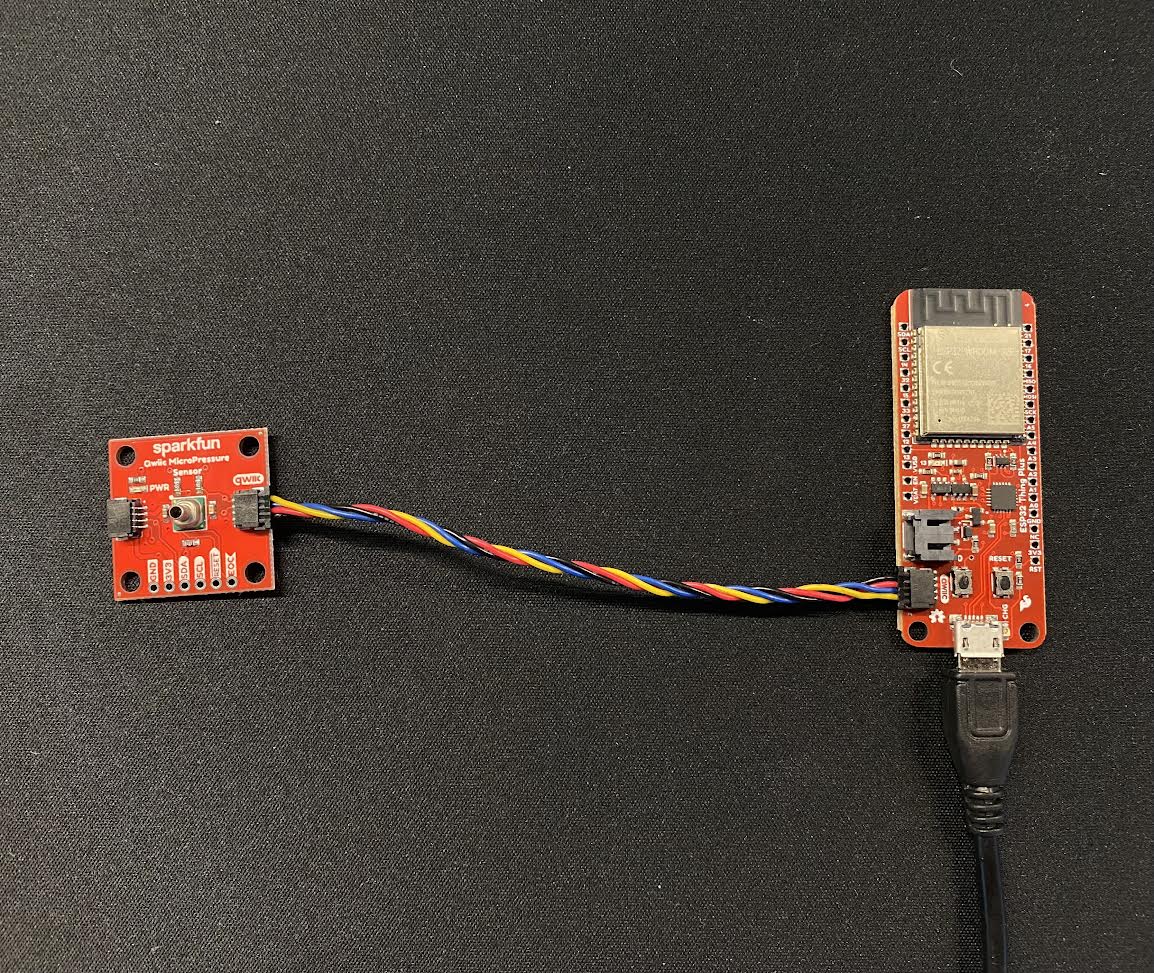
Luckily, the hardware is pretty easy to hookup; simply connect one end of your Qwiic cable to your Thing Plus, and the other end to your sensor. Boom! You’re done! The parts list below includes a USB cable for power but this project could also be used with a battery for maximum portability.
Software Setup and Programming
To run this project, you’ll need to install the SparkFun MicroPressure Library (for more information on how to install this library, and take advantage of its example sketches, check out our SparkFun Qwiic MicroPressure Hookup Guide!).
SparkFun Qwiic MicroPressure Hookup Guide
Height Demo Code
Once the library is installed, go ahead and open up a blank sketch. Make sure to select your board (SparkFun ESP32 Thing Plus) and COM port before uploading, and to hold down the boot button on your Thing Plus during the upload! The boot button is also what we’ll be using to tell the system when we’d like to take a reading; let us away to the code!
//SparkFun Qwiic MicroPressure Height Measuring Demo
//Original Demo by: Dryw Wade, Adapted for Qwiic MicroPressure by: Mariah Kelly

#include <Wire.h>
#include <SparkFun_MicroPressure.h>  // Click here to get the library: https://github.com/sparkfun/SparkFun_MicroPressure_Arduino_Library/archive/main.zip

#define EOC_PIN  -1
#define RST_PIN  -1
#define MIN_PSI   0
#define MAX_PSI   25

SparkFun_MicroPressure mpr(EOC_PIN, RST_PIN, MIN_PSI, MAX_PSI);

// Button pin (using boot button on board)
int buttonPin = 0;

// Interrupt flag for button presses
volatile bool buttonPressed = false;

// Time to wait after a button press before reading the next button press (helps with debouncing)
unsigned long timerDelay = 500;

// Measured pressure at the bottom and top of the measurement
int bottomPressure = 0;
int topPressure;

// Calibrated number of inches per Pascal of pressure difference. Note that it's negative, because lower altitude results in higher pressure
float inchesPerPascal = -3.3;

// Using arrays to take multiple readings and display average
#define numReadings 500
int bottomReadings[numReadings];
int topReadings[numReadings];

// Breaking up array calculations
boolean measuring = true;
boolean showData = true;

void setup() {
// Start serial
Serial.begin(115200); //Be sure that your Serial Monitor is set at this rate!
Serial.println("MicroPressure height demo begin!");

// Initialize the I2C library
Wire.begin();

if (!mpr.begin()) {
    Serial.println("Cannot connect to MicroPressure sensor.");
    while (1);
}

// Configure button pin as interrupt
attachInterrupt(digitalPinToInterrupt(buttonPin), myISR, FALLING);
}

void loop() {
// Wait for button press
if (buttonPressed) {
// Check whether the bottom pressure has been measured
    if (bottomPressure == 0) {
        if (measuring) {
        for (int i = 0; i < numReadings; i++) {
      // Bottom pressure has not been measured, store this measurement as the bottom
      bottomPressure = mpr.readPressure(PA);
      bottomReadings[i] = bottomPressure;
    }
    measuring = false;
  }
  if (showData) {
    for (int i = 0; i < numReadings; i++) {
      bottomPressure += bottomReadings[i];
    }
    bottomPressure = bottomPressure / numReadings;
    // Print out the bottom pressure
    Serial.print("Bottom pressure: ");
    Serial.print(bottomPressure);
    Serial.print(" Pa        ");
    showData = false;
  }
  measuring = true;
  showData = true;
} else {
  if (measuring) {
    for (int i = 0; i < numReadings; i++) {
      // Bottom pressure has been measured, this is the top pressure
      topPressure = mpr.readPressure(PA);
      topReadings[i] = topPressure;
    }
    measuring = false;
  }
  if (showData) {
    for (int i = 0; i < numReadings; i++) {
      // Print out the top pressure
      topPressure += topReadings[i];
    }
    topPressure = topPressure / numReadings;
    Serial.print("Top pressure: ");
    Serial.print(topPressure);
    Serial.print(" Pa        ");
    showData = false;
  }
  // Compute the difference in pressure
  int pressureDifference = topPressure - bottomPressure;

  // Compute total height in inches using known inches per Pascal
  int inches = pressureDifference * inchesPerPascal;

  // Compute number of feet in this height
  int feet = inches / 12;

  // Subtract that many feet from the total number of inches
  inches -= feet * 12;

  // Print computed height in ft'in"
  Serial.print("Height: ");
  Serial.print(feet);
  Serial.print("' ");
  Serial.print(inches, 1);
  Serial.print("\"");
  Serial.println();

  // Reset bottom pressure for next measurement
  bottomPressure = 0;
}
// Wait for button to stop bouncing
delay(timerDelay);

// Reset flags
buttonPressed = false;
measuring = true;
showData = true;
 }
}

void myISR() {
// Button just got pressed, set the flag
buttonPressed = true;
}
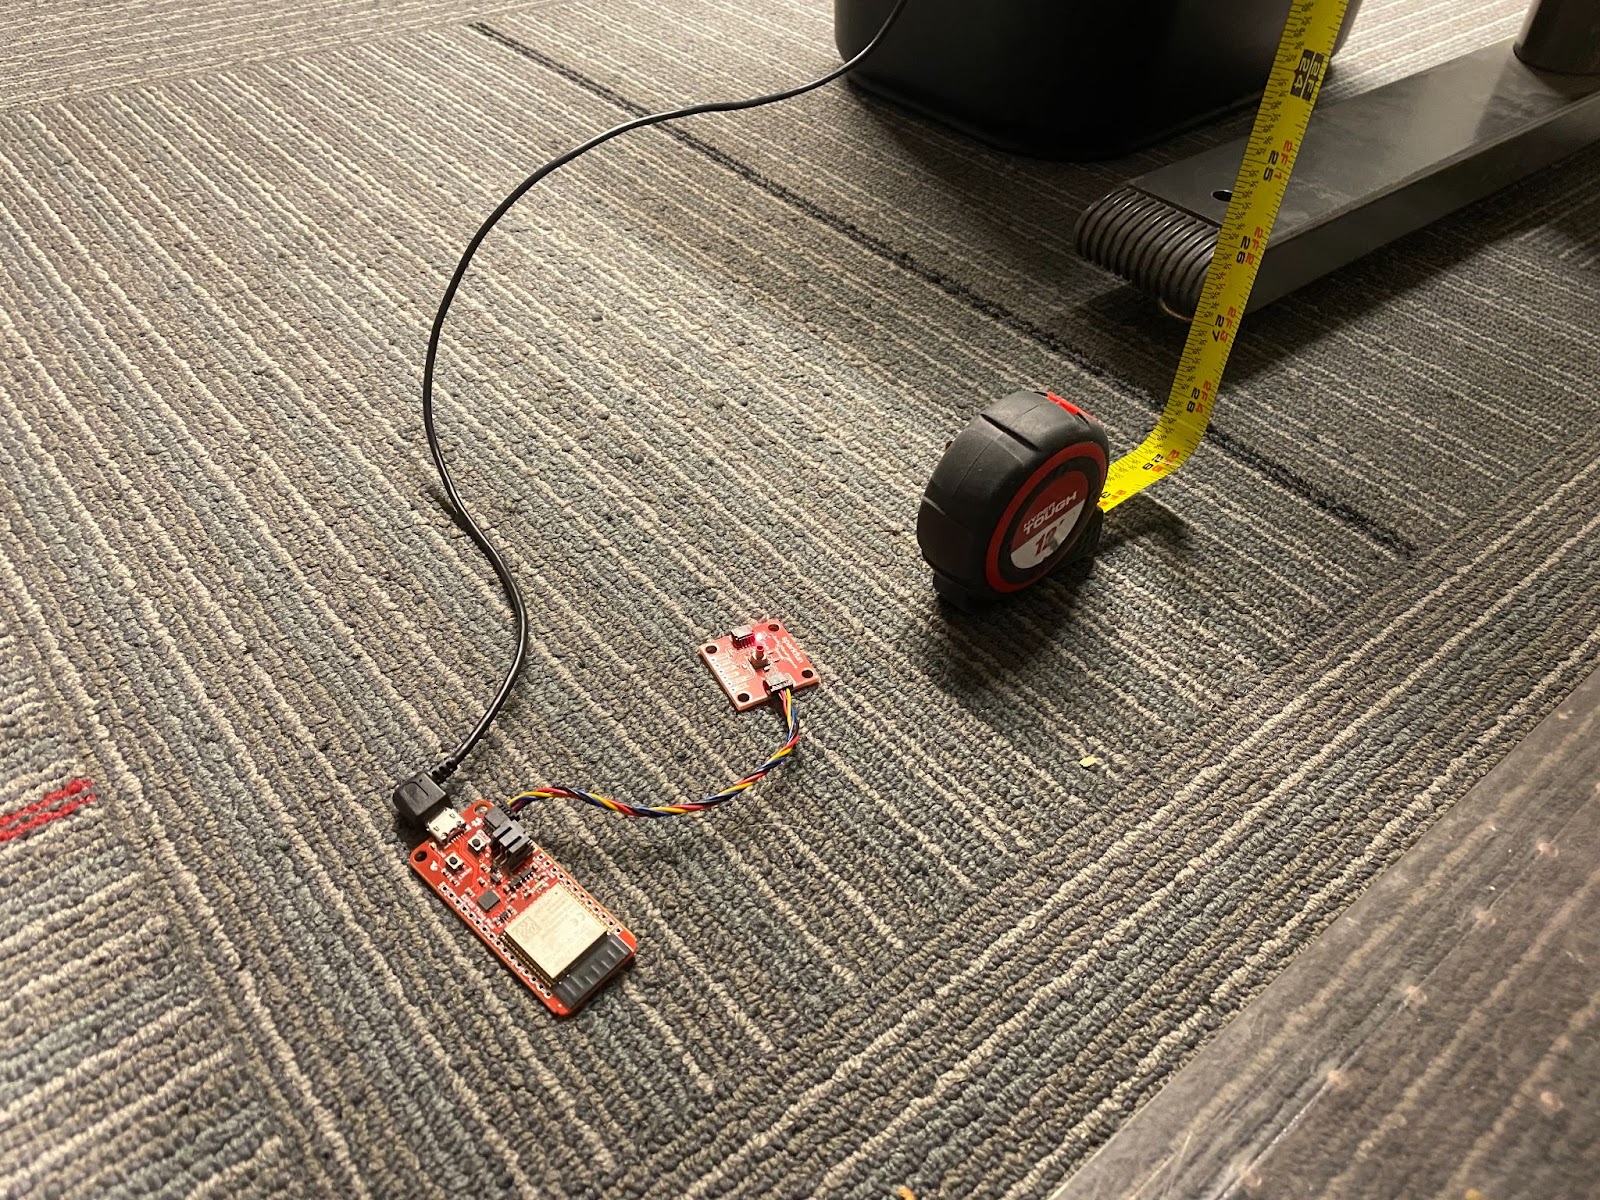
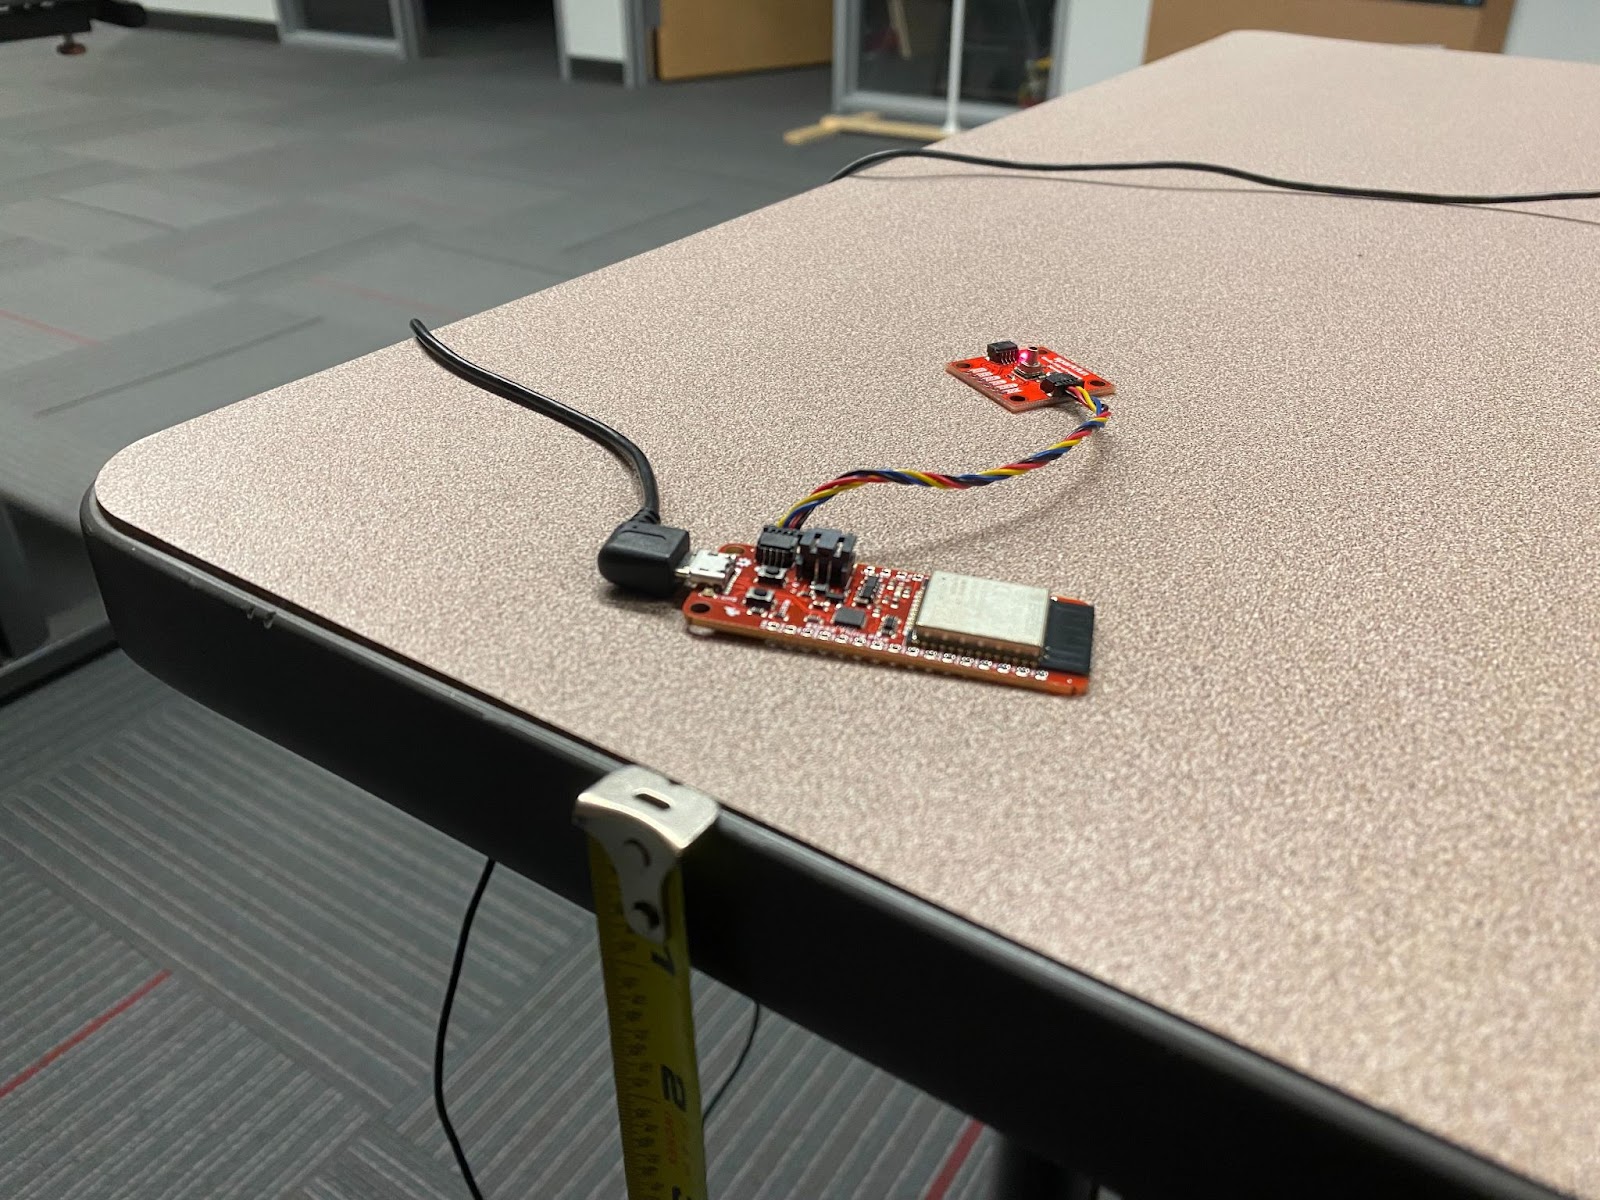
Now that we’ve uploaded our code, we can find something to measure! I used my desk–including a tape measure for reference–which is about 29 inches tall. Start by placing your system at the lowest point; this is where we’ll take our reading for the bottom pressure (we measure bottom to top, since a lower altitude results in a higher pressure, and vise-versa). The code has a built-in sampling system to help stabilize the sensor readings, so it’ll take a second or two after pressing the boot button to pop up on the serial monitor; it takes our ‘numReadings’ value of readings, which is 500 to start, but feel free to change that up as you see fit! Then, all there’s left to do is the same series of steps for our top pressure:
Now that we have our readings, let’s see how we did!

Not too shabby! We’re a few inches off, but that’s to be expected with this project. Now the super fun part is experimenting with how you might be able to tweak it to be even more accurate! I tried lots of different things and managed to get the margin of error down to a few inches, rather than feet.
Resources and Going Further
While this tutorial is largely conceptual, I could see a lot of field uses for quick, approximate measurements where a other measurement tools might struggle. Since we are using the Thing Plus - ESP32 WROOM the measurement data could be sent over WiFi or Bluetooth for quick reference on an OLED. If that's something you'd like to attempt, below is a tutorial that may help with that process.
Thanks for reading and please let us know if you've got a good use case for this type of measurement tool.
Sending Sensor Data Over WiFi