Machine Learning @ Home Kit Hookup Guide
 asassy
Workshop 1: Building a Pet Feeder
Alright, let me know if this sounds familiar to you - you've got a rambunctious _____ that tends to steal more food than they're allowed. Fill in the blank...could be a pet, a child, a friend (are they really?) or a roommmate. Whoever it is, it's problematic for you, either because their taking your food or they are simply eating too much. And, it's exhausting to monitor it yourself! What if you could create an automated food bin that would only open for specific people/pets?
This is the kind of problem that the Machine Learning @ Home Kit is well equipped to handle. It requires a system that can use images as data that will determine if a food bin is opened or not. Back in GTC 2021, one of our creative technologists, Derek, actually built it out, as seen linked below. It is highly recommended to just go through and watch the entire presentation, as it provides a thorough framework for making your way through image classification with the Jetson Nano and showcases how changing very little code can build a vastly different project. Furthermore, it's practically a step-by-step explanation for how to build out your own pet/human feeder.
As Derek does such a good job building out the hardware part of the project in the video, we'll just do a run-through of the software changes he made here.
The first thing required is to attach the SparkFun Pi Servo pHAT to the Jetson Nano, and then the servo itself. You can watch the video to get ideas about the mechanics of opening and closing the 'bin'.

As Derek explains, there are two major changes needed to personalize the DLI course example code for this project. The first is to write out a python script for operating the Qwiic servo. The second is change the parameters for the image classification to inputs of yourself and whoever you want to prevent from eating food.
Let's tackle the first part - coding in Python to drive the Qwiic servo through the Pi Servo pHAT. Open up a blank Python 3 Notebook in JupyterLabs, and test out the following script. It will use the Pi Servo Hat library to start the servo and move it specific increments at certain times.
#import the necessary libraries
import pi_servo_hat
import time
import math
import sys

#an object of our servo
myServo = pi_servo_hat.PiServoHat()

#starts up the servo
myServo.restart()

#initializes the position at (0,0)
myServo.move_servo_position(0,0)

#pauses for 1 second
time.sleep(1)

#moves the position 180 degrees
myServo.move_servo_position(0,180)

#pauses for 1 second
time.sleep(1)

#moves back to the initialized position
myServo.move_servo_position(0,0)
Okay, so we've got the servo moving, and we can use it to open and close our food bin. But, we need it to move only when a specific person/pet is in front of the bin. This is where the machine learning classification comes in with the USB camera.
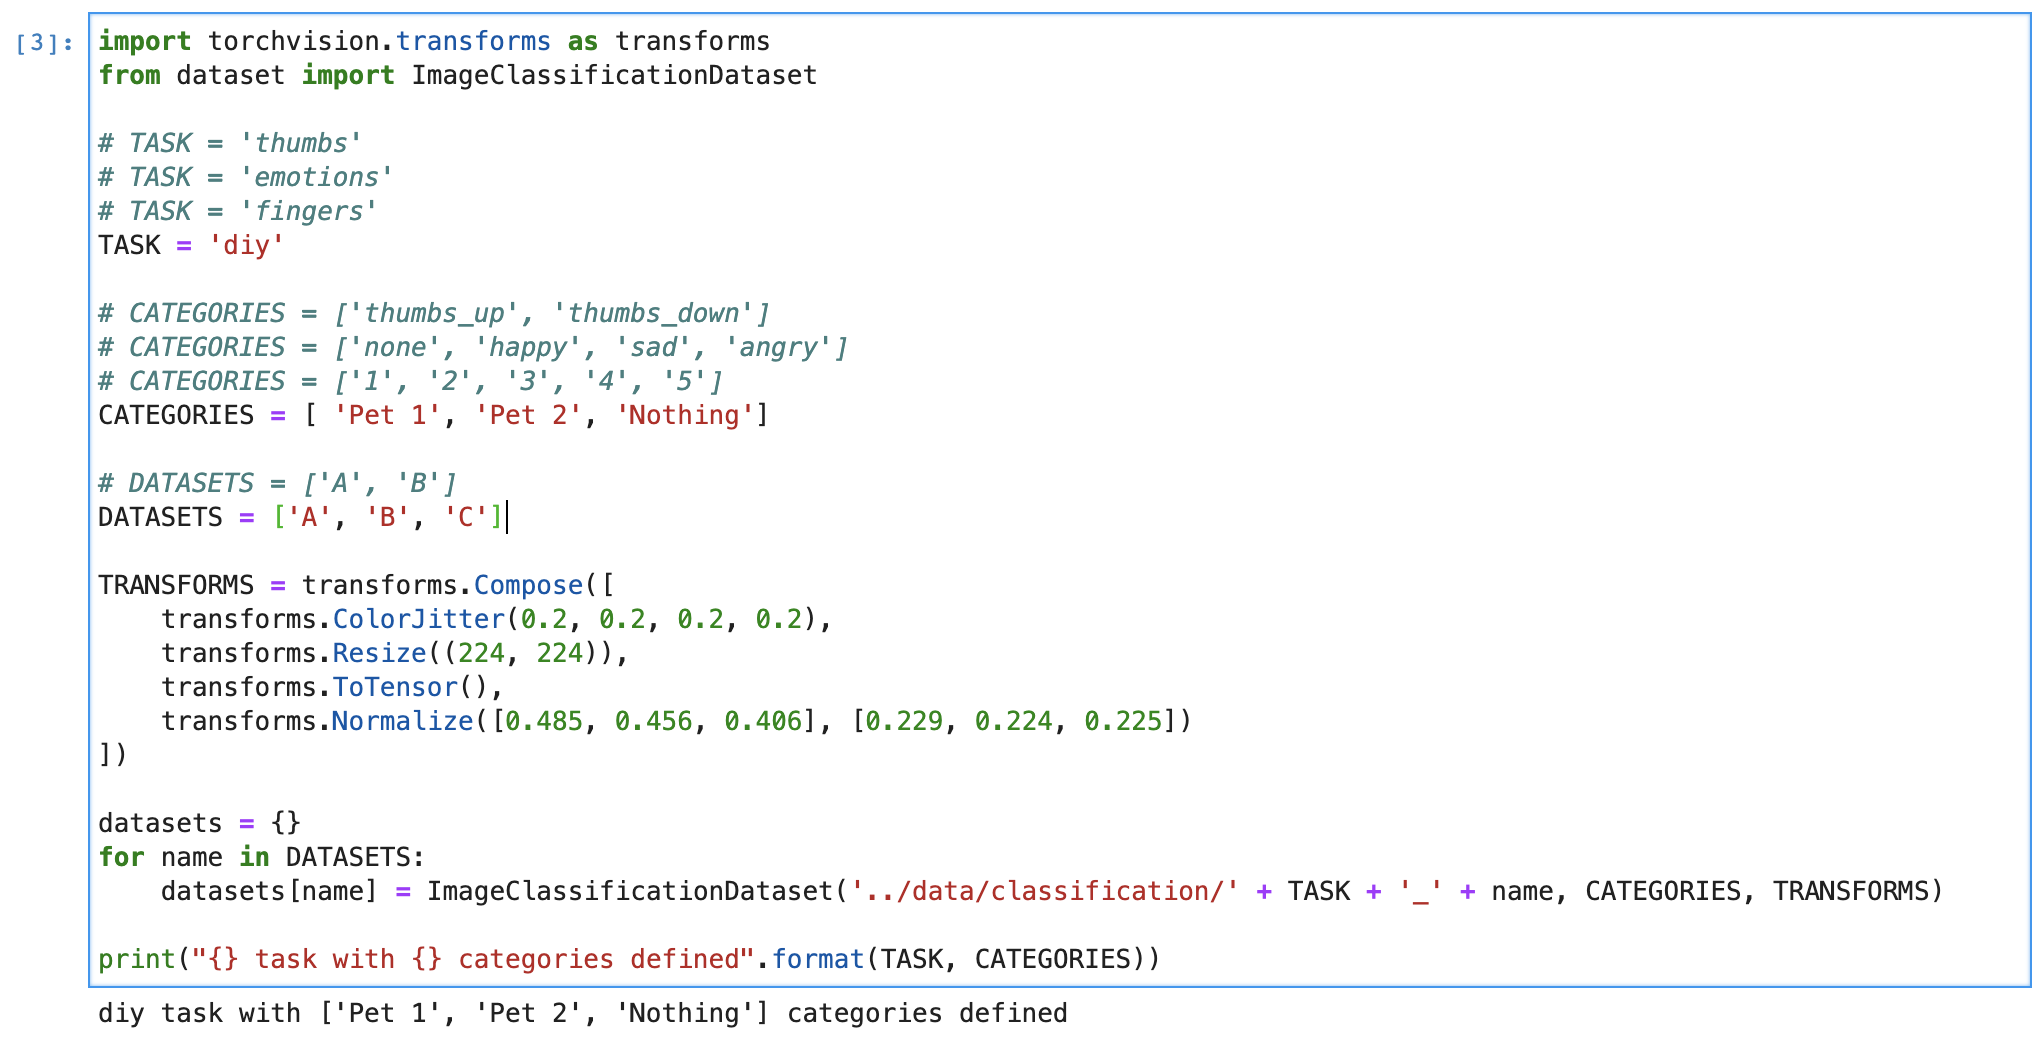
Within JuptyerLabs, go into the classifications folder and open up the classification_interactive.ipynb file. This notebook is a template of sorts for data collection, training, and testing with the Jetson Nano and camera; the DLI Course already has a few examples laid out for you to play with, like determining if your thumbs are up or down, your emotions, how many fingers you're holding up, or your own DIY task. However, no matter which dataset you are training, the data collection and model really remain the same, it's just the content of the data that is changing. Start off by running all of the code blocks up until the Task section.
Things start to change within this notebook once we get here. We'll comment out the task of 'thumbs' and instead call the 'diy' task. Similiarly, the categories will change from 'thumbs up, thumbs down' to the last category of diy. It is here that you'll make the decision of who you want to create this food bin for. In Derek's example, he just did himself, 'Derek', or 'nothing', which is two categories. If that's similiar to your case (you could replace 'nothing' with someone else's name), then fill in the category names and keep the datasets set to two variables. If you're in a situation with two pets and yourself, fill in the variable names, and then uncomment the datasets option with three variables. Now you can run the code block. Here's an example of how it could look:
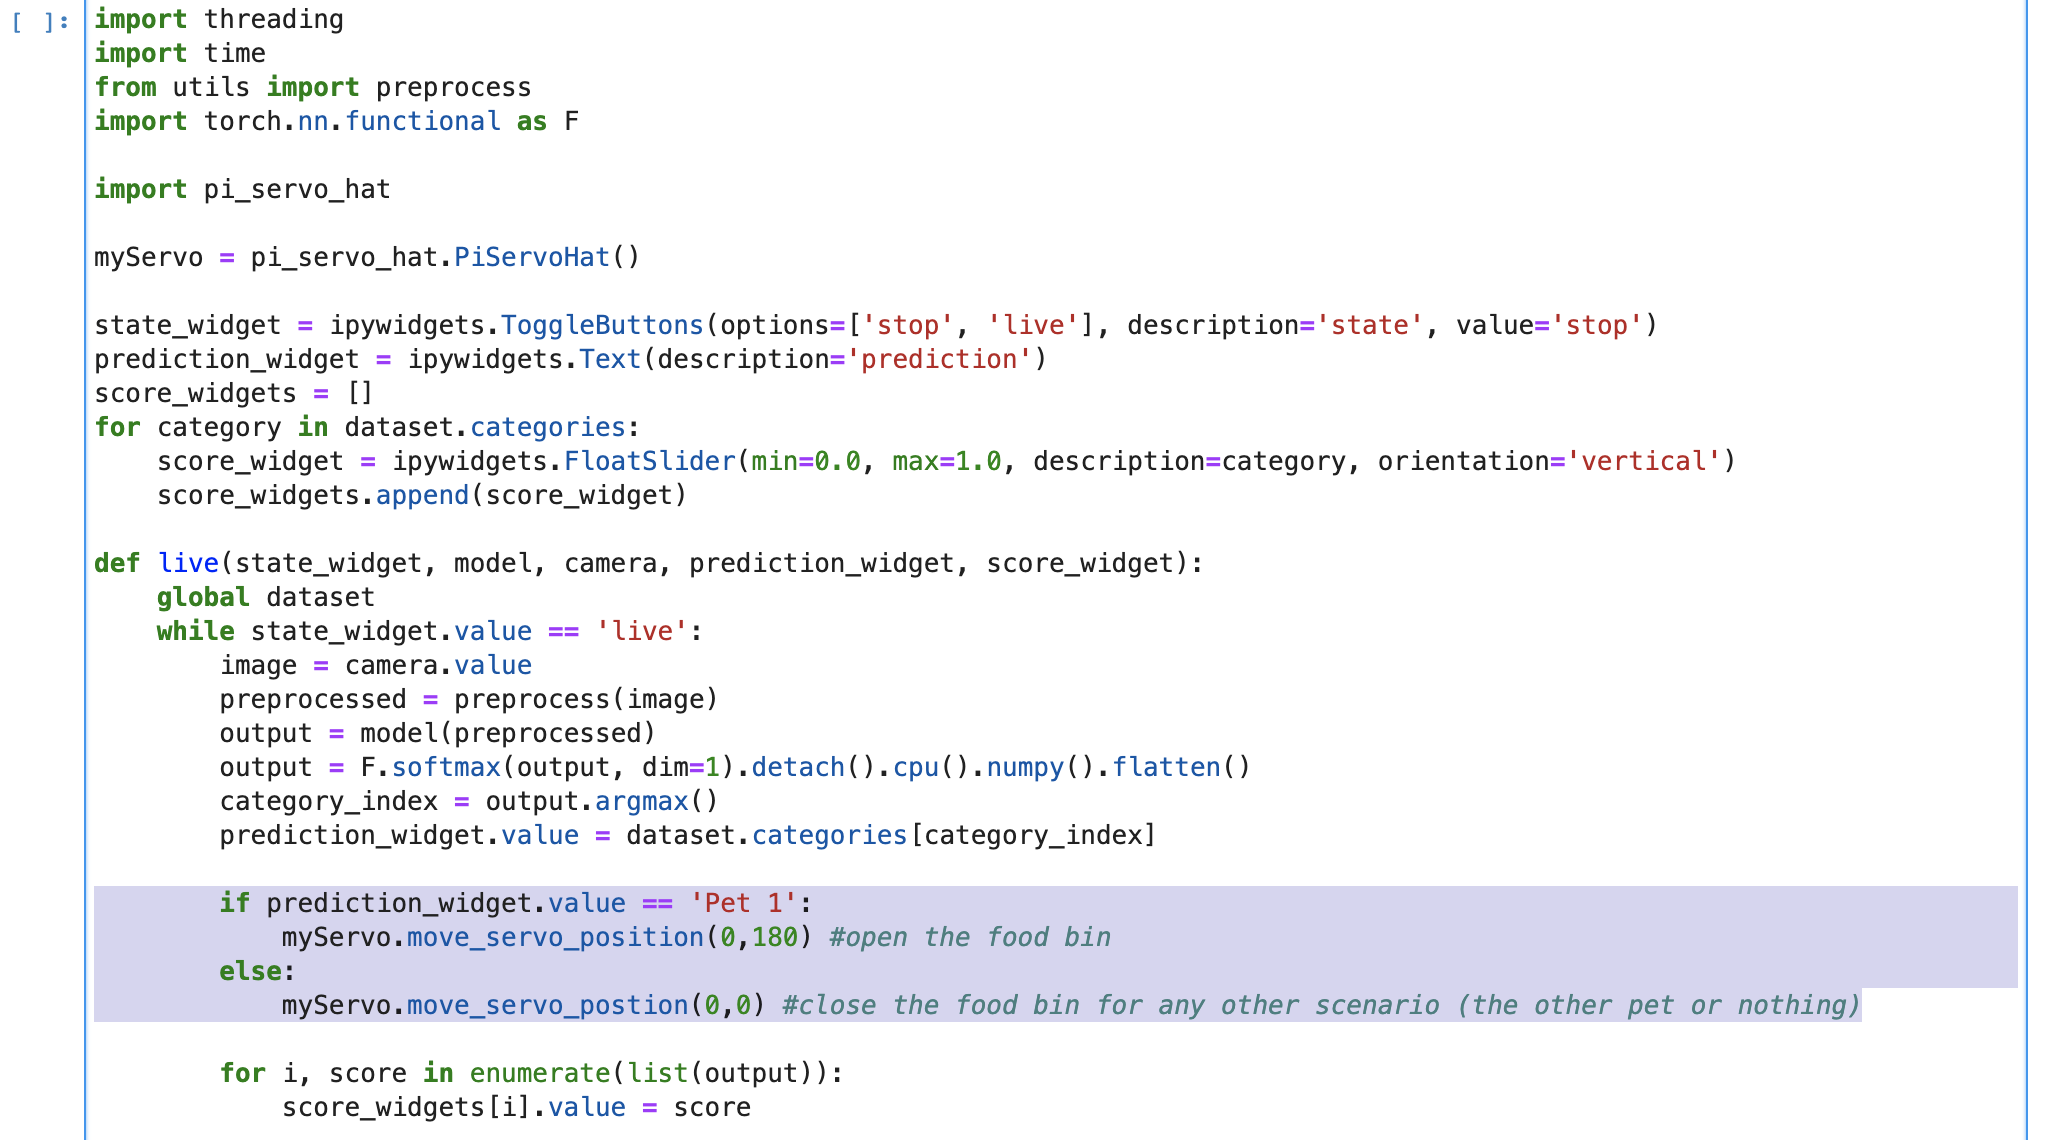
Since we're not changing the model itself, we can keep going down until we hit the Live Execution code block. It's here that we can actually call the servo to move based on who is in front of the camera. Firstly, we'll add the pi_servo_hat library underneath the other library imports. Then, under the live function, we can add the following code to move the servo depending on what the who is in front of the camera in real time.
if prediction_widget.value == 'Pet 1':
    myServo.move_servo_position(0,180) #open the food bin
else:
    myServo.move_servo_position(0,0) #close the food bin
Since only one pet/human is allowed into the food bin, the else statement covers all other scenarios where either nothing is presented or the wrong person/pet is in front of the camera.
Once you run all of the code blocks, you'll find the interactive tool ready for use. Click on the category you'd like to train (pet 1 or pet two or nothing), and start adding photos of that specific category. The more the better, but shoot for at least 100. Try to get all angles and all situations, maybe that means a dog with or without a collar, before and after going to the groomer, etc. Continue doing so with category you have.
Next is to decide how many epochs, or cycles through the full training dataset, you will need for an accurate application. There's actaully an interesting issue when training machine learning models on sample data called overfitting. Overfitting is when too many epochs are used, and the training model learns patterns that are too specific to the sample data, and therefore perform with less accuracy with real world data. Mess around with how a lower number and higher number of epochs change the way your model reacts to real world inputs, but for now, let's do 5 epochs.
And that's about it, you're ready to train the model! Once trained, you can test how accurate it is by showing the camera real world data, like your face or your dog's face. When you show input of the category you set to open the food bin, it should do exactly that. Now nobody can get your skittles, they're all for you!