Machine Learning @ Home Kit Hookup Guide
 asassy
Software Overview and Setup
This section is going to walk you through getting up and starting from a software perspective. With the advent of the Nvidia Jetson 2GB also came the use of Docker and its Containers as a way to manage different OS images rather than having to burn different OS images to microSD cards and swap them out as needed.
For those unfamiliar with Docker Containers, they are portable units of software that combine an application and all of its dependencies (code, runtime, system tools, system libraries, etc.) into a single package that is agnostic to the host OS. In other words, regardless of its environment the application will always run the same. This removes the need to build complex environments from scratch repetitively and simplifies the process of deploying applications.
For a quick start, we can just burn the basic OS to a microSD card, download whatever containers we need for what content we are working with, and then open those containers. The process is a little different and new for those who are used to managing SD cards for the Raspberry Pi or other single board computers, but it is an improvement and much more efficient in terms of time.
This section is a little long, but the setup is a crucial part of getting your first home automation project up and running! So take your time getting all of the settings configured correctly.
NVIDIA Jetson Nano OS Image
With all of the container talk, we still need a base operating system. You can find the most up-to-date image from Nvidia for the Jetson Nano here.
Once you download it, you can write the image to your microSD card by following Nvidia's instructions according to your computer’s operating system: Windows, macOS, or Linux.
Setup and Boot Through Display or Headless
You can load the OS Image and setup your Jetson Nano one of two ways: with a display, keyboard, and mouse attached, or in headless mode via a connection with another computer.
If you choose the first method, simply insert the microSD card, and connect the display via HDMI and power via USB-C, as well as the keyboard and mouse via USB. The Nano will boot up - it might take a few minutes - and will lead you to a configuration window. This will guide you through choosing a time-zone, a keyboard language, and setting up a user profile.
Setting up through headless mode is quite similar...you'll still connect the power via USB-C and insert the microSD card, but instead of connecting a display, mouse and keyboard, you'll connect the Micro USB-C to your computer. Using a terminal application (PuTTY is popular for Windows, Serial for Macs), you can communicate with the Jetson Nano through USB serial communication.
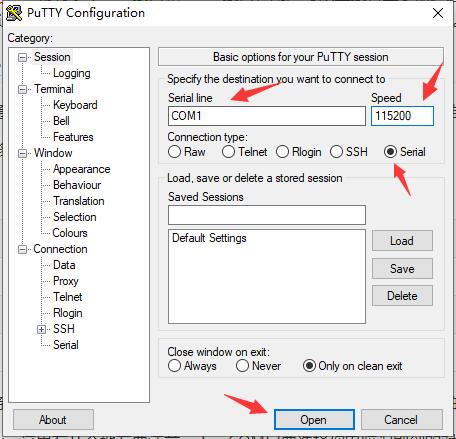
If you use PuTTy, you'll have to go to the device manager in Windows and look for Communication Ports to determine which port the Jetson Nano is running under. If you aren't able to find the Communications Port, go to the Action menu within the Device Manager, and then select Add legacy hardware. You'll continue through the menu by clicking next, which will take you to a list of hardware that cana be installed. Select Ports (COM & LPT), continue on clicking next (the Standard port types option will work), and you'll be finished. Within puTTY, enter the COM port number, and set the speed to 115200.
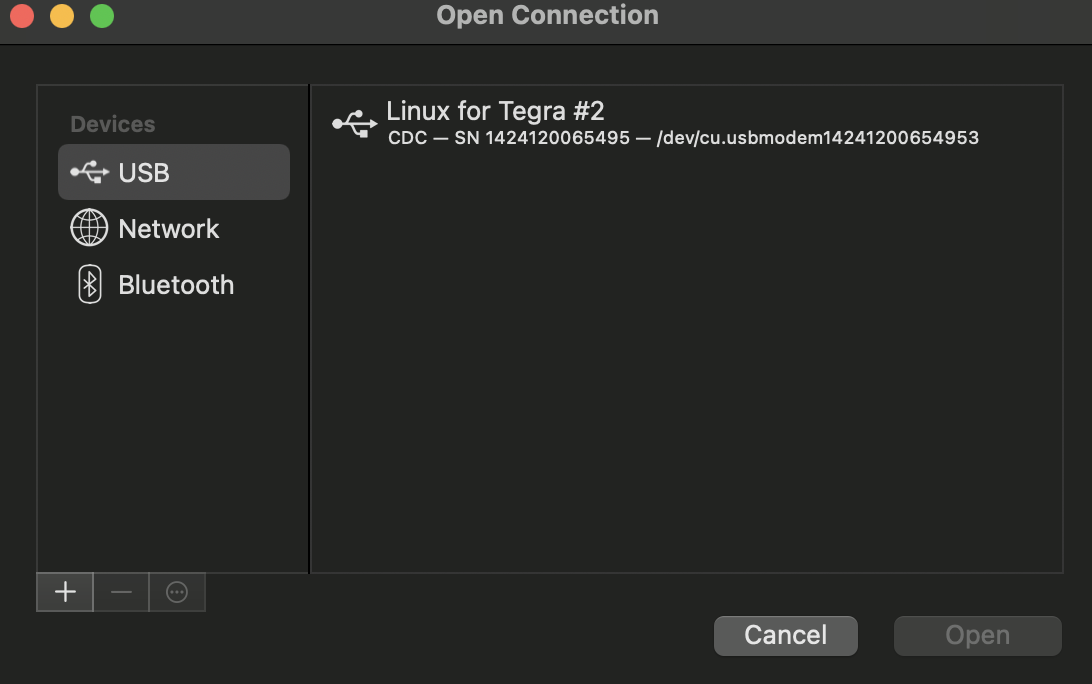
If you use Serial, the device will show up within the USB tab, and you'll be able to double click on it to enter the Nano's terminal. Remember to press enter once in the terminal to prompt it to ask you user/password settings, otherwise the cursor will just blink.
Within the Nano's terminal, through whichever method you communicate through USB serial, the Jetson Nano will prompt you with the same configuration setup as it did when connected to the display. It will just be done through the command line versus through a GUI.
Network Settings
Unfortunately, the Jetson Nano does not come equipped with Wifi, but we need it to access the DLI course Docker Container and JupyterLabs. There are a few ways to connect to WiFi - at first glance, it's obvious that the Nano comes equipped with an Ethernet port, so you can connect to your personal network by simply using an Ethernet cable.
However, it's likely you'll want to use the Jetson Nano wirelessly, and the easiest way to go about that is using a wireless network adapter that plugs into the USB port, like the Edimax adapter we carry here. These adapters just work smoothly; in most cases there are no additional drivers to install or setup to go through (and if there are drivers to install, we've written a tutorial on how to do that). Once the USB is plugged into the Nano, the device just automatically recognizes it, and you can go about selecting your network.
If you are using a 2GB and a separate display, connection through the WiFi dongle included should be straightforward using the GUI and selecting your network during setup.
If you are operating your Jetson Nano through headless mode, you'll have to use the command line to connect to the network. We'll start by using the following command:
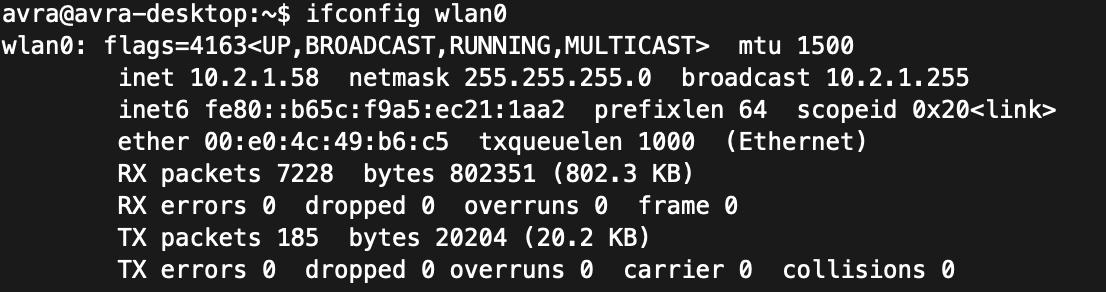
ifconfig wlan0Enter
ifconfig stands for interface configuration, so it allows you to setup the network interfaces of the Nano. wlan0 is the name of the first wireless network interface. This will tell us the status of wlan0 - if the Wifi adapter dongle is not properly plugged in or working, you won't see the status like shown below.
Once we know the adapter is working and the device has the capabilities of connecting to a network, we can list all of the possible network connections by typing the following command, which calls the Network Manager:
nmcli dEnter
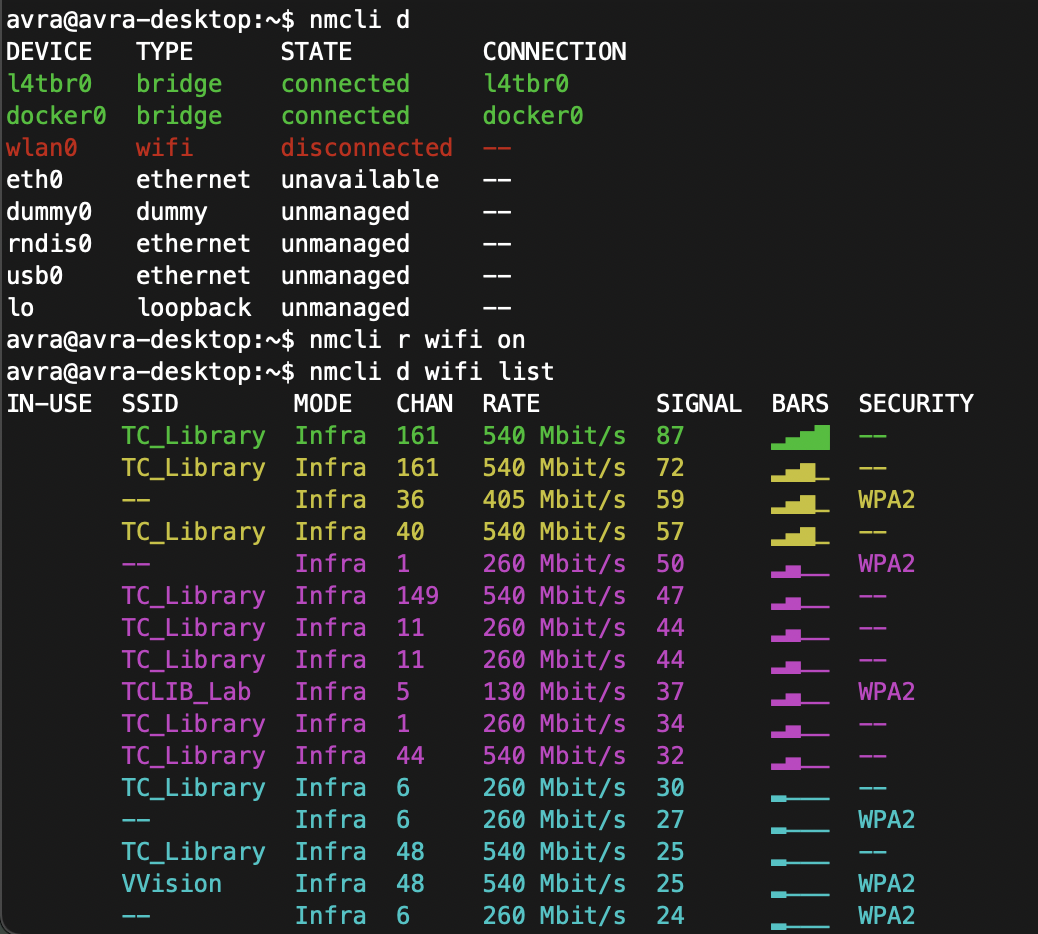
As seen below, the wlan0 device is not connected to anything. So, to connect to my network, we'll have to first ensure that the WiFi module is on by using the following prompt:
nmcli r wifi onEnter
And then we can scan the list of visible WiFi networks as well as their signal strenghts, data rate, channel, security, etc.
nmcli d wifi listEnter
Once you see the wireless network you want to connect to, type the following command, and remember that both the SSID and password are case sensitive.
sudo nmcli d wifi connect [SSID] password [PASSWORD]Enter
If the WiFi is public and doesn't have a password, then the following command works for connecting:
nmcli --ask dev wifi connect [SSID]Enter
Finally, you can check that you are connected by prompting the Network Manager to show you all of the active connections:
nmcli con show --active

If you run into issues, refer to the tutorial we wrote that has references for getting unstuck.
Download and Install the DLI Course Container
Once you have your Jetson Nano up and running and the basic configuration complete including connecting it to your personal network, either through WiFi or Ethernet), open a command prompt and type the following command to download the DLI Course container that we will use as our starting point and then add to it as we go!
docker pull nvcr.io/nvidia/dli/dli-nano-ai:v2.0.1-r32.6.1Enter
The container will take some time to download. It is a good time to grab some coffee, watch some YouTube videos or take a nap!
Launch the DLI Course Container
When the container image has completely downloaded you will again gain control of the command prompt. Once you do you can launch the container by typing the following command into the prompt. Make sure to have your USB camera plugged in at this point.
sudo docker run --runtime nvidia -it --rm --network host --volume ~/nvdli-data:/nvdli-nano/data --device /dev/i2c-1 --device /dev/video0 nvcr.io/nvidia/dli/dli-nano-ai:v2.0.1-r32.6.1
Notice that it is one command that is run on one line - you should run it altogether. NVIDIA does a good job of explaining the command that runs the Docker container and JupyterLabs inside of it:
- --runtime nvidia will use the NVIDIA container runtime while running the l4t-base container
- -it means run in interactive mode
- --rm will delete the container when finished
- --network host allows the container to use your Jetson host network and ports
- --volume defines a mounting directory, and is used to share the persistent data files and the USB camera between the Jetson host and the container
- --device allows access to the video device
This command will start a personal JupyterLab server in a local Docker container. Since you'll be using it whenever you want to build applications, which presumably is often, I recommend creating a Bash script using the nano text editor so that you don't have to go looking for the command each time, you can just run the script. If you'd like to do this, open a text editor like nano (you can always install it using sudo apt install nano), copy and paste the command above, and save the file with a .sh extension. You'll need to set execute permission on your script using the chmod command chmod +x script-name-here.sh and then you'll be able to run your script anytime you want by using ./script-name-here.sh.
If you have run the DLI Course container before, you may notice that this command has been slightly changed from the previous version you find in the course materials. We added a device flag addition for /dev/i2c-1. This option gives the container access to the i2c-1 bus that all of your SparkFun Qwiic Boards will connect through. Without this flag you would get a bunch of errors when you start trying to work with the different boards in your kit.
You'll know that the DLI Course Container is launched and successful when it shows the following message:

Copy the url (which is simply the Nano's specific IP address followed by :8888) and use the password dlinano to enter JupyterLabs. Notice that we already within the folder nvdli-nano, which gives us access to the DLI-Nano Notebooks directory.
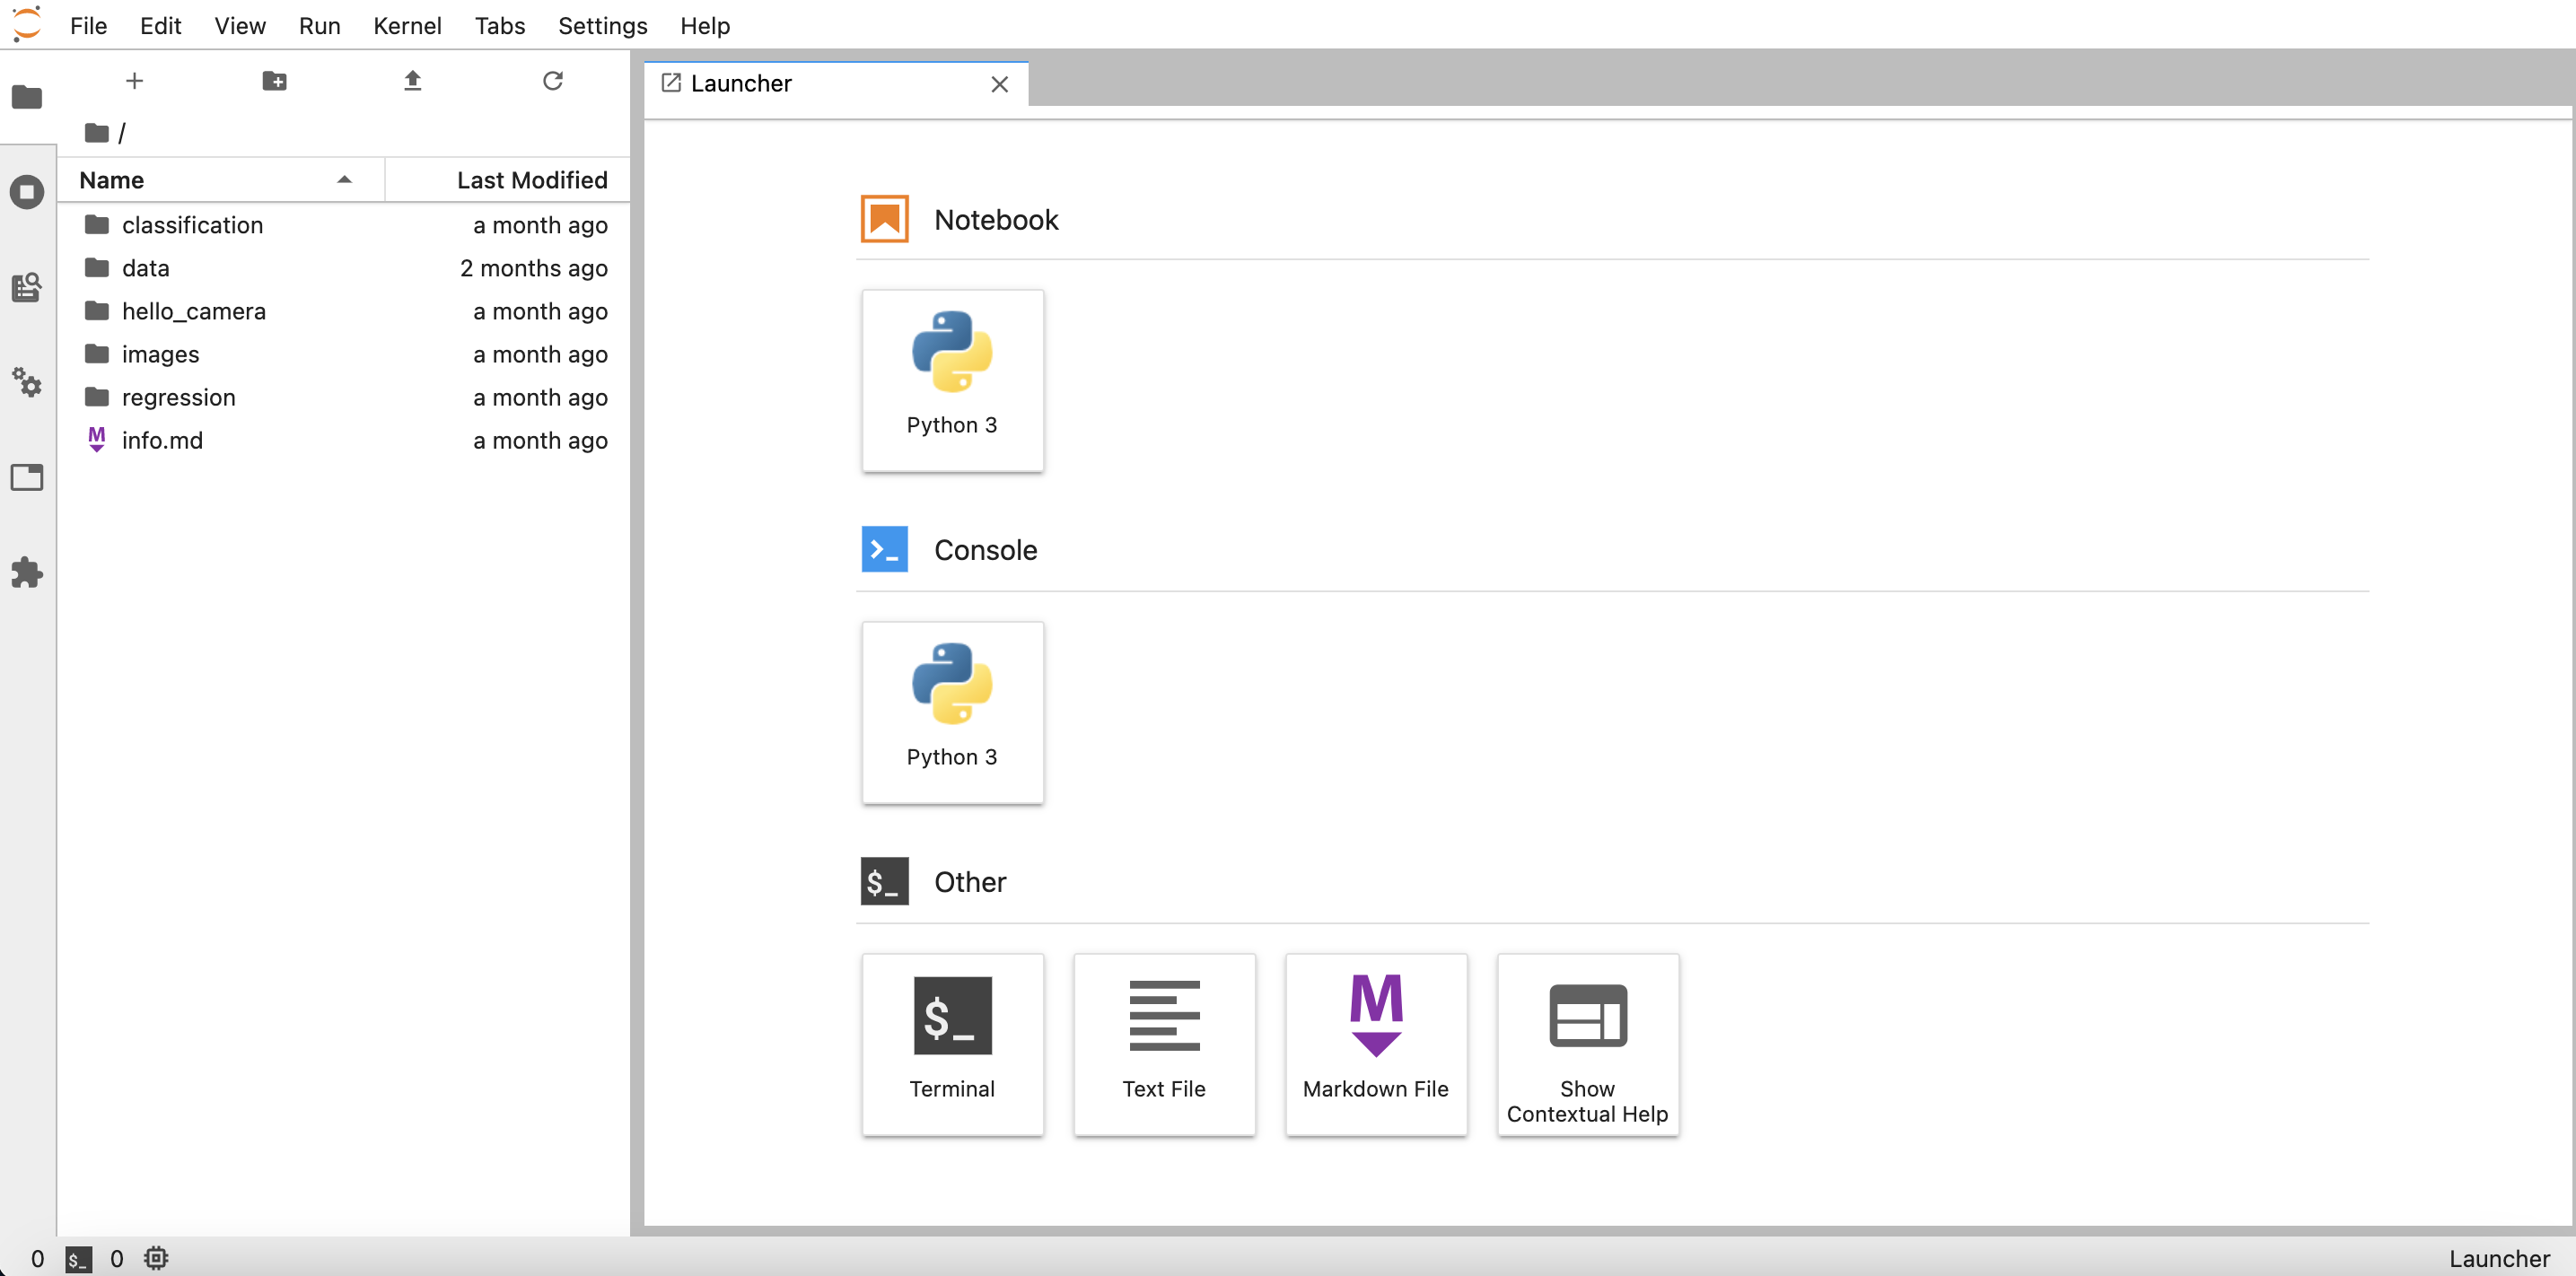
Navigate JupyterLab
Welcome to JupyterLab! JupyterLab enables you to arrange your work area with notebooks, text files, terminals, and notebook outputs. The main page will provide you with options to start from scratch and create your own Python 3 Notebook or Console, as well as open a terminal tab or create a Markdown file. And, because we loaded the DLI course image onto the Nano, we have access to all the associated course documents and examples, as seen in the file directory.
Once you are logged into Jupyter Notebooks you will need to open a new terminal window to download the Jupyter Notebooks for the Qwiic Boards as well as install the Qwiic Python libraries.
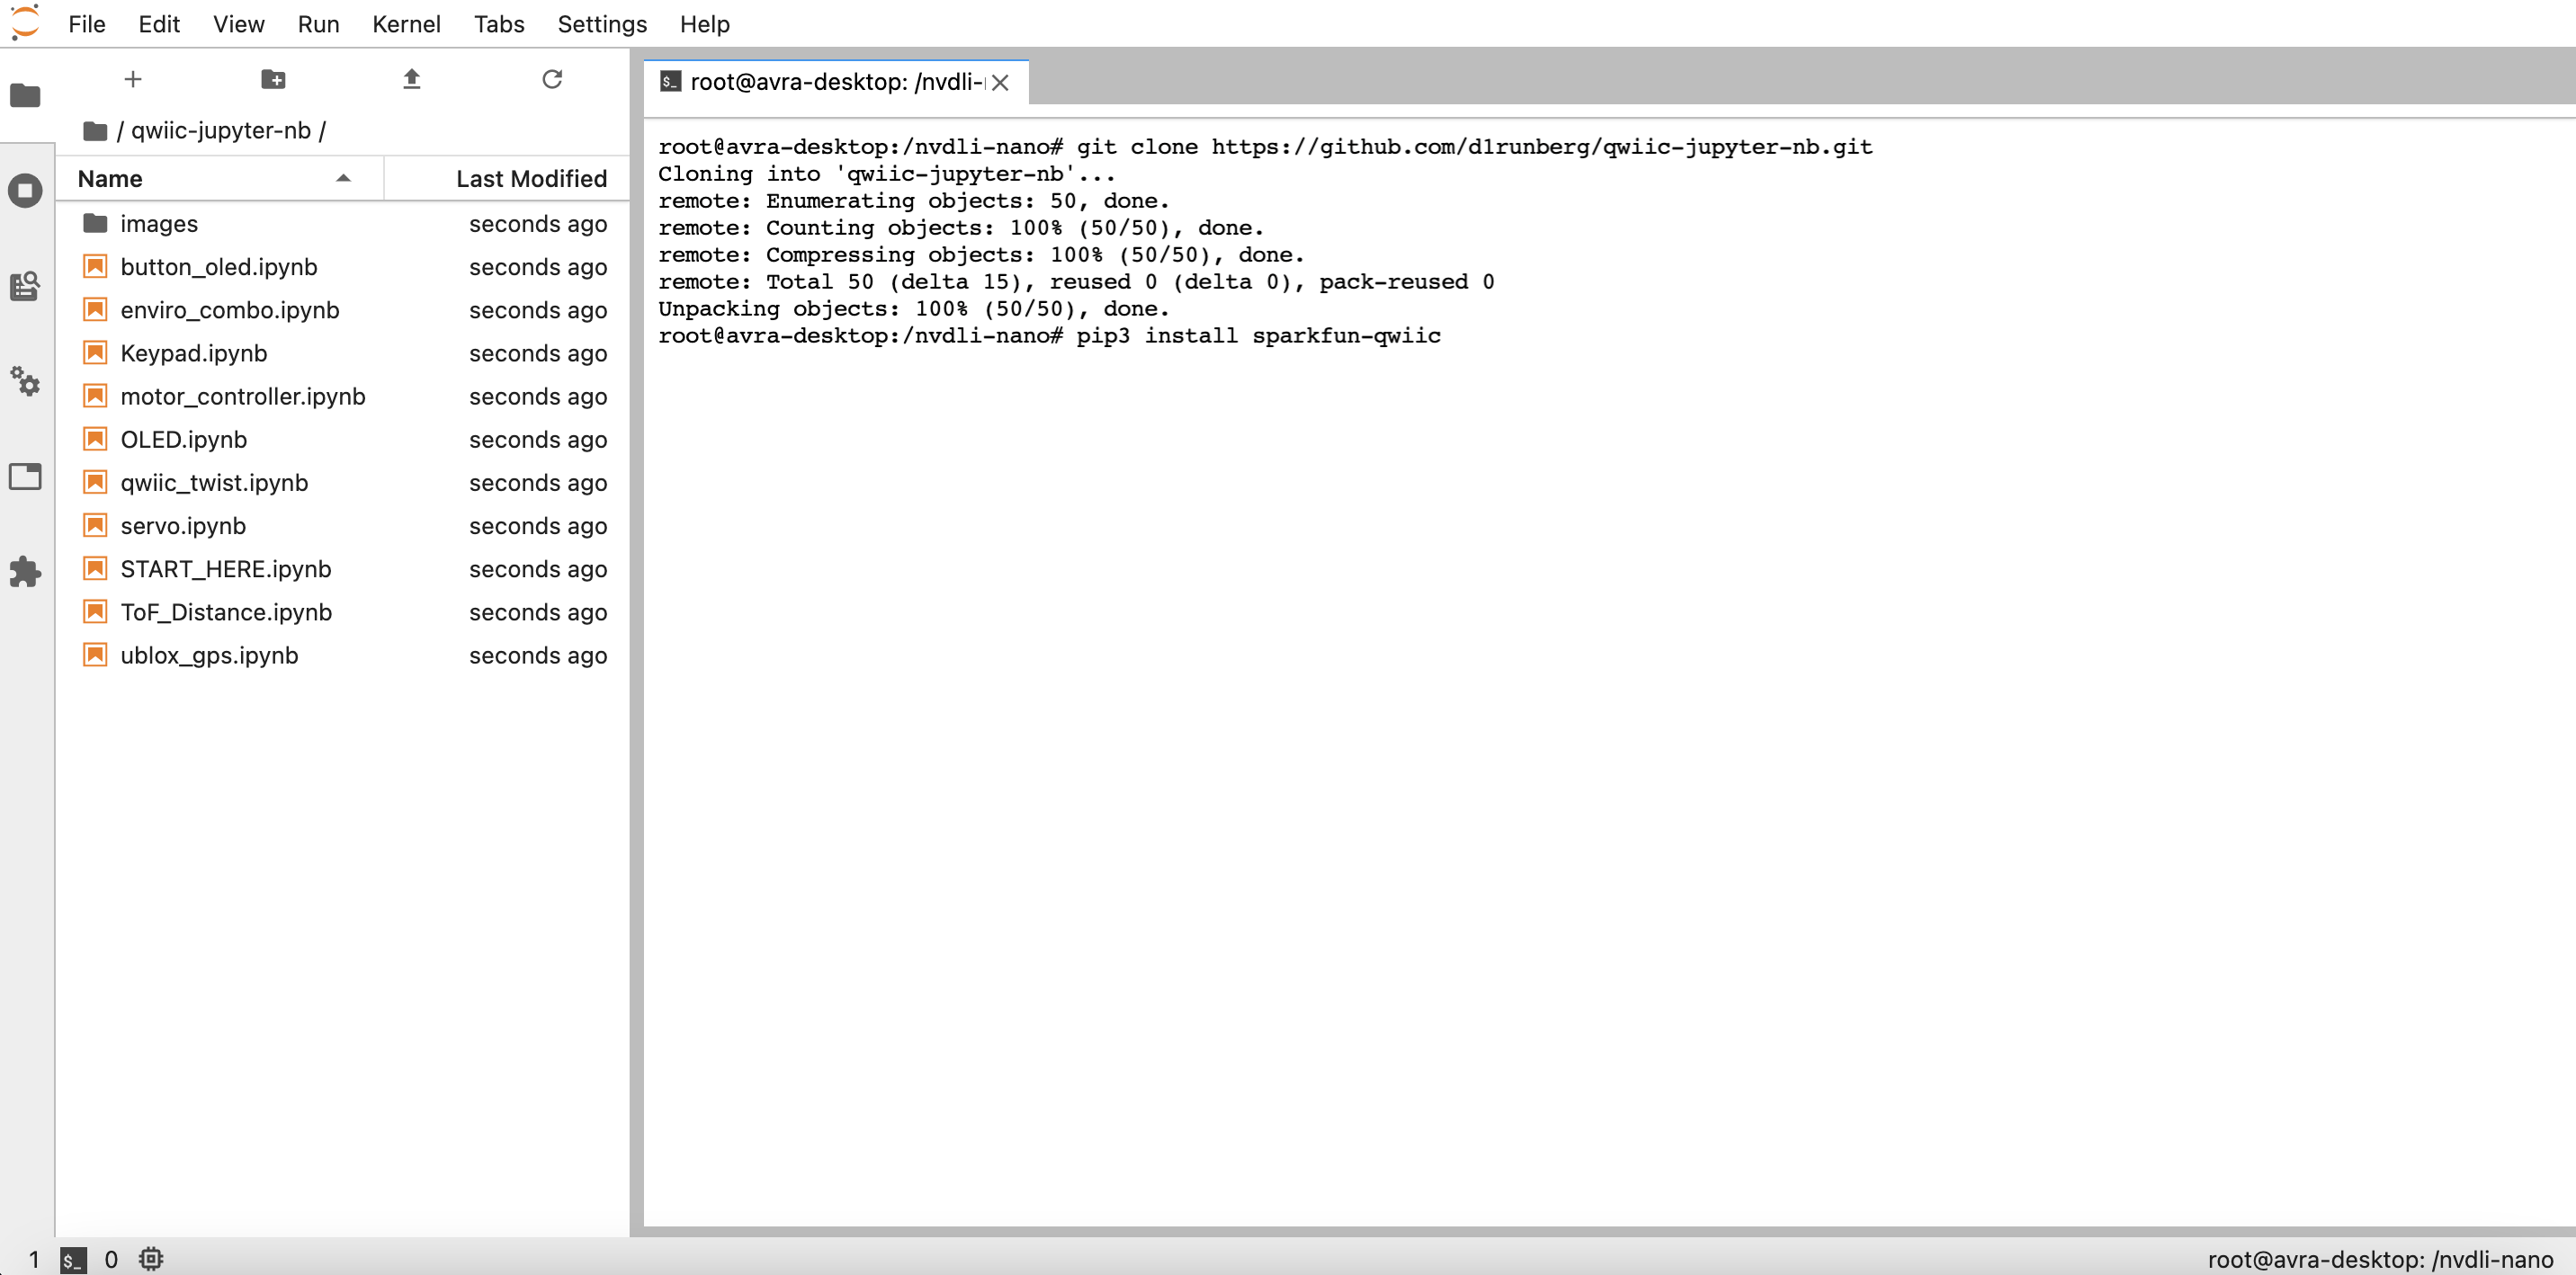
Once you open the terminal window from the Launcher window, you can download the SparkFun Qwiic Jupyter Notebooks from GitHub with the following command:
git clone https://github.com/d1runberg/qwiic-jupyter-nb.git [Enter]
This command will download a folder with the contents of our Jupyter Notebooks as well as the assets required to display images, etc. You should now be able to see the SparkFun Qwiic Notebooks directory in the directory tree on the left side of JupyterLabs!
Once the SparkFun Qwiic Notebooks downloads you need to install the Qwiic Python libraries before digging in and using them.
Installing Qwiic Libraries
With the terminal window in Jupyter Notebooks still opened you can install the SparkFun Qwiic Python libraries through pip by typing the following command:
pip3 install sparkfun-qwiic[Enter]
This will install the entire Qwiic Py package with libraries for the Qwiic boards that are supported in Python.
Once the installation is complete, you should be good to go and can close the terminal window.
You're officially good to go to start developing applications! Remember, the container we opened is built to delete the container when finished, so if you were to close down JupterLabs as is right now, you'd lose the Qwiic Jupyter Notebooks and Qwiic libraries that you just downloaded and installed.
You can work with nearly any Qwiic device that has a python library, which means you can extend your project well beyond the scope of the Machine Learning Kit. Before you jump into the deep end and working with machine learning, make sure you're well accainted with just running an example with a Qwiic board in JupterLabs.