LuMini 8x8 Matrix Hookup Guide
 Englandsaurus
Hardware Assembly
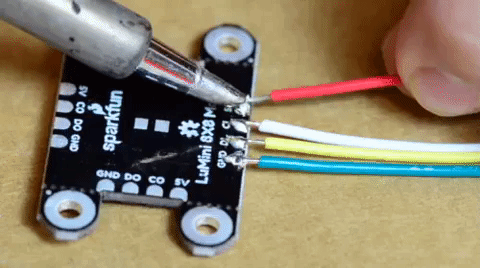
Soldering to the LuMini Matrix
Soldering wires to the pads on the LuMini Matirx is pretty simple. The trick is simply to pre-solder both the pad and wire before attempting to solder the two together. Then, press the wire onto the pad and solder away! Check out the below GIF if you're a little confused.
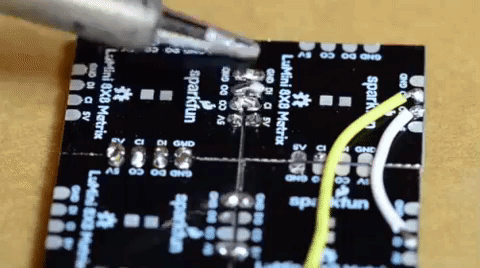
Choosing Pins
The APA102 LED is controlled on an SPI-like protocol, so it's generally good practice to connect CI on the LuMini Matrix to SCLK on your microcontroller, and connect DI to MOSI. However, This setup isn't required, and you can connect data and clock up to most pins on your microcontroller. Go ahead and determine which pins you will use, and solder your Data and Clock lines into your microcontroller.
Connecting to a SparkFun ESP32 Thing
In the examples below, we will be using a SparkFun ESP32 Thing. For the hardware connections, the 5V line is connected to the VUSB pin, GND is connected to the GND pin, DI is connected to pin 16, and CI is connected to pin 17.
Pin connections to SparkFun ESP32 Thing for examples below. Click image for wiring on the matrix panel.
Creating a Larger Installation
Now that we know how to solder to these pads, we can start making a grid of LuMini Matrices, or even tie them to other APA102 based products. To do this, all we'll need to do is solder CO and DO of one matrix panel to the CI and DI of the next matrix panel. Below, is an image multiple matrices soldered together to make a larger display.
Troubleshooting Tip: The standoffs mounting points can be clipped with a pair of dikes (diagonal wire cutters). You may need sand or file the edges square, since the diagonal cutters will leave a rough edge.