Logging Data to Google Sheets with the Tessel 2
 D___Run___
 Introduction
My family just became the proud new owners of an upright piano. This piano was owned by my wife's grandmother and is somewhat of a family heirloom. It comes with great emotional value, and it's only natural that we want to take care of it. After moving the piano into our house (not an easy task), my wife made the important call to "the piano guy" to talk about tuning it, cleaning it and general care.
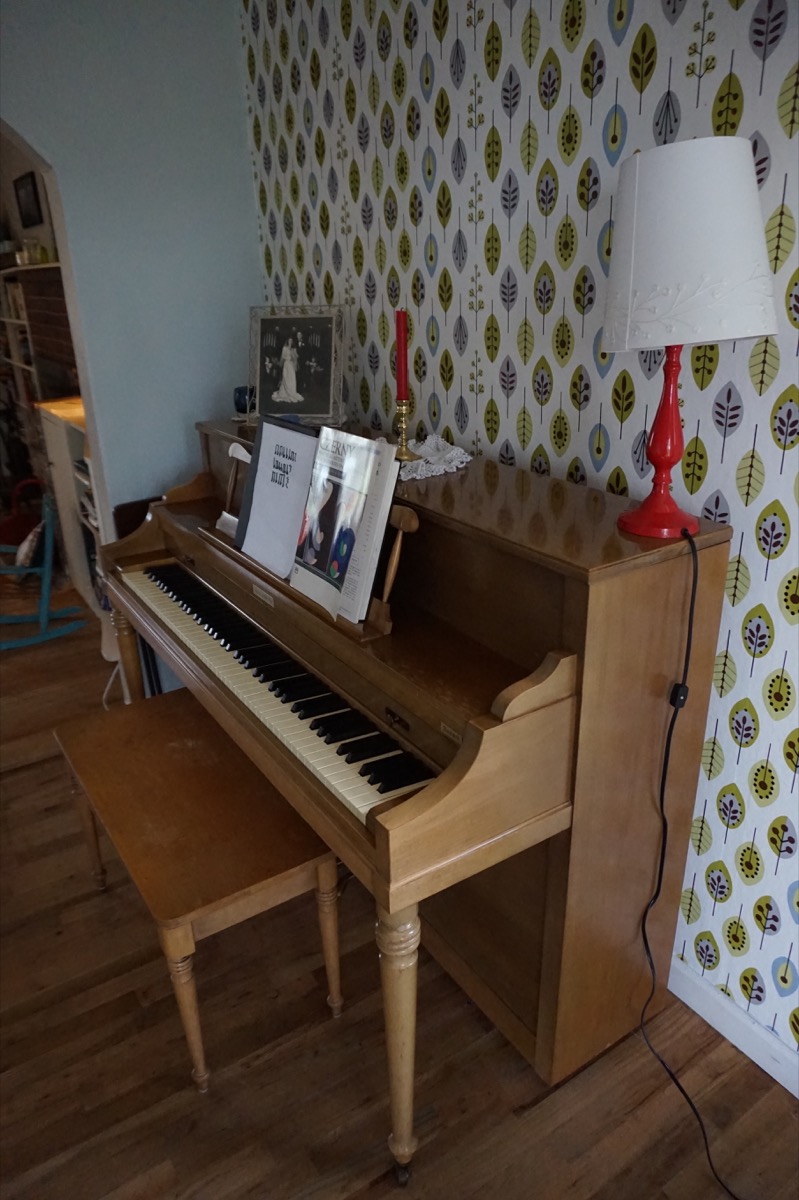
I was sitting close by and overheard the mentions of "temperature swing" and "humidity range." If either fell within a certain range, the piano would need to be placed in a certain spot in the room versus another. Upon hearing this, a smile crept across my face, recognizing the birth of a new project. In fact, my wife literally told the man over the phone, "Temperature range? My husband can take care of figuring that out for you, and we will let you know." He is going to get more than he bargained for!
Thus, I set about using the Johnny-Five Inventor's Kit to log the temperature and humidity of the room.
Logging is Never a Question of Why, but How!
Collecting data in a reliable and useful way is always a challenge. When it comes to embedded electronics/computers, the challenge is not so much a matter of collecting a large volume of data as it is the challenge of storage size, formatting the data output and post processes.
This tutorial will focus on collecting data using a Tessel 2 and a single sensor that comes in the Johnny-Five Inventor's Kit to monitor and log the air temperature and humidity in the piano room in my house.
As you will see in this project, managing data collection, formatting that data and processing it can be simplified by using Node.js and leveraging the huge community that supports it through its package manager called NPM.
We will look at two different ways to log this data, format it and bring it into Google Sheets to be able to graph it and share it easily with others.
More Than One Way to Skin a Cat
As with any electronics project, there is more than one way to do this! We are going to look at two different approaches to accomplish the same task using the Tessel 2. The main difference between the two methods being whether or not you have a WiFi/network connection.
This has been written as a "choose your own adventure" of sorts when it comes to the firmware for this project. One way is to use the file system and a USB drive; the other is to use an IoT service called IFTTT. Each script has its own section that will break down the code for you, and then we will tie up any loose ends.
Internet-Connected Method
If you have a connection to a the internat, either through WiFi or Ethernet, you can use the node module for If This Then That (IFTTT) to build an IFTTT recipe to send data to a Google Sheet using the Maker Channel. This is the preferred method if you are in a situation where you have network connection, as you will be able to view the data from your Google account in real time and see changes almost immediately.
Local, Offline Method
The second way to do the same thing but with a little more work on your part, is to set up the Tessel 2 to log the data to a USB mass storage device and then periodically pull the data from it and manually add it to a Google Sheet. This is obviously more work on your part, but in cases where there is poor or no network connection, it's a great alternative.
Hardware Overview
Required Materials
We designed this project so that you could build it from the Johnny-Five Inventors Kit, which includes everything you will need with the exception of a USB mass storage device. Almost everyone has a "thumb drive" laying around, and this is a perfect use for it. If you don't have one on hand, we have added a microSD card and USB reader to the parts list below. Either will work just fine!
If you don't have a Johnny-Five Inventors Kit on hand, here is a wish list of parts so that you can buy them all separately.
The Tessel 2
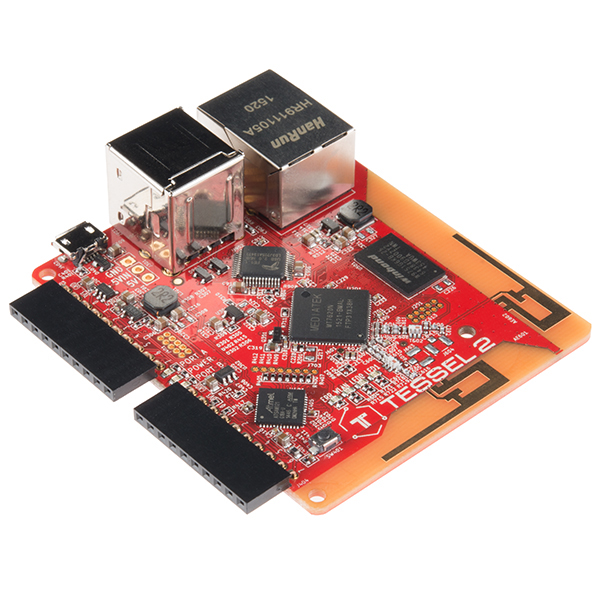
The Tessel 2 is an open-source development board. It runs JavaScript and supports npm, which means scripts to control it can be built with Node.js. It's a platform for experimenting, tinkering, prototyping and producing embedded hardware, perfect for the Internet of Things.
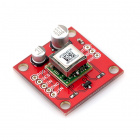
The BME280

The SparkFun BME280 Atmospheric Sensor Breakout is an easy way to measure stuff about the atmosphere around you: pressure, humidity and air temperature. All of this is combined into a petite package, called a breakout board.
The 3.3V breakout is power-efficient, using as little as 5µA (that's 1/1000000 of an amp!) when idling and less than 1mA when it's taking measurements.
In this experiment you will work with the BME280 to read the temperature, pressure and humidity of the room as well as your altitude based off of the atmospheric pressure. Finally, you will use your BME280 as the heart of a web-based weather dashboard application.
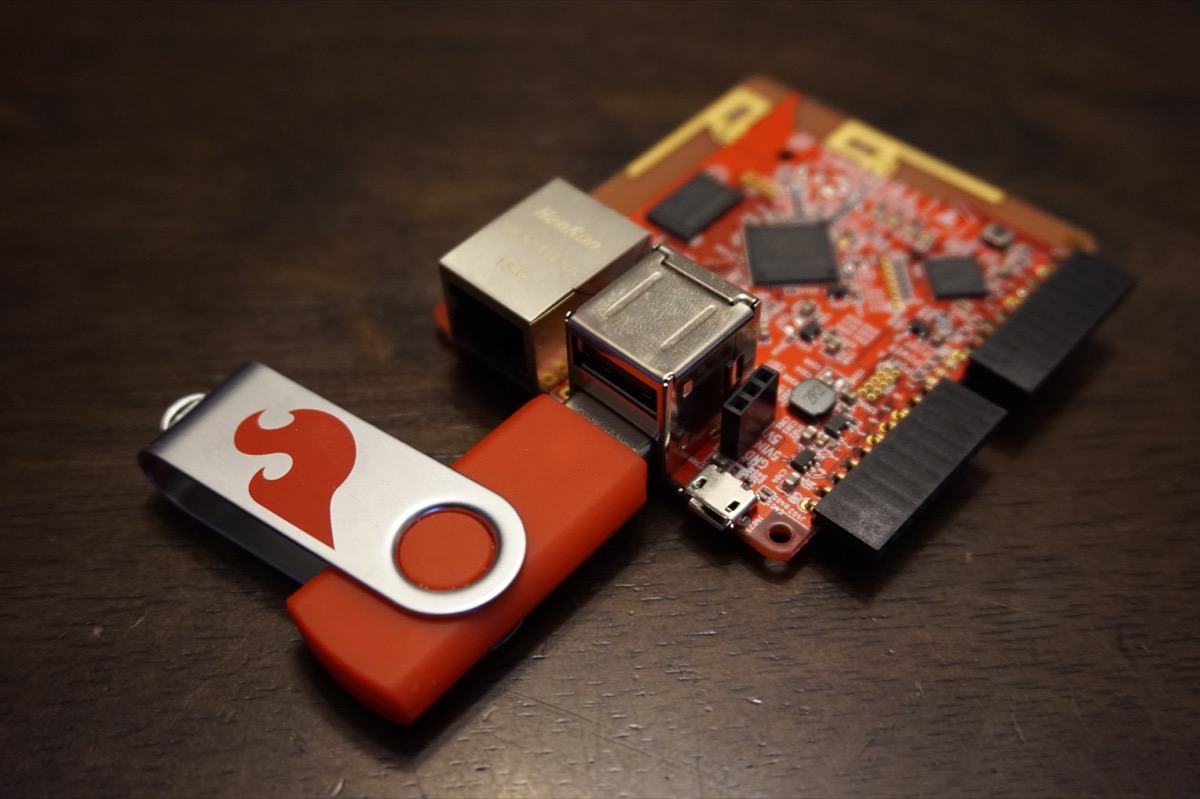
USB Thumb Drive

There isn't much to be said about these little storage drives. You can find one pretty much anywhere. For the purposes of this project, we would recommend one that is smaller so that handling the project and fitting it into an enclosure isn't cumbersome.
Preflight Check
If this is your first time using your Tessel 2 you will need to do a little setup first. Have no fear; it is relatively painless and shouldn't take more than 20 minutes or so to install software and get you up and running! Check out the Getting Started with the Tessel 2 Guide to walk you through the process of:
- Installing the required software to develop for the Tessel 2
- Installing the T2-CLI tool
- Setting up the Tessel 2
- Creating a project directory (folder)
- Running a blink script to make sure it is working
Getting Started with the Tessel 2
Node.js Native Modules and NPM
If you have had experience with the Tessel 2, then you know that it is programmed with JavaScript and the Johnny-Five framework to be able to control the Input/Output (I/O) on the board. If you have never programmed with JavaScript before or the Tessel 2, we highly recommend that you check out the Johnny-Five Inventor's Kit Experiment Guide for a more in-depth explanation and exploration.
To get you started with this specific project, let's create a project directory as covered in the preflight check and install all of the needed node modules that we will use. We can do this through our console by using these commands:
language:console
mkdir loggerProject;
cd loggerProject;
npm init -y;
npm install johnny-five tessel-io node-ifttt-maker;
These commands do the following in order:
- Create a directory (folder) called
loggerProject - Change directory, or move into
loggerProject - Initiate an npm project within
loggerProjectthat creates apackage.jsonfile. - Install the needed libraries, which in this case are
johnny-five,tessel-ioandnode-ifttt-makerusing npm install. These will be placed in a directory callednode_modules
With your setup complete, you are ready to set out on your new adventures of logging data!
Building the Circuit
Despite your method for logging the data, your circuit will be the same, with the exception of adding a USB storage device to one of the USB ports on the Tessel 2 for the offline method.
Build the BME280 Circuit
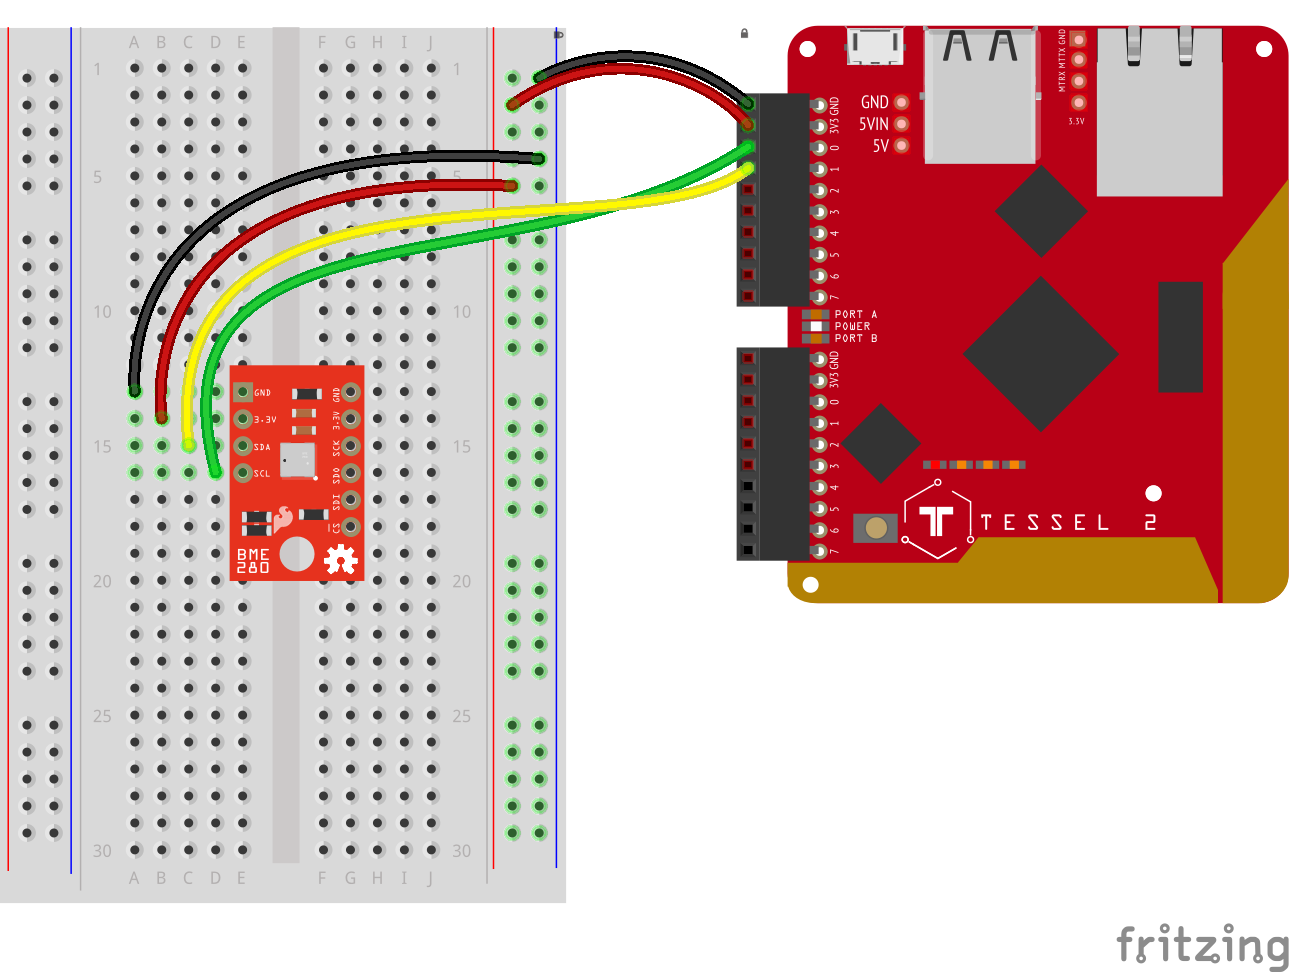
This circuit is faily simple. Attach the BME280 breakout board to the breadboard so that it spans the center notch. Connect the BME280's SCL (clock) pin to Tessel's Port A, Pin 0. Connect the SDA (data) pin to the Tessel's Port A, Pin 1. Connect 3.3V to the Tessel's 3.3V pin and GND to GND.
Testing the BME280
Before we move on to the larger project, let's take a second to test the BME280 to make sure it's up and running. From the command line, create a new file called bmeTest.js by typing the following command:
touch bmeTest.js
Open your favorite code editor, and navigate to your bmeTestjs file to edit it. Type—or copy and paste—the following JavaScript code into your bmeTest.js file:
language:javascript
var Tessel = require("tessel-io");
var five = require("johnny-five");
var board = new five.Board({
  io: new Tessel()
});

board.on("ready", () => {
  var monitor = new five.Multi({
    controller: "BME280"
  });

  monitor.on("change", function() {
    console.log("thermometer");
    console.log("  celsius      : ", this.thermometer.celsius);
    console.log("  fahrenheit   : ", this.thermometer.fahrenheit);
    console.log("  kelvin       : ", this.thermometer.kelvin);
    console.log("--------------------------------------");

    console.log("barometer");
    console.log("  pressure     : ", this.barometer.pressure);
    console.log("--------------------------------------");

    console.log("altimeter");
    console.log("  feet         : ", this.altimeter.feet);
    console.log("  meters       : ", this.altimeter.meters);
    console.log("--------------------------------------");
  });
});
To Deploy Code Over WiFi:
- Connect your Tessel to the same WiFi network as your computer t2 wifi -n[SSID] -p[PASSWORD]`
- Make sure that your Tessel is provisioned and shows up in your list of Tessels using t2 list. See the Hardware Installation and Setup for how to provision your Tessel if it doesn't show up in your list.
- Deploy your code using the
--lantag. Example: t2 run mycode.js --lan
Type—or copy and paste—the following into your terminal:
t2 run bme.js
What You Should See
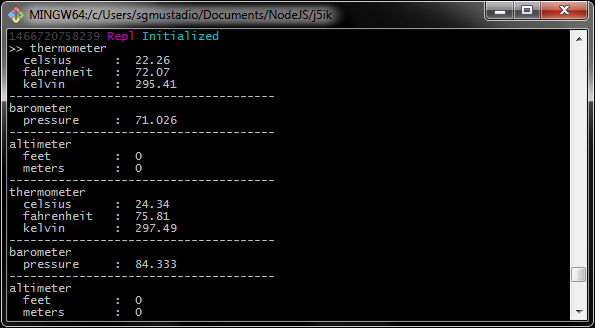
This is going to print a lot of data to your console, very quickly—so quickly that you likely won't be able to make sense of it! Go ahead and exit the program by typing Command-C or Control-C. This will stop the script so you can read the output.
Code to Note
Once the board has emitted the ready event, hardware inputs are ready for interaction, so the first thing that occurs is an instantiation of a Multi object. Multi objects represent two or more components, usually sensors, that are packaged together and exposed via a single register. Multi and IMU (Inertial Measurement Unit) boards that combine multiple movement sensors like accelerometers, gyroscopes, etc.) are very similar; the latter is used for non-motion-related packages.
language:javascript
var monitor = new five.Multi({
  controller: "BME280"
});
Now that we have a monitor Multi instance, the next thing to do is register an event handler to be invoked whenever changes are detected in the sensor readings:
language:javascript
monitor.on("change", function() {
  // ...
});
Within that handler, we're logging all of the relevant data properties for this multicomponent package:
language:javascript
console.log("thermometer");
console.log("  celsius      : ", this.thermometer.celsius);
console.log("  fahrenheit   : ", this.thermometer.fahrenheit);
console.log("  kelvin       : ", this.thermometer.kelvin);
console.log("--------------------------------------");

console.log("barometer");
console.log("  pressure     : ", this.barometer.pressure);
console.log("--------------------------------------");

console.log("altimeter");
console.log("  feet         : ", this.altimeter.feet);
console.log("  meters       : ", this.altimeter.meters);
console.log("--------------------------------------");
... which is a lot of data and will likely overwhelm the terminal, so be ready to type Command-C or Control-C to end the program.
OK, everything works! Let's now explore how to log all of this data!
Firmware: Logging Data with `fs`
Node.js has a number of built in-modules to keep your project as modular and streamlined as possible. You can find the whole list of the modules available to you in the documentation for Node.js. Since Node is so modular, you still have to require even the modules that are included in the core itself.
The module that we are going to put to good use for logging to the USB drive is the File System module, or fs for short. This module enables you to interact with, modify, add and remove files on your computer's file system (in this case your Tessel's).
The Concept
The functionality of this project can be explained as such. We want the Tessel 2 to do the following things:
- Create a
.csv(comma separated value) file on the USB drive. - Read the values from the sensors using Johnny-Five and store them locally as variables.
- Build a string that formats the values the way we would like them for easily importing into a spreadsheet.
- Append the
.csvfile with the logging string we created. - Rinse (set the string back to "") and repeat for the give
dataevent frequency!
First of all, let's head over to your terminal. In your working project directory, create a new JavaScript file called usbLog.js by entering the following command:
touch usbLog.js
The Code
You can now navigate to your new file in your text editor and copy and paste the following script into that file. Make sure you save after you have done that.
language:javascript
//require the file system module
var fileSys = require('fs');
//require the modules for hardware I/O
var five = require('johnny-five');
var t2 = require('tessel-io');

//create a new board object with io set to Tessel
var board = new five.Board({
  io: new t2()
});

//create a date object
var date = new Date();
//create a filePath string for location of USB drive.
var filePath = "/mnt/dev/sda0/" + String(date.now())+ '.csv';
//create a CSV header string to be added at the begining of the log.
var headerString = "Date,Air Temperature(F),Relative Humidity(%),Soil Moisture"
//create an empty logString
var logString = "";
//define the interval of logging in minutes, change this if you so choose.
const interval= 5;
//create a new file using the appendFileSync to keep things sychronous.
//create the variables for data as globals
var temp, humidity, moist;

//create the csv file with given path and append the header
fileSys.appendFileSync(filePath,headString,(error)=>{
  //if you get an error, log a message
  if(error){
     console.log('error setting up log file!');
  }
});

//when the board is ready...
board.on('ready', ()=>{
  //create a new multi object called atmos for the BME280
  var atmos = new five.Multi({
    controller: 'BME280',
    freq: (interval*60000)
  });

  //when atmos gets 'data'...
  atmos.on('data', ()=>{
    //store temperature and humidity
    temp = this.thermometer.fahrenheit;
    humidity = this.hygometer.relativeHumidity;

    logString = date.toISOString()+','+temp+','+humidity+','+moisture+'\n'
  //append the log file with the logString
  fileSys.appendFileSync(filePath,logSting,(error)=>{
     //if error, log message
     if(error){
      console.log('error logging to file!');
    }
    //else reset the logString to blank
    else{
      logString = '';
    }
  });
  });

});
Save your script, and insert your USB Thumb drive into a USB port in your Tessel 2. We recommend using the top USB drive because there are a number of thumb drives that may be wide enough to block the micro USB port you need to power the board, but your USB may work in the bottom one just fine. It doesn't change how anything functions.
Once you have inserted your USB thumb drive and saved your script as usbLog.js, go ahead and deploy your code to your Tessel by running the following command in your console:
t2 run usbLog.js
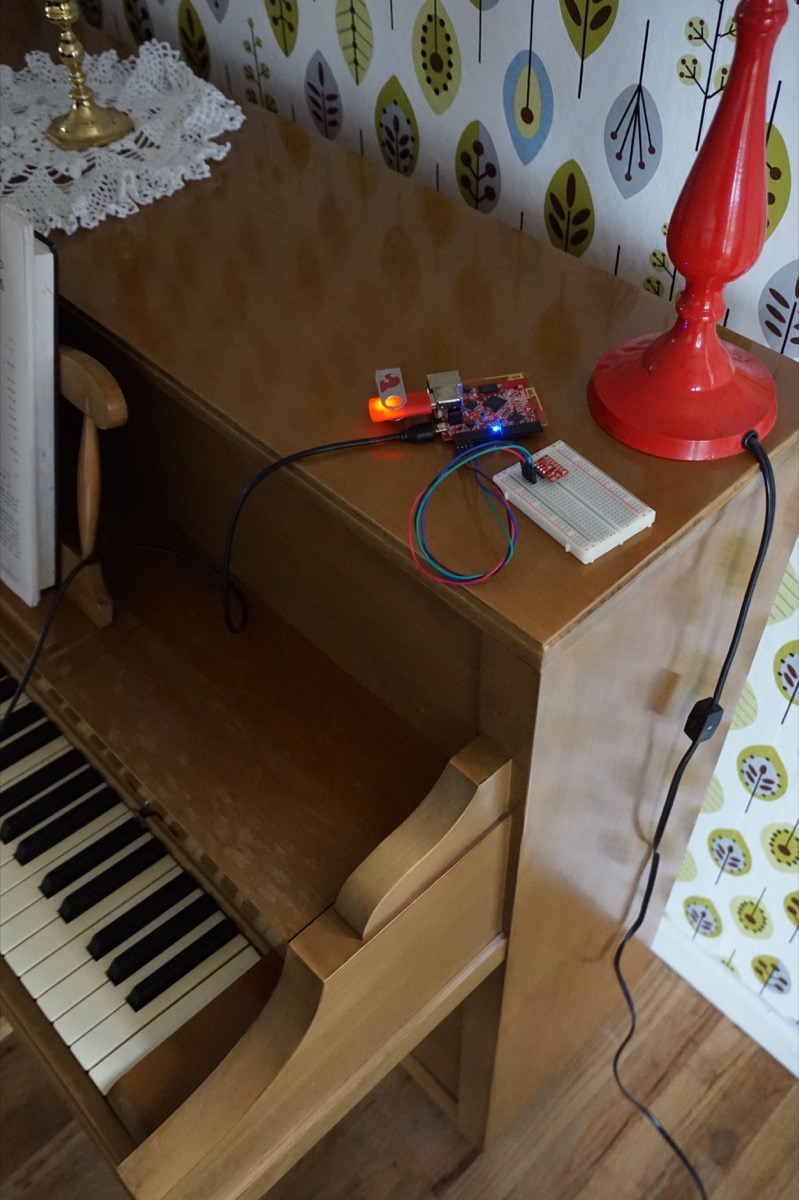
Let the script run for a while while putting your finger over the BME280.
The Tessel will log values once every five minutes, so let it run for a good long while. Eat a cookie, read a magazine, lie back and relax while the Tessel does all of the work. Or you can change the logging interval for testing purposes.
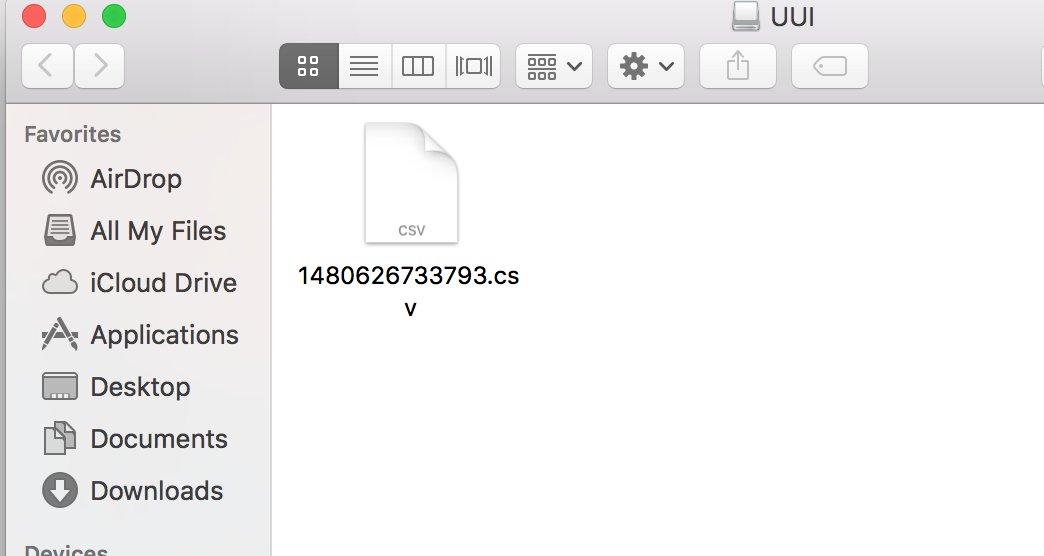
Once you can't stand it anymore and you want to get your hands on your data, go ahead and remove the USB storage device from the Tessel, and insert it into a computer.
An external drive should become visible; go ahead and open it. You should be greeted with a single file on your device, which should have a name of a very long number with a file extension of .csv. Open the file, and it should contain your data in CSV format!
With that you are ready to import the data into your Google Sheets file, but let's pause for a bit and dive into what makes this code work!
Code to Note
Before we move on to the Google Sheets portion of this project, let's take a deeper look into the code and how this was accomplished using Node.js and Johnny-Five.
language:javascript
var fileSys = require('fs');
Node.js is super modular; to do even simple things, many times you have to include native modules that come with Node.js. File System, or fs, is one of those modules. It is used any time you want to use other files in conjunture with your node project.
language:javascript
var five = require('johnny-five');
var t2 = require('tessel-io');

//create a new board object with io set to Tessel
var board = new five.Board({
  io: new t2()
});
When using Johnny-Five with single board computers (SBCs) you have to install and require a secondary module for working with that specific SBC's I/O pins. In this case we are working with the Tessel 2, so we need to require the tessel-io module that we installed during setup. Then, when we create a board object, we specify the io of the board as a new t2().
language:javascript
var date = new Date();
If you have used any JavaScript before, you may be familiar with the Date object. We use it in this script to create a time stamp for our data, and even the log file name is based off of now() method, which retrieves the number of seconds since January 1, 1970, 00:00:00 UTC. Most importantly we use the toISOString() method to produce a user-friendly time and date stamp for our data-logging string.
language:javascript
fileSys.appendFileSync(filePath,headString,(error)=>{
  //if you get an error, log a message
  if(error){
     console.log('error setting up logging file!');
  }
});
To write data to the log file, we use the appendFileSync() method of the fs module. This takes two arguments: the first is the file path to the file you want to append (or add to), and the second is the data you want to append to the file as a string. You can find out more about the method and the differences between the synchronous and asynchronous versions of the method in the fs documentation.
We use this method twice! The first time writes the .csv header to the file at the very beginning of the script. Later we use it inside of the setInterval() function to log the individual lines of data every five minutes.
language:javascript
  //when atmos gets 'data'...
  atmos.on('data', ()=>{
    //store temperature and humidity
    temp = this.thermometer.fahrenheit;
    humidity = this.hygometer.relativeHumidity;

    logString = date.toISOString()+','+temp+','+humidity+','+moisture+'\n'
  //append the log file with the logString
  fileSys.appendFileSync(filePath,logSting,(error)=>{
     //if error, log message
     if(error){
      console.log('error logging to file!');
    }
    //else reset the logString to blank
    else{
      logString = '';
    }
  });
  });
Each sensor object has an event attached to it. In this case we are using the 'data' event. This event happens at a given time interval, which is controlled by the freq option in the board setup. In this case we set freq: (interval*60000). So, every five minutes or 5*60000 milliseconds the 'data' event gets called. When the data event is received by the sensor object, the event is triggered, and we then store the sensor values in the variables temp and humidity.
Every five minutes a new string gets built by concatenating the date string and the data points from the two variables, which are then terminated with a newline character (\n).
The string is then appended to the file, and, if there is no error in the process, the logString is reset to a blank string. This is then repeated every five minutes.
Getting the Data into Sheets
Now we have data in not so user-friendly CSV format ... now what? Google Sheets to the rescue! If you have been under a rock for the past 10 years and haven't heard that Google has an online suite of office tools at your disposal, today is the day we rectify that problem. The spreadsheet program is called "Sheets."
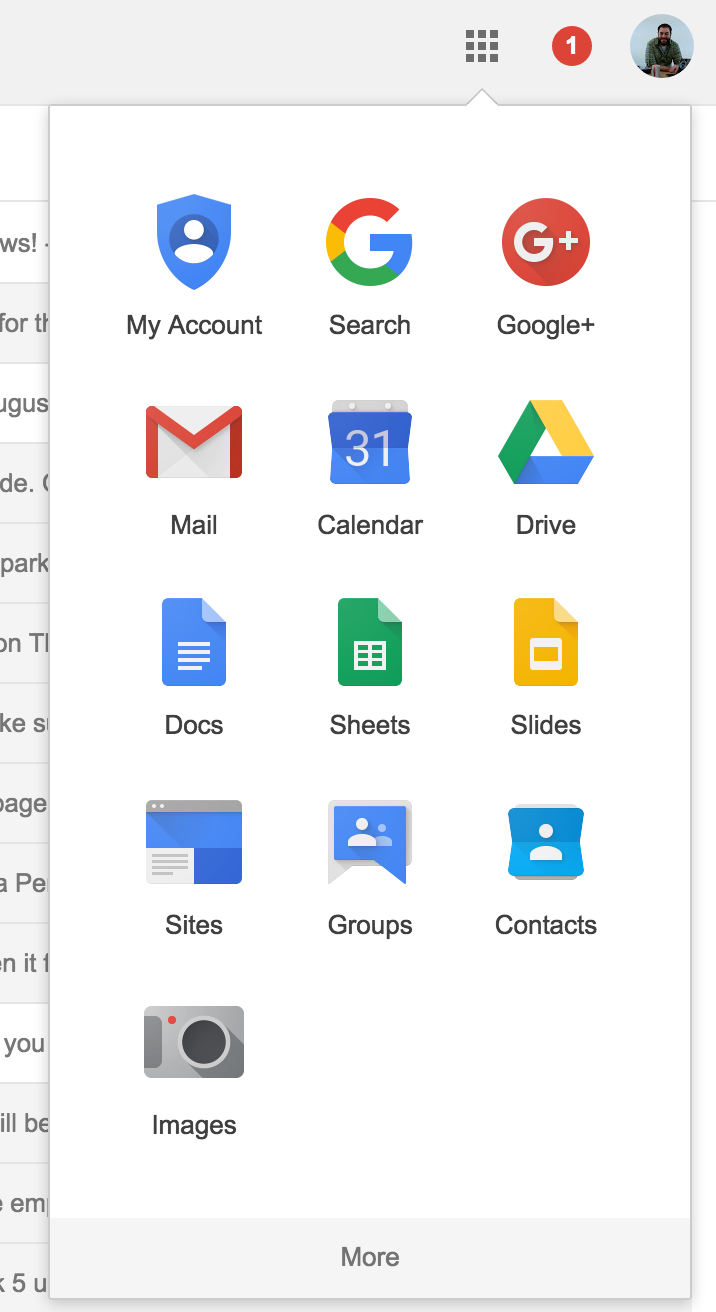
If you don't have a Google account, no problem. It's easy to sign up for one, and it's free! Once you are signed in to your Google account, click on the apps icon, which is the little grid of squares in the upper righthand corner. Select Sheets from that list.

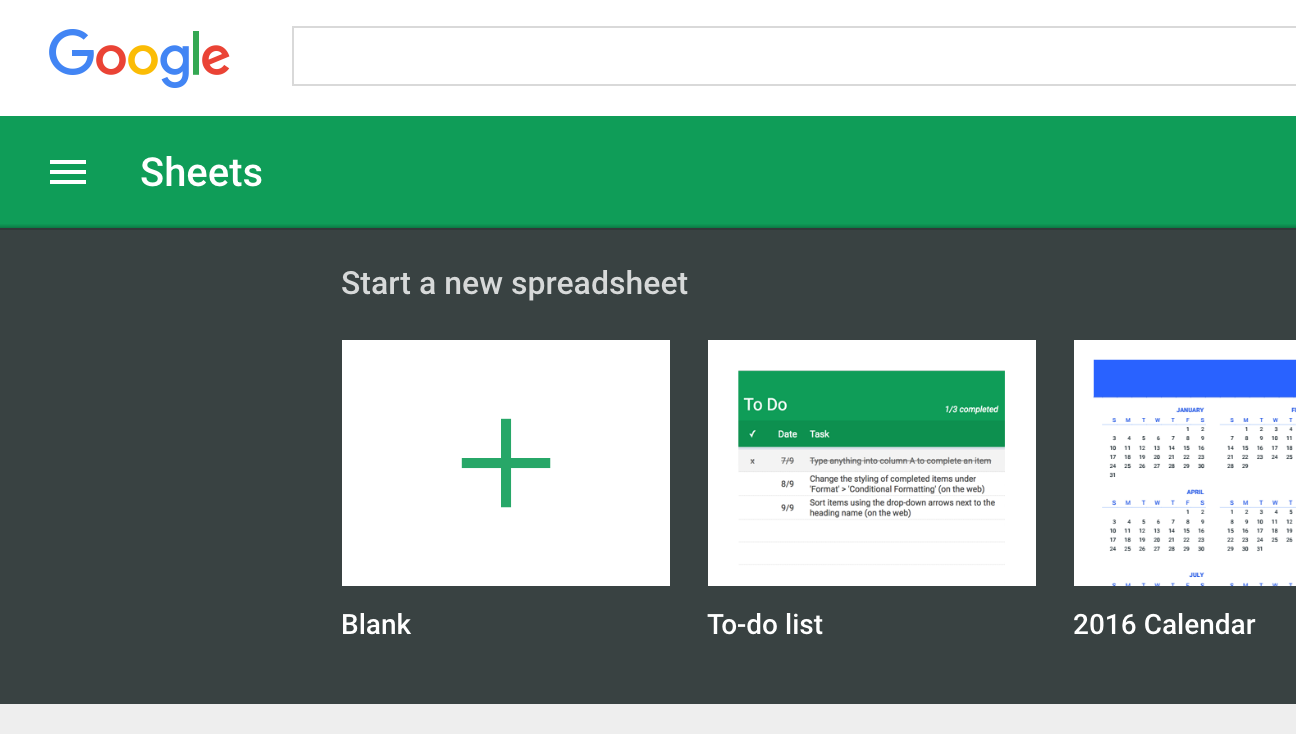
From there, you will be greeted with a number of options for what to do in Sheets. You want to just create a blank sheet for now. Click on "blank" once in the program.
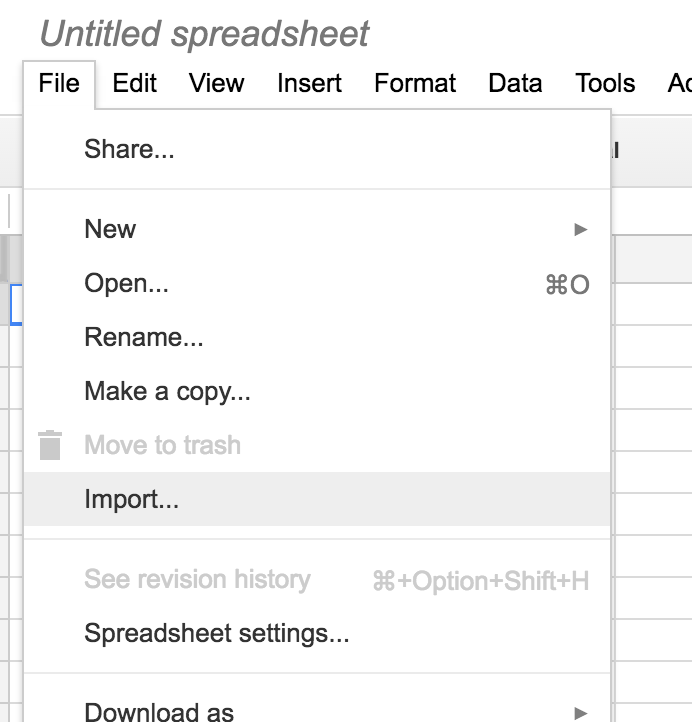
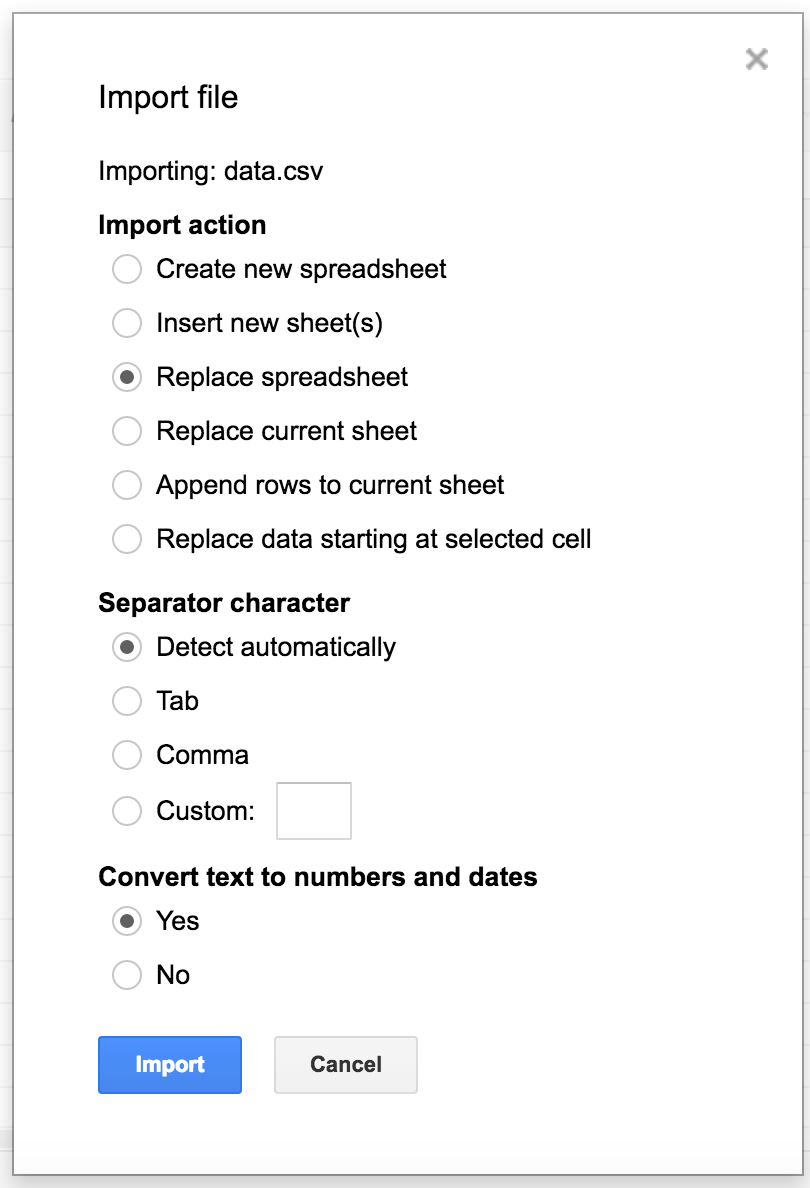
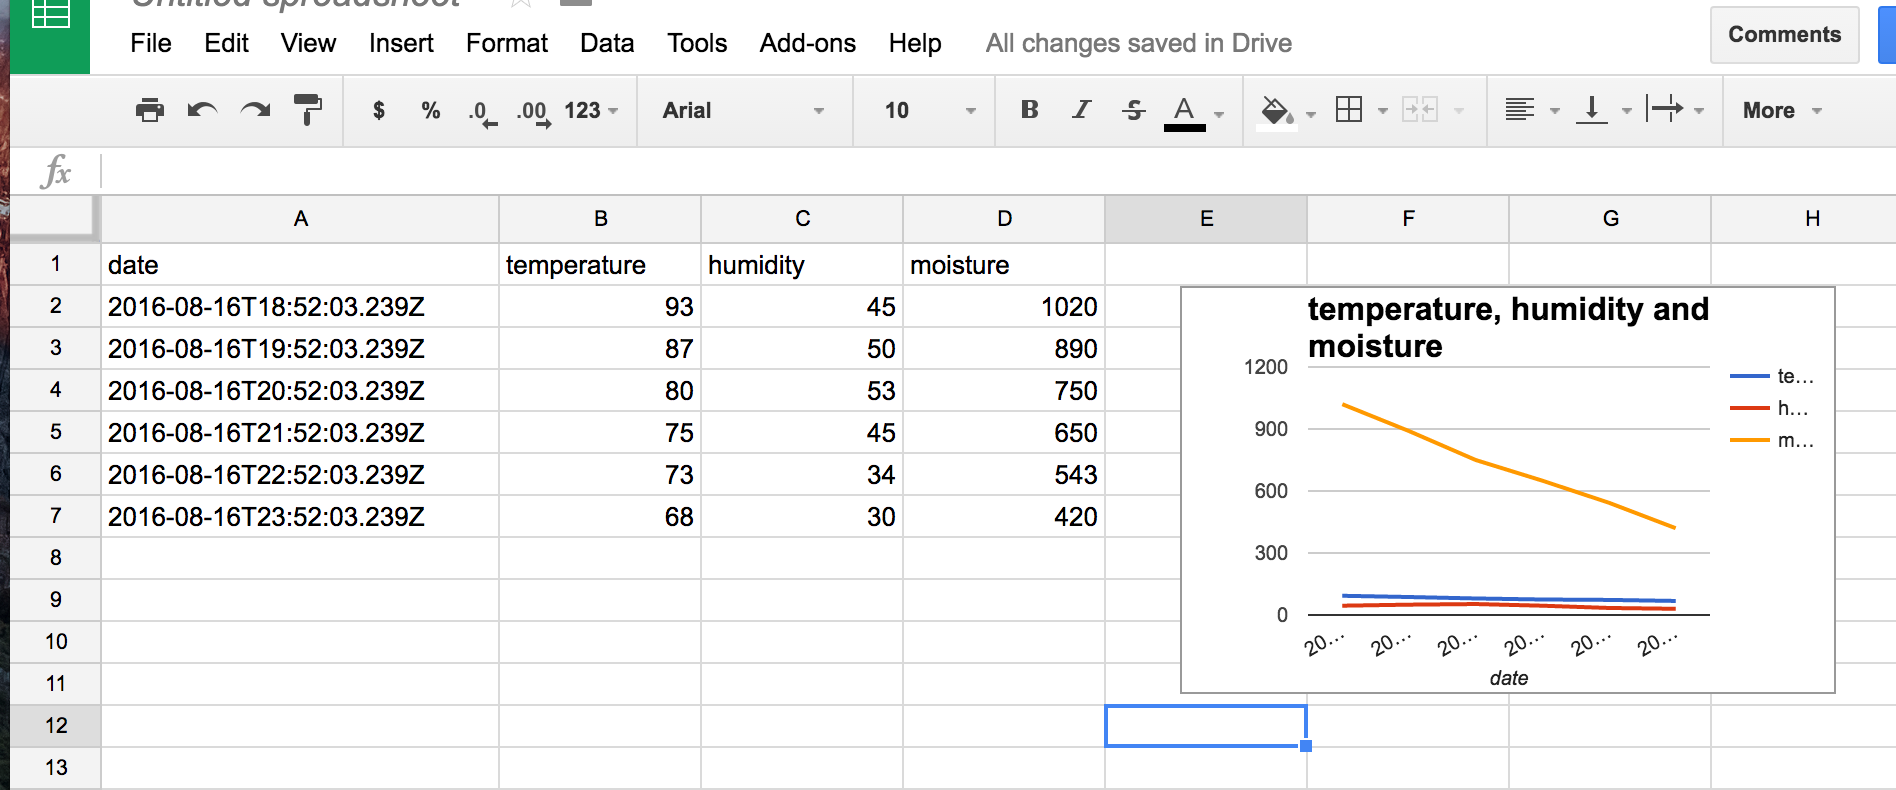
A new Sheets project will open. Select _File > Import..._. This will bring up a dialog box that you will need to use to navigate to your external USB drive and the .csv file that is on it. Select the file, and click _Open_.
From there you will get a slew of options about how you would like to import the data. We actually preformatted the data when we collected it, so this is all done. Go ahead and click through this window.
Your data will now appear as a sheet as shown! Wahoo, data in a table!

From here, it is a few simple steps to building a graph.
Using your cursor, select the Create Graph button, and it will bring up the graph options. You can select your graph type, and it will give you a preview of what it will look like. I selected a line graph:
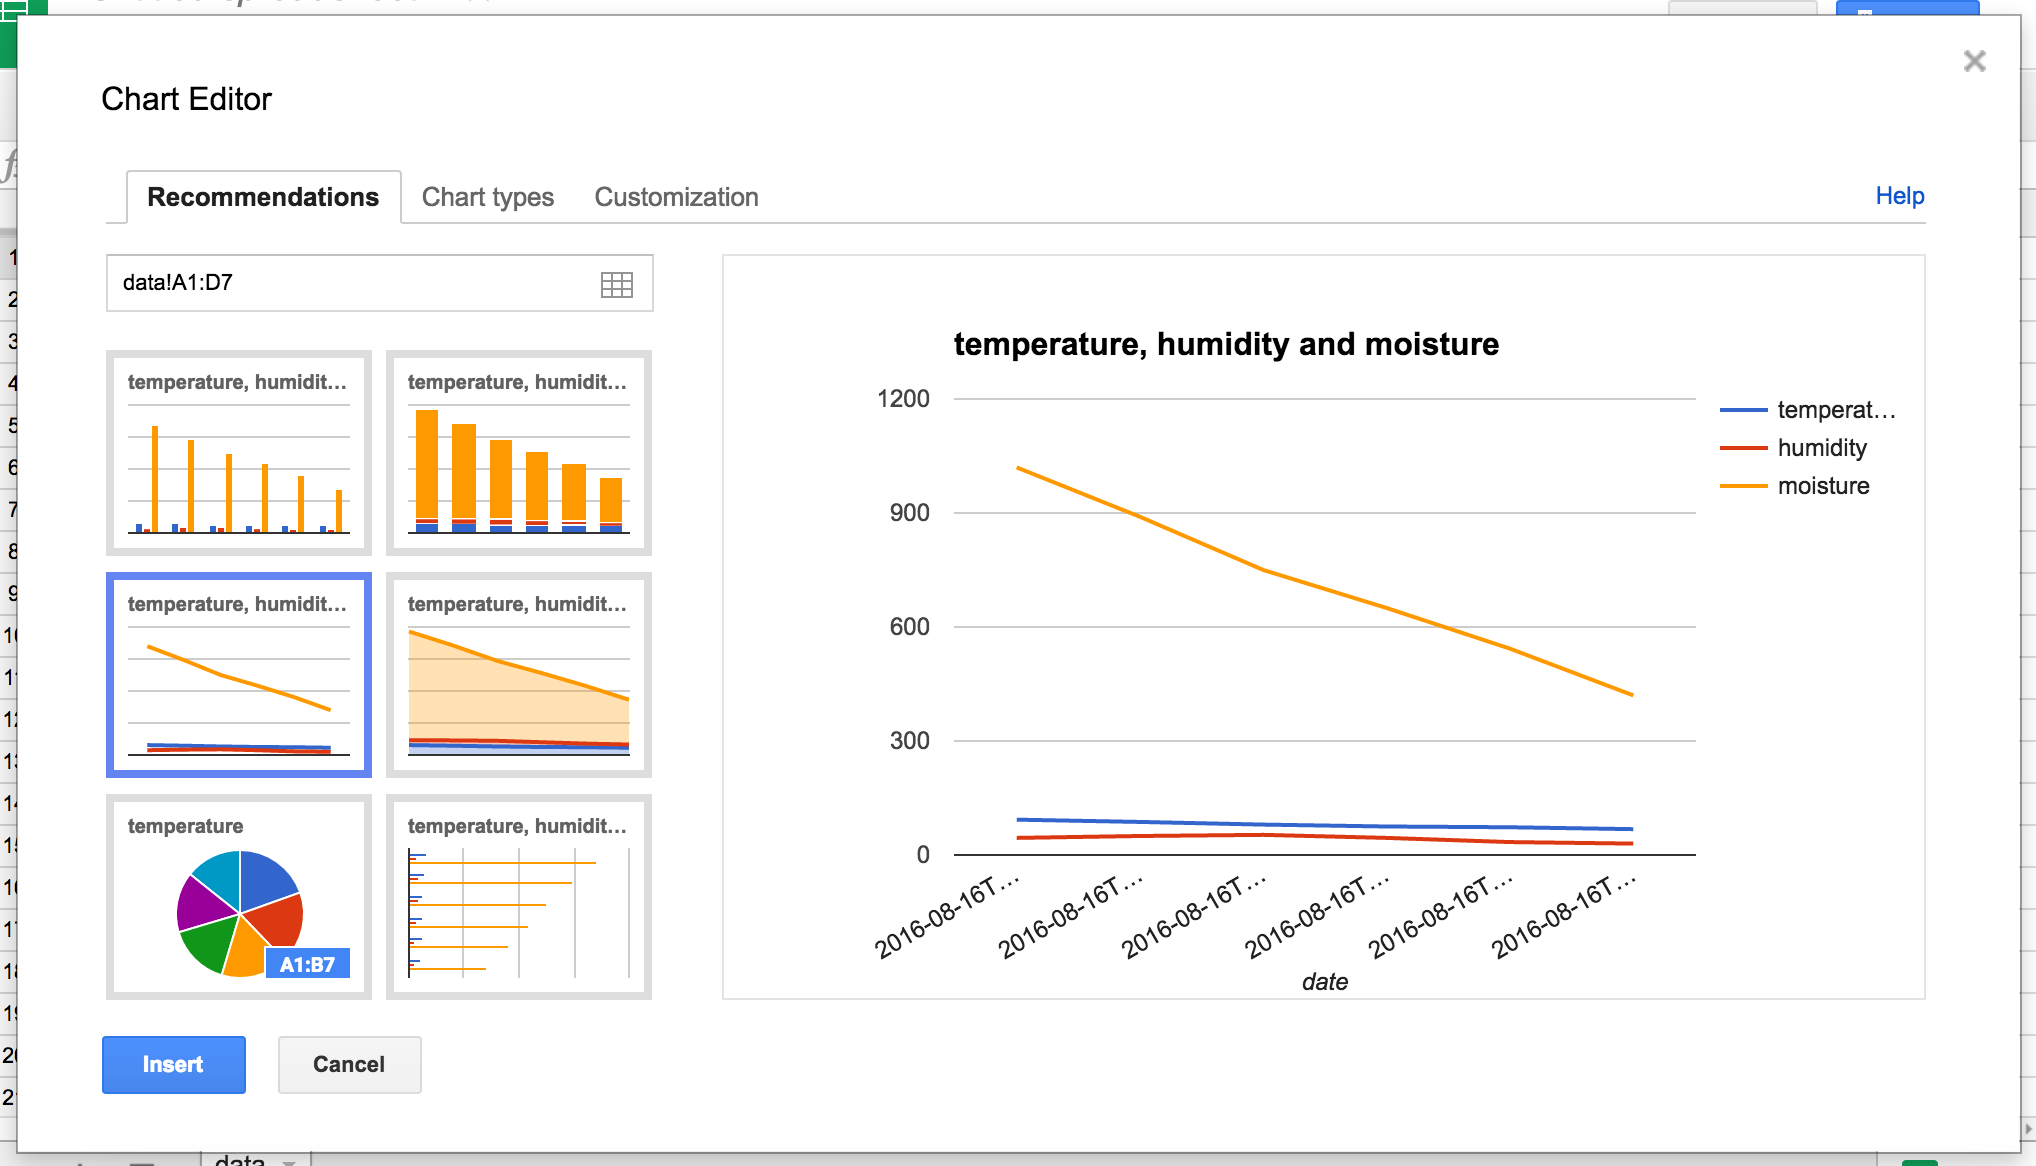
Once you are happy with your graph selection, accept your graph. It will then show up in your sheet, where you can move it around and resize it.
With that you are done! You can do all sorts of further calculations and other graphs using Sheets. Or if there is something that you are missing and you'd prefer to use Microsoft Excel or another Office tool chain, feel free; they are all about as simple to import data into. The downside of doing this is that you have to make a new sheet or copy and paste data into this one every time you want to update it. This is where IFTTT comes into play!
Firmware: Logging with IFTTT
Now that you have been logging data locally and then physically transferring it to your computer and then into Google Sheets, it is now time to simplify the process using IFTTT and the Maker Channel.

If you have never heard of If This Then That (IFTTT), it is a simplified software and web automation tool. It allows you, the user, to build what are called recipes, which consist of two channels, or services, and a trigger. Basically, as the name implies, if (this happens) then (do something). The things that happen or do something are different connected web apps such as Google Drive, Slack, Twitter and Facebook -- or even your Android phone. IFTTT allows you to connect all of these services in a simple way to harness the web to do work for you!
The Concept
This project is going to use IFTTT to do a lot of the work that we physically had to do in the File System version of this project. We will connect the Tessel 2 and its data to a Google Sheet using the IFTTT Maker Channel to send the data to sheets and populate the sheet in real time. Let's take a deeper dive into how this works!
The IFTTT Maker Channel works through making web requests. Web requests are essentially a way for you to ask a server for information. We can use this to our advantage and make a statement through making a request. Let's look at an example to make this a little clearer. Here is a web request URL used by the Maker Channel:
https://maker.ifttt.com/trigger/{event}/with/key/hhpANc1sDCoGpQ0-DfnbR_6g2WKLxwKSYvZDIRVGz5I?value1=123&value2=hello&value3=world
Let's break this into chunks and make sense of it.
The first part probably looks familiar to you: https://maker.ifttt.com/. This is the domain (ifttt) with a subdomain of maker. This is the structure of all websites. If you want to navigate to Google, you type www.google.com (google is the domain).
The second part is a little trickier. It looks like this: /triger/{event}/with/key/. This is stating a category of the domain (trigger) and a subcategory, which is {event}, and other subcategories of /with/key. These are all used to categorize what is happening. Basically we are causing a trigger with a name of {event} followed by the key.
The string of random numbers and letters is a private and unique key, the one used to start the trigger. It is assigned to you when you sign up for the Maker Channel. This allows for unique and safe events to be triggered without someone accidentally triggering someone else's project.
The final part of this puzzle is the query string ?value1=123&value2=hello&value3=world. A query string is the part of a URL that allows a request to look for specific data. Again, this is us making a statement through asking a question because we know what the server is looking for in terms of the questions asked. The Maker Channel allows us to send up to three different variables in this way, and they are named value1, value2 and value3. These values can be a string, a number, a Boolean state ... as long as it is data, you can store it in one of these three buckets. The query string starts with a question mark (?), and each query value is separated by an ampersand (&).
Phew, that is a lot to take in! The good thing is that IFTTT does a lot for us, and there is also a Node.js module to help us on the code side of things. Let's build the recipe first!
The IFTTT Recipe
Open a new browser window, and navigate to https://ifttt.com.
If you haven't signed up for IFTTT, you can do so at this point. Don't worry; we will wait for you.
Once you have signed up, you can start to build a recipe. You can start by clicking on the "Channels" menu button at the top of the page and then searching the channels for "Maker."

When you find the Maker Channel, select it. You will end up on the landing page for the Maker Channel. To use the Maker Channel, you have to connect your IFTTT account to it. Cclick on the 'Connect' button.
Once your account is connected you will be assigned a key. This key will be really important as we start to use the Maker Channel. You can always come back to your account to copy and paste the key, but you can also copy and paste it into a text document for now.
Now, let's create a recipe! Click on the 'Create Recipe' Button, and you will be confronted with the fun 'If This Then That' interface. The 'This' is a hyperlink. Click on it.

Search for and find the Maker Channel again, and select it. You only have one option in terms of triggers for the Maker Channel, to make a web request. Select that trigger.

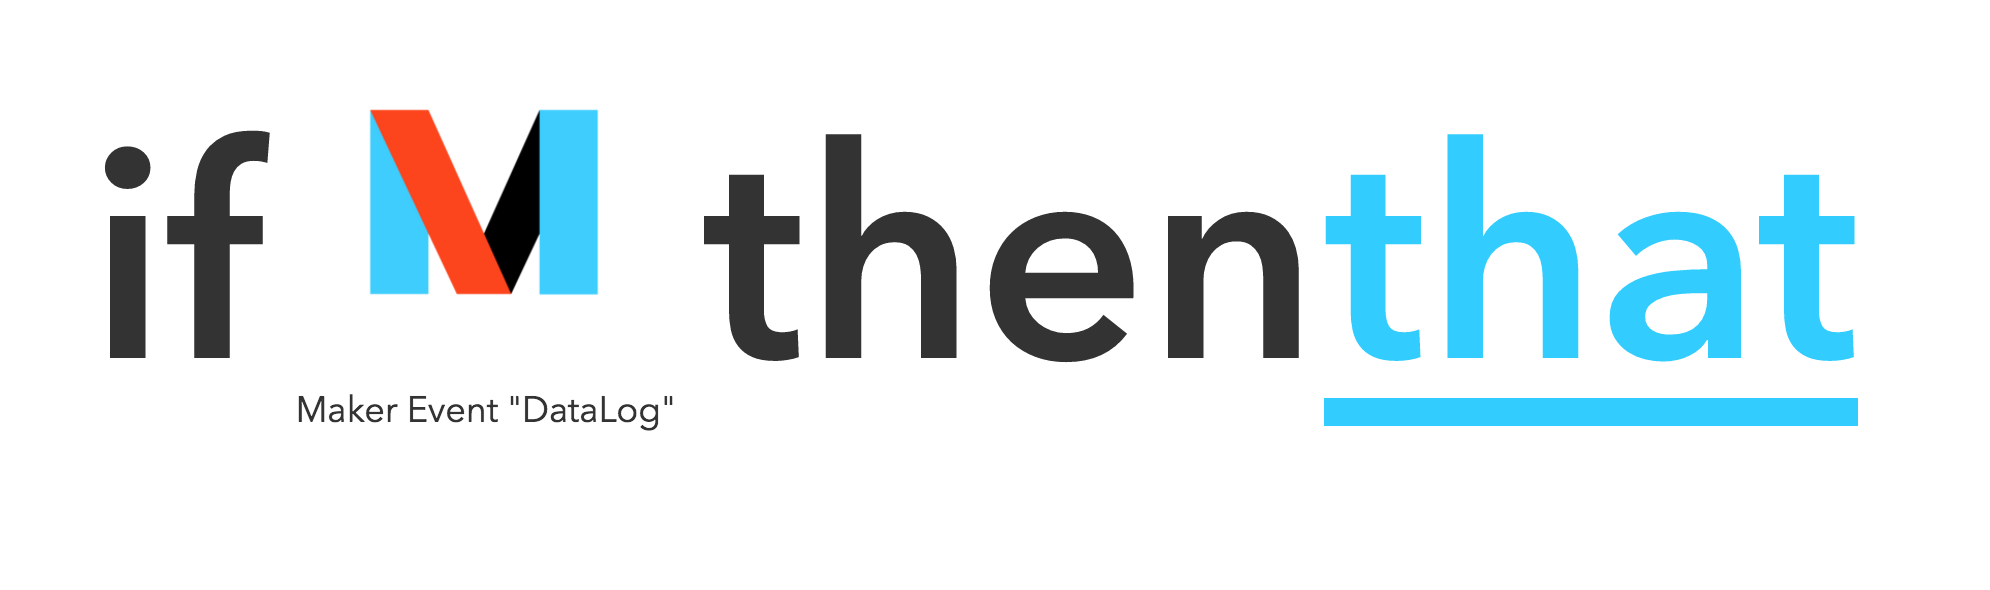
From here, you name your trigger. We named ours 'DataLog'.
When you accept a name, you will then get to select the 'That' of your recipe.
Search for 'Google Drive' for your 'That' event (it should be one of a few options).

Unlike the Maker trigger, where you only had a single option, the That for Google Drive has a number of options. You want to select the 'Add Row to Spreadsheet' option.
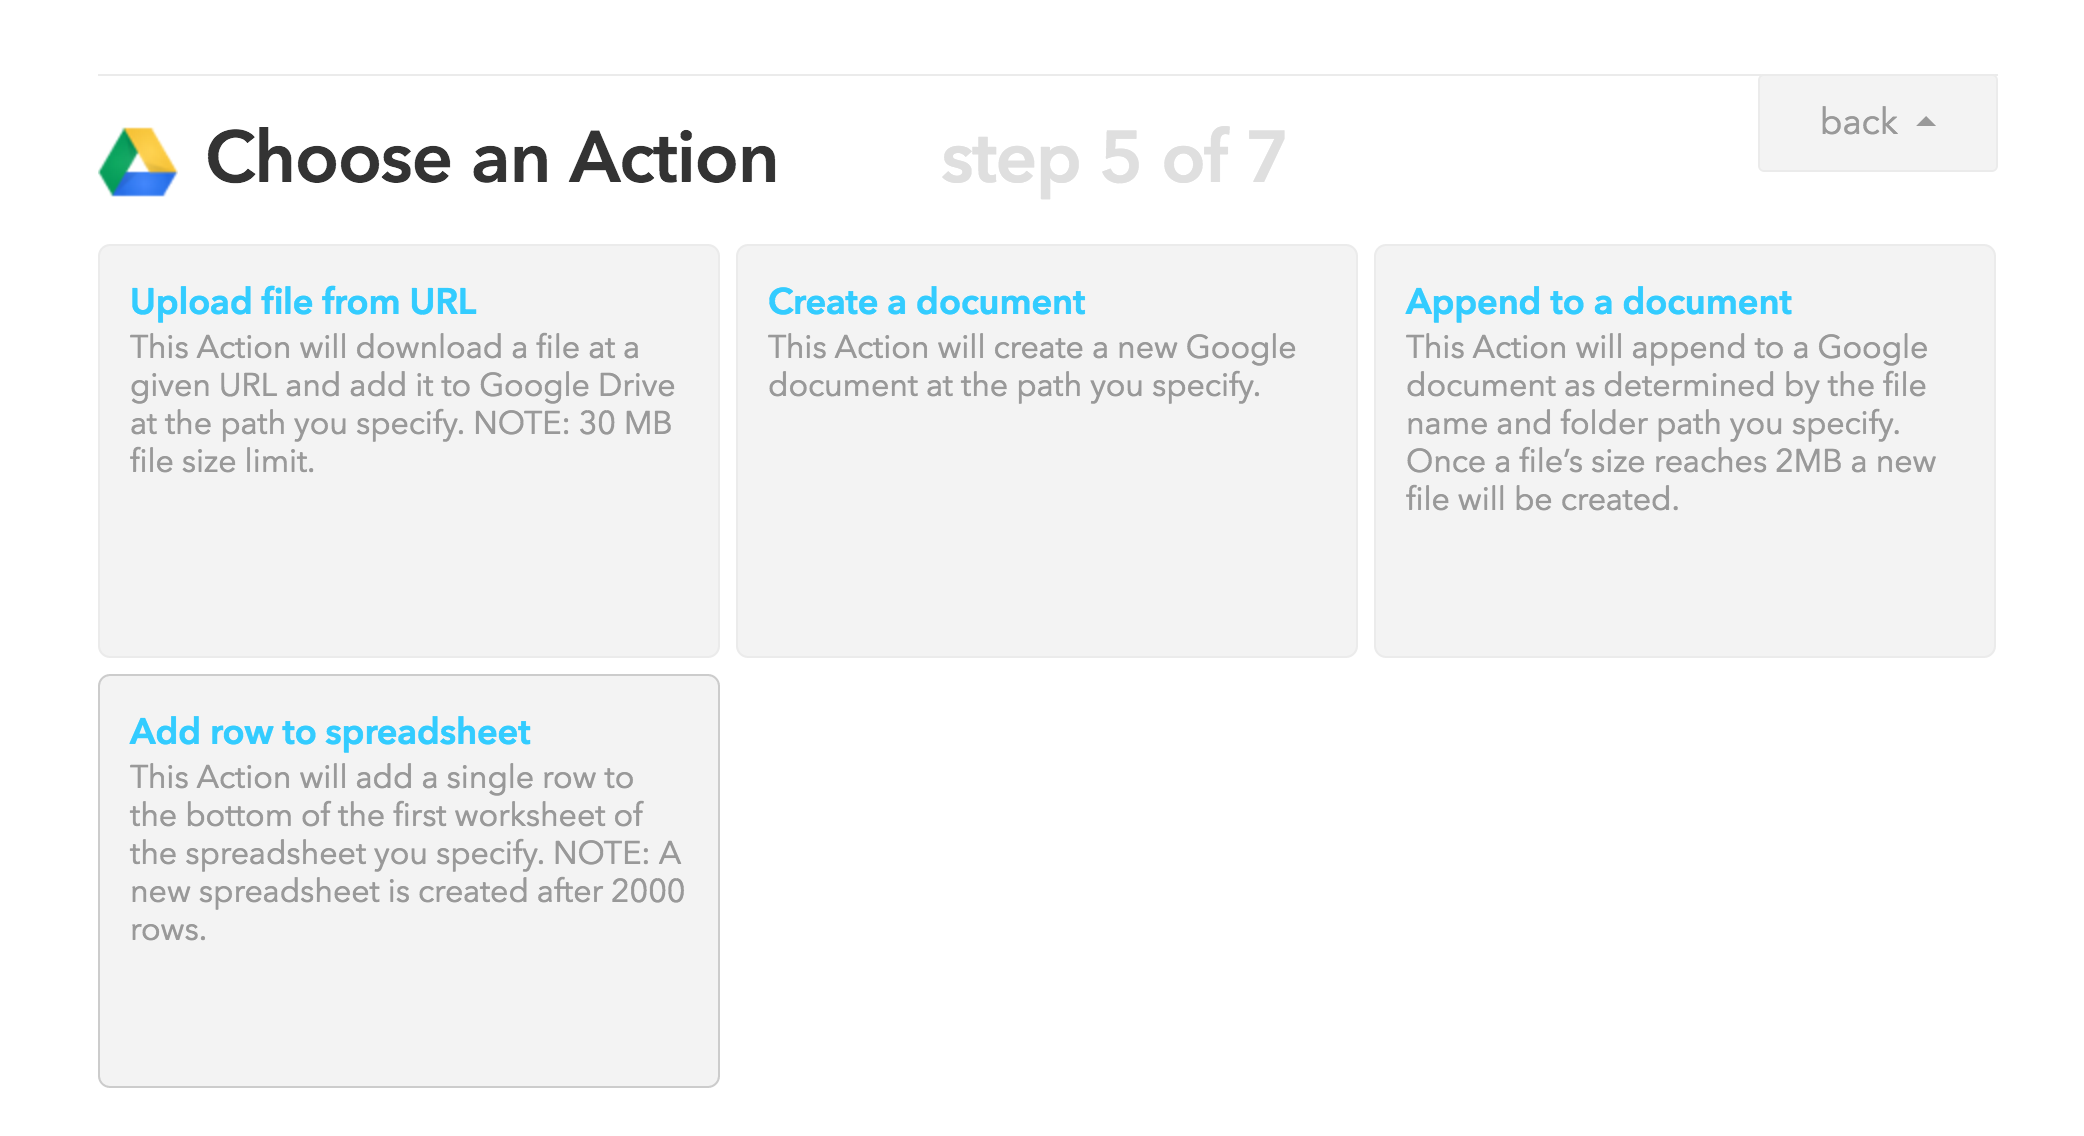
Ok, we are almost done! This next step allows you to name your spreadsheet and do some formatting of what the different columns of data will be. We will make a slight modification to the standard format by removing the event name from the rows, as this would be redundant and useless information for this example.

With that, the recipe is complete, and you should now be looking at an overview page.
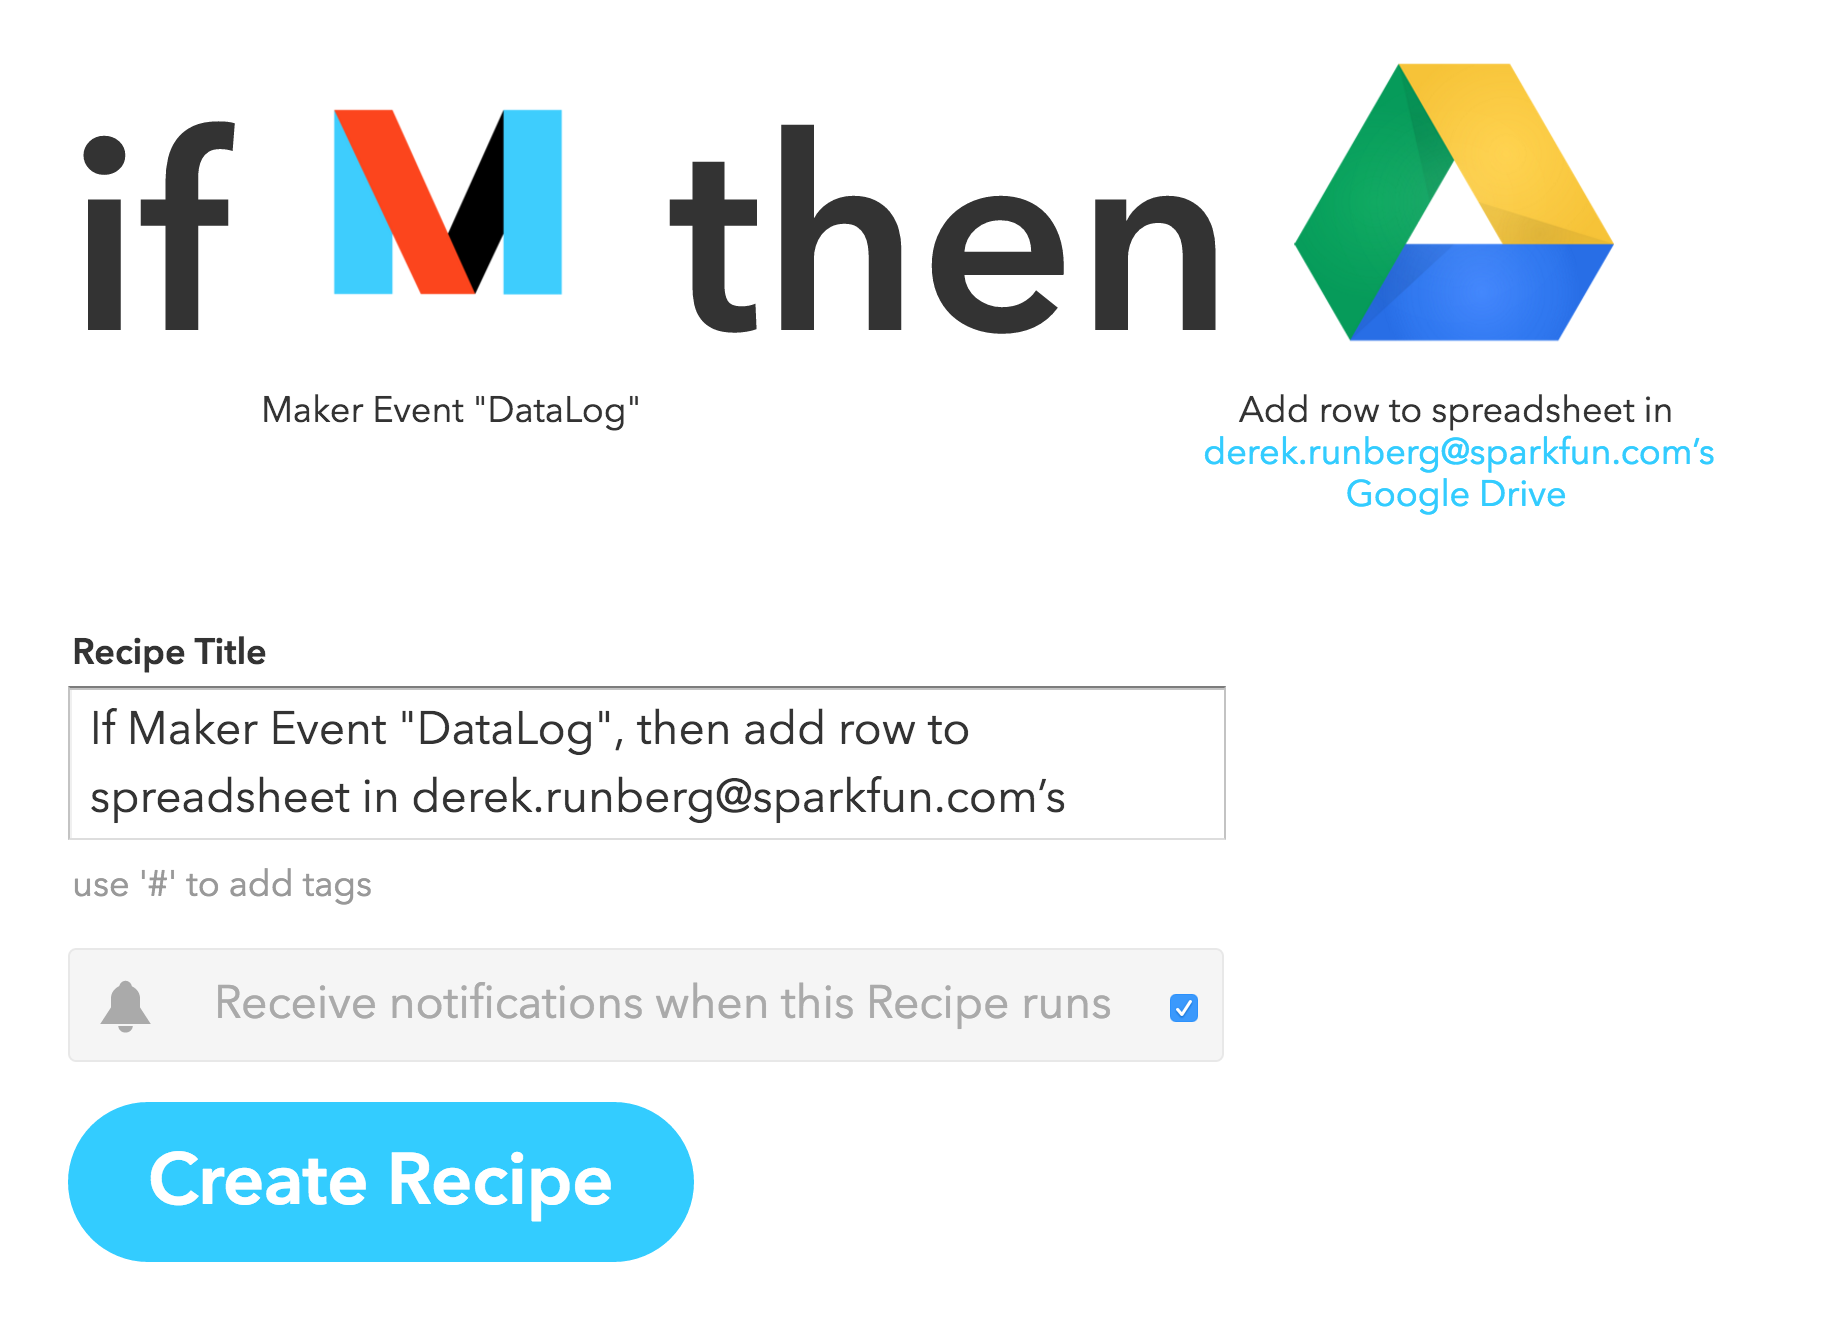
This page will be accessible to you any time you come back to your IFTTT account under your recipes. You can then modify it as needed later on. Bam! You are done with your first IFTTT recipe! Now, let's write some code to put it to good use.
The Code
How are we going to integrate JavaScript with IFTTT?
You may have guessed it -- there is module for that!
We will be using the node-ifttt-maker module to make it as easy as possible to make web requests from the Tessel 2. First thing, we have to install the module into our project directory. If you haven't done so already, open up your terminal and navigate to your loggerProject directory. To install the module, type the following command:
npm install node-ifttt-maker
At this point, you don't need to install any other modules, as we have already installed johnny-five and tessel-io with our preflight check. You can now create a script for this project by typing the following into the terminal prompt:
touch iftttLog.js
With the file created, go ahead and open it in your text editor and type -- or copy and paste -- the following code into the file:
language:javascript
var five = require('johnny-five');
var t2 = require('tessel-io');

var IFTTT = require('node-ifttt-maker');

var ifttt = new IFTTT('<YOUR MAKER KEY>');

var board = new five.Board({
  io: new t2()
});

var temp, humidity;
const interval = 5;
board.on('ready',()=>{
  var atmos = new five.Multi({
    controller: 'BME280',
    freq: (interval*60000)
  });


  atmos.on('data', ()=>{
    temp = this.thermometer.fahrenheit;
    humidity = this.hygometer.relativeHumidity;

    var reqInfo= {
      event: 'gardenLog',
      method: 'GET',
      params: {
          'value1': temp,
          'value2': humidity,
       }
    }

  ifttt.request(reqInfo, (error)=> {
      if (err) {
        console.log(error);
      }
      else {
        console.log('---OK---');
      }
    });
  });
});
Make sure you save this file!
Open up your terminal window, and navigate to the project folder for this project to deploy the script to your Tessel 2. Type the following command to do so:
t2 run iftttLog.js
If everything is set up correctly, you should be greeted with the REPL prompt, and, in five minutes, you should get a ---OK--- logged. This should repeat every five minutes. Make dinner, sit back and crack open a cold one, or play a video game for a while to build up a few logs.
While you are building up a body of data in the ethers of your Google Drive, let's take a closer look at the code that you just ran.
Code to Note
language:javascript
var IFTTT = require('node-ifttt-maker');
var ifttt = new IFTTT('<YOUR MAKER KEY>');
As with all Node.js modules, you need to require the node-ifttt-maker module. You then create an ifttt object of the IFTTT class, and you pass your maker key as a string to this. This is really nice because you only need to include your key once, and only once.
  language:javascript
  var reqInfo= {
  event: 'pianoLog',
  method: 'GET',
  params: {
      'value1': temp,
      'value2': humidity,
      }
   }
The Johnny-Five code is all the same from the previous version of this project. The main difference between the two scripts is what happens in the atmos.on() method. In this script, we create an object that contains all of the IFTTT web request information. This includes the event name as a string (pianoLog) and the method for making the request (do not change this from GET). It also includes the three parameters we want to log as value1, value2 (You can pass up to 3 values using the IFTTT Maker channel, for this example with are only using 2). We define each of these as the two variables temp and humidity, and they will be updated with those variable values each time the data event is fired. Building the object in this way will keep the actual request method cleaner and allows for a more straightforward way of defining things.
  language:javascript
  ifttt.request(reqInfo, (error)=> {
      if (err) {
        console.log(error);
      }
      else {
        console.log('---OK---');
      }
  });
The actual ifttt.request() method is pretty simple. You pass the reqInfo object that you just defined previously and then a callback that we use for error checking. If there is an error, it will log the error to the console, otherwise it logs ---OK--- to the console and the web request was successful!
Viewing Your Data in Sheets
You can now navigate to your Google Drive. In your Drive, you should now have a folder that is called IFTTT. Navigate to IFTTT, and open the Maker folder inside of that. You should now have a Sheets document named pianoLog or whatever you named your event.
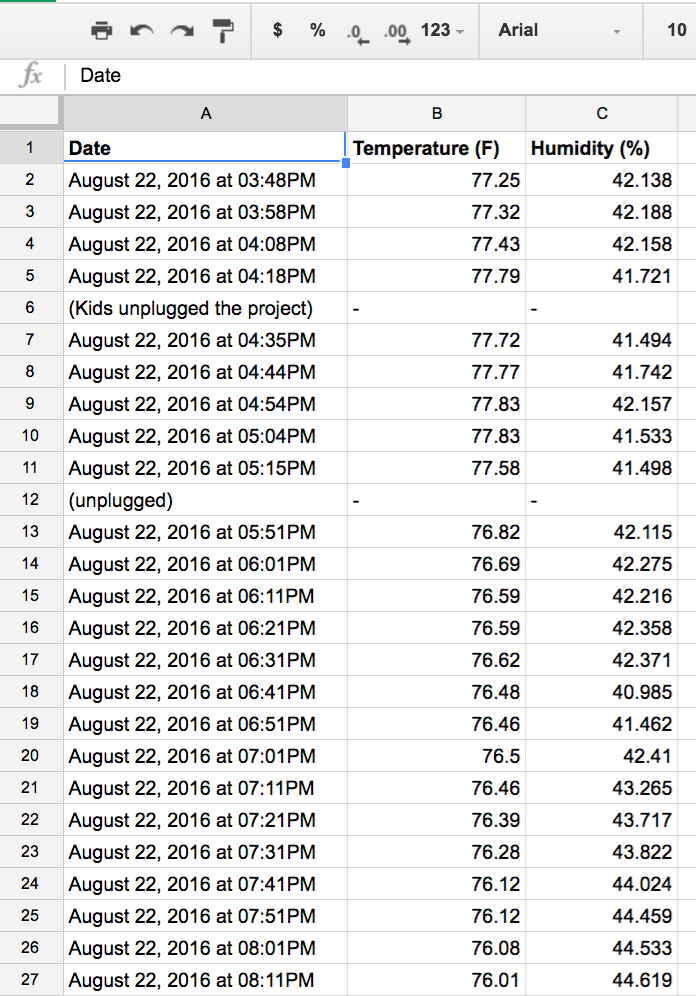
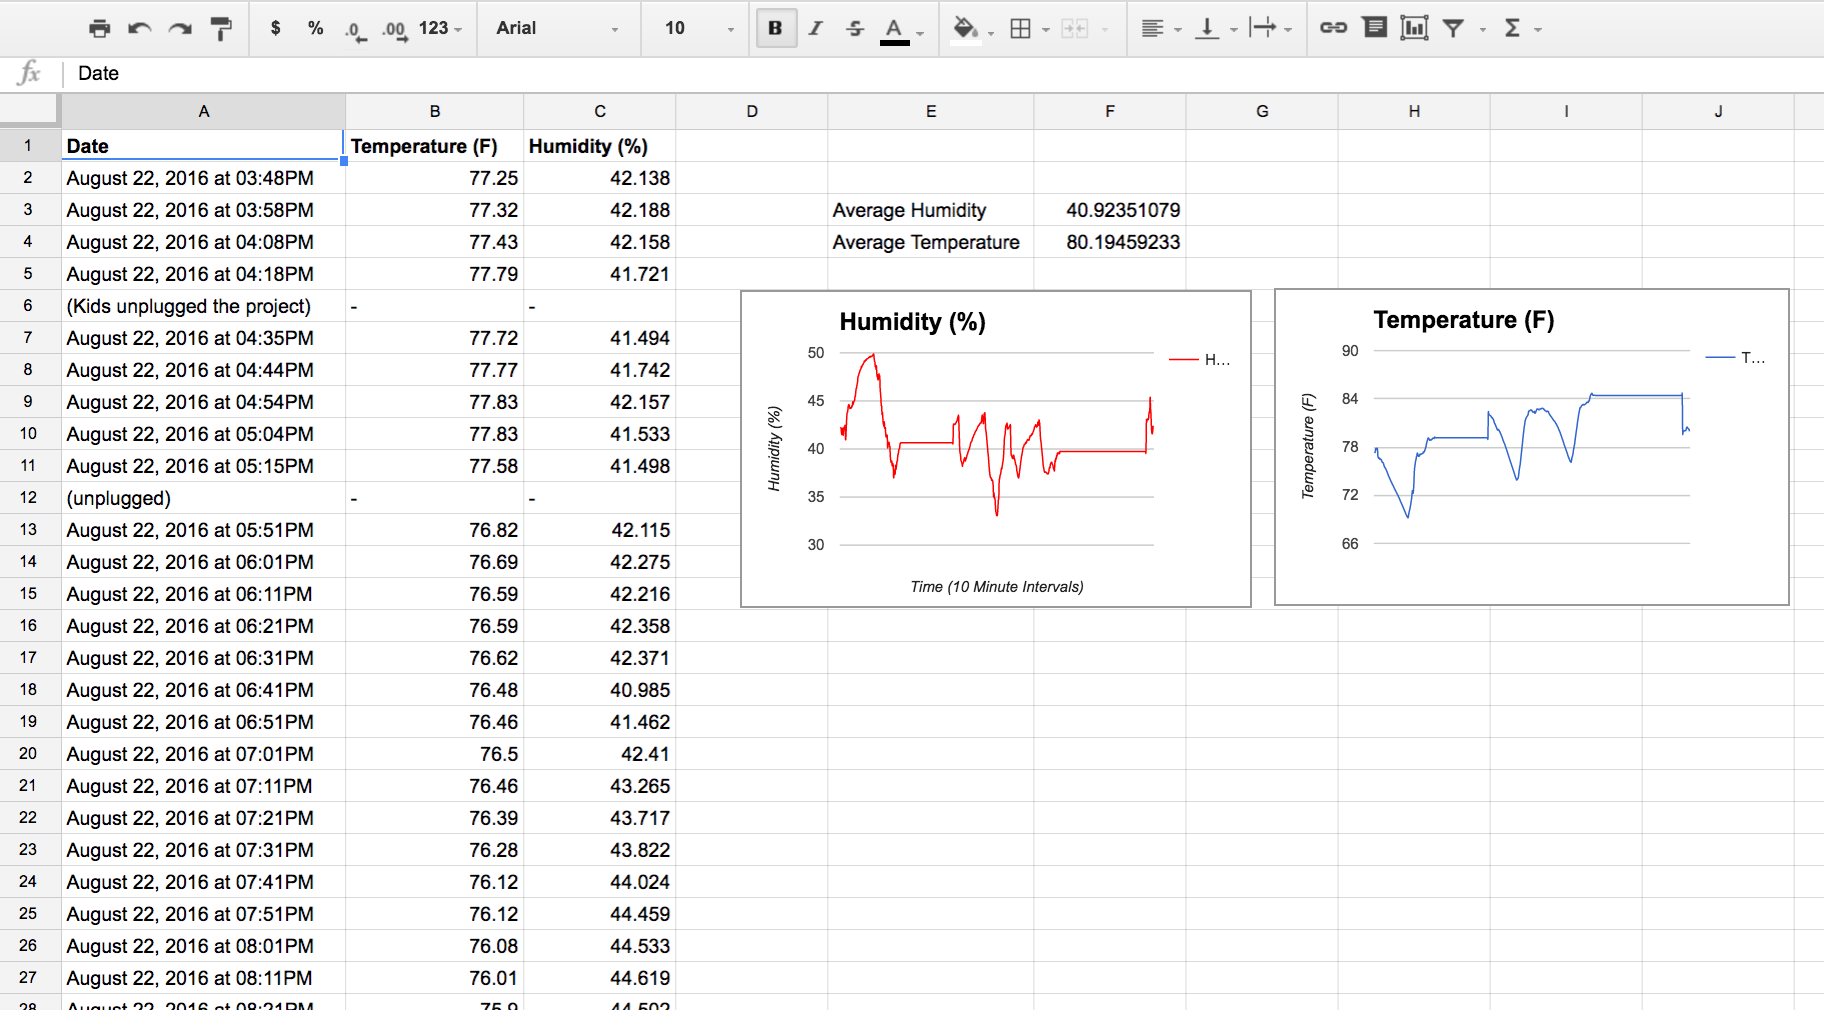
Open your pianoLog sheet, and your logs should be visible in the spreadsheet similar to the following screen capture (with the exception of my notes where my kids decided to be smart and unplug the project):
You can now go through a similar process of graphing. This is similar to the USB drive method of logging in terms of graphing this data or using other analysis tools. Here is a the graph of my data over a few days of logging the data.
Final Touches
There are a number of things still to cover in terms of deploying this project. Here are a few thoughts that we have found work well for the Tessel 2.
Enclosures
If you are going to put this project outside for any length of time, you will need some sort of weatherproof enclosure so that you don't leave the Tessel and the circuits you built in the elements (nothing good will come of that).
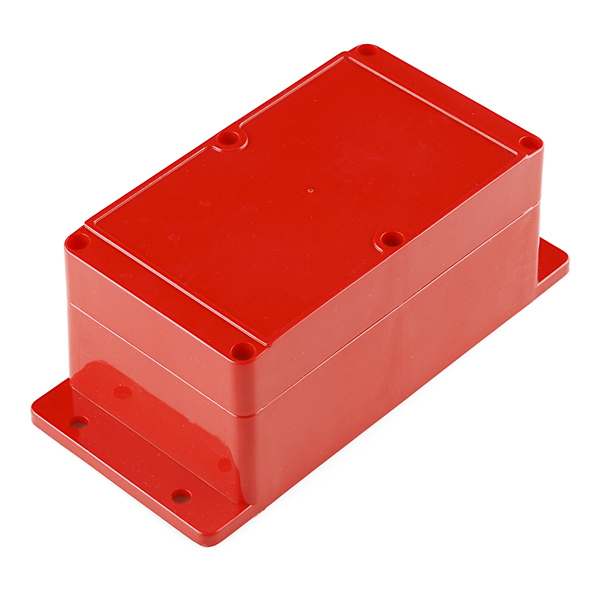
We have built a number of projects with the Tessel that use our Big Red Box enclosure. It has plenty of room, has a gasket edge and is weatherproof. It has plenty of space for the Tessel, a breadboard and batteries.
If you are in a hurry, or if you are going to be leaving the project outside for a shorter period of time, a Ziploc bag or Tupperware container works really well as a makeshift enclosure.

Powering Your Project
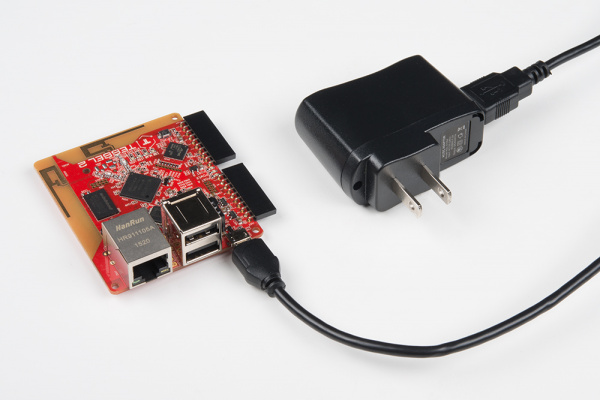
Powering a remote project is always tricky and probably the most difficult hurdle to overcome. Your easiest way to power the project is from a 5V USB wall adapter plugged into an outdoor power outlet, if you have one nearby. This will give it a consistent power supply as long as there is power to the outlet.
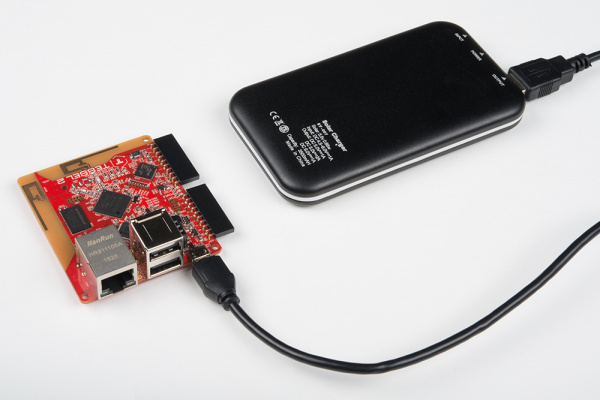
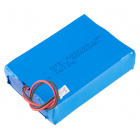
Your next option in terms of simplicity is a consumer USB LiPo rechargeable battery. These are becoming cheaper and cheaper these days, to the point where we find them as give-aways at events and in gift bags. The larger the battery in terms of milliamp hours, the better!
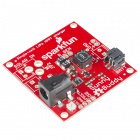
Probably the most technical way of running this project long term would be to build a LiPo battery solar charging system with a 5V DC/DC converter, a sunny buddy and a good-sized LiPo battery and solar panel, but that may be for another day and another tutorial. ;)
SparkFun DC/DC Converter Breakout
BOB-09370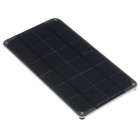
Solar Panel - 3.5W
PRT-13782Resources and Going Further
Exploring IFTTT
Whether you stick with this project to log weather data indoors, or are leaving it out in the woods collecting data for your next biology course, we highly recommend exploring the different channels on IFTTT and playing around with different recipes. You might be surprised what you can accomplish by just exploring and playing around with different channels.
For more Tessel fun, check out these other great SparkFun tutorials.