LilyPad Light Sensor V2 Hookup Guide
Contributors:
 Gella
Gella
Attaching to a LilyPad Arduino
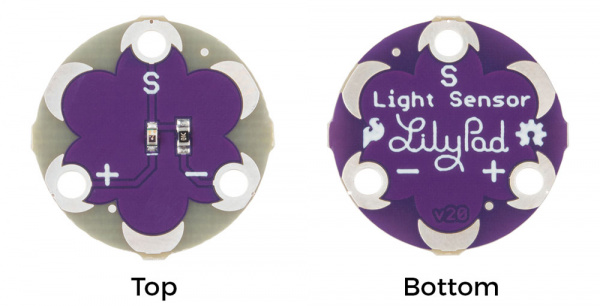
The LilyPad Light Sensor has three sew tabs - Power (+), Ground (-), and Signal (S). Next to each tab is a white label on the top and bottom of the board for reference. The signal tab should be connected to an analog tab (marked with an 'A') on a LilyPad Arduino.
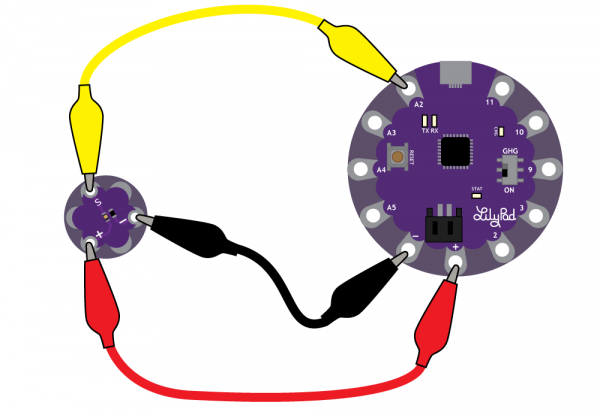
To follow along with the code examples in this tutorial, connect the light sensor to a LilyPad Arduino as shown below. Use alligator clips to temporarily connect Signal to A2 on a LilyPad Arduino, (-) to (-) on the LilyPad, and (+) to (+). When you are finished prototyping, replace the alligator clips with conductive thread traces for permanent installation in your project.
Connecting to a LilyPad Arduino USB
Please Note:
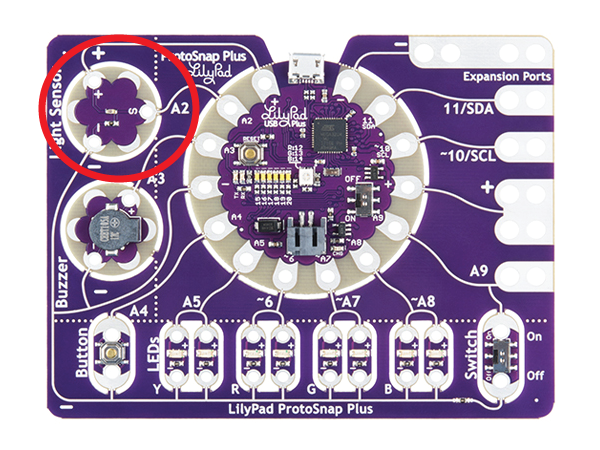
If following along with a LilyPad ProtoSnap Plus, the light sensor is pre-wired to Pin A2. The light sensor on the ProtoSnap is a slightly different version than the catalog item, but functions the same.
If following along with the LilyMini ProtoSnap,the light sensor is pre-wired to Pin 1. Again, the light sensor on the LilyMini ProtoSnap is a slightly different version than the catalog item, but functions the same.
 |
 |
| LilyPad Light Sensor location circled on a LilyPad ProtoSnap Plus board | LilyPad Light Sensor location circled on a LilyMini ProtoSnap board |

