LilyPad E-Sewing ProtoSnap Hookup Guide
 Gella
Gella Introduction
The LilyPad E-Sewing ProtoSnap is a great way to explore how buttons and switches behave in simple e-sewing circuits before crafting your project. This guide will go over the individual components in the E-Sewing ProtoSnap and how to break it apart to prepare for use in a project. You can follow along with this guide for both the E-Sewing ProtoSnap and E-Sewing ProtoSnap Kit.
Suggested Reading
If this is your first sewable electronics project, we recommend you read our LilyPad E-Sewing tutorial.
LilyPad Basics: E-Sewing
December 17, 2016
Hardware Overview and Features
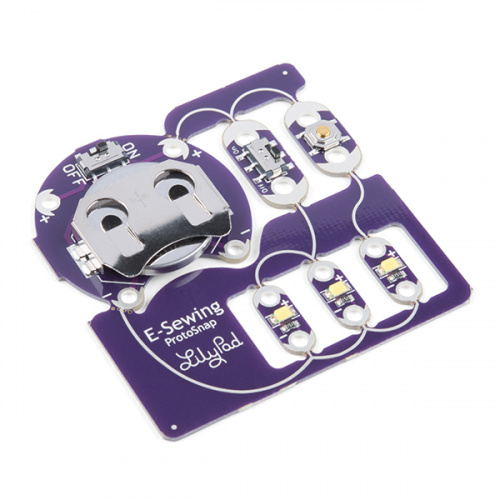
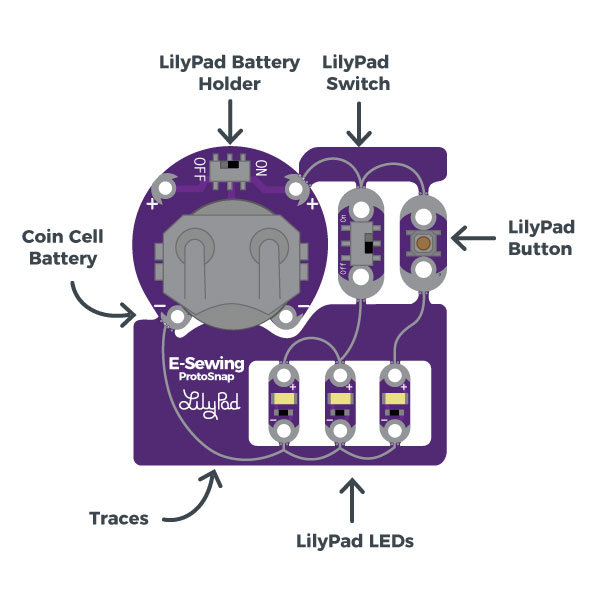
Like other LilyPad ProtoSnap series boards, the individual pieces of the board are pre-wired - allowing you to try out the function of the circuit before sewing. The E-Sewing ProtoSnap includes three white LilyPad LEDs: two connected to a LilyPad Slide Switch and one connected to a LilyPad Button Board. A LilyPad Coin Cell Battery Holder with a 3V Coin Cell Battery provides the power for the circuit. These parts are connected together by conductive pathways called traces.
Required Materials and Tools
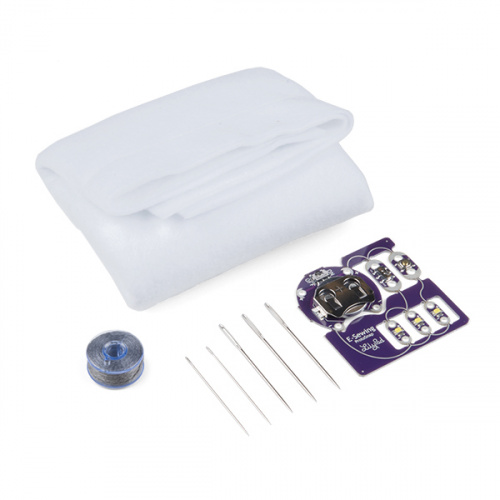
If you are using the E-Sewing ProtoSnap Kit, you will also have:
- Conductive Thread
- Needle
- 9"x12" sheet of craft felt
To create a finished project with the E-Sewing ProtoSnap you will also need:
- Materials listed above (if not using the E-Sewing ProtoSnap Kit)
- Felt or fabric to stitch your circuit into
- Pen, marker, or chalk
- Scissors
- Hot glue gun (with extra glue)
- Optional: Craft supplies for decorating (feathers, sequins, buttons, etc.)
Exploring the Sample Circuit
Let's try out the circuit!
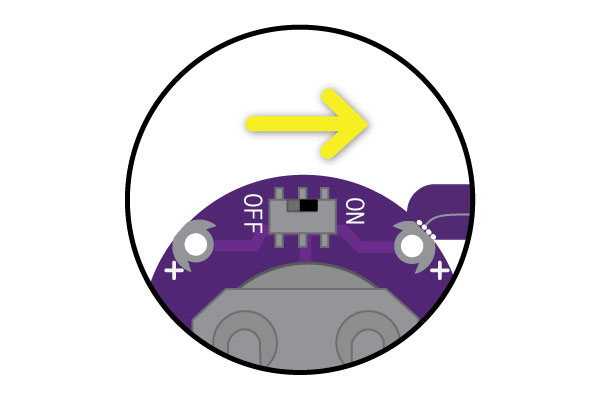
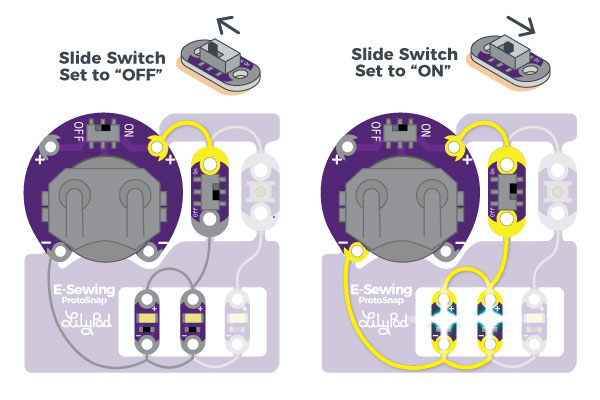
The LilyPad Battery Holder at the corner of the ProtoSnap holds a 20mm CR2032 Coin Cell Battery. With the battery installed, slide switch on the battery holder to the ON position.
Using the LilyPad Slide Switch
The LilyPad Slide Switch has a small switch labeled ON/OFF. When moved to the OFF position, parts inside the switch move away from each other and open the circuit (disconnecting it). The LEDs will not light up. When the toggle switch is moved to the ON position, the two sew tabs on the switch are connected, allowing current to flow through and close the circuit. You should see the two LEDs below the switch light up.
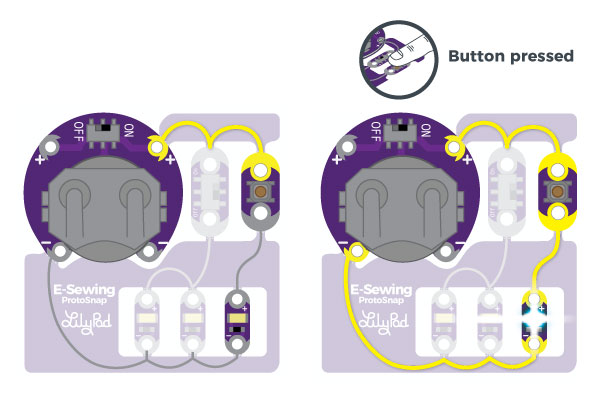
Using the LilyPad Button
The LilyPad Button Board is also a type of switch. The circuit that is connected to the far right LED is open when the button is left by itself. When you press the button in the middle of the board, it connects the two sew tabs and allows current to flow through. When you let go of the button, the connection is opened again, and the button springs back into place. This button is an example of a momentary switch – it is only active when an action is applied.
This is slightly different from the slide switch, which is an example of a maintained switch, meaning its state remains the same until changed.
Stitching into a Project
Ready to sew into a project? First, slide the coin cell battery out of the battery holder and set aside.
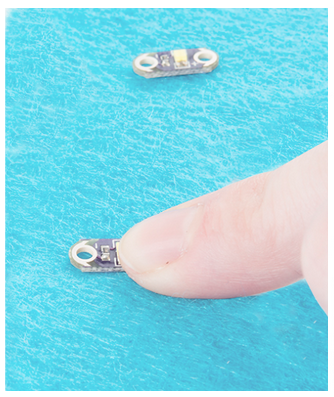
Carefully snap apart the connected components on the E-Sewing ProtoSnap panel to prepare for sewing. Discard the non-sewable pieces and scraps. Use a set of pliers or diagonal cutters if you are having trouble snapping the pieces apart. You will end up with six individual LilyPad pieces: the battery holder with battery, three LEDs, button, and switch.

Designing Your Project
Sketch on a piece of paper or arrange the LilyPad pieces on your felt or fabric to form your design. At this point, you can recreate the connections the pieces had in the ProtoSnap format or design your own new configuration. Keep in mind that the positive tabs of the LED must connect to the button or switch in order to be controlled by them. The negative tabs of the LEDs should connect back to the negative tab on the battery holder.

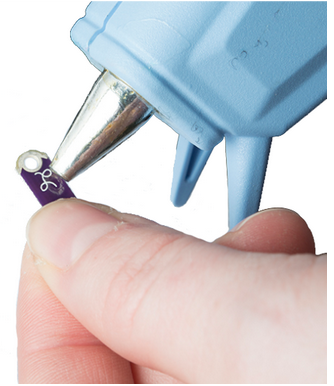
When your circuit design is finalized, secure the LilyPad pieces on your project with a small dab of hot glue or fabric glue, making sure not to cover the holes in the sew tabs. Double check the orientation of the LilyPad pieces against your diagram (or template if using a SparkFun design) before gluing.
To help you plan your stitch lines, draw your circuit onto the fabric with chalk or a washable marker.
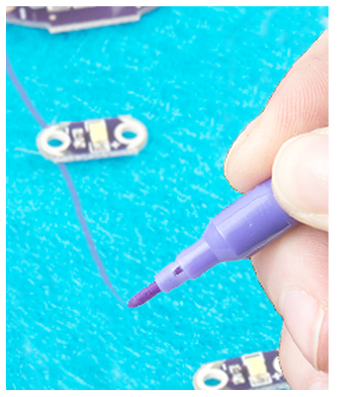
After arranging the circuit, carefully connect each LilyPad component together with conductive thread stitching. Each connection between components should be a separate piece of conductive thread and avoid crossing other stitch lines.
If have never sewn with conductive thread this tutorial covers the basics.
LilyPad Basics: E-Sewing
December 17, 2016
Troubleshooting
With any electronics project, there are times you will have to troubleshoot if your circuit isn't working. If your circuit isn't lighting up, try a new battery or check that your project is switched on. Check your sewing for any loose threads or ends that may be touching other parts of your circuit and causing a short circuit. Learn more about troubleshooting your project in the LilyPad Basics: E-Sewing tutorial.
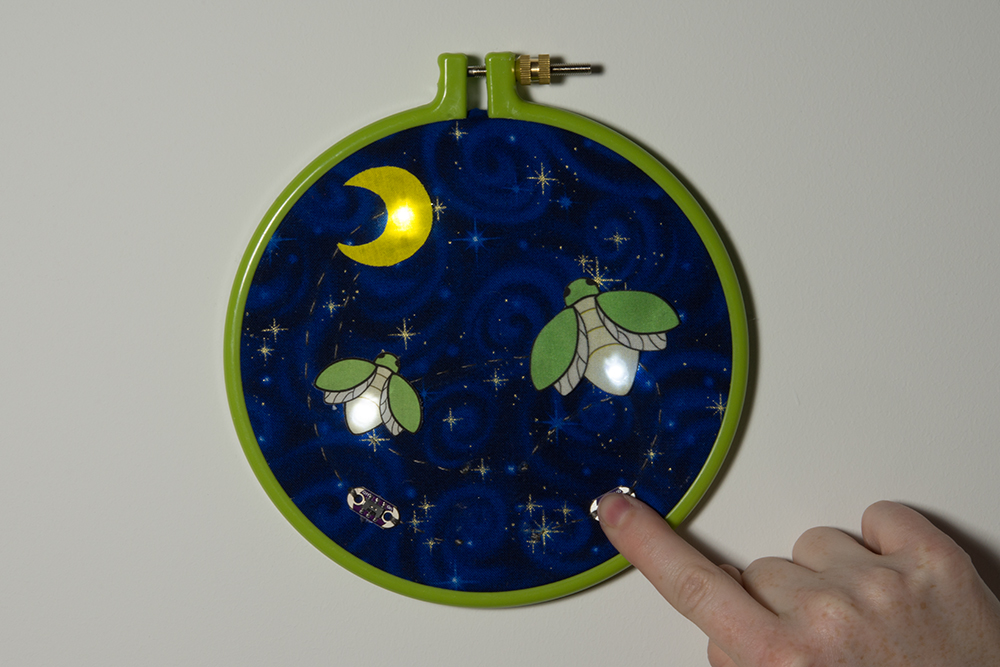
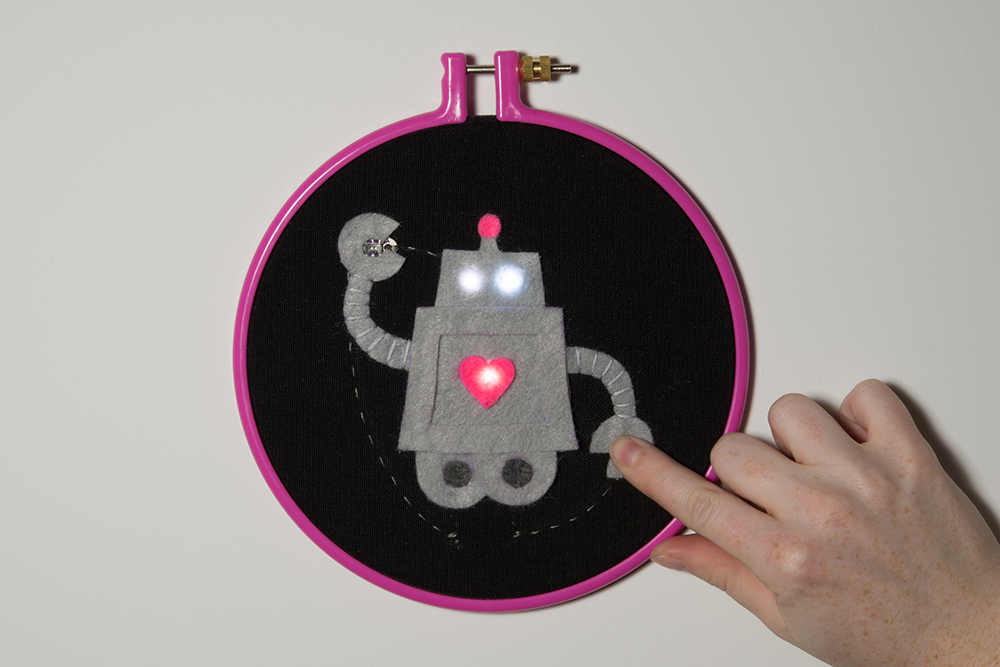
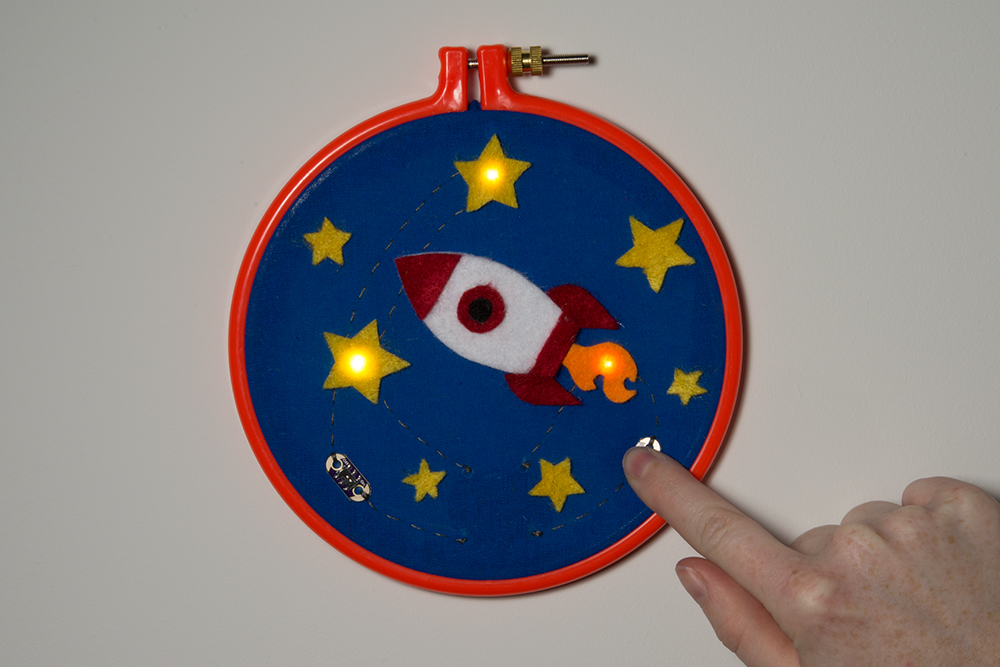
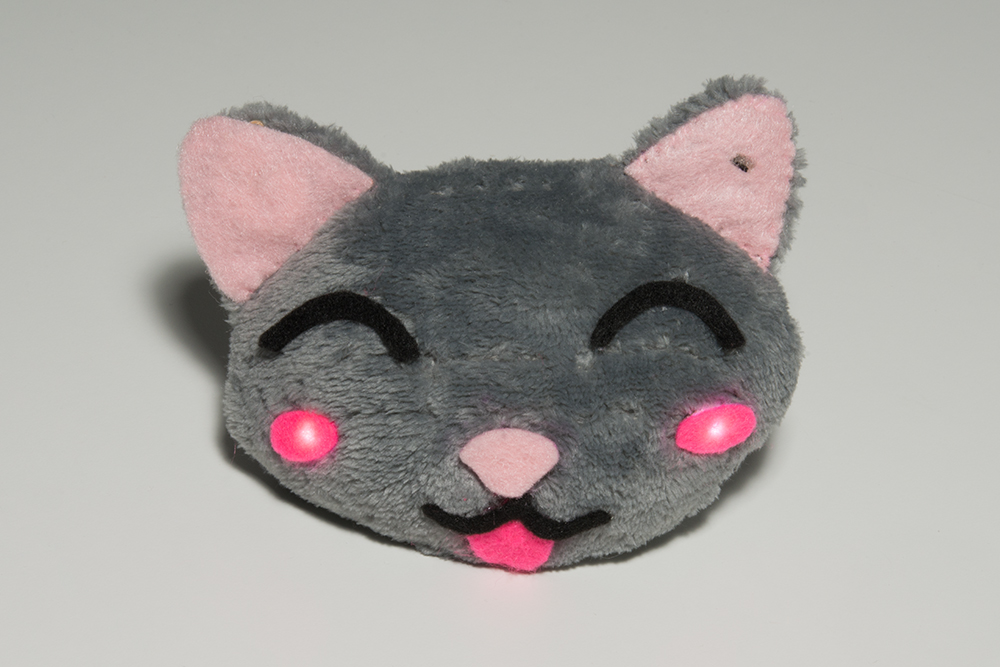
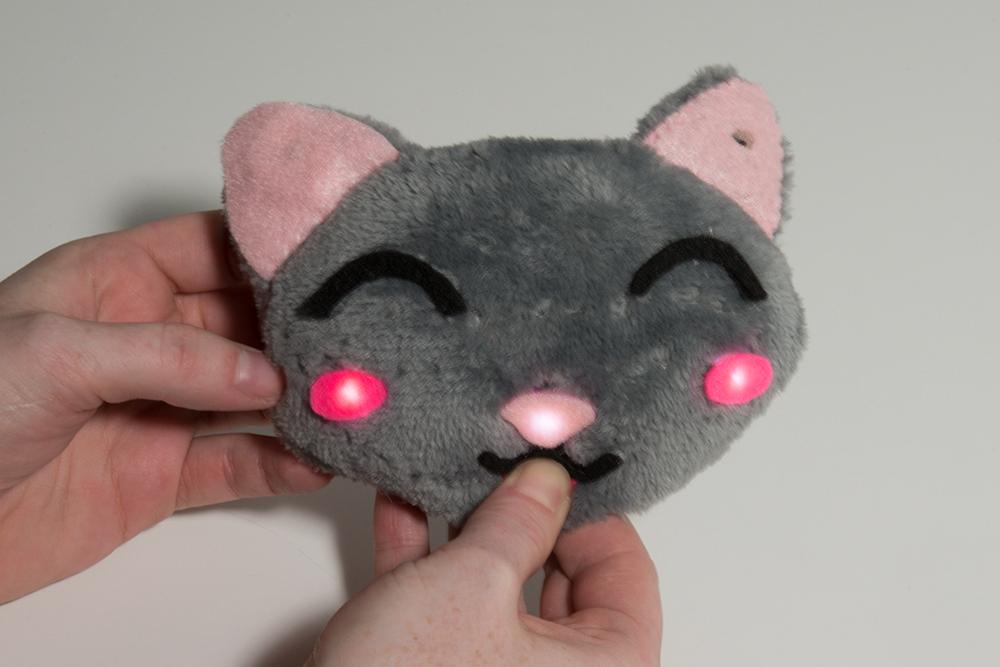
Example Projects and Templates
Check out the Light-Up Plush project tutorial for step-by-step instructions on using the E-Sewing ProtoSnap in a project.
Light-Up Plush
December 16, 2016
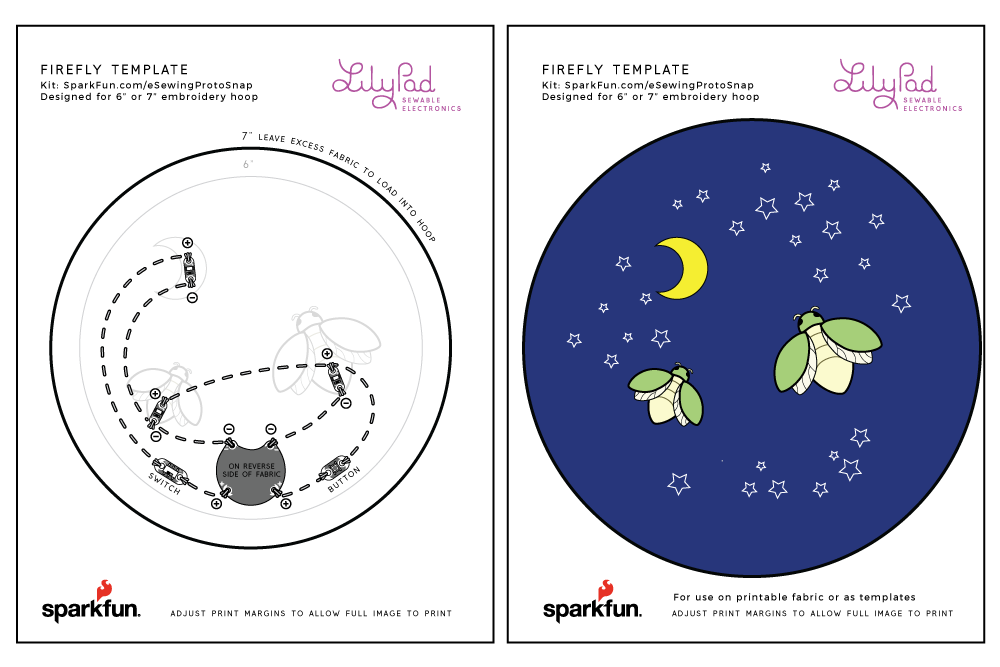
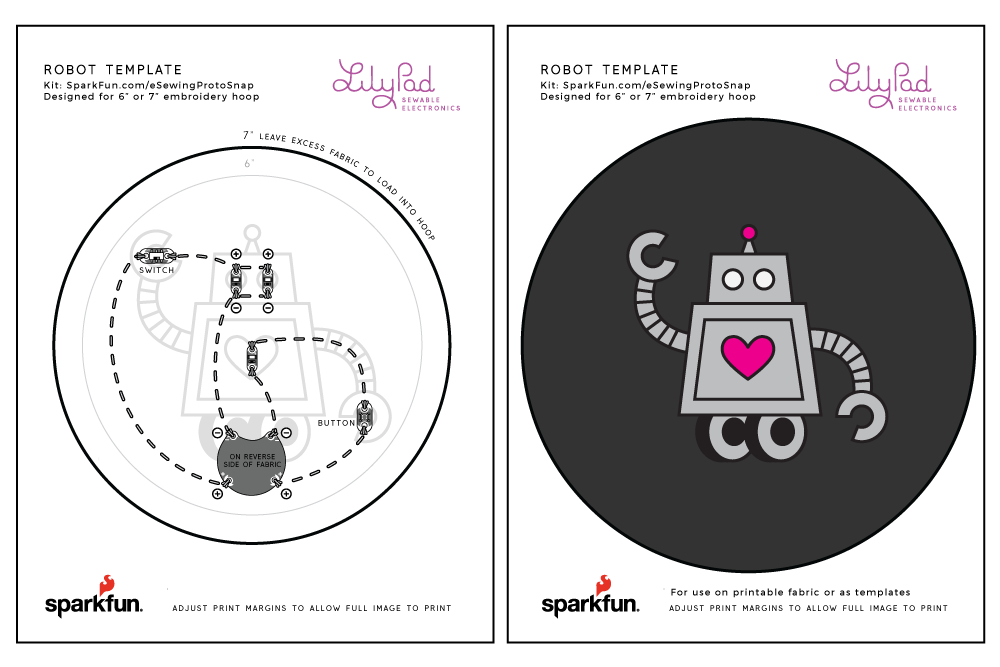
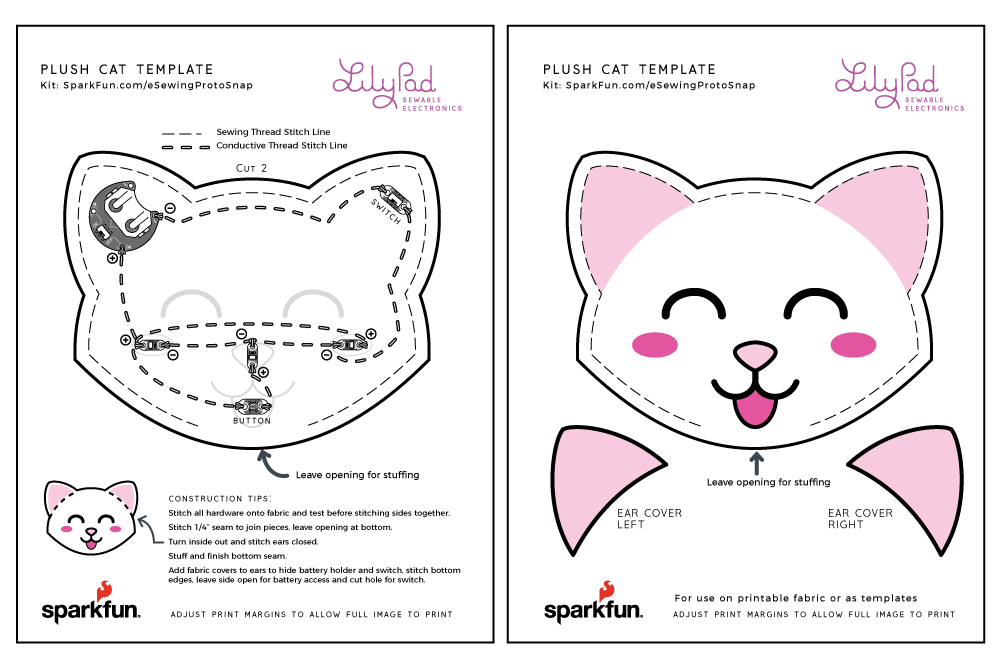
Project Templates
Looking for some more project ideas? Below are a few templates to use with an embroidery hoop or making another plush. Click on the button to download and print (2 pages each).

Resources and Going Further
For more information about the LilyPad E-Sewing ProtoSnap, check out the resources below:
- Schematic
- Eagle Files
- Template Downloads
- LilyPad Portal
- GitHub Repository
Here are some more LilyPad sewable electronics projects to try:
Light Up Pennant with E-Textiles
Night-Light Pennant with LilyMini ProtoSnap
Illuminated Mask
Twinkle Zodiac Constellation
Learn more wearable electronics techniques in these resources: