LilyPad Basics: Powering Your Project
 Gella
Gella Power Options: Using a Built-In USB Connector
While working on programming a LilyPad Arduino project, you can use the power supplied by the USB cable connecting your LilyPad Arduino to your computer. Make sure the slide switch on the LilyPad Arduino is set to the ON position to upload code and power up your board while prototyping.

This method works for LilyPad Arduinos with a built-in micro USB port and those with programming headers and LilyPad FTDI Basic Breakout.
LilyPad boards with a micro USB connector can be powered by 5V Lithium Ion battery packs such as the ones used in the Spectacle line or for backups for cell phone charging.
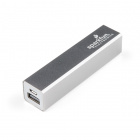
Lithium Ion Battery Pack - 2.5Ah (USB)
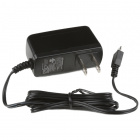
PRT-14367If your project is not portable or wearable (such as a wall hanging or permanent installation) you may choose to utilize a 5V wall adapter power supply for your project. Plugging into a dedicated power source will eliminate the need to constantly swap out or recharge batteries in your project.

Micro USB does not necessarily mean the battery pack is right for your project. When sourcing battery packs outside the SparkFun catalog make sure to double check the labeling on the packaging and the product to verify it is a 5V supply.
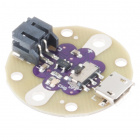
The LilyPad Simple Power is a board that offers you some flexibility - it can accommodate a rechargeable battery or a micro USB cable attached to a wall adapter for LilyPad projects that do not have a built-in battery connector.