LilyMini ProtoSnap Hookup Guide
 Gella
Gella 
Hardware Overview and Features
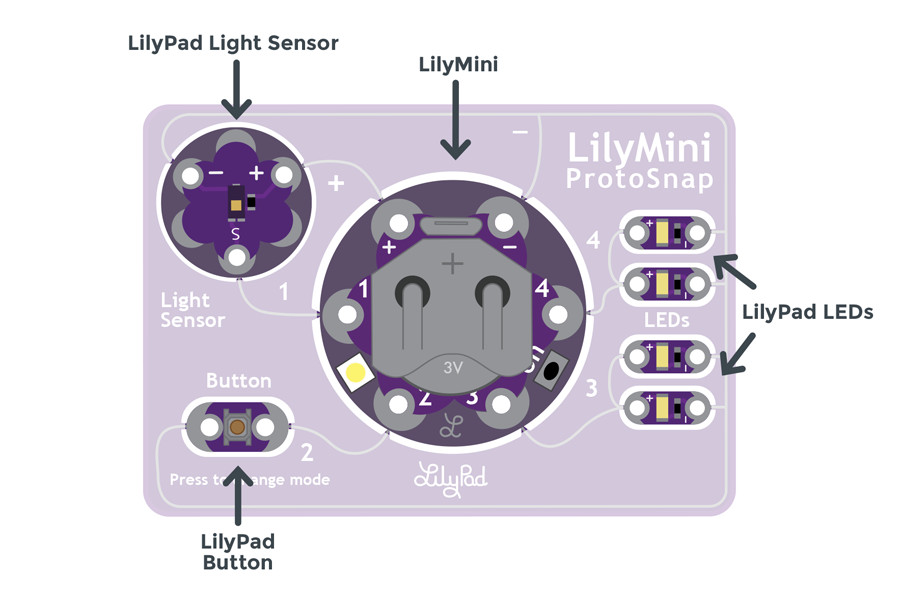
The LilyMini ProtoSnap includes six LilyPad components connected to a LilyMini by silver pathways called traces. After breaking the ProtoSnap into individual pieces, we will replace these pathways with conductive thread stitch lines. For easy reference, each piece on the ProtoSnap has a nearby label with its name and the LilyMini sew tab to which it is connected.
| LilyPad Component: | Connected to LilyMini Sew Tab: | Description: |
|---|---|---|
| LilyPad Light Sensor (S) | 1 | LilyMini receives ambient light level input from light sensor. |
| LilyPad Button | 2 | LilyMini receives button press input to change modes. |
| 2 LilyPad LEDs (+) | 3 | A pair of LEDs controlled by LilyMini modes. |
| 2 LilyPad LEDs (+) | 4 | A second pair of LEDs controlled by LilyMini modes. |
| LilyPad Light Sensor (+) | + | LilyMini provides power to the Light Sensor. |
| All components (-) | - | All components share a common ground connection back to the LilyMini. |
Powering the LilyMini ProtoSnap
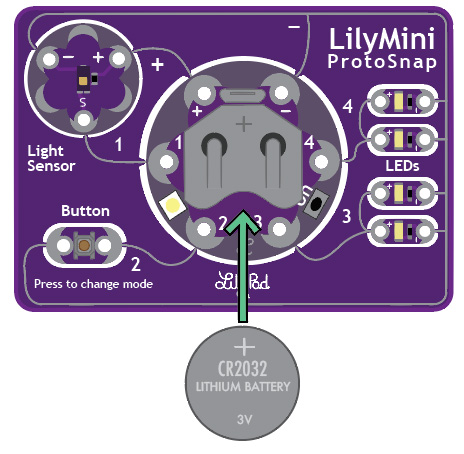
The LilyMini board, at the center of the ProtoSnap, has a built-in battery holder that will hold a 20mm CR2032 Coin Cell Battery. The board can also be powered through the micro USB port. If both are present, the USB cable takes priority. When the LilyMini is being powered via the cable, no power is drawn from the battery.
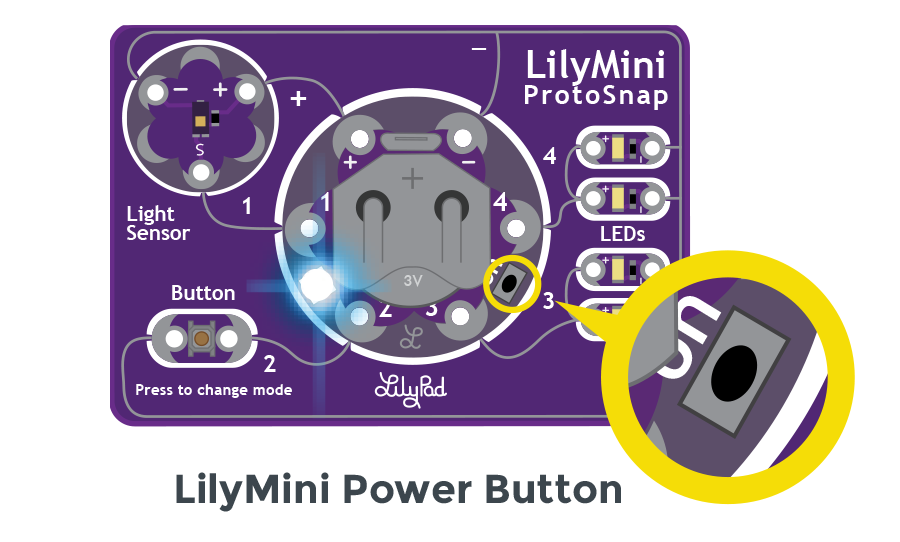
To turn on the LilyMini, locate the small push button labeled ON between sew tabs 3 and 4. With the battery installed (or USB cable connected) press and release the button quickly to start up the LilyMini. To turn the LilyMini off, press the button a second time.
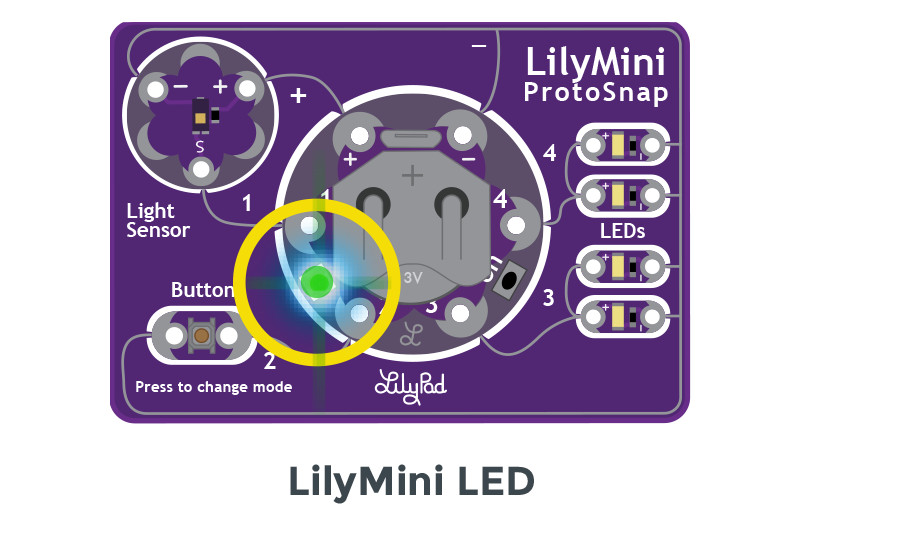
A built-in LED between sew tabs 1 and 2 is used as an indicator light when powered on. The LED will briefly flash green upon start up if the battery has enough charge to power the board or flash red if the battery is too low and will not power the circuit. The LilyMini does not include a battery charging circuit, when the LED flashes red we recommend installing a new battery for best performance.