Light-Emitting Diodes (LEDs)
 Nick Poole,
  bboyho
LEDs Without Math
Before we talk about how to read a datasheet, let's hook up some LEDs. After all, this is an LED tutorial, not a reading tutorial.
It's also not a math tutorial, so we'll give you a few rules of thumb for getting LEDs up and running. As you've probably put together from the info in the last section, you'll need a battery, a resistor, and an LED. We're using a battery as our power source, because they're easy to find and they can't supply a dangerous amount of current.
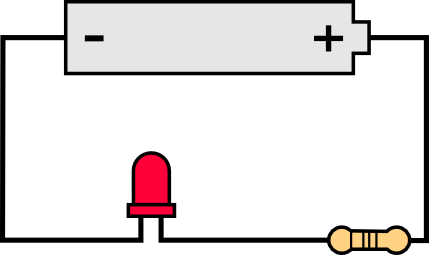
The basic template for an LED circuit is pretty simple, just connect your battery, resistor and LED in series. Like this:
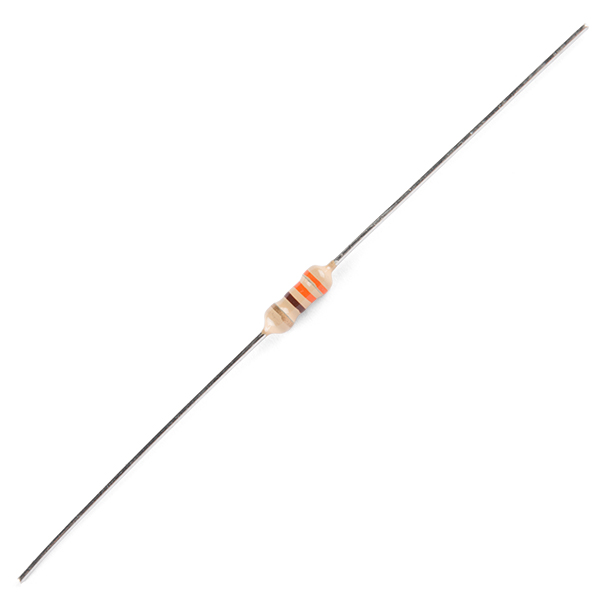
330 Ohm Resistor
A good resistor value for most LEDs is 330 Ohms ( orange - orange - brown ). You can use the information from the last section to help you determine the exact value you need, but this is LEDs without math... So, start by popping a 330 Ohm resistor into the above circuit and see what happens.
Trial and Error
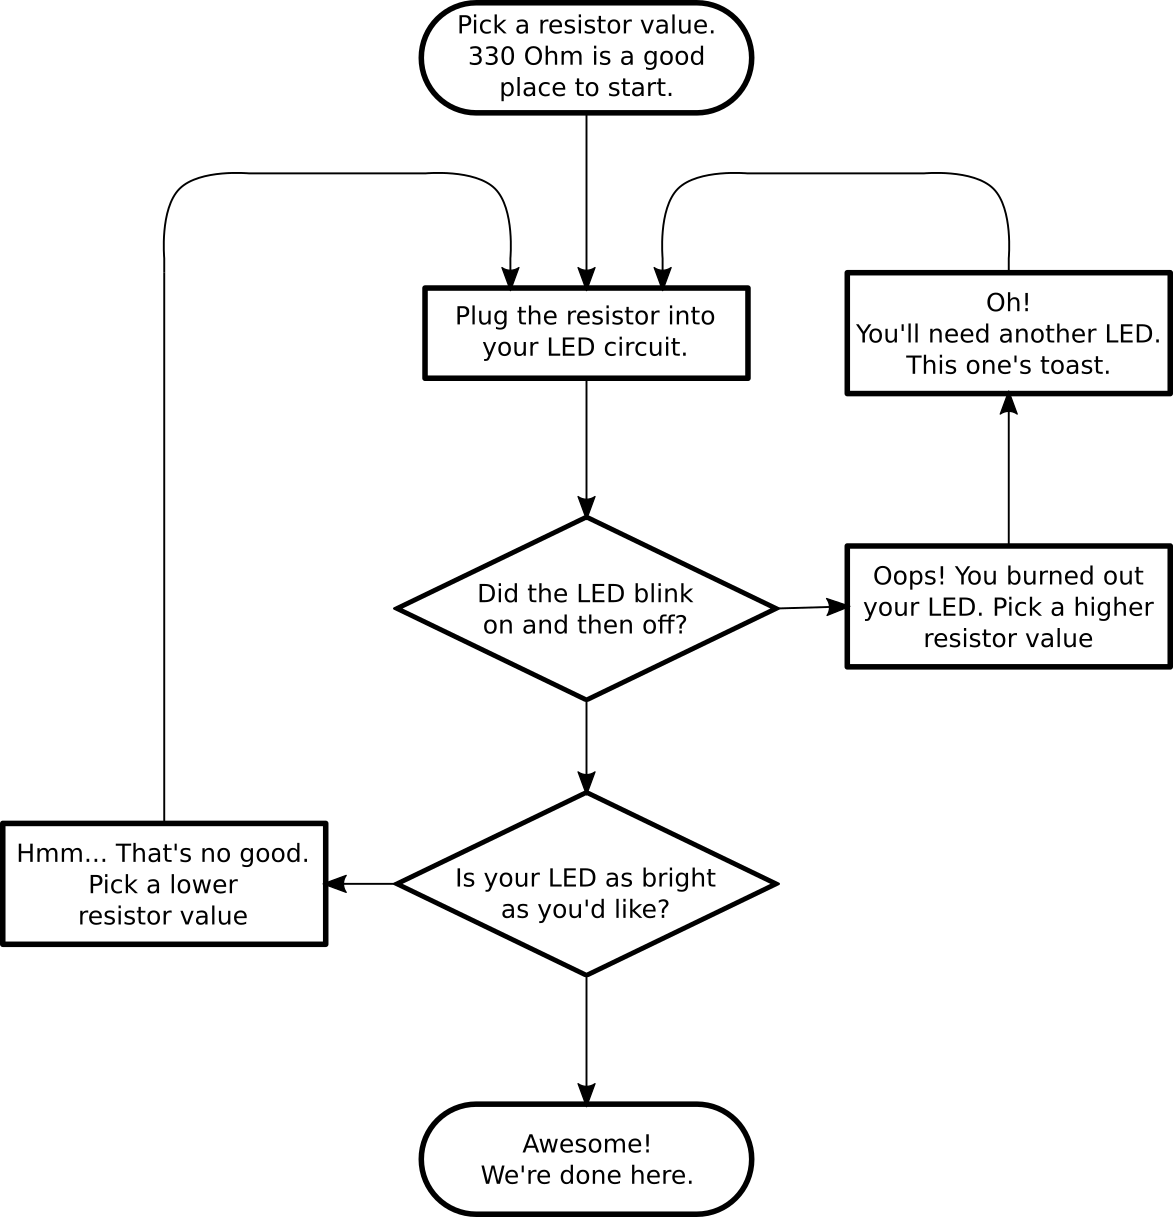
The interesting thing about resistors is that they'll dissipate extra power as heat, so if you have a resistor that's getting warm, you probably need to go with a smaller resistance. If your resistor is too small, however, you run the risk of burning out the LED! Given that you have a handful of LEDs and resistors to play with, here's a flow chart to help you design your LED circuit by trial and error:
Throwies with a Coin Cell Battery
Another way to light up an LED is to just connect it to a coin cell battery! Since the coin cell can't source enough current to damage the LED, you can connect them directly together! Just push a CR2032 coin cell between the leads of the LED. The long leg of the LED should be touching the side of the battery marked with a "+". Now you can wrap some tape around the whole thing, add a magnet, and stick it to stuff! Yay for throwies!
Of course, if you're not getting great results with the trial and error approach, you can always get out your calculator and math it up. Don't worry, it's not hard to calculate the best resistor value for your circuit. But before you can figure out the optimal resistor value, you'll need to find the optimal current for your LED. For that we'll need to report to the datasheet...