LED PomPom Headbands
 Feldi
Feldi 
Understanding Your Circuit
The beginner PomPom Headband project is an example of a basic circuit – an electrical loop that travels from a power source along a path (i.e. wires, traces, or any conductive materials), through one or more component(s), and then back to the power source. For our project, we’ll use LEDs (Light-Emitting Diodes). This electrical loop for the project is completed by soldering the LED's leads together. In order to light the LEDs, electricity from the power source must flow from the positive (+) side of the battery through an LED and back to the negative (–) side of the battery. This electric flow is called current.
In this circuit, the LEDs are soldered in parallel. Take a look at the LEDs, current limiting resistors, and battery in the circuit diagram below. When the LEDs are connected in parallel, all the positive leads will be connected together. The bent leads on the right of the LEDs (anodes +) are connected to VCC on the power source and each other in red. Additionally, the negative leads will share another connection. Notice that the leads on the left of the LEDs (cathodes -) are connected to ground on the power source with a resistor. We used a 47Ω resistor labeled with the yellow-purple-black bands.
It's important to keep in mind that certain electronic components have polarity, meaning electric current can only flow through them in one direction. If hooked up incorrectly, the LEDs will not light up. The battery is also polarized; it has a positive and negative side. Always check the to make sure that all your parts are correctly oriented before soldering together a circuit.

*PLEASE NOTE: Usually, you would want to include a current limiting resistor between the power source and LEDs. In our circuit, we added a 47 Ohm current limiting resistor for each LED. You will want to consider adding a current limiting resistor to safely power the project.
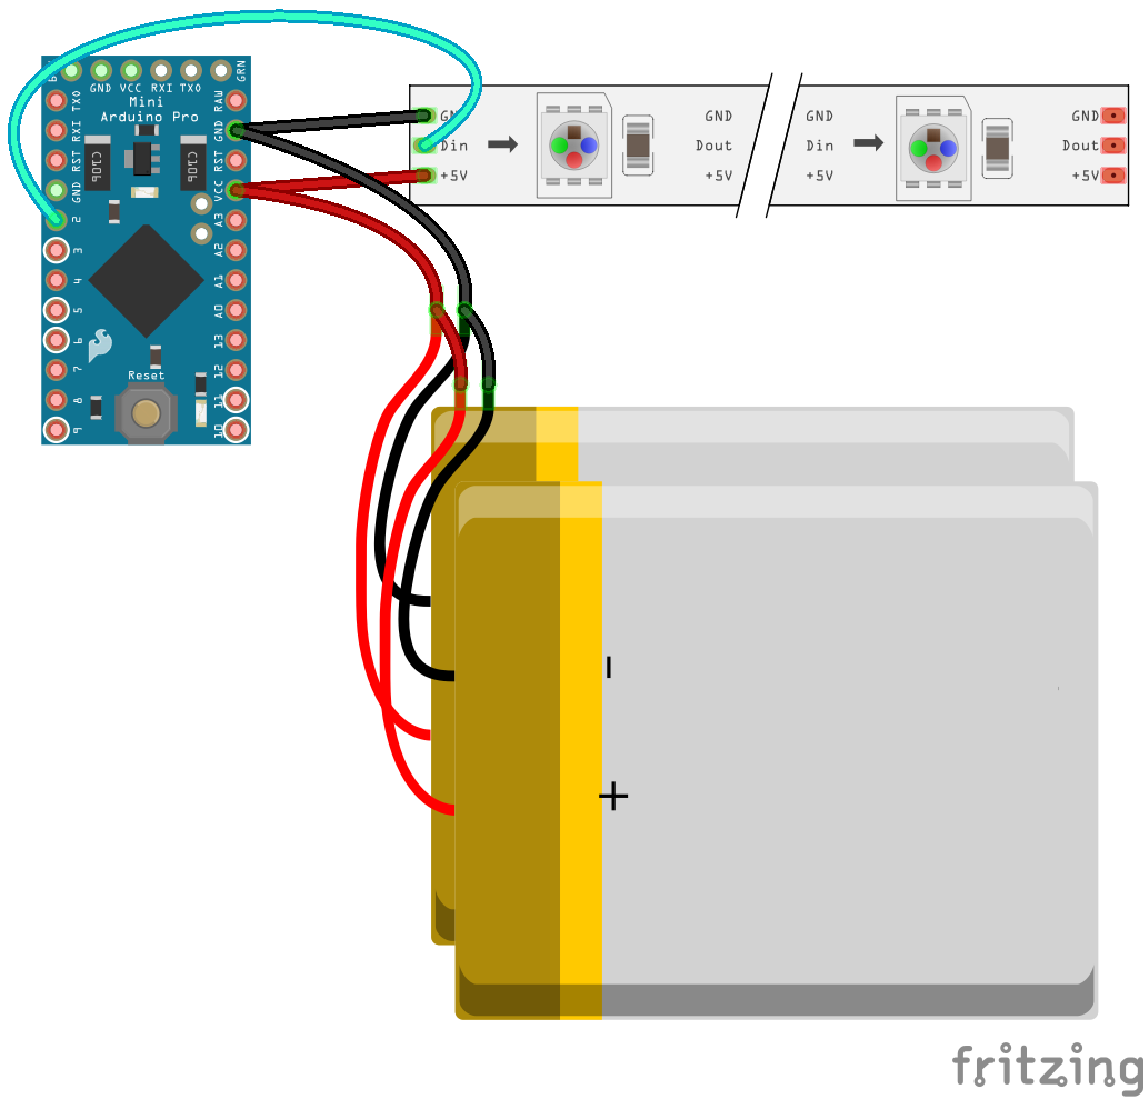
The more advanced PomPom Headband project is a more complex circuit in that we are including a microcontroller - the 5V Arduino Pro Mini. This single board computer is the brains behind this project. The program we upload to the 5V Arduino Pro Mini will dictate the colors of addressable RGB LEDs. The exciting part about this project is that you can change your code as many times as you like to customize the colors for a specific event! Please refer to the below circuit diagram when soldering your parts together.