IoT Weight Logging Scale
 SFUptownMaker
Hardware Hookup
You'll need to connect up the hardware before going any farther. We'll walk you through it.
Connect Up the Scale
I bought a Taylor model 7058 scale for this project at my local Target store. I chose it because it was cheap and looked like it might have an LED display (it doesn't). I had hoped to repurpose a significant amount of the internal hardware but in the end, all I was able to salvage was the body and load cells.
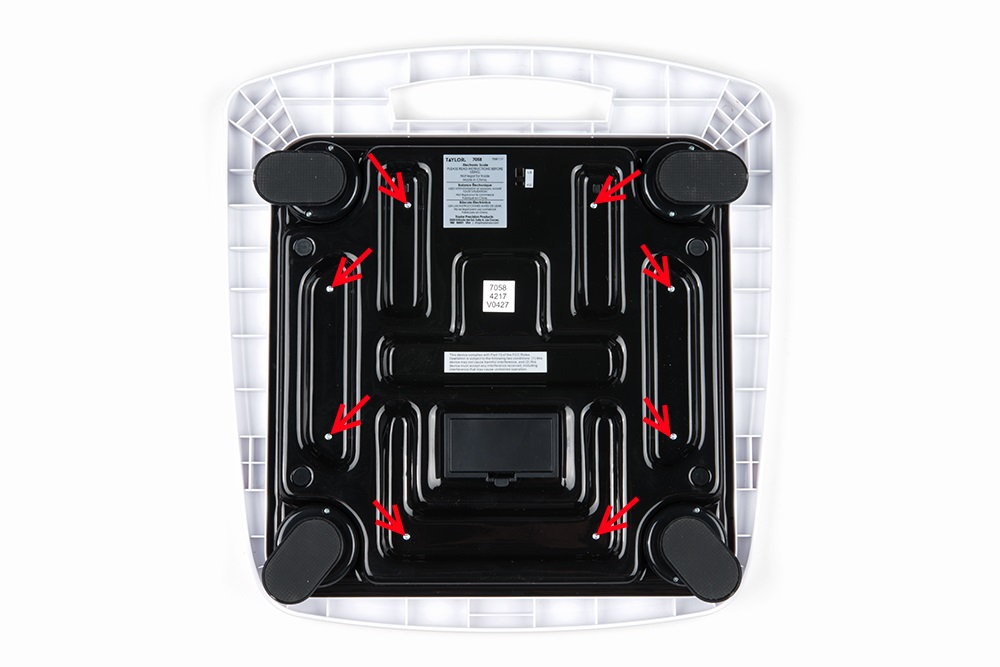
Start by removing the screws from the underside of the scale. The image below has red arrows pointing to the screws that need to be removed. Other screws do not need to come off and in fact, should not be removed.
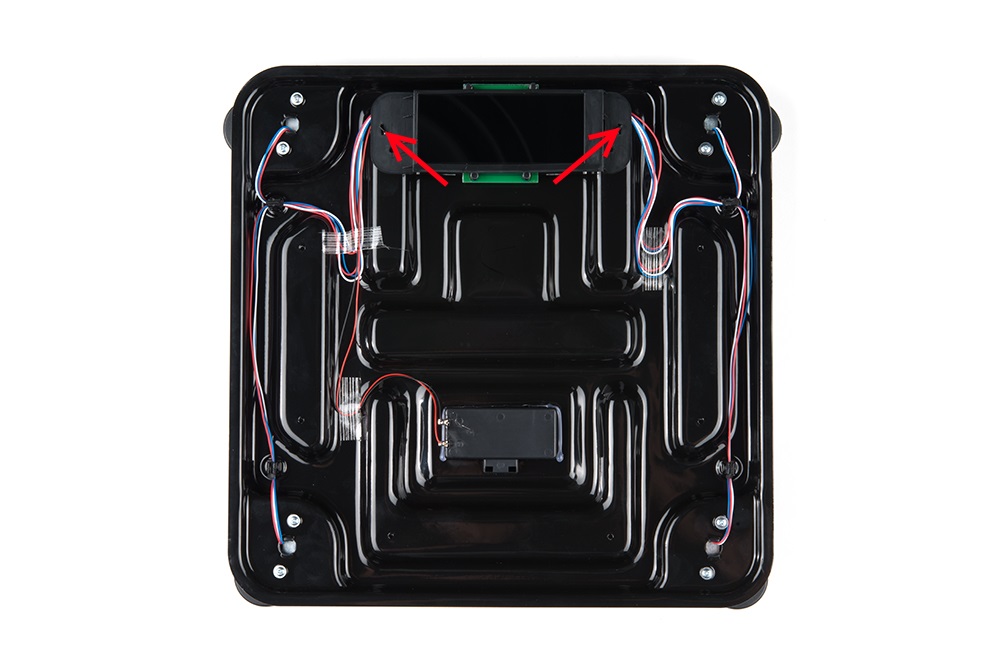
Flip the scale over and lift the top plate off, carefully. The electronics are held in a box that is attached to the bottom plate by a couple of twisted tabs, marked in the image below with red arrows.
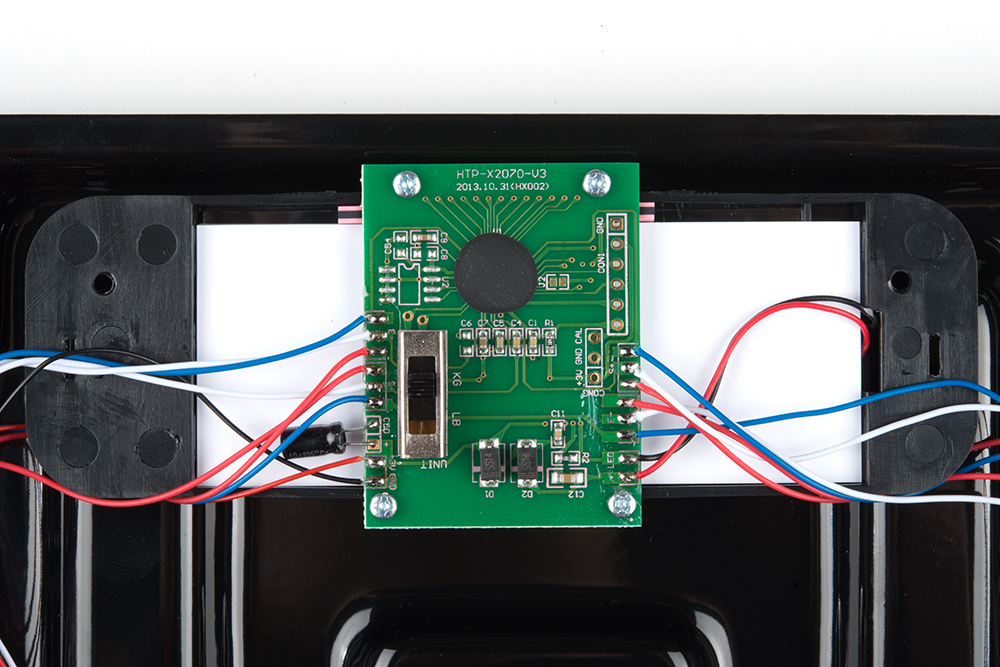
Snip the wires off the PCB. I prefer to snip the wires and restrip them rather than desoldering as I feel it gives a cleaner end to the wire, leaving the wires less likely to fray. You can pitch the entire electronics subassembly-- we won't be reusing any of it.
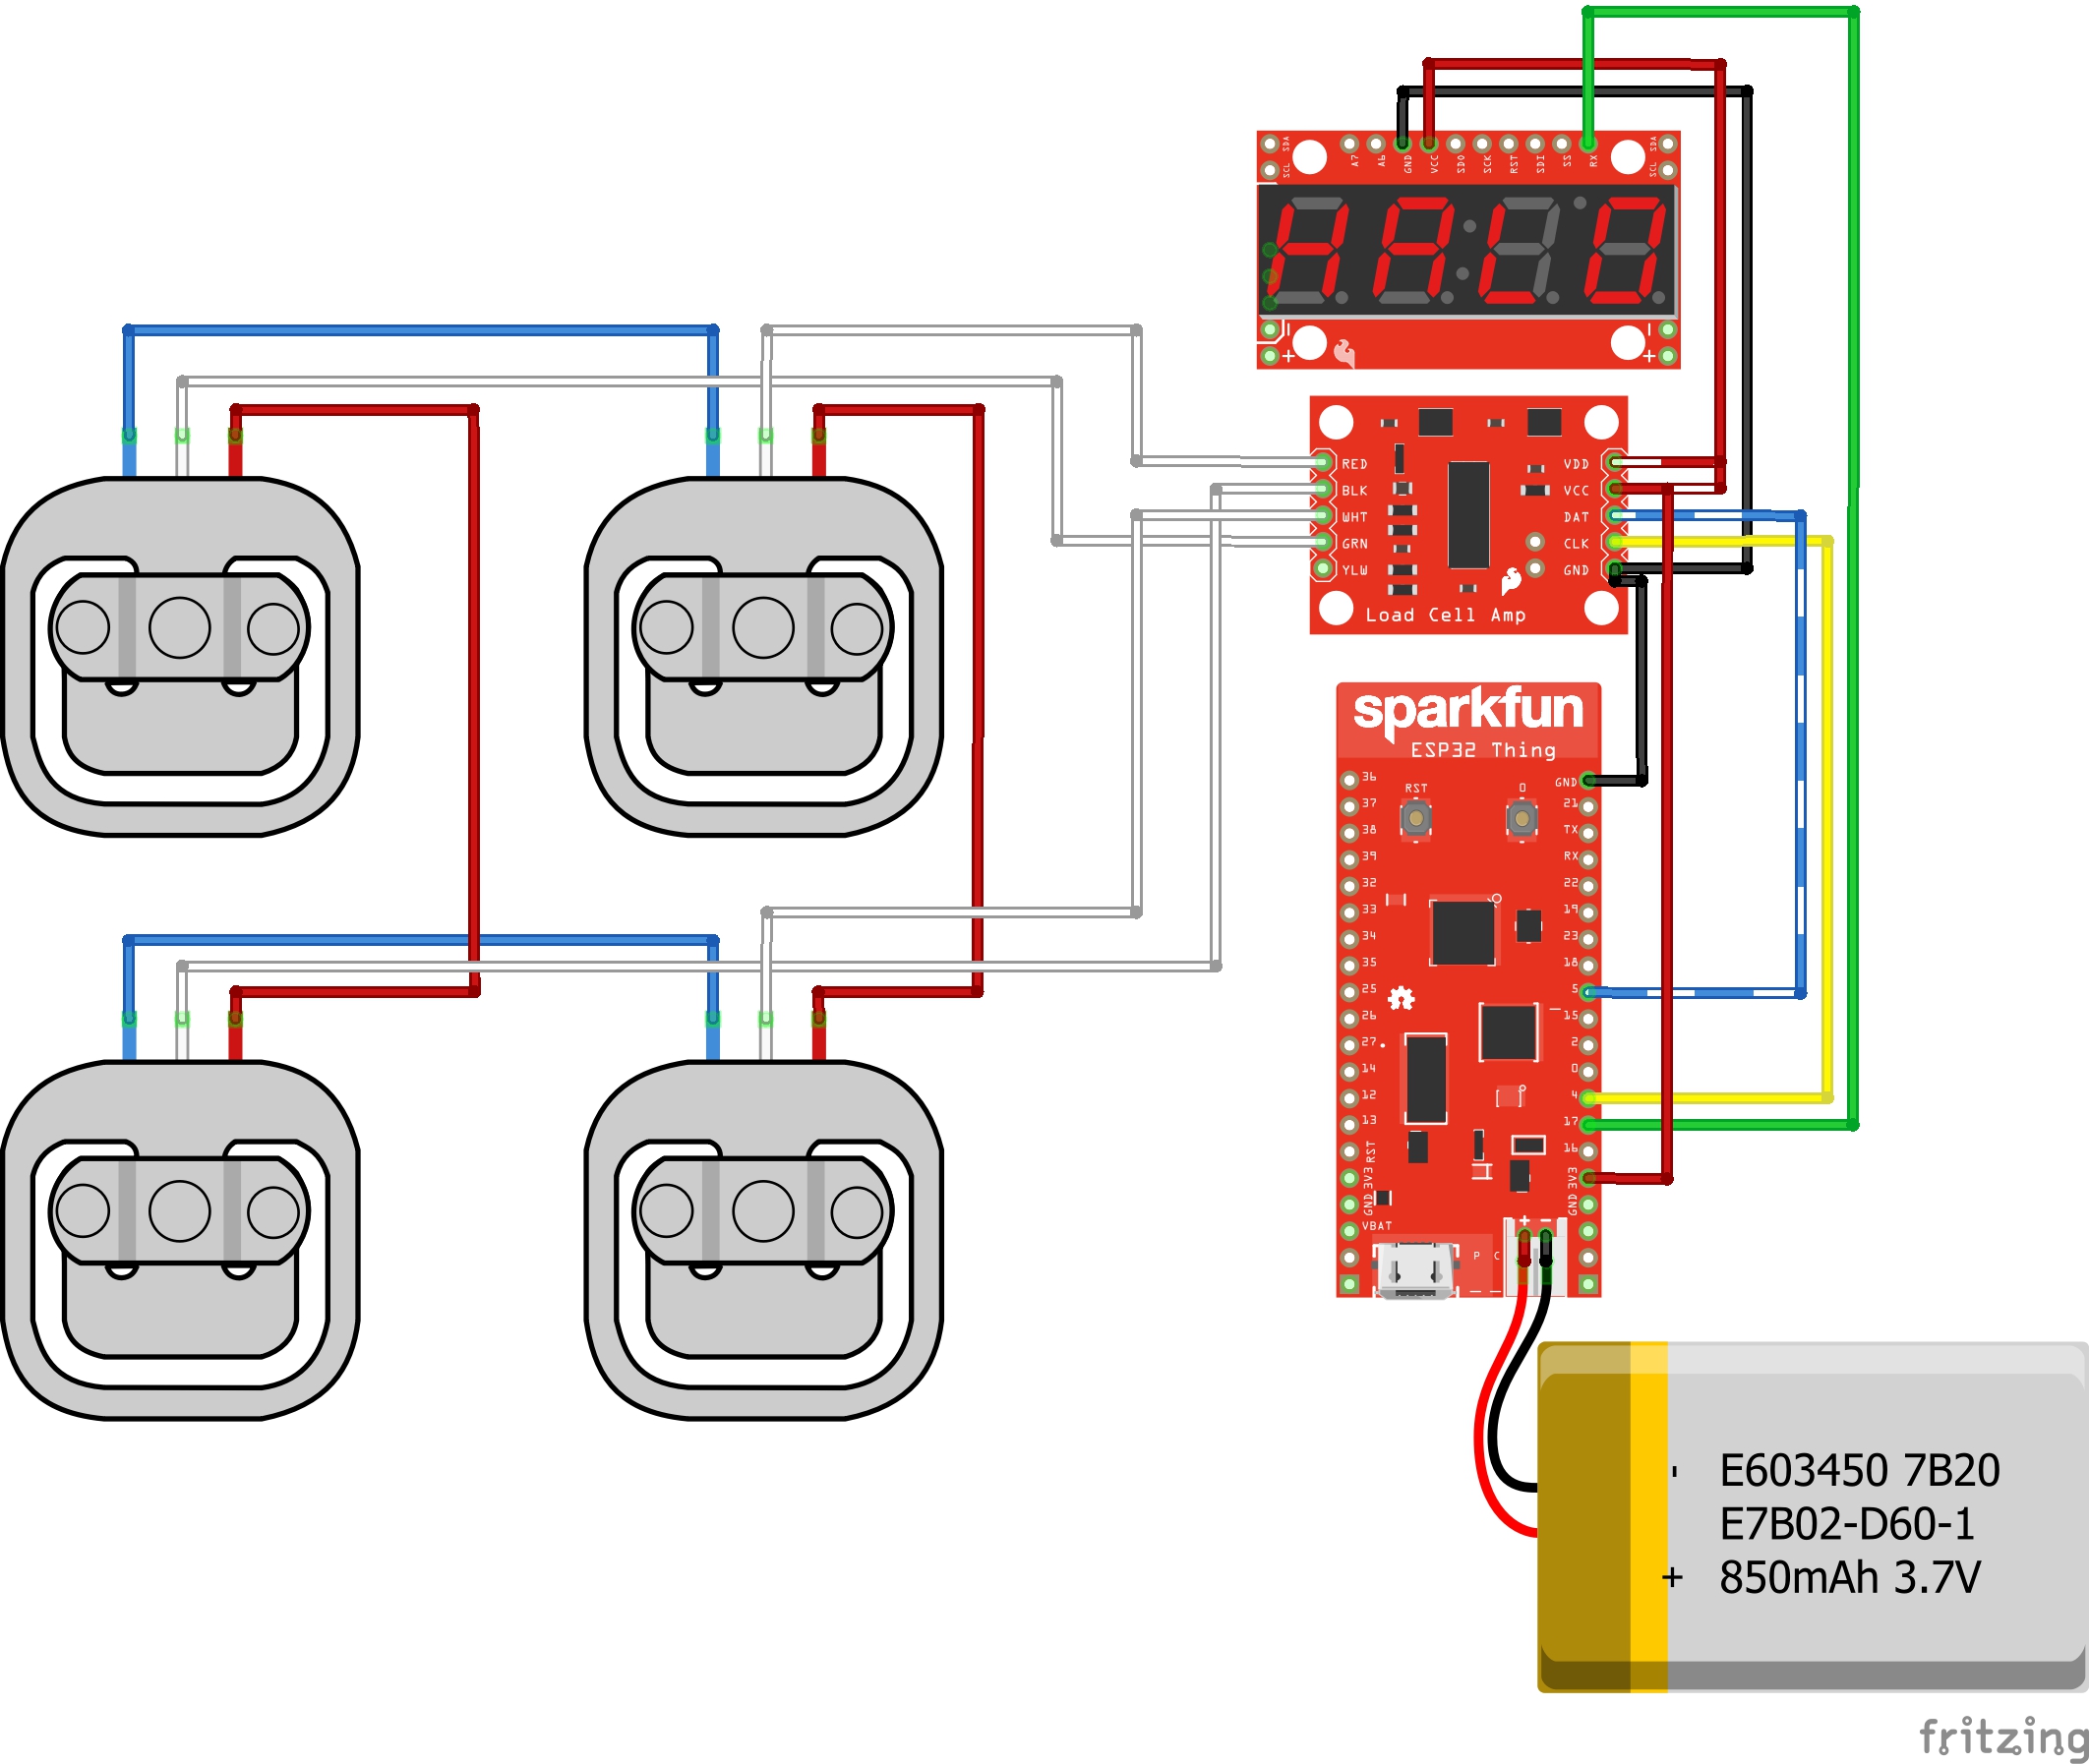
You'll now need to reconnect the wires, some to one another, others to the amplifier. Check out the drawing below for the order in which to hook up the wires. The upper left sensor's blue wire connects to the upper right sensor's blue wire. The upper left sensor's red wire connects to the lower left sensor's red wire. The lower left sensor's blue wire, to the lower right sensor's blue wire, and the lower right sensor's red wire, to the upper right sensor's red wire. Red to red, blue to blue.
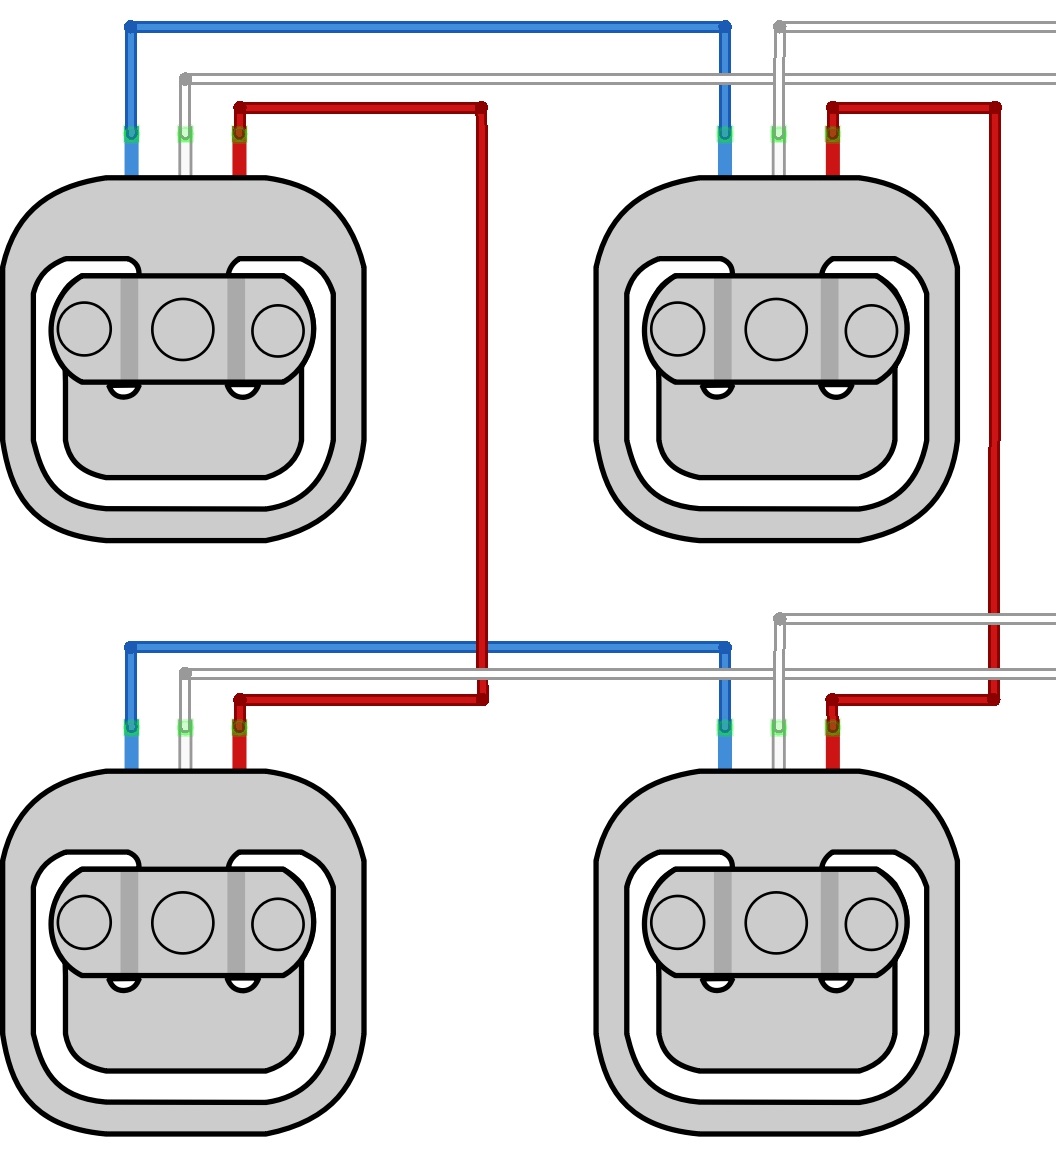
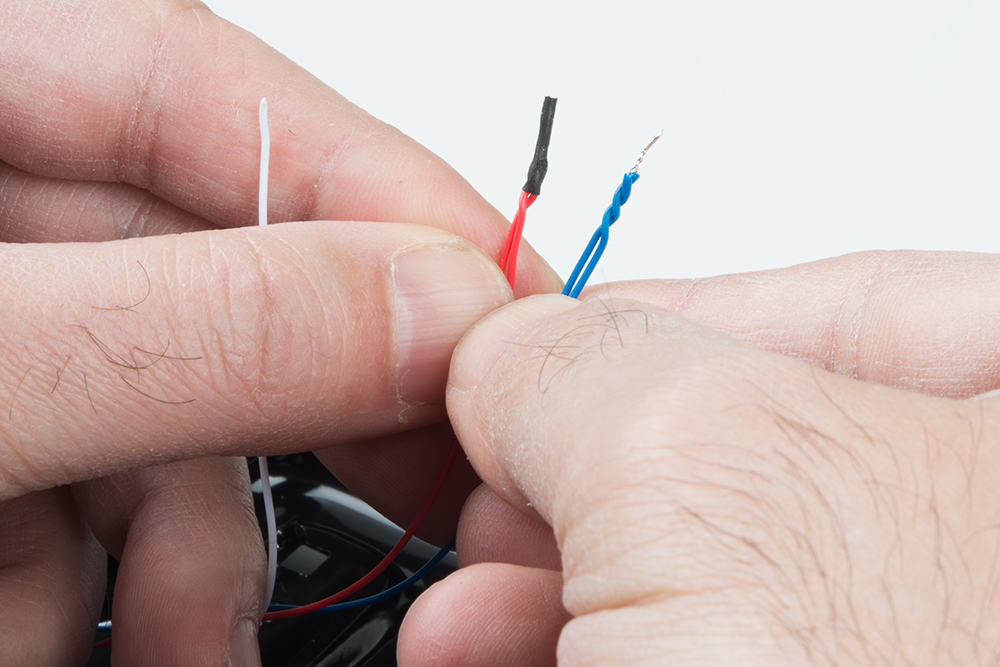
My strategy is to strip perhaps 3-4mm of the end of the wire and twist the two wires together, then solder the bare ends and slip a small section of heat shrink tubing over the joint. The white wires will be connected to the amplifier, so don't worry about them right now.
Connect Up the Electronics
Now that you've got the scale all ready to go, you can bring in the electronics. Below is a hookup diagram showing how to wire them all together. To power the project remotely, we'll be using a LiPo battery.
I chose to pop out the plastic window that the display had previously been behind so I could run the wires out the front and mount my electronics on the outside. You may want to try squeezing everything inside the case, as it will probably fit and will give a cleaner build. However, it does make accessing the power port on the ESP32 Thing more difficult for either powering or charging.