IOIO-OTG Hookup Guide
 Joel_E_B, Ytai
Building Your First PC App
In the previous section, we ran a pre-built PC application. In this section we will use that same application's code to learn how to build/compile our own PC application (.jar file) for the IOIO.
Download Gradle
To begin, we need to first download Gradle to compile the code. Gradle is an open source build automation system used to compile code -- Java in this case.
Download Gradle here, if you have not done so already. You can grab the Binary only distribution.
Extract the .zip file, and place it somewhere you'll remember. It's recommended you place it in your home directory.
You will most likely need to add the Gradle bin folder to your $PATH.
Windows users can find GUI $PATH instructions here. Command line instructions can be found here. The command should look something like this:
PATH %PATH%;~/gradle-2.12/bin/
Mac users can find $PATH instructions here. The command should look something like this:
export PATH=$PATH:~/gradle-2.12/bin/
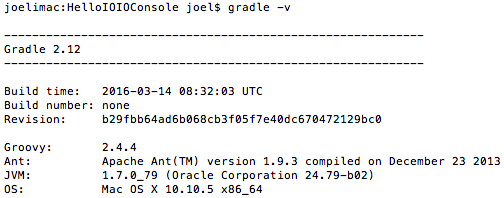
You can check to see if it worked by typing gradle -v. You should see some version info print out.
More information on Gradle can be found on the IOIO Wiki.
Looking at the Code
In the command line, navigate to the App-IOIOxxxx folder you downloaded from GitHub previously. Then cd to the /src/applications/pc directory. Here you will find all the PC applications and all their source code. The application we used previously was the HelloIOIOConsole app. From here, continue to navigate to this directory: /HelloIOIOConsole/src/main/java/ioio/examples/hello_console/. In here you'll find a HelloIOIOConsole.java file. This is the code we want to have a look at. Open this file in vim or your favorite editor. You can copy the line below.
vim /src/applications/pc/HelloIOIOConsole/src/main/java/ioio/examples/hello_console/HelloIOIOConsole.java
You can also navigate to that folder from your file explorer and open the file in your favorite code viewer.
The code you see should look like the code below:
language:java
1 package ioio.examples.hello_console;
2
3 import java.io.BufferedReader;
4 import java.io.IOException;
5 import java.io.InputStreamReader;
6
7 import ioio.lib.api.DigitalOutput;
8 import ioio.lib.api.IOIO;
9 import ioio.lib.api.exception.ConnectionLostException;
10 import ioio.lib.util.BaseIOIOLooper;
11 import ioio.lib.util.IOIOConnectionManager.Thread;
12 import ioio.lib.util.IOIOLooper;
13 import ioio.lib.util.pc.IOIOConsoleApp;
14
15 public class HelloIOIOConsole extends IOIOConsoleApp {
16         private boolean ledOn_ = false;
17
18         // Boilerplate main(). Copy-paste this code into any IOIOapplication.
19         public static void main(String[] args) throws Exception {
20                 new HelloIOIOConsole().go(args);
21         }
22
23         @Override
24         protected void run(String[] args) throws IOException {
25                 BufferedReader reader = new BufferedReader(new InputStreamReader(
26                                 System.in));
27                 boolean abort = false;
28                 String line;
29                 while (!abort && (line = reader.readLine()) != null) {
30                         if (line.equals("t")) {
31                                 ledOn_ = !ledOn_;
32                         } else if (line.equals("n")) {
33                                 ledOn_ = true;
34                         } else if (line.equals("f")) {
35                                 ledOn_ = false;
36                         } else if (line.equals("q")) {
37                                 abort = true;
38                         } else {
39                                 System.out
40                                          .println("Unknown input. t=toggle, n=on, f=off, q=quit.");
41                         }
42                 }
43         }
44
45         @Override
46         public IOIOLooper createIOIOLooper(String connectionType, Object extra) {
47                 return new BaseIOIOLooper() {
48                         private DigitalOutput led_;
49
50                         @Override
51                         protected void setup() throws ConnectionLostException,
52                                         InterruptedException {
53                                 led_ = ioio_.openDigitalOutput(IOIO.LED_PIN, true);
54                         }
55
56                         @Override
57                         public void loop() throws ConnectionLostException,
58                                         InterruptedException {
59                                 led_.write(!ledOn_);
60                                 Thread.sleep(10);
61                         }
62                 };
63         }
64 }
If you have programmed Arduinos or other microcontrollers before, you will see some familiar lines of code. Starting on line 16, we have a variable called ledOn_. This boolean holds the state of the LED, true or false for high or low.
Following that, we have the run() function on line 24. Then you can see the if and if/else statements that control the state of the LED based on the input received in the Command line.
Next, on line 51, there's the void setup() function and the void loop() function on line 57, with which you may be familiar. Inside the setup() function on line 53, there is the led_ variable that is set to IOIO.LED_PIN. This is telling the code to use the IOIO's onboard Stat LED, "pin 0."
Last, in the loop() function on line 59, there is the led_.write() function that alters the state of the Stat LED, !ledOn_, when the appropriate characters are received from user input. The Thread.sleep(10); is just a delay, having the loop check every 10ms.
Compile the Code
Now that we have a better understanding of what's happening in the code, it's time to build our own executable .jar file that will allow us to run this PC app on the IOIO.
To compile the code, change directories back to:
/src/applications/pc/HelloIOIOConsole
In this directory, you will see the src folder we were just exploring and a build.gradle file. If you would like, you may open the build.gradle file in your favorite editor to see how the compiler works. Going into those details is beyond the scope of this tutorial.
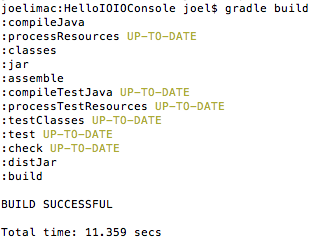
Type gradle build. You should see some info print out followed by BUILD SUCCESSFUL.
Run the Application
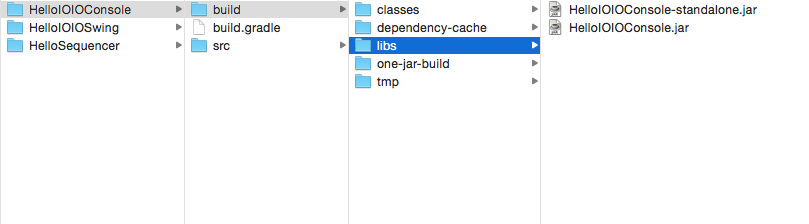
Type ls once the compilation is complete. You should now see a folder titled build. Inside that build folder is the .jar app we intend to run on the IOIO. Navigate to:
cd build/libs
Here, you should see two .jar files. The one titled HelloIOIOConsole-standalone.jar is the one we're after.
Connect the IOIO to the PC if it isn't connected already.
Back in your Command line, type the following to run the app. Don't forget to change YOUR_IOIO_SERIAL_PORT to the port to which your IOIO is connected, as mentioned in the previous section.
java -Dioio.SerialPorts=YOUR_IOIO_SERIAL_PORT -jar HelloIOIOConsole-standalone.jar
As in the previous section, you should see some info print out followed by IOIO connection established. You can now control the IOIO Stat LED just as before, typing t + ENTER to toggle its state.
Congratulations, you just built your first Java app for the IOIO!
From here, you can use this code as a base to start exploring the IOIO's capabilities. Change or add a few lines of code, compile with Gradle, and see what happens!
For a complete list of all the commands you can issue to the IOIO, go back to the IOIO folder you downloaded from GitHub. Inside that folder is another folder titled doc. Navigate to doc, and open the index.html file in your browser. There you will find a reference of all the IOIO classes. See if you can get an LED to blink on one of the IOIO's digital I/O pins.
Check the Resources and Going Further section for more information and links to IOIO resources.
If you are having trouble getting the app to work, please visit the Troubleshooting section.