Interactive Hanging LED Array
 Nick Poole
On Running Cable
Because I wanted to hang the lights in an array on the ceiling, each LED needed to be on a separate length of wire running from its position on the ceiling to the control cabinet. That's a problem for a couple of reasons, not least of which is the sheer amount of wire needed to make that stretch. I started by selecting a good multi-conductor cable. I figured it would be easier to strip some sort of ribbon cable and drop the LED lines at intervals from the main ribbon than it would be to run 144 separate wires and bundle them later. After looking around for multi-conductor cable that can be bought in bulk, I finally settled on networking cable!
As it turns out, a 1000ft. box of CAT5 networking riser will wire just about anything and everything you need. And, because networking cable is made up of twisted pairs, it's perfect for wiring LEDs. In an ideal world, I could have taken that box of wire and just started draping wire from the ceiling to get things cut correctly. Unfortunately, in the real world, this was getting installed in a conference room, so I couldn't really set up shop.
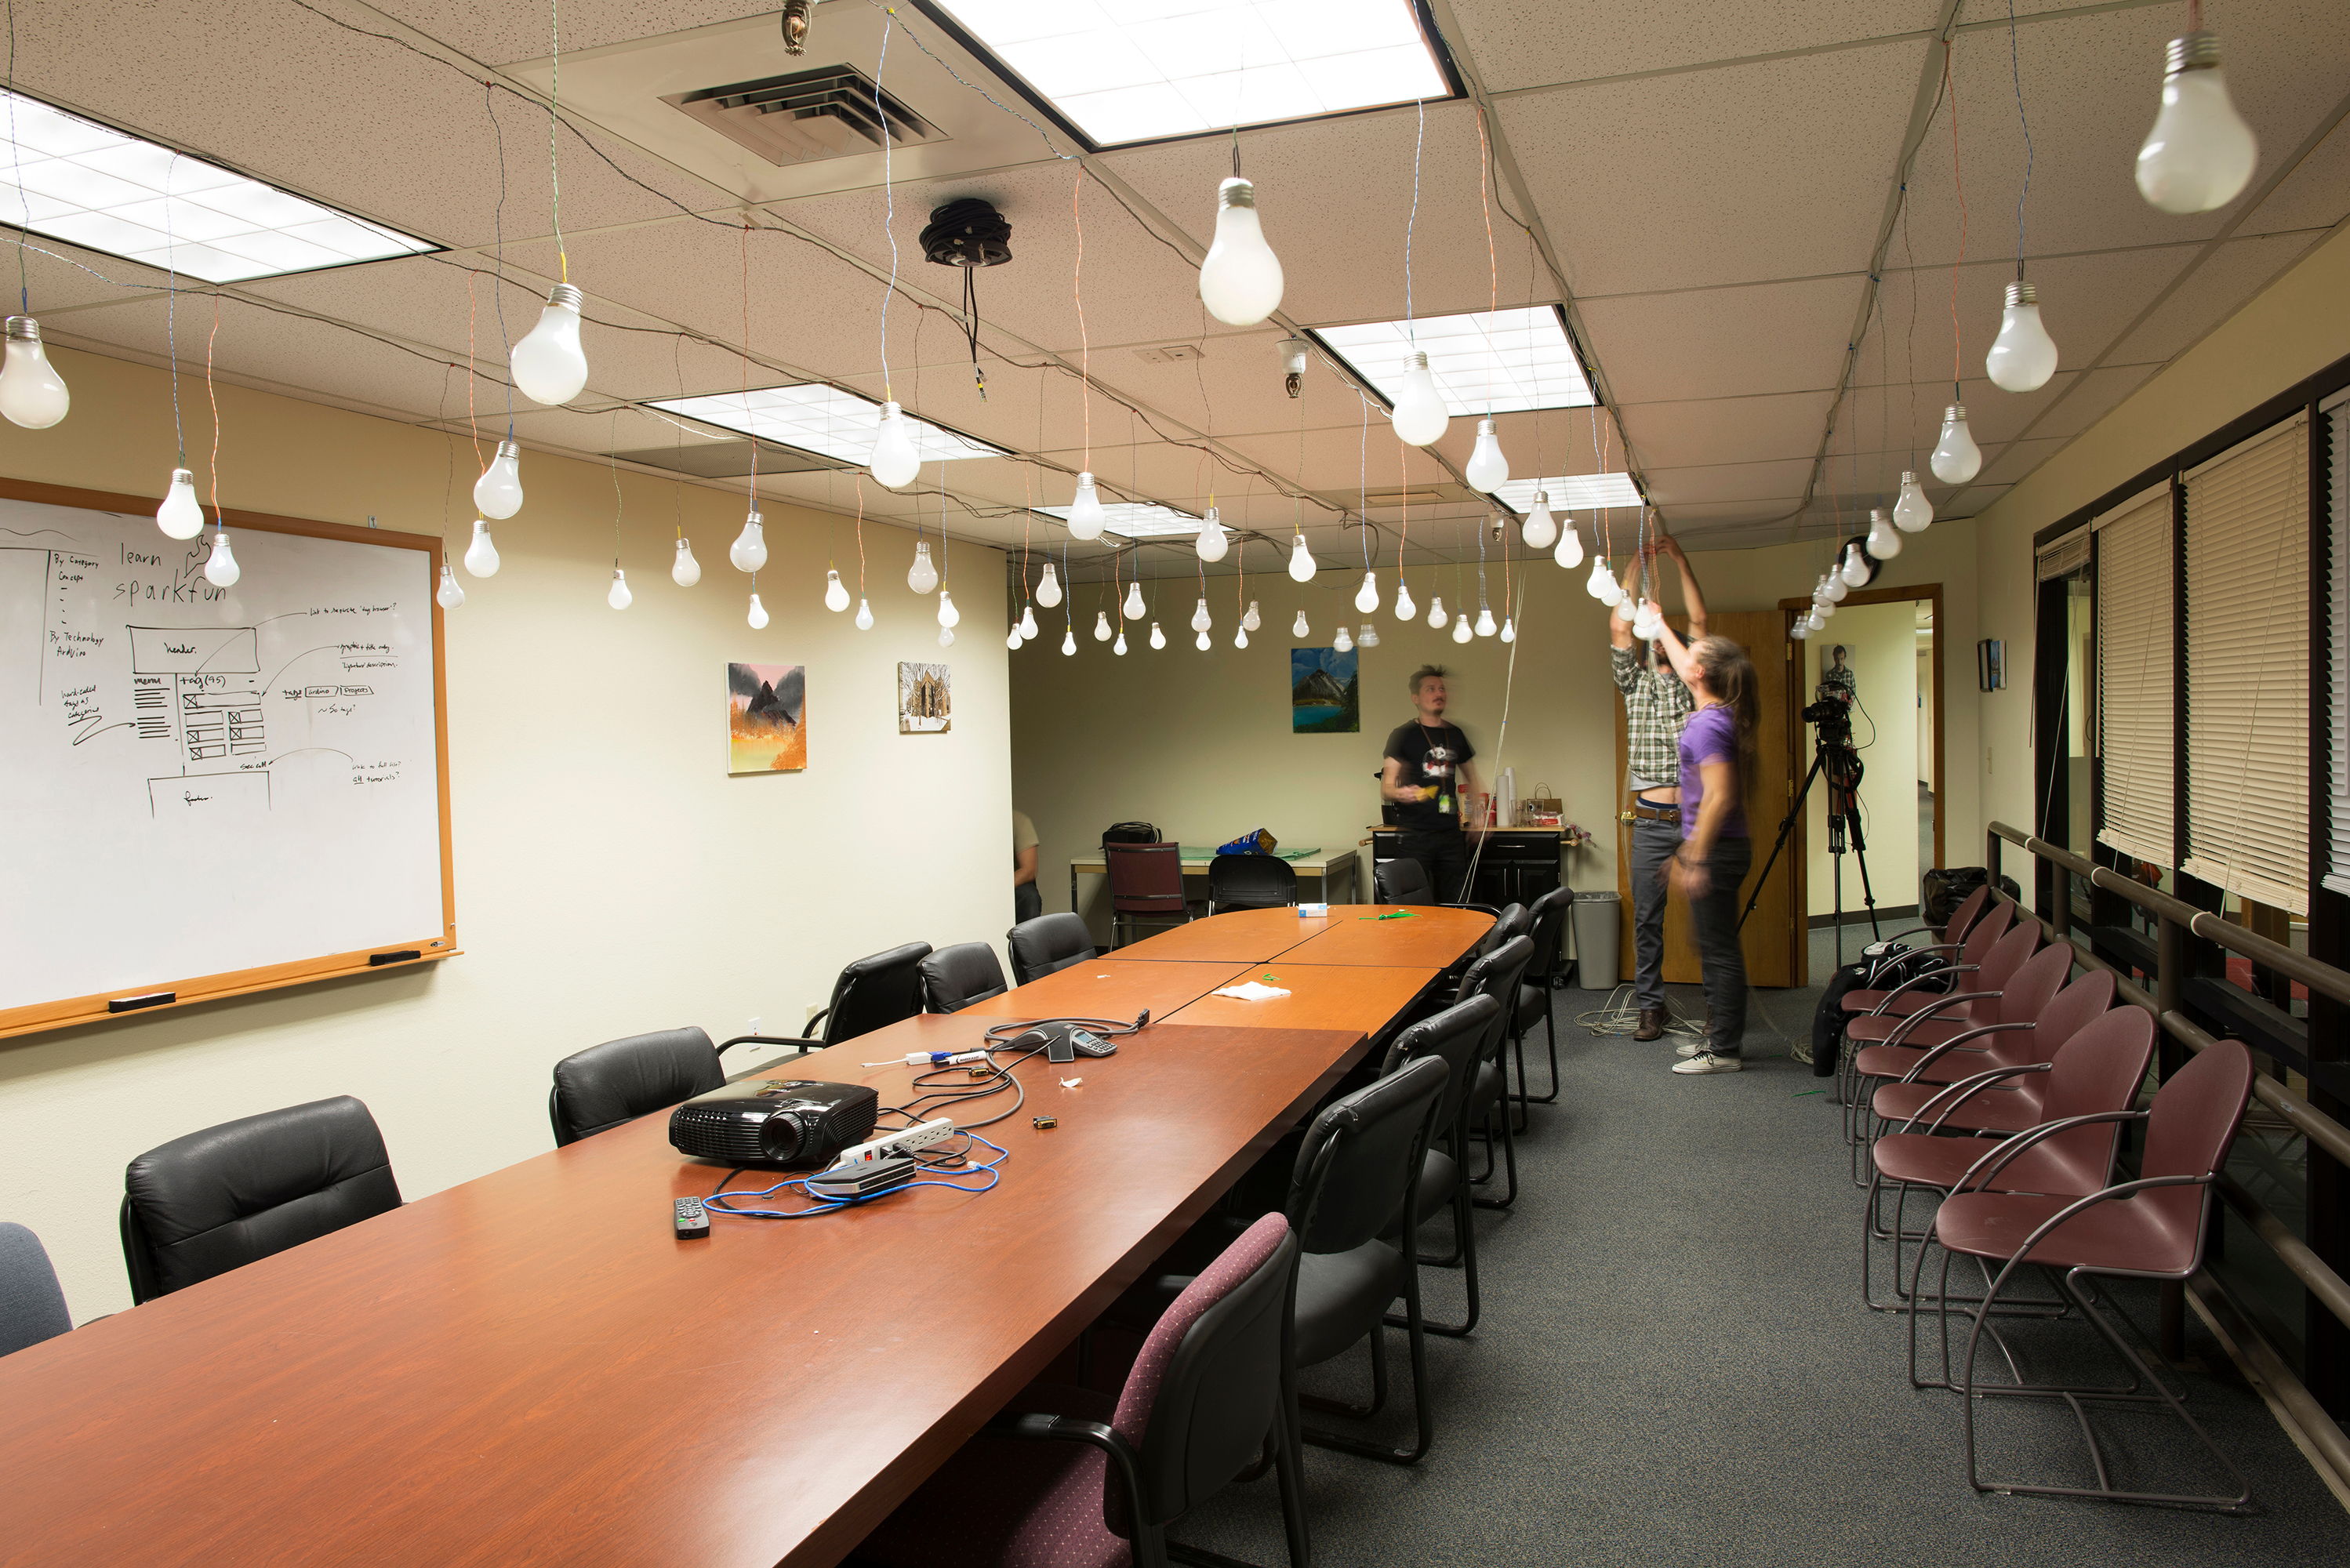
Since I was working on a drop ceiling, I decided to make the grid of the LED matrix on 2 foot centers. Because I knew that and the fact that I wanted about 2 feet of drop from the ceiling, I was able to plan all of my cable runs and build them in my office before installing them. I started by organizing the LEDs into rows and columns, then finding out what length of cable was required from the control cabinet to the end of each column. That "lead length" was added to the beginning of each cable stretch, and then I made a mark every 2' after that for 24'. I stripped the cable back to the point of the first LED drop, cut one of the twisted pairs at that point, and soldered the LED to it. Finally, each LED drop got a zip tie to keep the cables bundled. Each column became its own roll of wire and LEDs that I could just haul over to the conference room and hang in a few hours... not without some help.
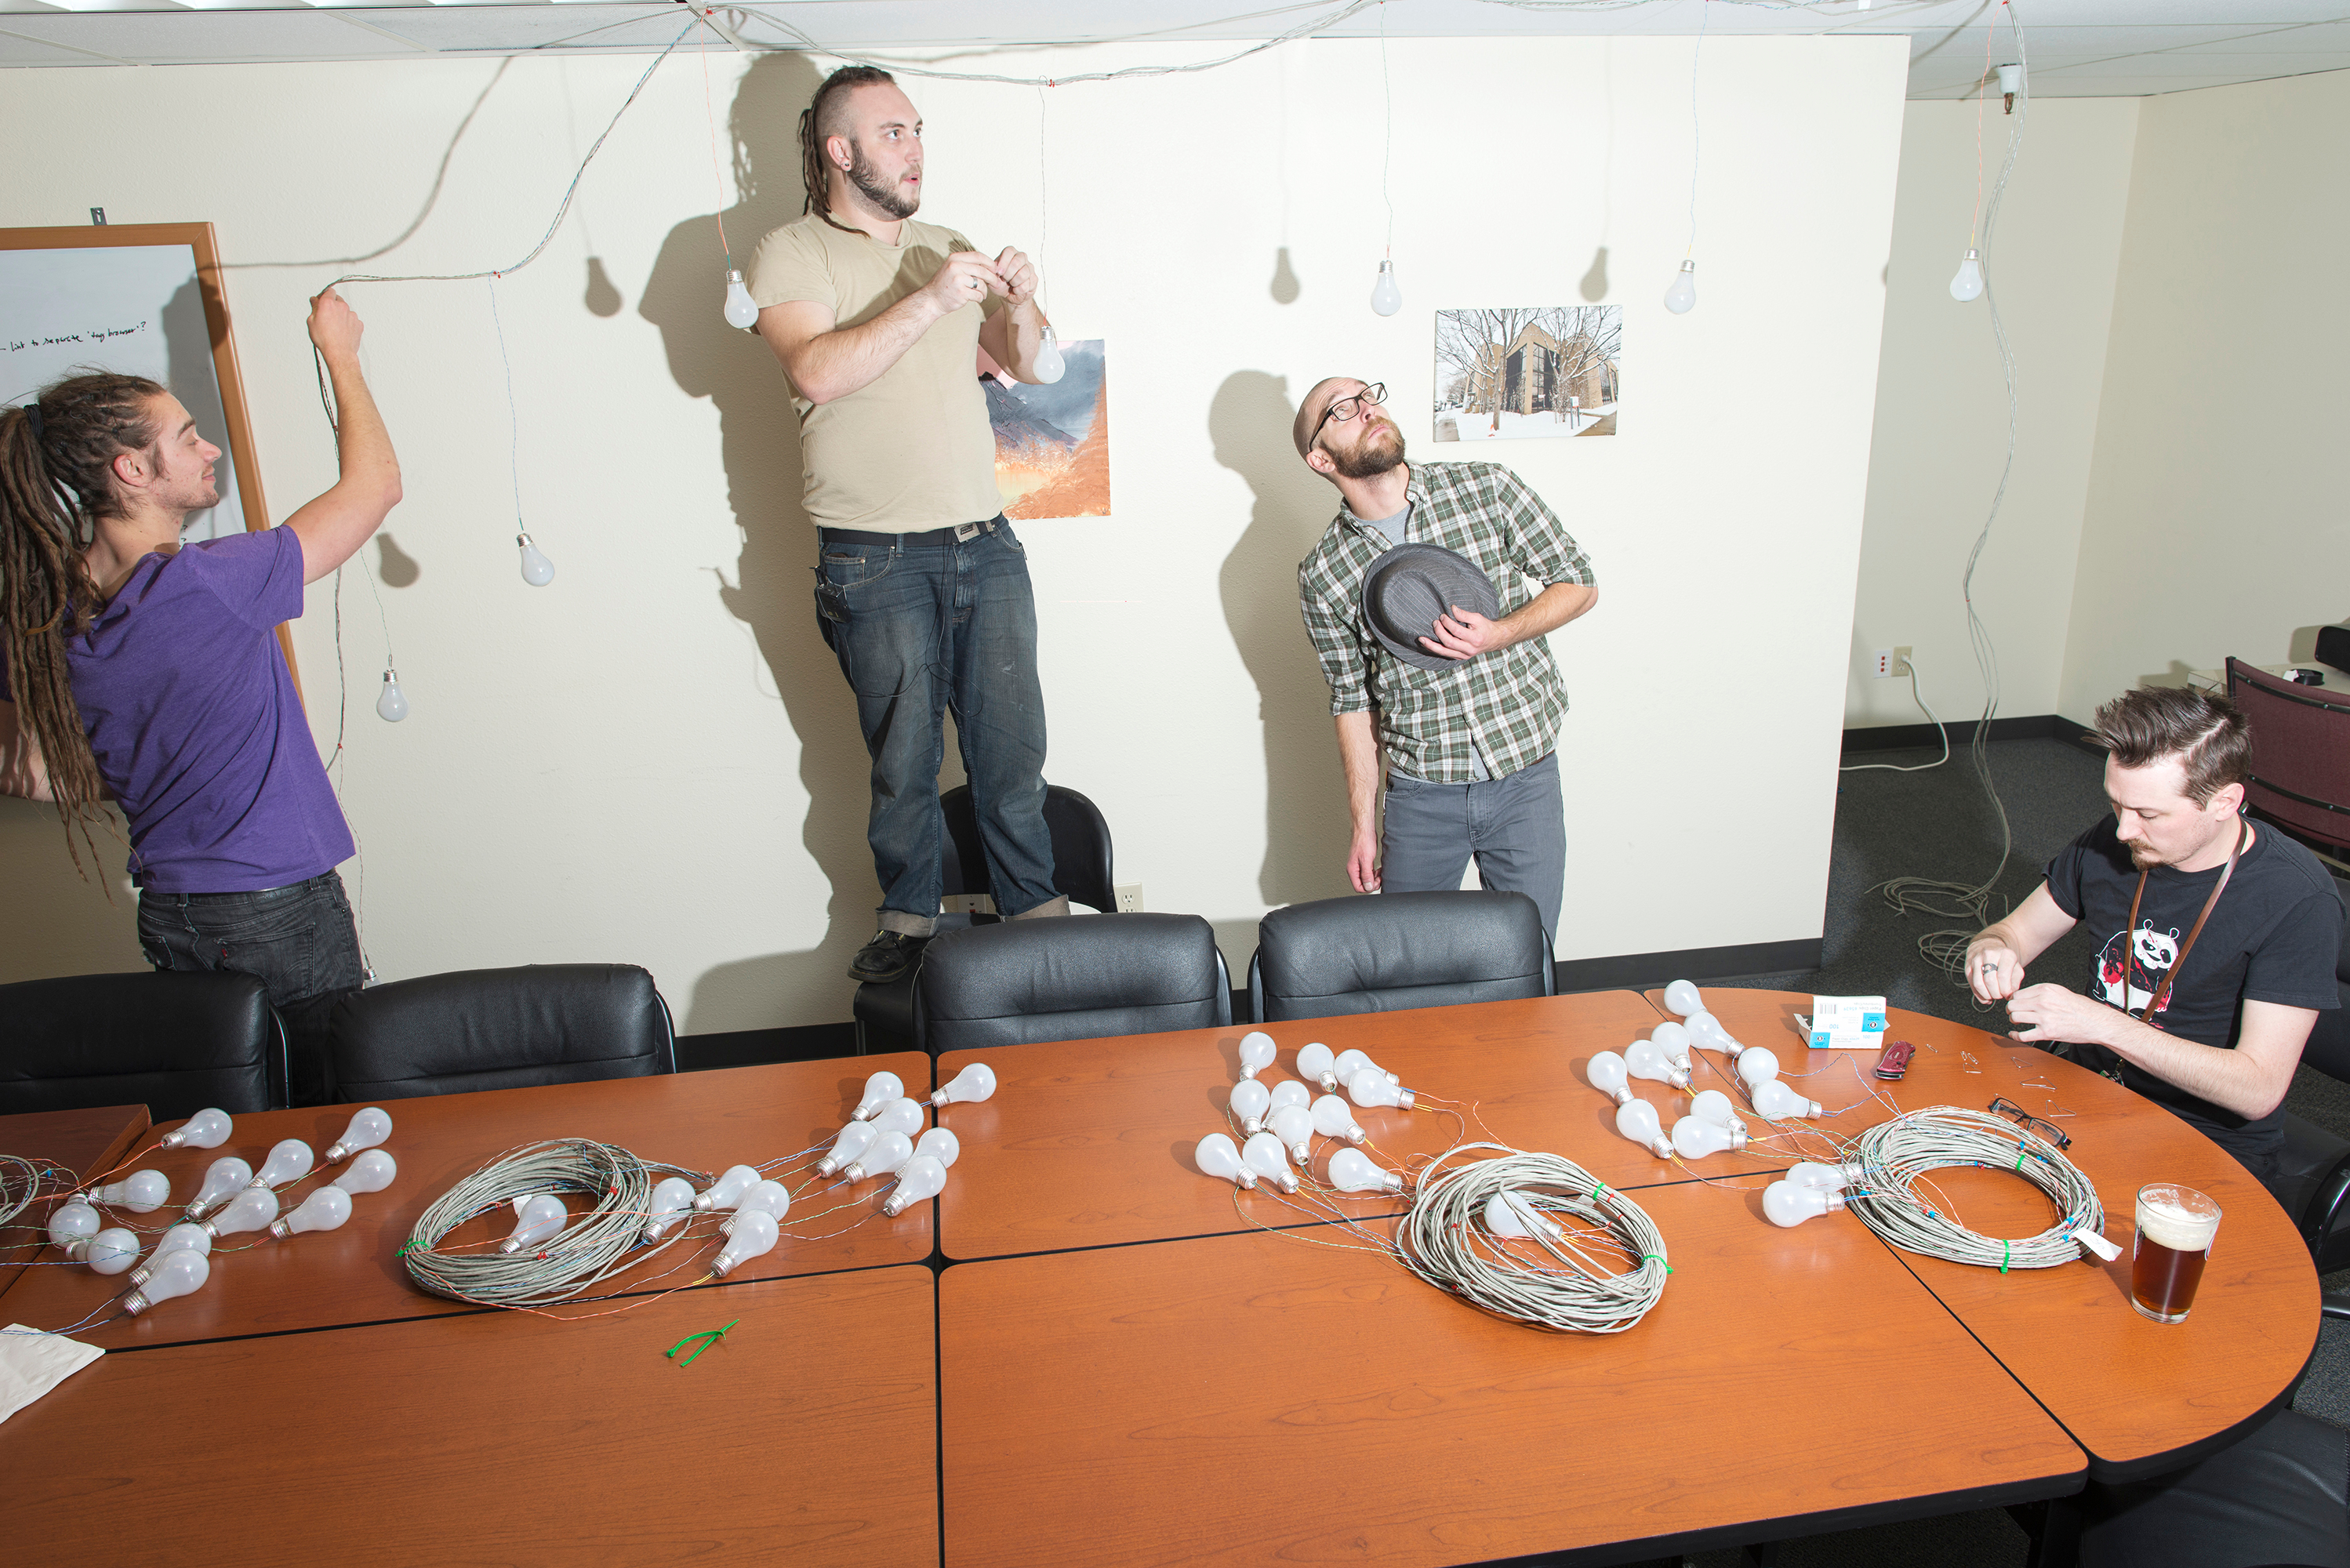
On the night of the installation there were a handful of us running wires around the conference room, and a couple of people recording the event for posterity. Instead of trying to find actual ceiling hooks, we snagged a box of paper clips from the supply closet and bent them into hook shapes. It actually worked fairly well. Many hands made fast work, and, much to my surprise, all of the bulbs lined up and I had more than enough cable to reach the control cabinet.
After doing this project I learned a few lessons in building wiring harnesses. All of which I will gladly share with you now:
Measure Twice, Cut Once - Yep, an oldie but a goodie. There's nothing worse than ruining a 40' wiring harness by chopping 6" off the wrong conductor.
Leave Some Slop - Okay, even if you're 100% sure that you've made the right measurements, throw an extra bit of length on there. I added about 6" extra to all of my lines to allow for silly things like accidentally cutting a wire instead of stripping it.
Rubber Bands, Zip Ties, and Wire Loom - Cable management hardware is essential, while I have been known to simply tie knots in cables to keep them together this method has a few downsides including the overall shortening of the cable. You can never have too many wire ties.
Spare a Thought for Resistance - Just ask any Power Engineer, even copper wire will introduce significant resistance given a long enough stretch. Measure the resistance of your wiring harnesses and account for any voltage drop. If you're doing a high power project, whip out your Ohm's Law calculator, and make sure you aren't driving too much current through the wire.
Spread the Work Out - Get some friends, or, if you're not on a tight deadline, you can do it yourself in chunks. Stripping and bundling wire is the kind of thing that you can burn out on really quickly, and, if you try to finish it all in one stretch, you could make the kinds of mistakes that are hard to track down post-install.
Label Ev-er-y-thing! - Same deal as wire ties, you can't have too many labels. Create a color code, write it down, take pictures, wrap everything in masking tape, and label it with markers. Just make sure once you're done, you know which wire on end A connects to which wire on end B.
That's most of the infrastructure installed. Once I had the power and control cabinet built and the lightbulbs were in the air, all I needed was some kind of data for the installation to react to...