Humidity-sensing LED Flower
 Dia, Member #313449
The Code
Not sure how to upload code to your Arduino? No problem! Take a look our tutorial explaining everything in detail. Remember to select the correct board and port for your application.
Copy and paste the code below into the IDE, and click Upload:
language:c
 /*********************************************************
ElectriCute: Humidity Sensing LED Flower
Dia Campbell
SparkFun Electronics
Oct. 29, 2014
Based off of the code found on bildr.org,
http://bildr.org/2012/11/sht15-arduino/
which in turn was based of the wiring code at
http://wiring.org.co/learning/basics/humiditytemperaturesht15.html
With a few additions from Arduino example code
Basically, if this code was a dog, you'd have gotten it from the pound.

Development environment specifics:
Arduino IDE 1.0+
Arduino Pro 5V 16MHz

This code is beerware; if you see us at the local pub,
and you've found our code helpful, please buy us a round!
*********************************************************/


 int SHT_clockPin = 3;  // pin used for clock
 int SHT_dataPin  = 2;  // pin used for data
 int redPin = 4; // Define RGB pins
 int bluePin = 6;
 int greenPin = 5;

void setup(){
  Serial.begin(9600); // open serial at 9600 bps
pinMode(redPin, OUTPUT); //set RGB pins as outputs
pinMode(bluePin, OUTPUT);
pinMode(greenPin, OUTPUT);

 }
 void loop(){
  //these can take a bit to get the values (100ms or so)
  float temperature = getTemperature();
  float humidity = getHumidity();

   Serial.print(temperature);
   Serial.print(" | ");
   Serial.println(humidity);

    if (humidity > 25) {  //humidity threshold; change to suit your purpose
    digitalWrite(bluePin, HIGH);  //When humidity is high enough
   digitalWrite(greenPin, HIGH); //all three pins are high
  digitalWrite(redPin, HIGH);
  }
  else {
    digitalWrite(bluePin, LOW);  //when humidity is too low
    digitalWrite(greenPin, LOW); //turn off green and blue
    digitalWrite(redPin,HIGH);  //turn on red
   delay(1000);               // wait for a second
  digitalWrite(redPin, LOW);    // turn the red LED off
  delay(1000);               // wait for a second
    }
  }


float getTemperature(){
  //Return Temperature in Celsius
  SHT_sendCommand(B00000011, SHT_dataPin, SHT_clockPin);
  SHT_waitForResult(SHT_dataPin);

  int val = SHT_getData(SHT_dataPin, SHT_clockPin);
  SHT_skipCrc(SHT_dataPin, SHT_clockPin);
  return (float)val * 0.01 - 40; //convert to celsius
   }

float getHumidity(){
  //Return  Relative Humidity
  SHT_sendCommand(B00000101, SHT_dataPin, SHT_clockPin);
  SHT_waitForResult(SHT_dataPin);
  int val = SHT_getData(SHT_dataPin, SHT_clockPin);
  SHT_skipCrc(SHT_dataPin, SHT_clockPin);
  return -4.0 + 0.0405 * val + -0.0000028 * val * val;
 }


void SHT_sendCommand(int command, int dataPin, int clockPin){
  // send a command to the SHTx sensor
  // transmission start
  pinMode(dataPin, OUTPUT);
  pinMode(clockPin, OUTPUT);
  digitalWrite(dataPin, HIGH);
  digitalWrite(clockPin, HIGH);
  digitalWrite(dataPin, LOW);
  digitalWrite(clockPin, LOW);
  digitalWrite(clockPin, HIGH);
  digitalWrite(dataPin, HIGH);
  digitalWrite(clockPin, LOW);


  // shift out the command (the 3 MSB are address and must be 000, the last 5 bits are the command)
  shiftOut(dataPin, clockPin, MSBFIRST, command);

   // verify we get the right ACK
   digitalWrite(clockPin, HIGH);
   pinMode(dataPin, INPUT);

  if (digitalRead(dataPin)) Serial.println("ACK error 0");
  digitalWrite(clockPin, LOW);
  if (!digitalRead(dataPin)) Serial.println("ACK error 1");
 }


void SHT_waitForResult(int dataPin){
  // wait for the SHTx answer
  pinMode(dataPin, INPUT);

  int ack; //acknowledgement

  //need to wait up to 2 seconds for the value
  for (int i = 0; i < 1000; ++i){
    delay(2);
   ack = digitalRead(dataPin);
   if (ack == LOW) break;
 }

  if (ack == HIGH) Serial.println("ACK error 2");
   }

 int SHT_getData(int dataPin, int clockPin){
  // get data from the SHTx sensor

  // get the MSB (most significant bits)
  pinMode(dataPin, INPUT);
  pinMode(clockPin, OUTPUT);
  byte MSB = shiftIn(dataPin, clockPin, MSBFIRST);

  // send the required ACK
  pinMode(dataPin, OUTPUT);
  digitalWrite(dataPin, HIGH);
  digitalWrite(dataPin, LOW);
  digitalWrite(clockPin, HIGH);
  digitalWrite(clockPin, LOW);

  // get the LSB (less significant bits)
  pinMode(dataPin, INPUT);
  byte LSB = shiftIn(dataPin, clockPin, MSBFIRST);
  return ((MSB << 8) | LSB); //combine bits
    }

void SHT_skipCrc(int dataPin, int clockPin){
  // skip CRC data from the SHTx sensor
  pinMode(dataPin, OUTPUT);
  pinMode(clockPin, OUTPUT);
  digitalWrite(dataPin, HIGH);
 digitalWrite(clockPin, HIGH);
 digitalWrite(clockPin, LOW);
}
Once the code is uploaded, open the Serial Monitor. This should open a window which is scrolling numbers. The right column is temperature, the left column is humidity. Take a look at the number your humidity is hovering around, and use that to determine what you'd like your ideal humidity to be.
The line addressing humidity threshold is commented, and pretty close to the top, so look for that and make adjustments as needed. I set mine to just a hair above ambient humidity, because I wanted it to be easy to demo. You may want yours to be a bit less sensitive. In that same section, you can make changes to the way the lights react to those changes!
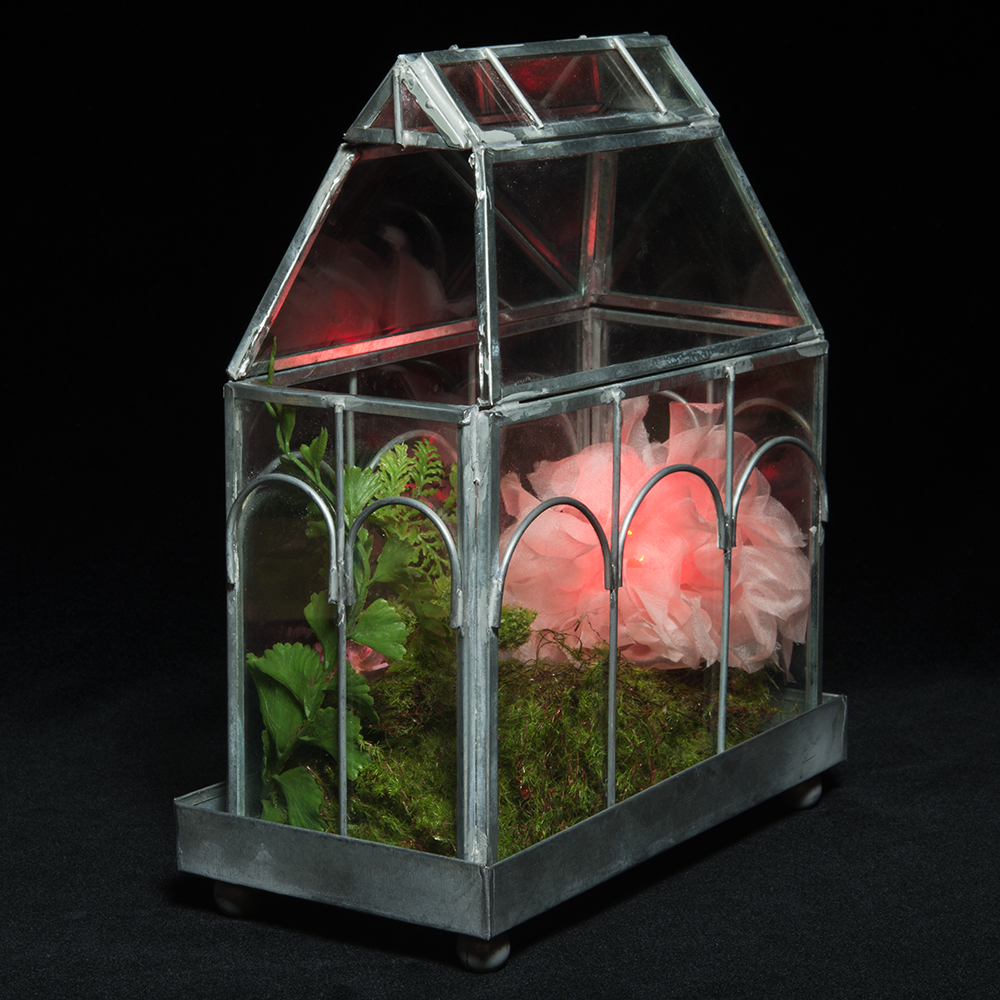
When the sensor is reading below that threshold, the LED blinks red, like so:
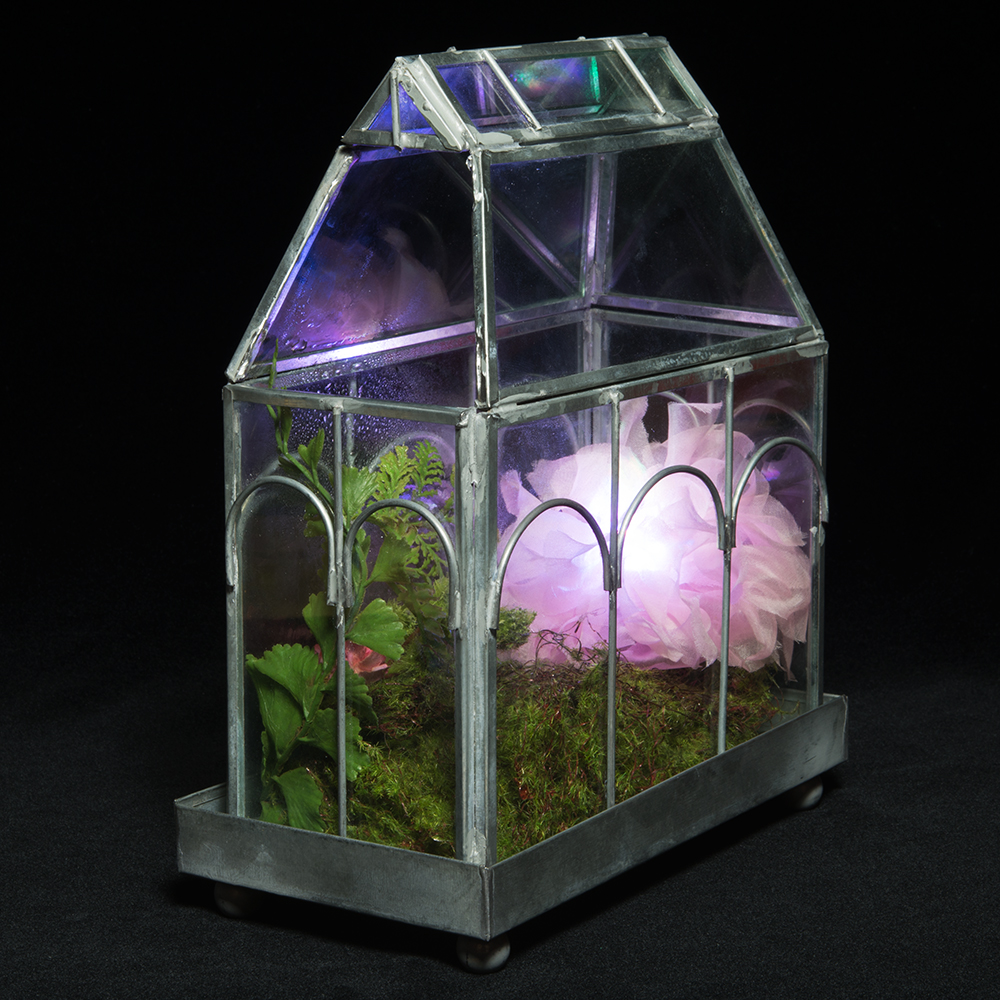
And, when it's above the threshold, a nice, white glow is emitted:
Once you've got your reactivity and behavior where you'd like them, you're all set! Unhook the board from the computer, plug the battery into the Arduino, and put your new humidity sensing device in your favorite terrarium, buttonhole, fascinator, or whatever you choose!