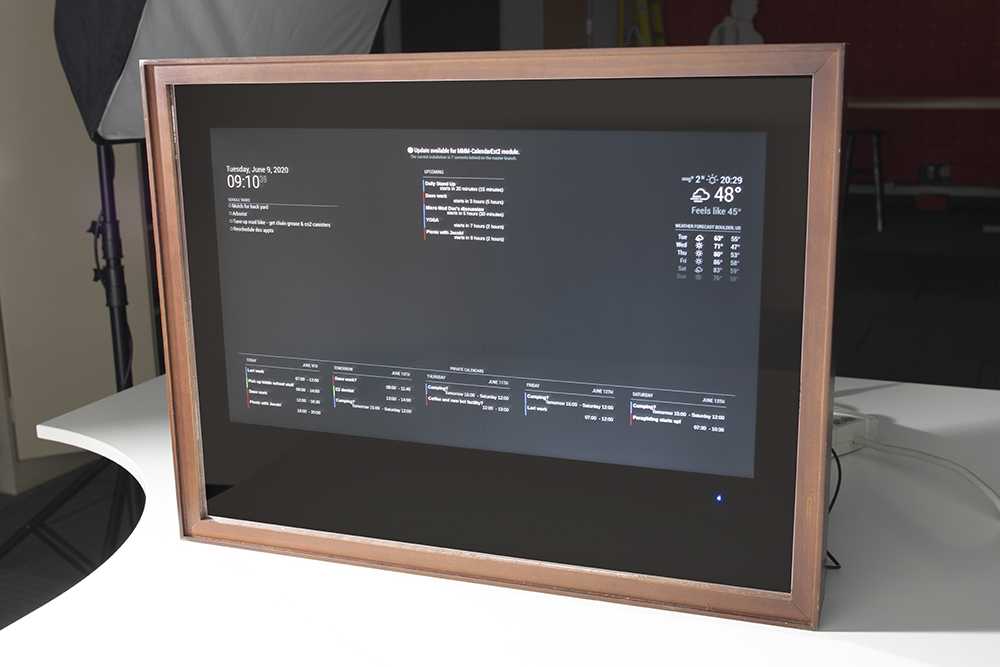
If you follow the SparkFun Blog, you may have seen my post about my attempts to keep up with my family's ever changing schedule. With schooling and summer camps going online and both myself and my partner working from home... there's just too many virtual meetings to keep up with. An offhand comment about needing a "battle station" led to the Magic Mirror project.
This tutorial presumes you have some basic familiarity with Unix systems and commands. It's not required, but is certainly helpful. Let's dive in and see how to set this up, shall we?
To follow along with this tutorial, you will need the following materials. You may not need everything though depending on what you have. Add it to your cart, read through the guide, and adjust the cart as necessary.
If you prefer a larger, wall mounted Magic Mirror (like the one in this tutorial), you will need to find the following:
If you aren’t familiar with the following concepts, we recommend checking out these tutorials before continuing.
If you haven't read through the Raspberry Pi 4 Kit Hookup Guide, head on over there now to get yourself set up.
If you've followed along with the Raspberry Pi 4 Kit Hookup Guide, you should have a functioning Raspberry Pi desktop in front of you. Now we can move on to the "magic"!
The basic installation is relatively straight forward. We'll run through the steps here, but you can also head over to the Magic Mirror Installation & Usage tutorial and follow their steps.
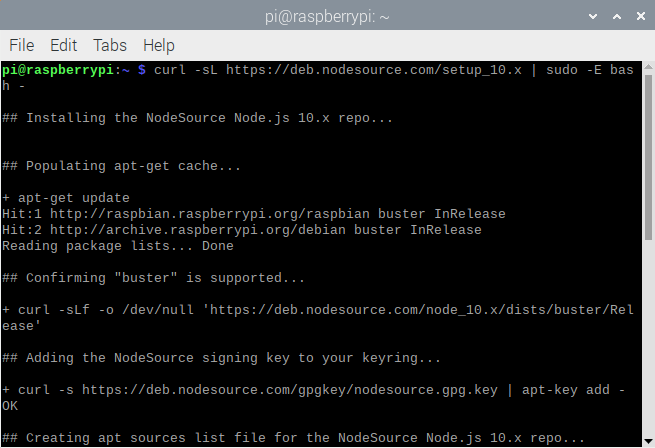
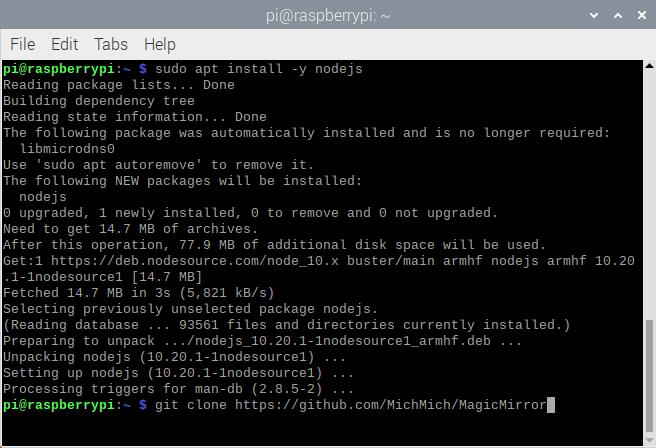
We first need to install NodeSource. Open a terminal window on your Raspberry Pi desktop. Then copy and paste the following code:
language:shell
curl -sL https://deb.nodesource.com/setup_10.x | sudo -E bash -
If all goes well, you should see something like the following:
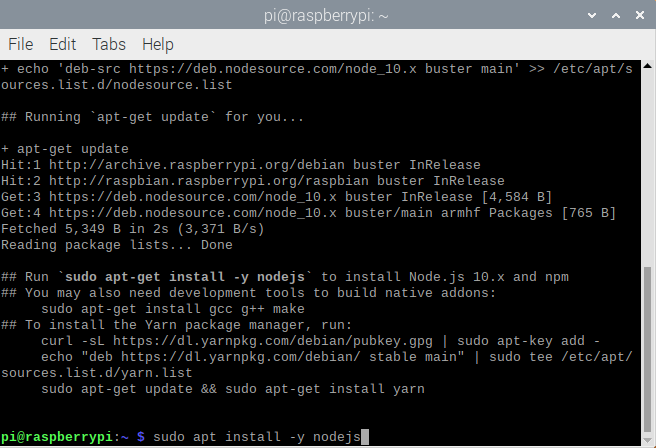
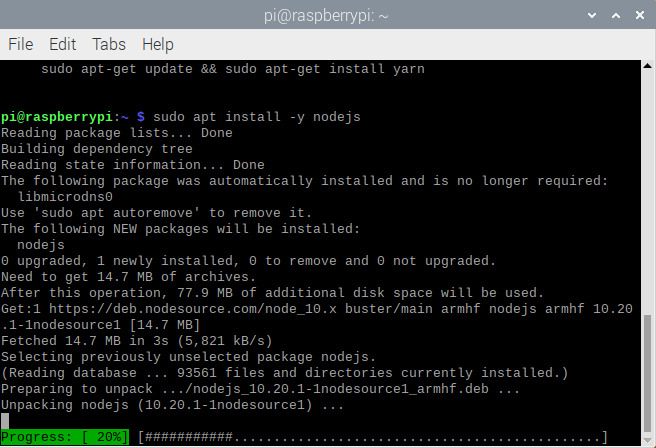
The next thing we need is NodeJS. Copy and paste the code below into your terminal window:
language:shell
sudo apt install -y nodejs
Installing NodeJS....
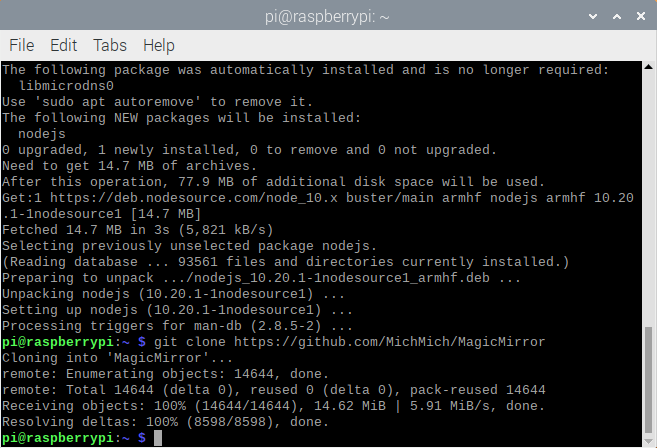
Now we get to the good part! Let's clone the MagicMirror GitHub repo to our Raspberry Pi. Copy and paste this code to your terminal and watch the GitHub clone magic happen....
language:shell
git clone https://github.com/MichMich/MagicMirror
Away we go!
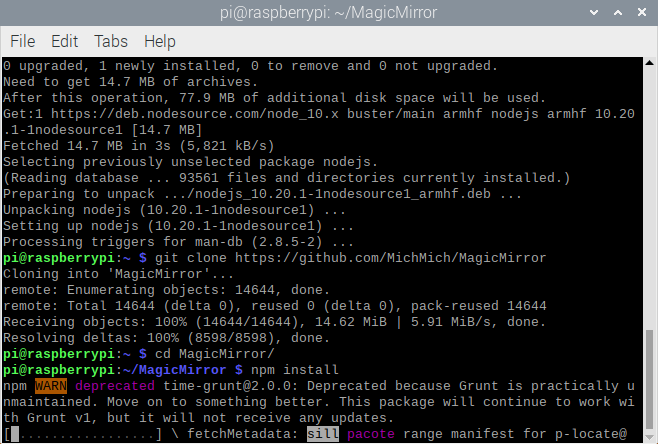
We're close! Go ahead and cd (change dir) into the MagicMirror directory:
language:shell
cd MagicMirror
And then we type in the following:
language:shell
npm install
So close! Let's copy the sample config file into one we can play around with:
language:shell
cp config/config.js.sample config/config.js
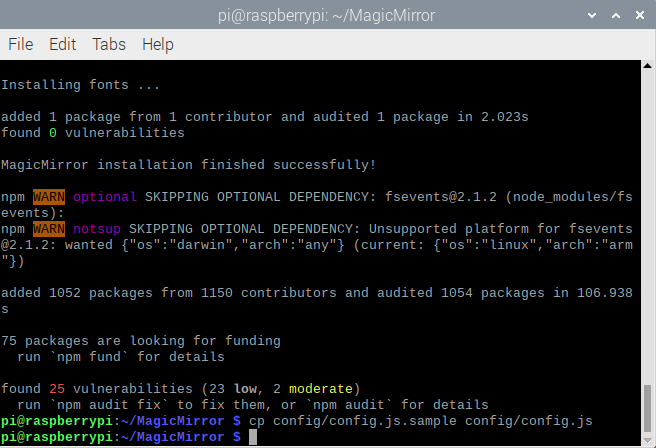
Okay! Let's make this magic!
language:shell
npm start
This file is essentially the brains of the operation. This is where you layout how you want your Magic Mirror to look. You can add modules, delete modules, move modules, and customize to your heart's content.
Navigate to your /home/pi/MagicMirror/config directory and open up config.js in Geany (right click and select Geany).
We're going to skip over most of the setup code. That said, let's look at one little bit here - scroll down until you see the outlined bit below:
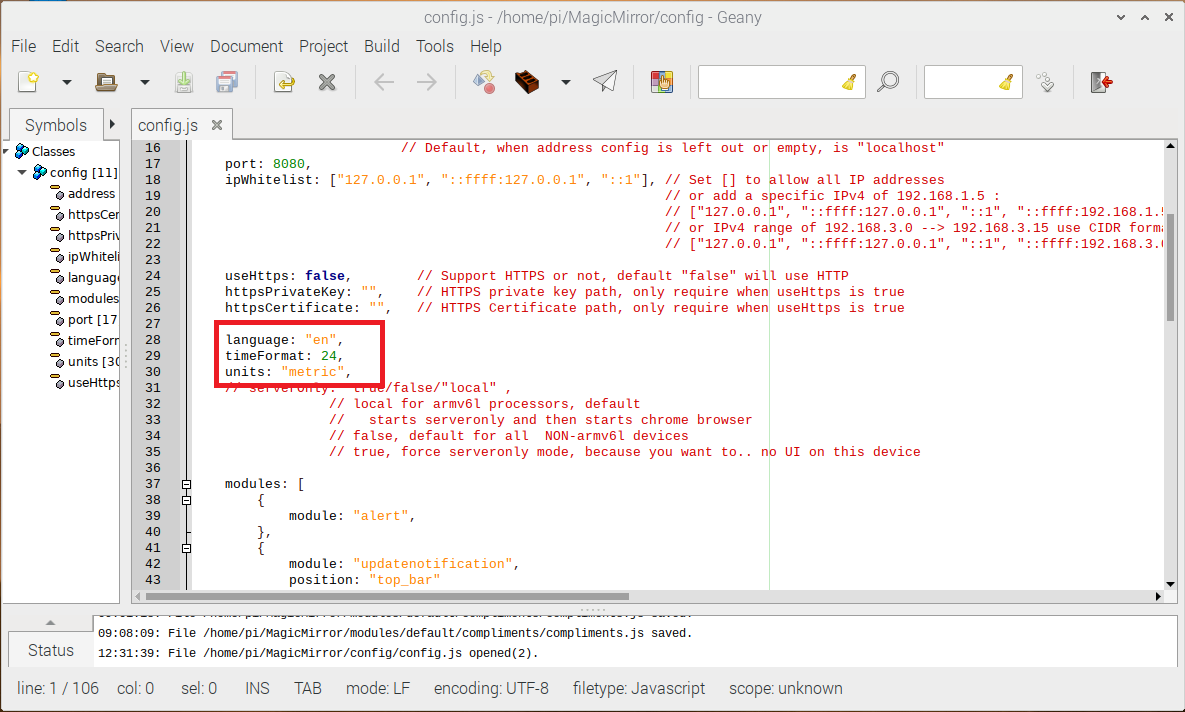
Outlined in the image are the following settings:
nl, ru, fr, etcScroll a little further down and you'll find the modules section:

Hopefully, this section is also fairly straight forward. You'll notice that for each module:, you'll need the position: you'd like it to be on the screen. Possible values are:
top_bartop_lefttop_centertop_rightupper_thirdmiddle_centerlower_thirdbottom_leftbottom_centerbottom_rightbottom_barfullscreen_abovefullscreen_belowIf you put multiple modules in the same position, they will be shown in the order they are listed in the config file.
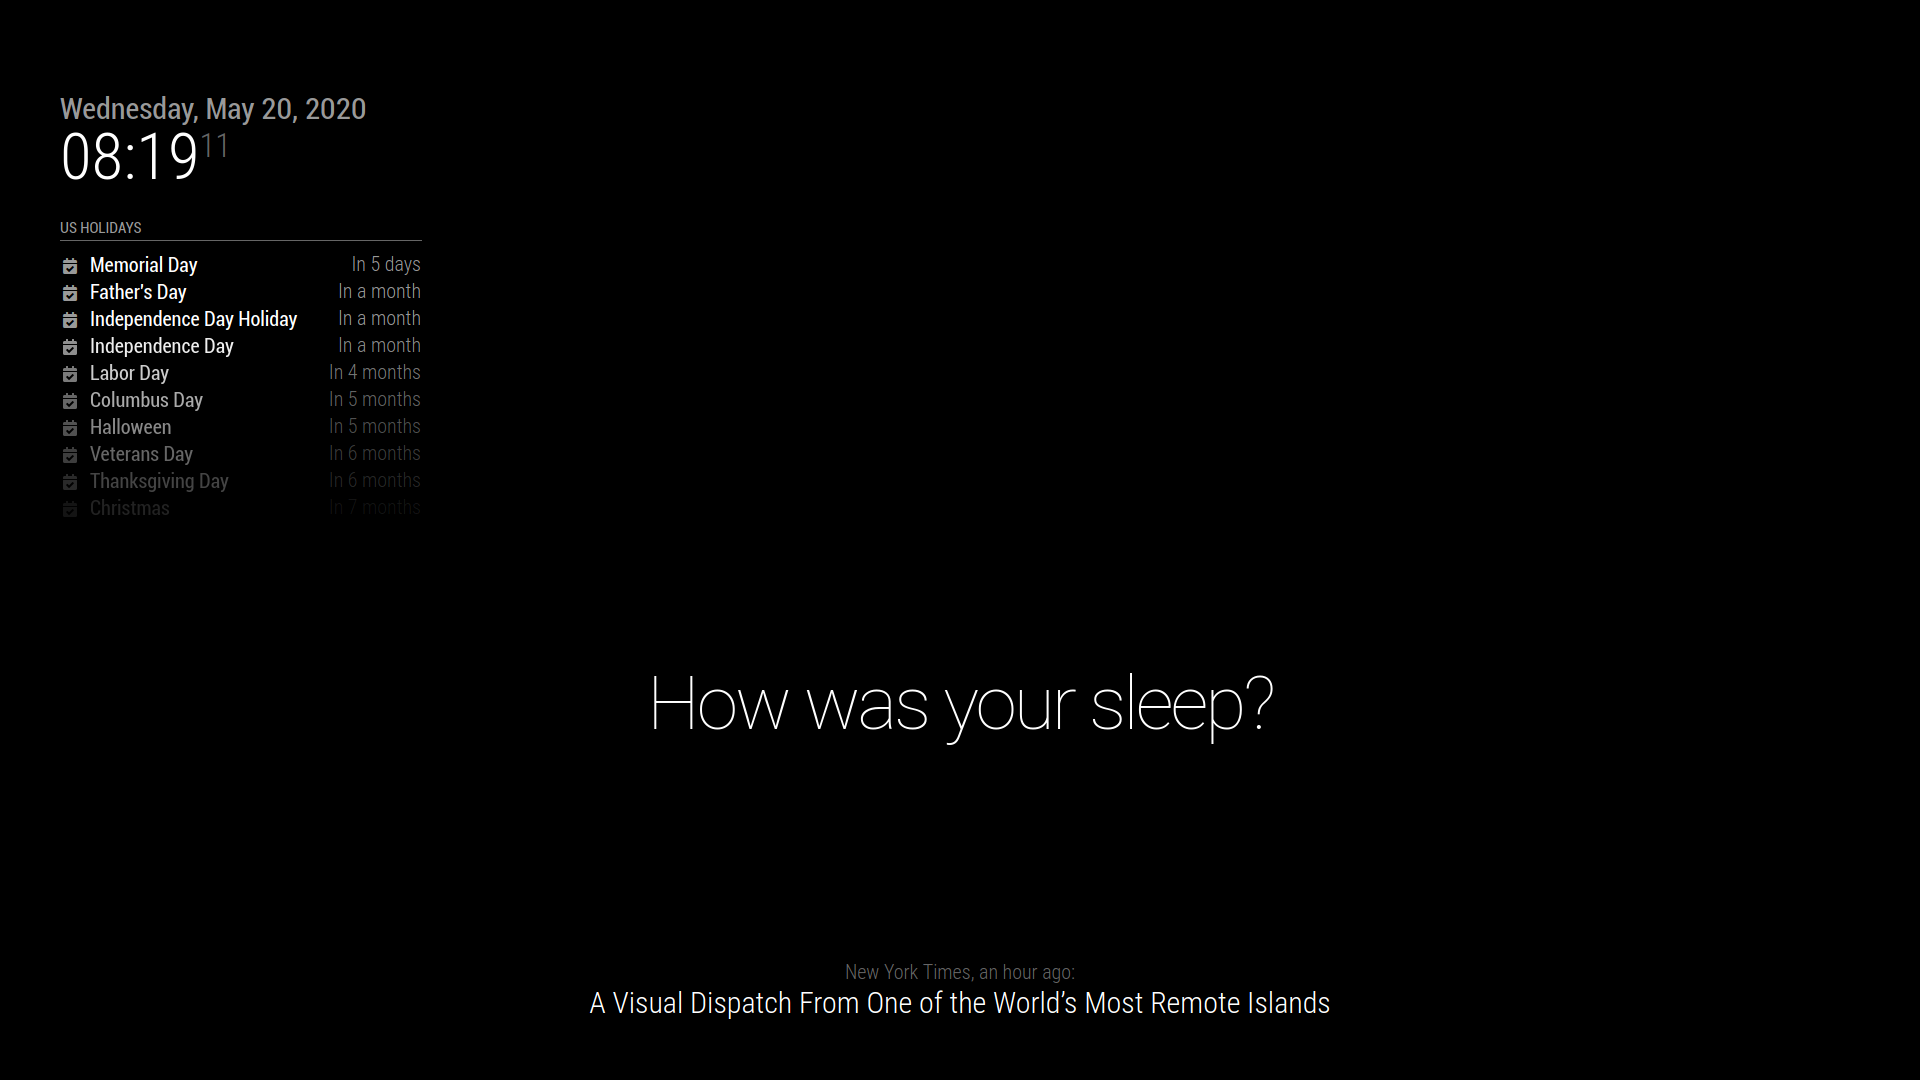
Remember the initial Magic Mirror image above?
Let's move that clock from the top left to the top right!
Find the following in your config file:
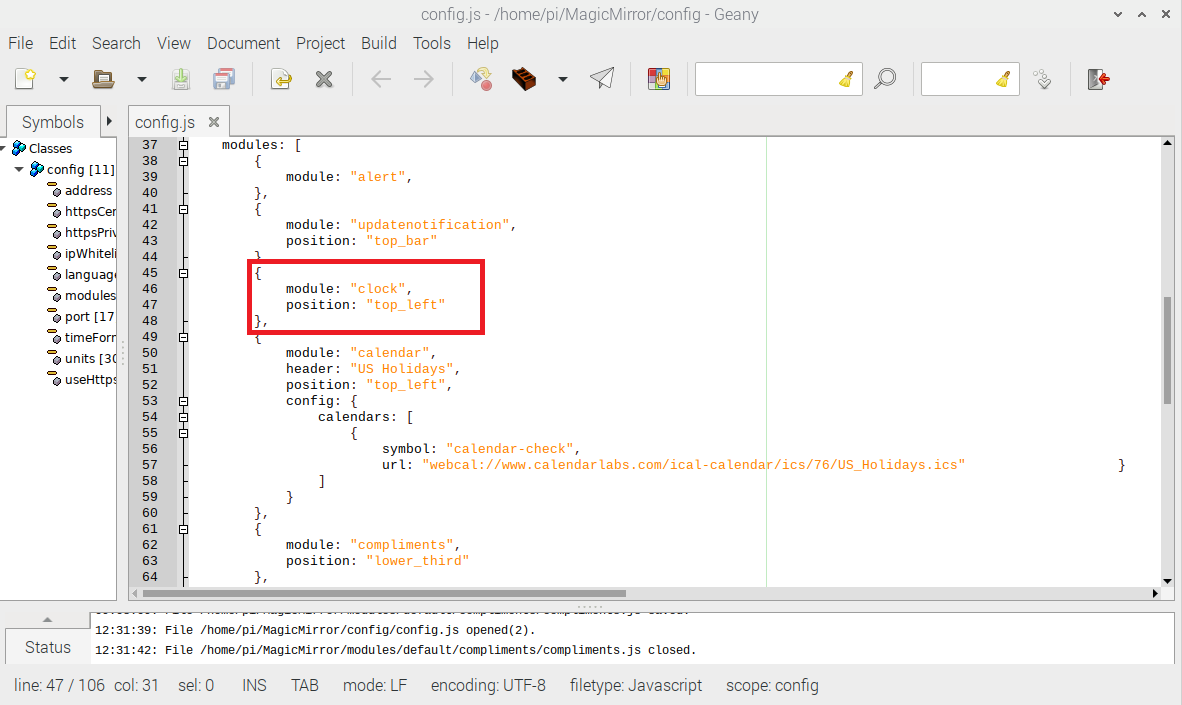
Change top_left to top_right:

Save the config file, go back to your terminal window, and start up Magic Mirror (npm start) aaaaaaand...
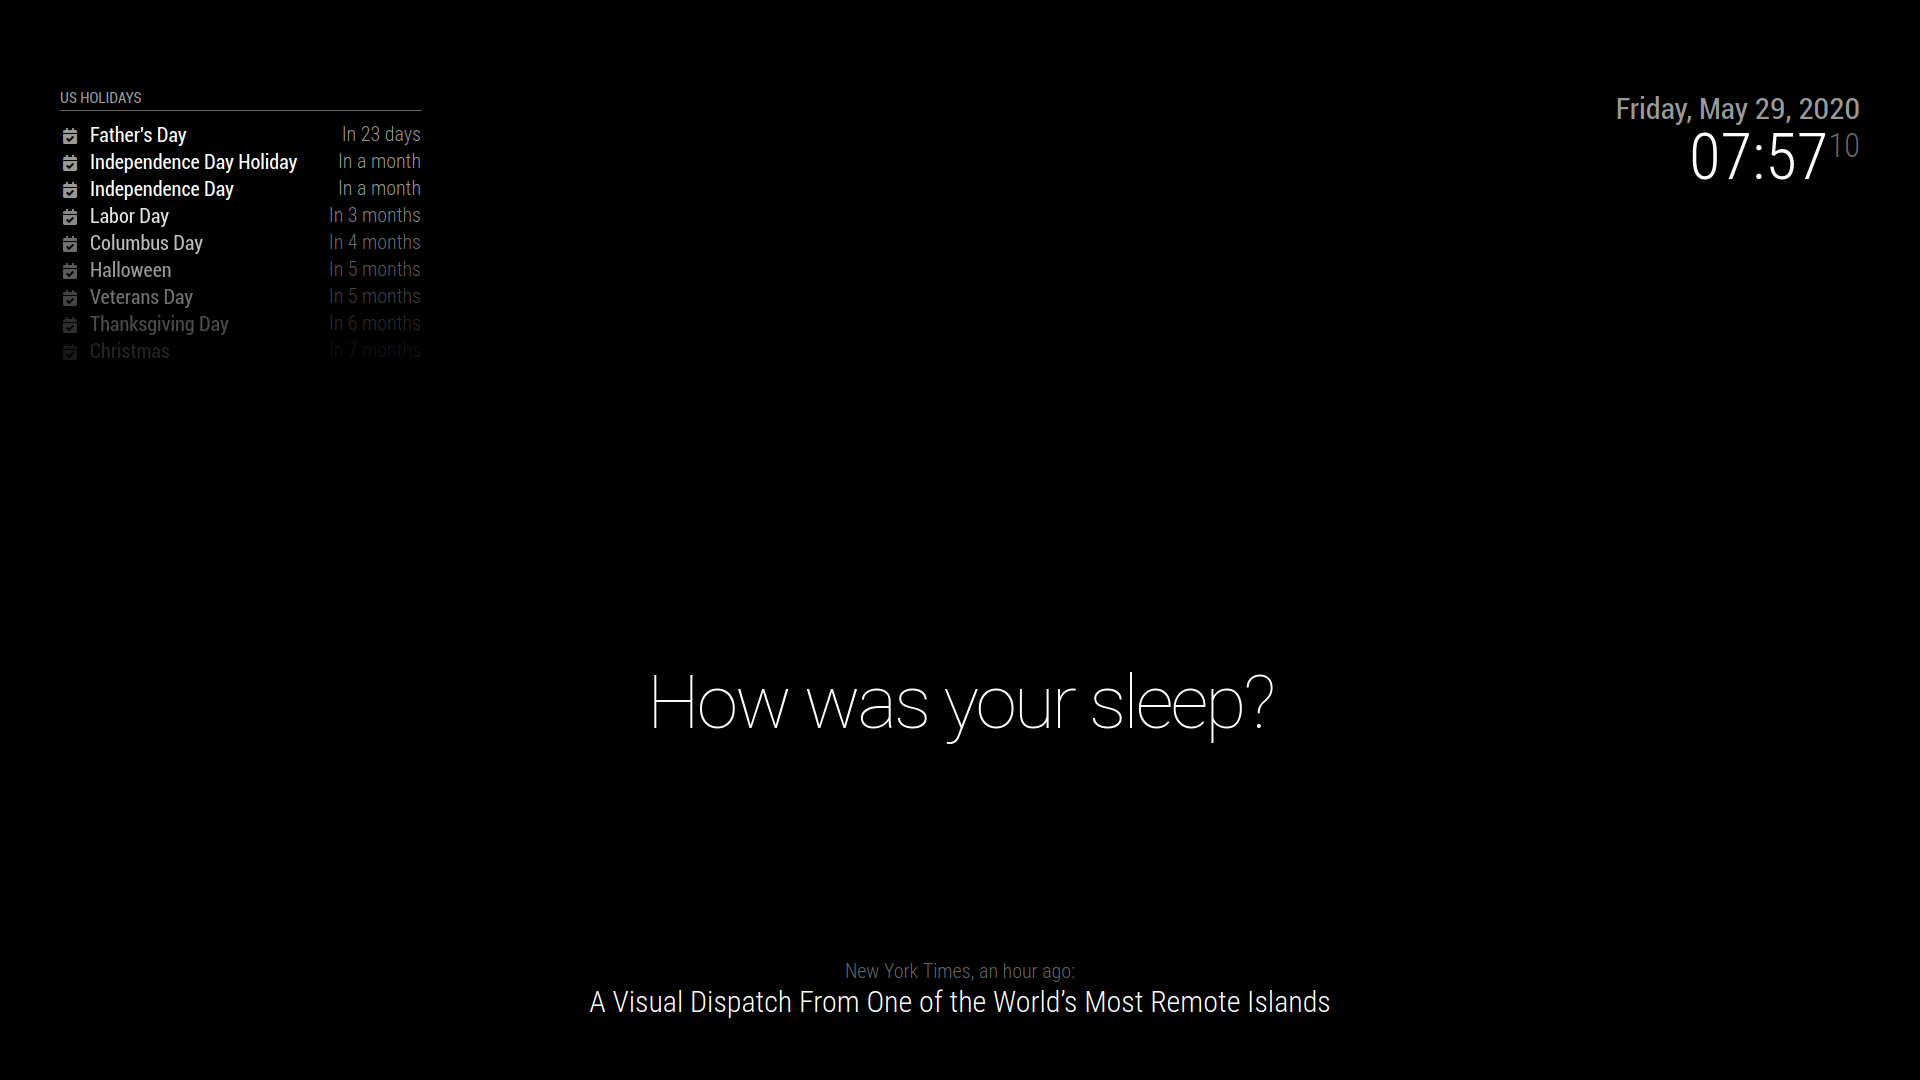
VOILA! Easy peasy, right? Each module has its own default requirements and in the default config.js file, these requirements are set up for us. We'll look at some more customization in subsequent sections.
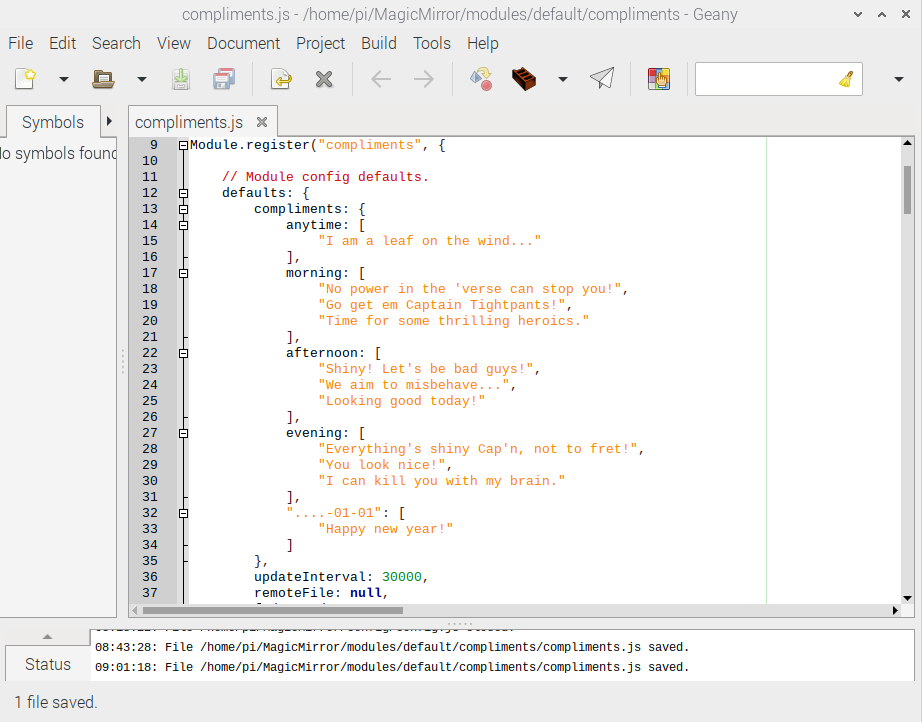
Sooo... one of the first compliments that popped up on my brand new magic mirror was "Hey there sexy!". Not sure about y'all but that made me slightly uncomfortable. Especially when my kids started repeating it to random strangers walking by. No bueno. Let's start by looking at the Compliments module and editing those compliments to be a bit more to our (my) liking.
CD to your MagicMirror/modules/default/compliments directory on the Pi. Open up compliments.js in either Geany or your text editor of choice. You should see something like the following:

See all those weird compliments in there? Yeah. Let's change those. This file is pretty straight forward javascript - you can go ahead and change the text of those compliments; just make sure you leave the syntax intact. This is looking better....
Save your file and head on back to the terminal window. Make sure you are in your MagicMirror folder and type in npm start. Voila!

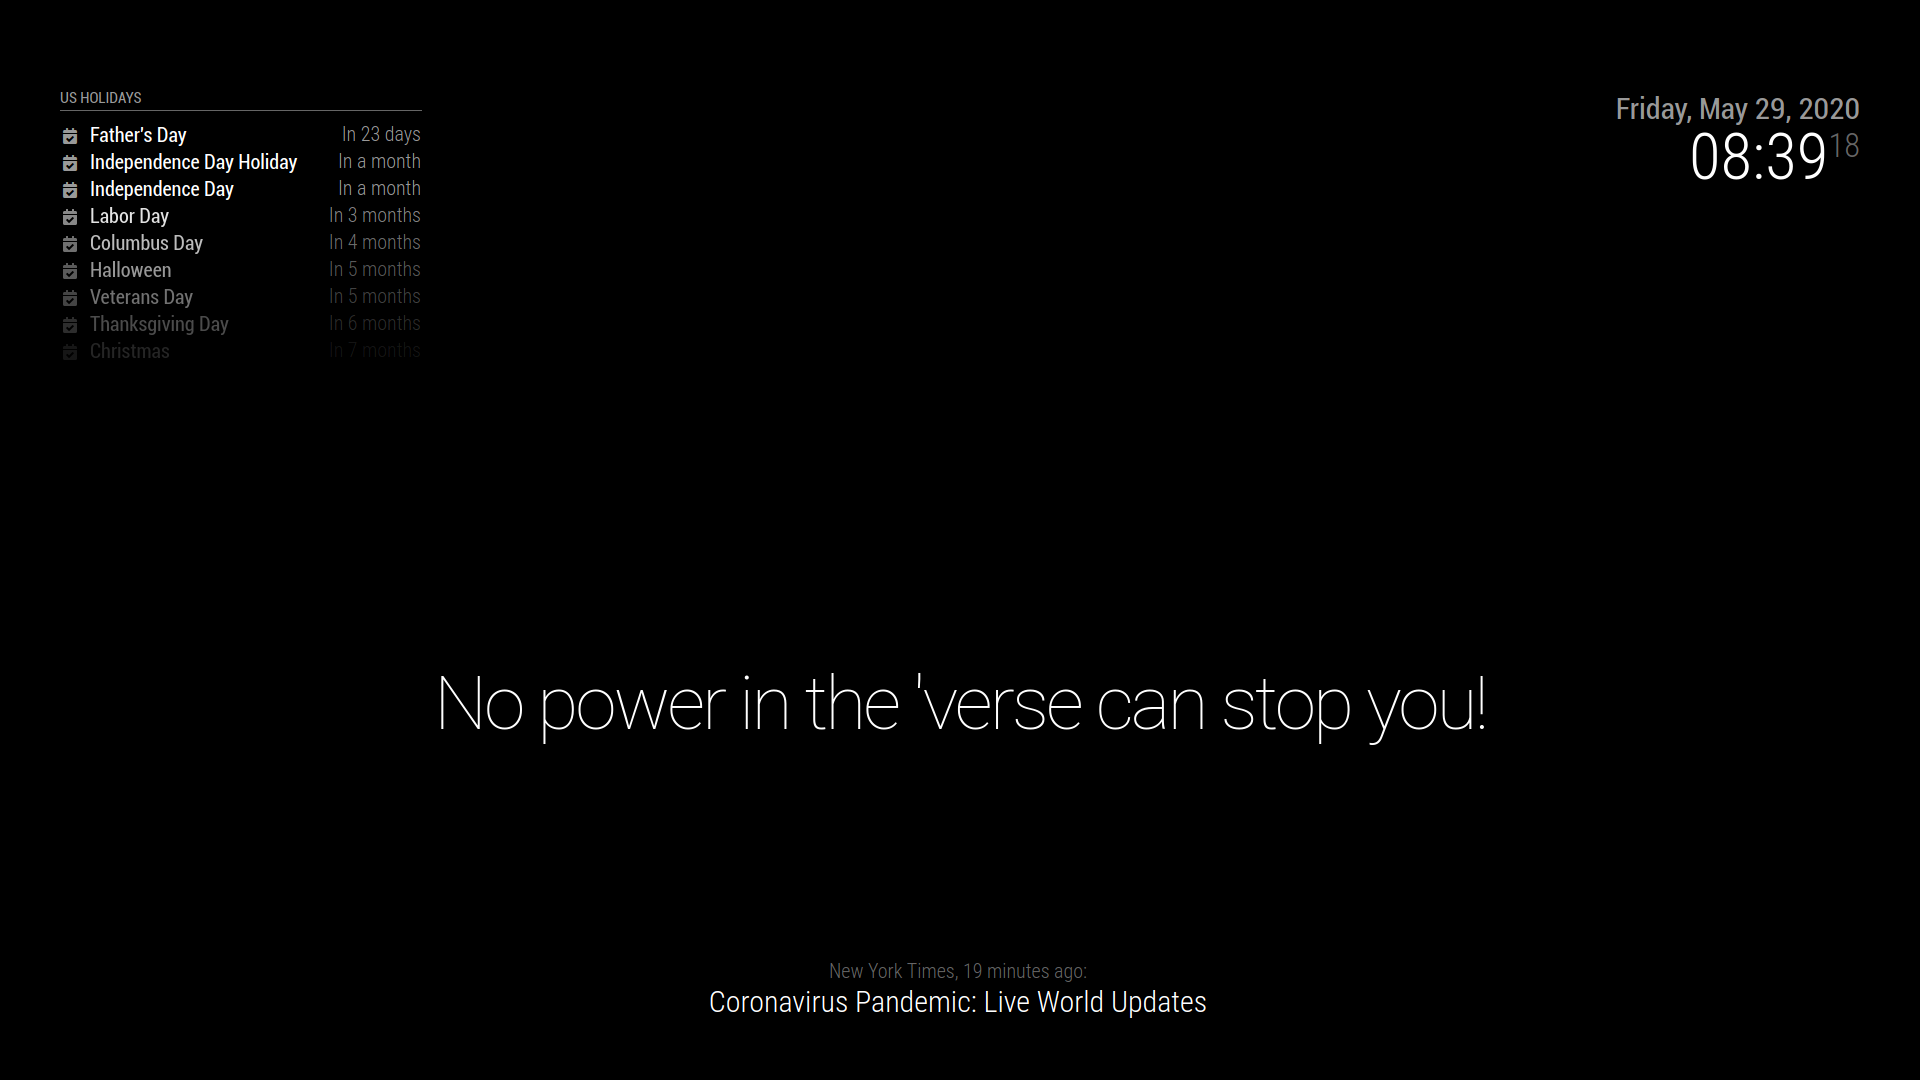
Feelin' pretty shiny right about now.
One of the primary reasons I wanted a Magic Mirror was to keep track of everyone's calendars. Let's change our calendar module to reflect our Google calendars instead of holidays.
In config.js, navigate to the calendar module.
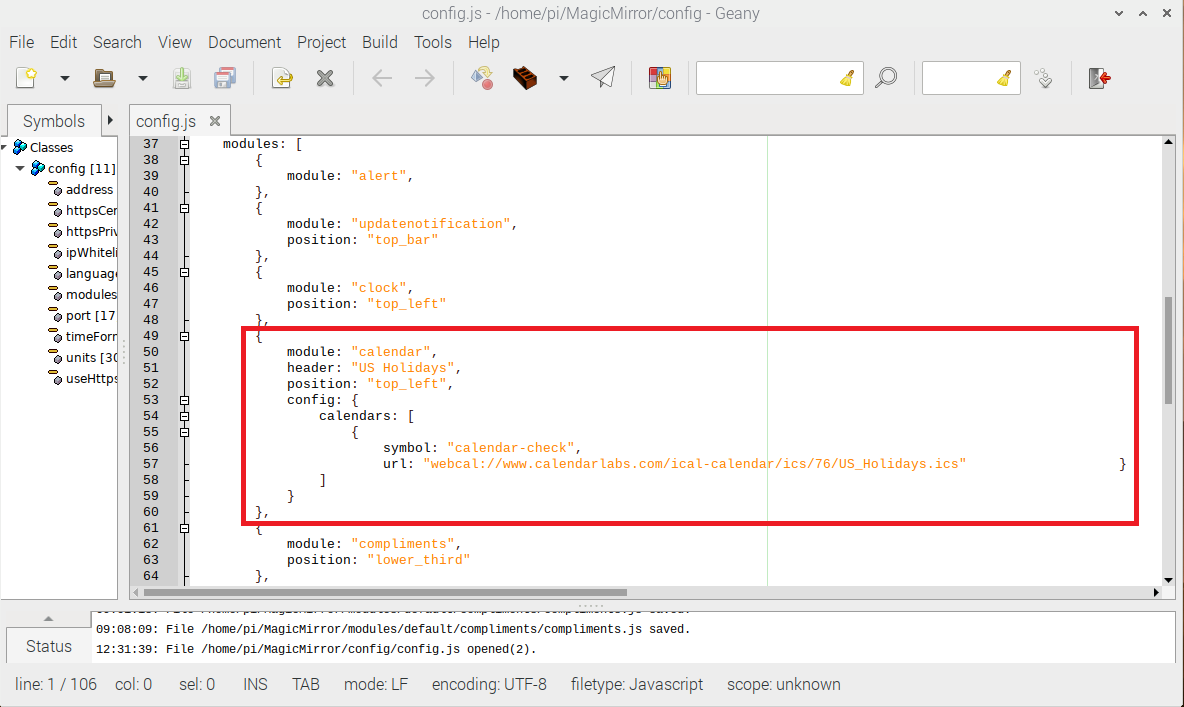
See where it says url? That's what you'll need to change. You may want to change the header as well.
From your google calendar, navigate to the Settings and Sharing option on the calendar you want to use. Click on the three little dots next to the calendar to get to the link!
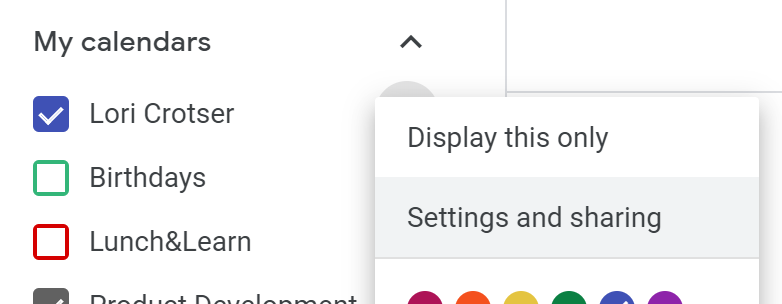
Click on that link! Once you're in Settings and Sharing, scroll down until you see the following:
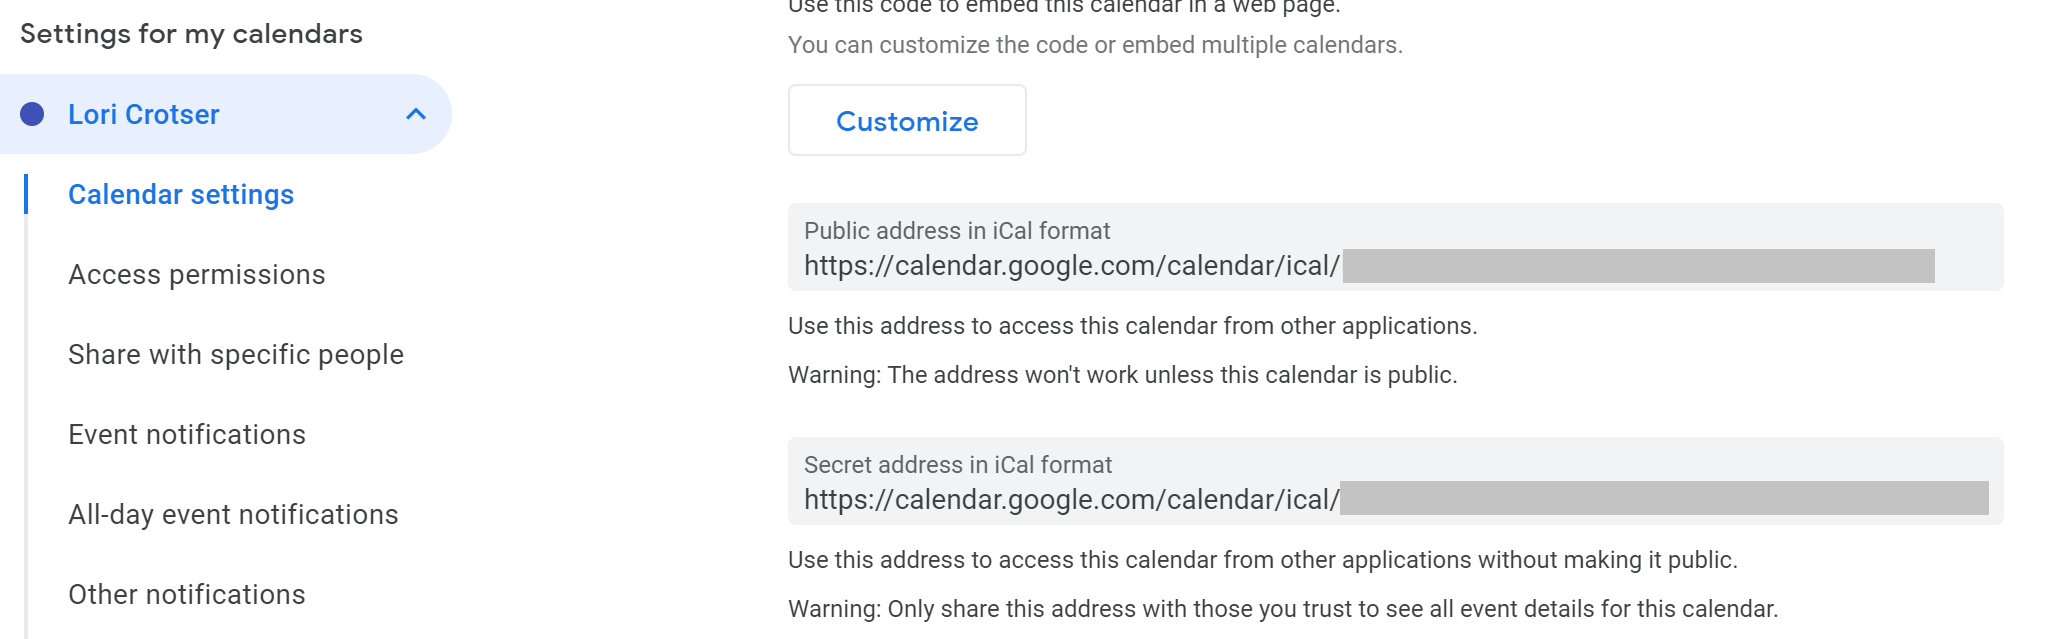
You'll notice that there is a Public Address and a Secret Address. If your calendar is public, go ahead and use that address. However, if you want to keep your calendar private to the world at large, go ahead and use the secret address in iCal format. Copy that link!
Now head on back to the config.js file and paste that iCal link (secret or public) into the url location.
Save your config.js file, head back to the terminal window, and type in npm start to see your changes in the Magic Mirror!
There are plenty of third party modules that can customize the look of your calendars. Take a peek here. Almost all of the modules have their requirements either listed out or an example is shown. Give it a try!
Now that we have THAT out of the way, let's look at other modules we can edit or add.
By default, the Magic Mirror comes with the following modules:
The default config.js file that we copied in the Installing Magic Mirror section has the basics set up for us. But what if we want more? Well, we're in luck. There's a whole ecosystem of third party modules you can add into your Magic Mirror.
Let's do something simple - let's add the Word of the Day.
Start by opening a terminal window on your Raspberry Pi and navigating to your MagicMirror's modules folder. If you are using the default installation directory, use the command:
language:shell
cd ~/MagicMirror/modules
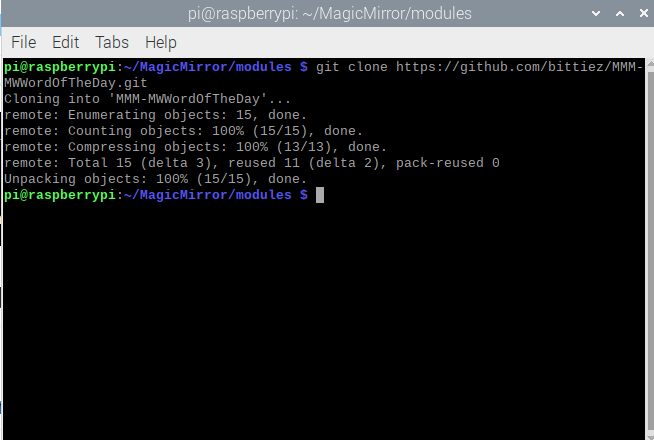
Clone the module:
language:shell
git clone https://github.com/bittiez/MMM-MWWordOfTheDay.git
You should see something along the lines of the following:
Once you have the module code, head back to your config.js file and add the following:
language:javascript
module: 'MMM-MWWordOfTheDay',
    position: 'top_right',
    config: {
        updateInterval: 120000,
        headerText: "Word of the day"
}
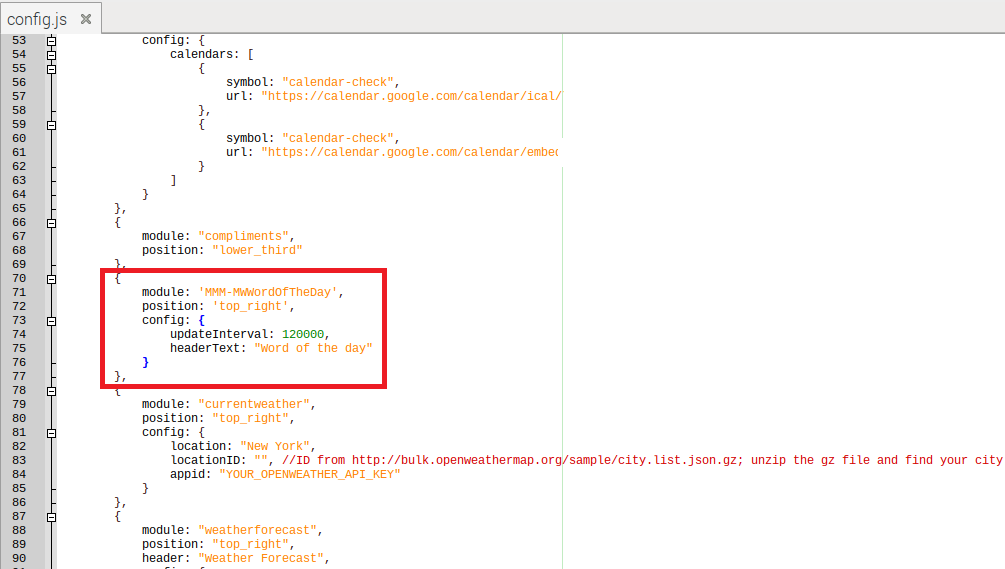
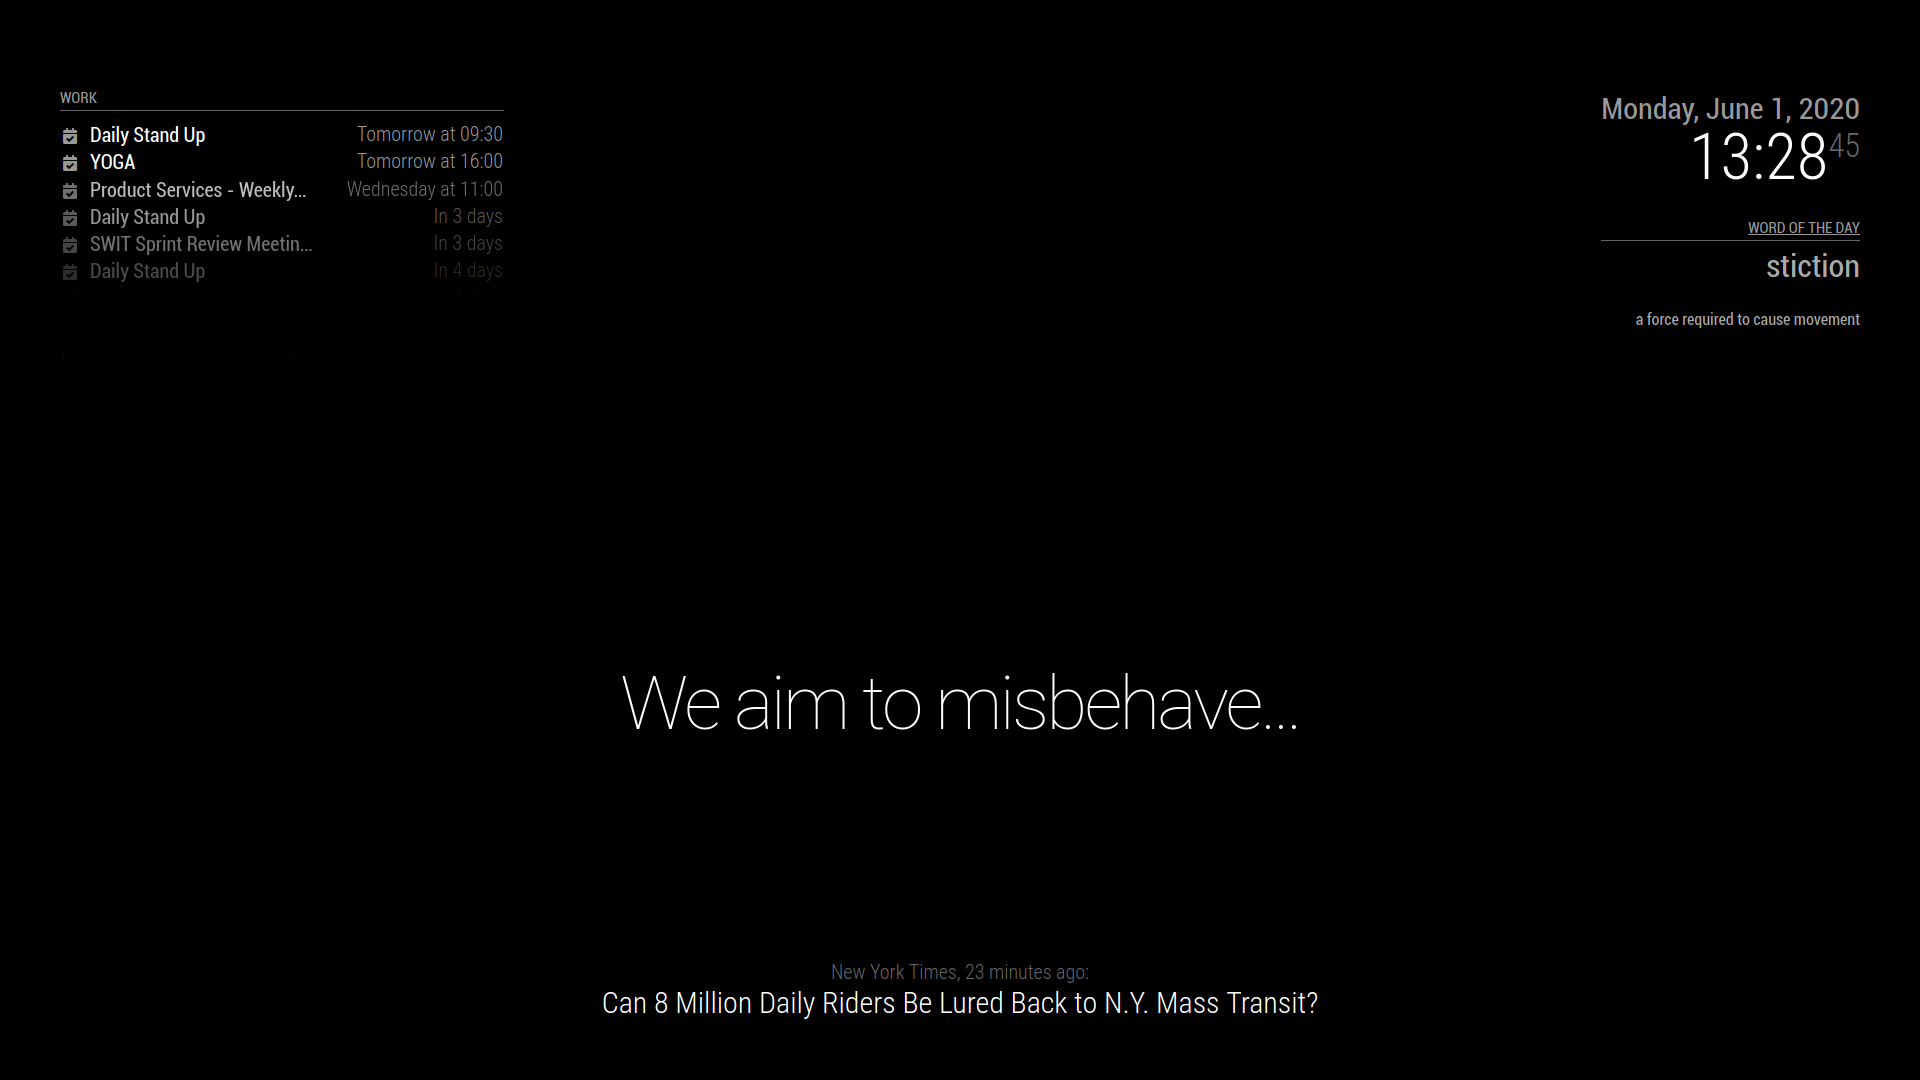
Save and quit! From your terminal, type npm start and you'll see your word of the day in the upper right hand corner!
There are so many options when making the box and the mirror. Googling "Magic Mirror Frame" is a little bonkers. I went with a shadow box I got on sale from Michaels, and some outdoor reflective film I bought from Amazon. I also had to get some right angle HDMI adapters so that the cable would lay somewhat flat and fit into the frame.
Since the frame was bigger than the screen, I had to do some finagling to get the screen to fit where I wanted it to.
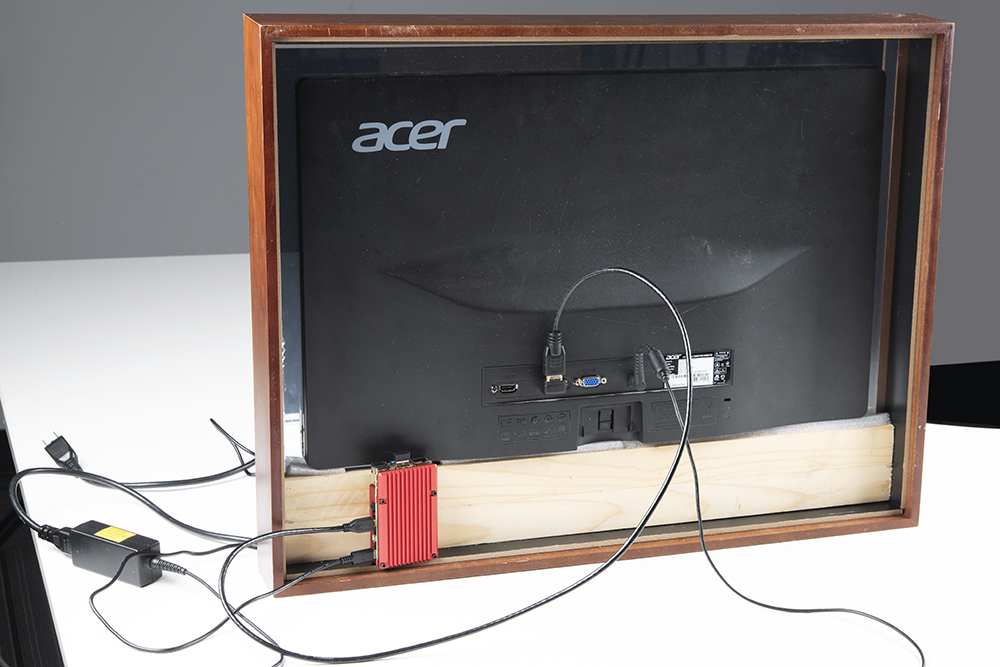
The Raspberry Pi 4 runs hot enough that I bought the Heatsink Case. I still needed to drill a few extra holes on the top of the mirror frame to provide enough ventilation but it's worth it to have the possibility of future expansion.
When time permits, I'll likely add a safe reboot and shutdown button with the Qwiic PHat like Bobby does here:
I may also use the Qwiic PHat to extend the Qwiic ecosystem. It'd be nice to add a proximity sensor such that it's not just on all the time. As you can see in the images above, I've already used css to customize our calendars and added Google Tasks in. Super handy to know what you need to do each day!
The MagicMirror project has a wonderful forum of users ready and willing to help out! I have popped over there a few times to sort out some CSS configuration questions myself.
Please create a config file: If you've made changes to your config file and get this error, there is likely a syntax error in your file. If you are just starting out, you need to copy the config.js.sample to config.js.
npm fails to start: Get errors when you type in npm start? Likely you're not in the MagicMirror folder. Make sure you're in the correct directory and try again.
Module not working: Make sure that when you install modules, you are in the MagicMirror/modules folder. The project assumes your modules will be installed here and if they are not, the config file can't find them.
So now you have a delightful command center. What will you do next? How will you customize your daily routine?
You can also check out some of our other great Raspberry Pi Tutorials here:
learn.sparkfun.com | CC BY-SA 3.0 | SparkFun Electronics | Niwot, Colorado