HID Control of a Web Page
 Nate
Nate 
Receiving HID Packets
Upload the HID_TX_Example onto the Teensy.
language:c
    /*
 Example HID to Webcontrol - Basic transmit over HID
 By: Nathan Seidle (SparkFun Electronics)
 Date: January 6th, 2014
 This code is public domain but you buy me a beer if you use this and we meet someday (Beerware license).

 This example shows how to transmit a counter over Raw HID.
*/

//Declare hardware pins
byte statLED = 6; //Teeny 2.0++ has status LED on pin 6

long readingTime; //Controls how often we send our trimpot value to the computer
unsigned int counter = 0; //Used to show packet count sent to computer

byte outgoingBuffer[16];

void setup()
{
  //Blink to show we're alive
  pinMode(statLED, OUTPUT);
  for(int i = 0 ; i < 5 ; i++)
  {
    digitalWrite(statLED, HIGH);
    delay(25);
    digitalWrite(statLED, HIGH);
    delay(25);
  }
  digitalWrite(statLED, HIGH); //Turn off LED

  //Fill the buffer with static numbers
  for(int x = 0 ; x < 16 ; x++)
    outgoingBuffer[x] = x;

  readingTime = millis();
}

void loop()
{
  //Send sensor readings to computer every 30ms, about 33Hz
  if (millis() - readingTime > 30) {
    readingTime += 30;

    //Fill the tail end with a counter
    outgoingBuffer[14] = counter >> 8; //MSB
    outgoingBuffer[15] = counter & 0xFF; //LSB
    counter++;

    //Send the read frame to the computer
    int response = RawHID.send(outgoingBuffer, 100);

  }
}
Upon uploading the code, you'll notice nothing is happening. The problem is that we can't easily see USB packets. In the old serial world days, we could open a terminal window and watch a COM port. In HID land we need to view packets on the USB bus. A handy Windows tool to do this is the SimpleHIDWrite.exe program developed by Jan Axelson. Open up SimpleHIDWrite, and select 'Teensyduino RawHID' from the device list.
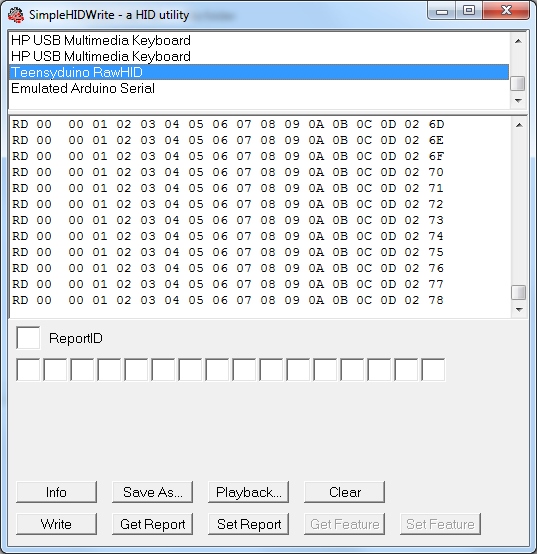
Here we see packets streaming by. The computer is receiving HID from the Teensy! We can see these 16 read bytes displayed in HEX. The last two bytes are our counter and increase with each read.
Don't see 16 bytes? That's probably because you weren't able to edit and save the frame setting in the usb_private.h file. Go back to the previous section, and double check that you have successfully edited the file.
Passing Variables

Now let's transmit the value of a trim pot. Attach a trimpot to pin A7 (labeled F7) on the Teensy. Not sure which Arduino pins are what on the Teensy? Check out this image or this page for a handy PDF.
Once you have the trimpot connected, upload the HID_TXTrimpot_Example to your Teensy.
language:c
/*
 Example HID to Webcontrol - Transmit analog value over HID
 By: Nathan Seidle (SparkFun Electronics)
 Date: January 6th, 2014
 This code is public domain but you buy me a beer if you use this and we meet someday (Beerware license).

 This example shows how to read a trimpot and send the value over Raw HID.
 */

//Declare hardware pins
byte statLED = 6; //Teeny 2.0++ has status LED on pin 6
byte trimpot = A7; //For the trimpot. This is labeled F7 on the Teensy2.0++

int trimpotValue; //Contains analog to digital value of the trimpot
long readingTime; //Controls how often we send our trimpot value to the computer
unsigned int counter = 0; //Used to show packet count sent to computer

byte outgoingBuffer[16]; //Holds the 16 bytes sent to computer

void setup()
{
  //Setup input/sensor ports
  pinMode(trimpot, INPUT_PULLUP);

  //Blink to show we're alive
  pinMode(statLED, OUTPUT);
  for(int i = 0 ; i < 5 ; i++)
  {
    digitalWrite(statLED, HIGH);
    delay(75);
    digitalWrite(statLED, LOW);
    delay(75);
  }
  digitalWrite(statLED, LOW); //Turn off LED

  //Fill the buffer with zeros
  for(int x = 0 ; x < 16 ; x++)
    outgoingBuffer[x] = 0;

  readingTime = millis();

}

void loop()
{
  //Send sensor readings to computer every 30ms, about 33Hz
  if (millis() - readingTime > 30) {
    readingTime += 30;

    //Read inputs
    trimpotValue = averageAnalogRead(trimpot);

    //Fill the head with the analog value
    outgoingBuffer[0] = trimpotValue >> 8;
    outgoingBuffer[1] = trimpotValue & 0xFF;

    //Fill the tail end with a counter
    outgoingBuffer[14] = counter >> 8; //MSB
    outgoingBuffer[15] = counter & 0xFF; //LSB
    counter++;

    //Send the read frame to the computer
    int response = RawHID.send(outgoingBuffer, 100);

  }
}

//Takes a series of readings on a given pin
//Returns the average
int averageAnalogRead(int pinToRead)
{
  byte numberOfReadings = 8;
  unsigned int runningValue = 0;

  for(int x = 0 ; x < numberOfReadings ; x++)
    runningValue += analogRead(pinToRead);
  runningValue /= numberOfReadings;

  return(runningValue);
}
This example takes an analog reading of the trimpot and passes the 10-bit number out bytes 0 and 1.
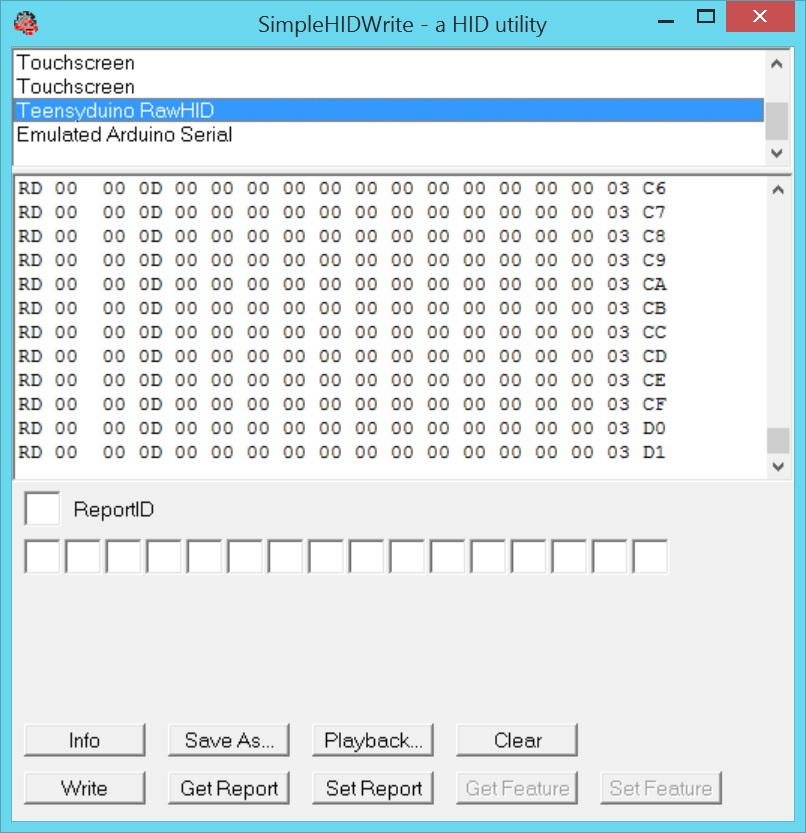
Open SimpleHID. You'll have to re-select the Teensy each time you load new code because it re-enumerates as an HID device. Twist the trimpot, and you'll see the values of the first two bytes change!
Pushing Values to a Webpage
Now that we can gather values and push them onto the HID bus, let's pipe them to a webpage. Milan Pipersky created a driver that allows a webpage to access HID hardware. Download and install the HID API Browser Plugin. This was created using FireBreath to allow multiple platforms and browsers get access to hardware. From their website:
FireBreath is a framework that allows easy creation of powerful browser plugins. A plugin built on FireBreath works as an NPAPI plugin or as an ActiveX control (windows only) and support could be added for other plugin types built in C++ as well.
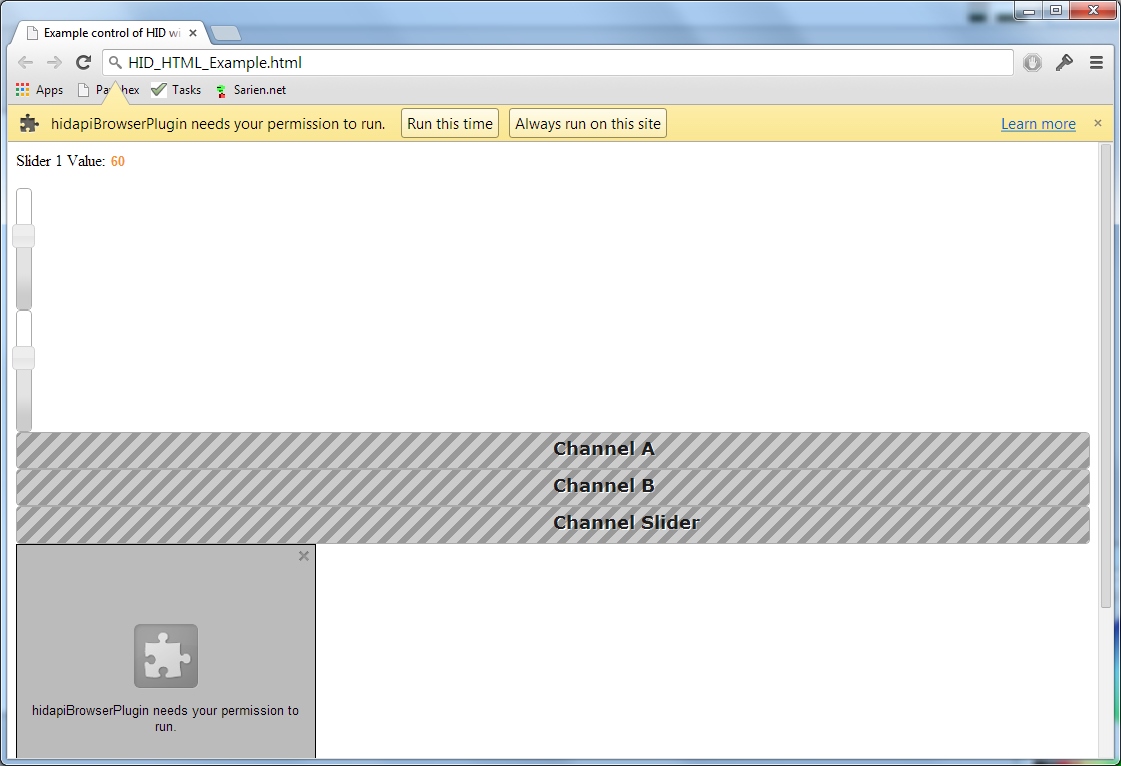
Next, open the example control html page. You will need to give permission to the plugin to run.

You should see a few messages and warnings to allow the plugin to function. Now twist the trimpot. You should see the progress bar change!
To me, controlling HTML from hardware is magic! From here you can begin to see the power that is possible. Any sensor that we can hook up to an Arduino can be directly displayed on a web page.
You could create a web-based game that responds to how loud the user yells at their controller or how hard they pound their desk. You could record sensor data such as temperature, UV light, sound and vibration levels. You could monitor buttons, switches on doors or movement in a room. Kind of fun to think about... But the real power is in controlling outputs!