Experiment Guide for the Red Hat Co.Lab Farm Kit
 D___Run___,
  Gina Likins
 Experiment 3: Planting Your Farm
Prep Your Sensor
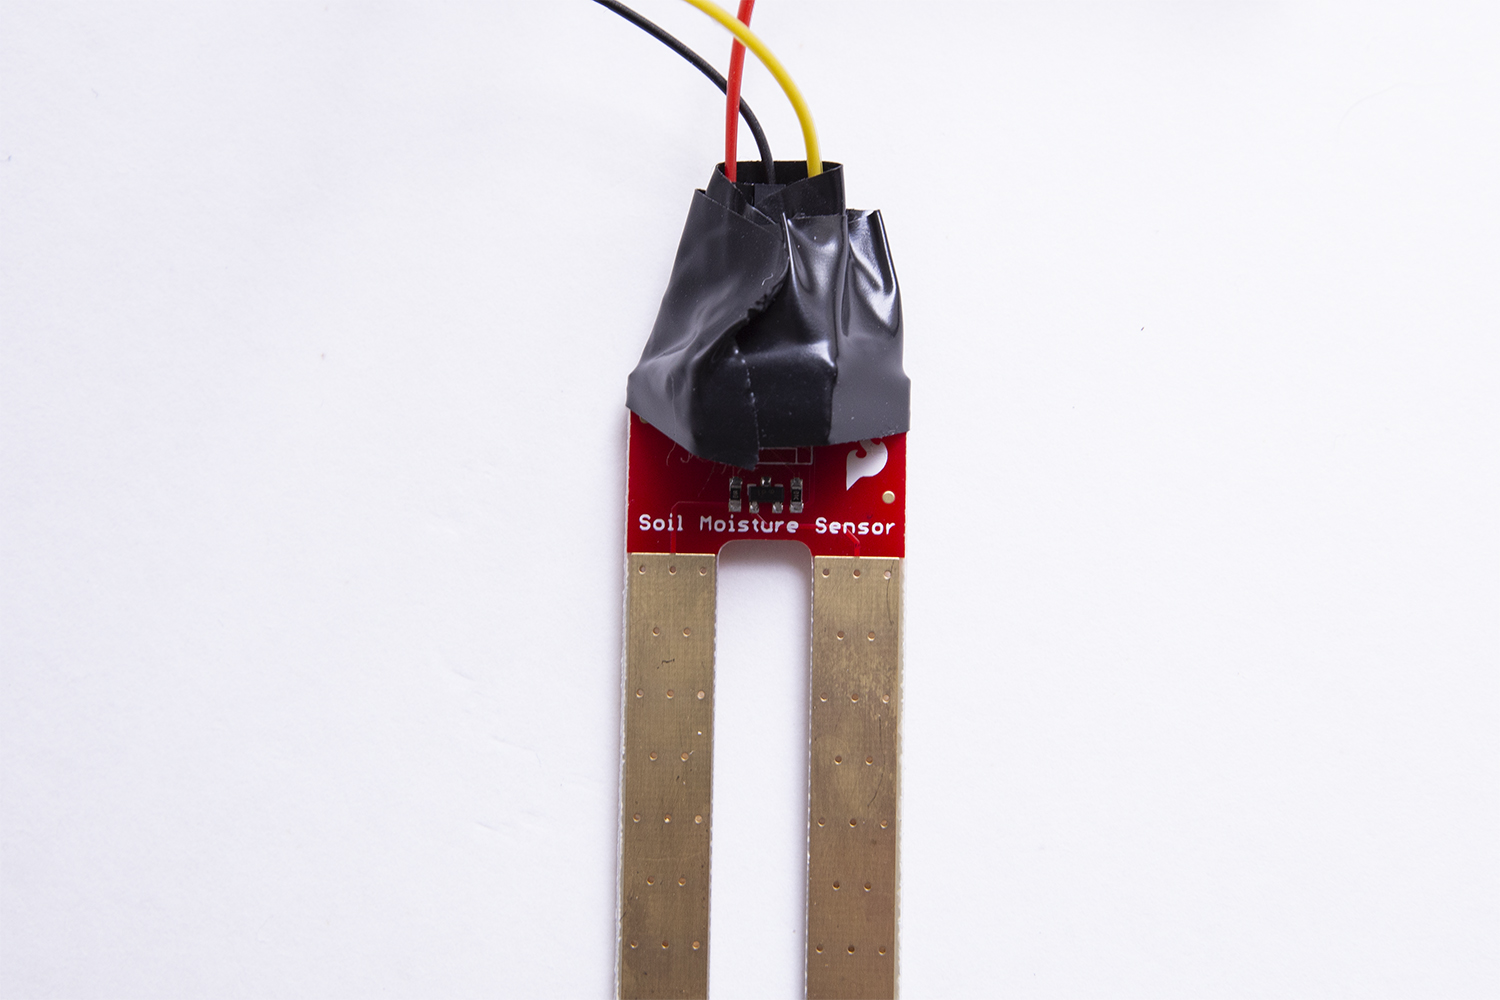
You may want to wrap the connections on your sensor with electrical tape to help protect the connections. It's not absolutely necessary -- and if you keep the connections out of the actual wetness (and don't pour water on them!) -- you should be fine even if you don't, but a little extra insurance never hurts.
Prep Your Container and Hydroponic Felt
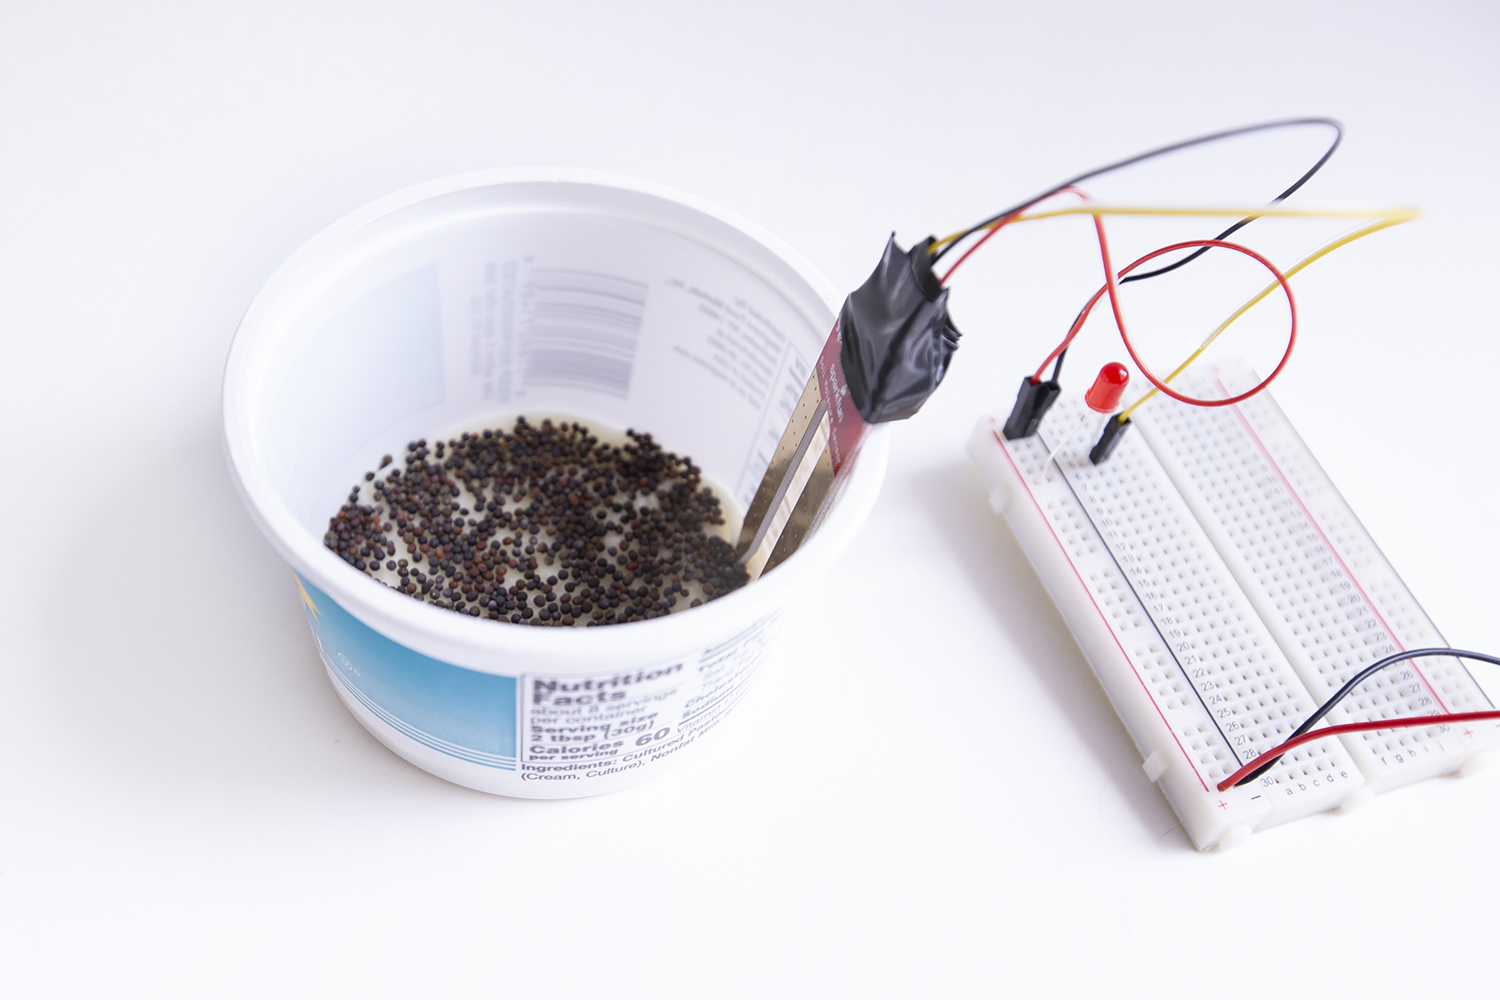
If you're using a recycled container make sure it's washed out well before starting.
Instead of soil, we're using hydroponic felt, which works as an alternative to using soil for microgreens because its structure is ideal for young plant roots to thrive. The felt fibers hold in water so that plant roots can absorb it and grow.
It comes in a 4"x4" sheet, so you might need to trim it to fit the bottom of your container. (You have two sheets -- one is a spare -- so you only need to trim one right now.)
If you do need to trim your felt, use your pencil to trace the bottom of your container's outline lightly on your felt, then use your scissors to trim your felt a just a little inside the line you drew, so it will fit nicely on the bottom.
If you do have to trim your felt, save the scraps. If your location is very warm, you live in a place with less humidity, or you have a very sunny spot for your planter, you may find out that your felt dries out in less than 24 hours. If that's the case, you can wet those leftover bits and place them on top of your seeds so that more moisture is maintained.
Plant Your Seeds
We're planting microgreens, which are like baby herbs or veggies. Read more about microgreens and how to plant and take care of them.
Take your felt and soak it in water, then wring out any extra moisture. The felt should be wet, but water shouldn’t drip out if you hold it by one edge.
Place the wet hydroponic felt in your planter, and sprinkle microgreen seeds to cover the bottom of the planter.
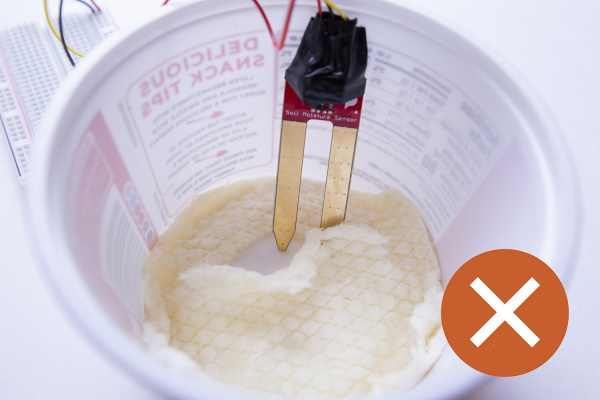
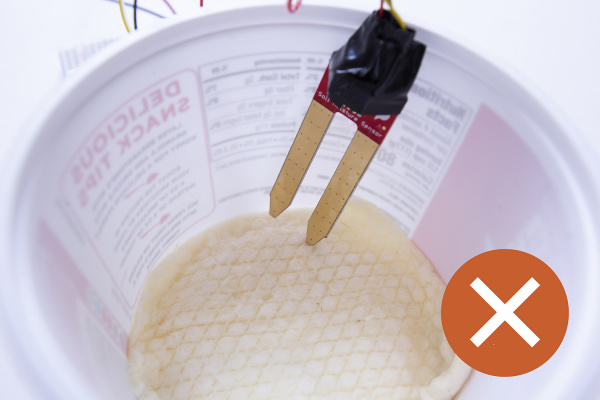
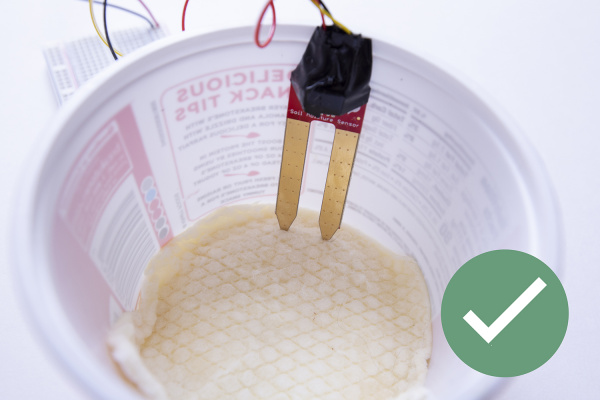
Put your "Water-Me Sensor" near enough to your planter that both tips of the sensor prongs can reach inside and touch the felt. You may need to make a little platform for your sensor to sit on if your planter is so deep that the sensor prongs can't reach without stressing the jumper wire connections.
Place the sensor so that both prongs are just a little bit dug into the felt. You don't want them so far in that they are touching the bottom of the container, but you do want them "in" the felt rather than just sitting on top.
Tend Your Farm
Place your whole farm setup near a window with sunlight and check your soil moisture sensor to make sure that your plants have enough water!
The "Water-Me Signal" is your friend here -- check it every day. It's easy to overwater the seeds, and if you do, they will mold (ick!), so don't overdo it. You want damp, not soggy or waterlogged.
Enjoy watching your microgreens grow! Your second piece of felt can be used to try a different variety of seed or a different growing environment. What happens if you plant the same seeds in a warmer environment, for instance? Do you have to water them more often? Do they grow as tall?
Project checklist
☑ Read Requirements and Assemble Tools
☑ Read the Instructions
☑ Identify the Parts
☑ Build Your Project
☑ Testing
☑ Show it off!