Decade Resistance Box Hookup Guide
 Byron J.
Enclosure Drilling
The decade resistance can be mounted in an enclosure, or used without one. If you want to put it in an enclosure, it is easiest to prepare the enclosure before the board is assembled.
If you aren't going to use an enclosure, you can skip ahead to the next section.
For this guide, we'll be using a small aluminum enclosure, because they are durable, and aluminum is easy to drill.
Marking
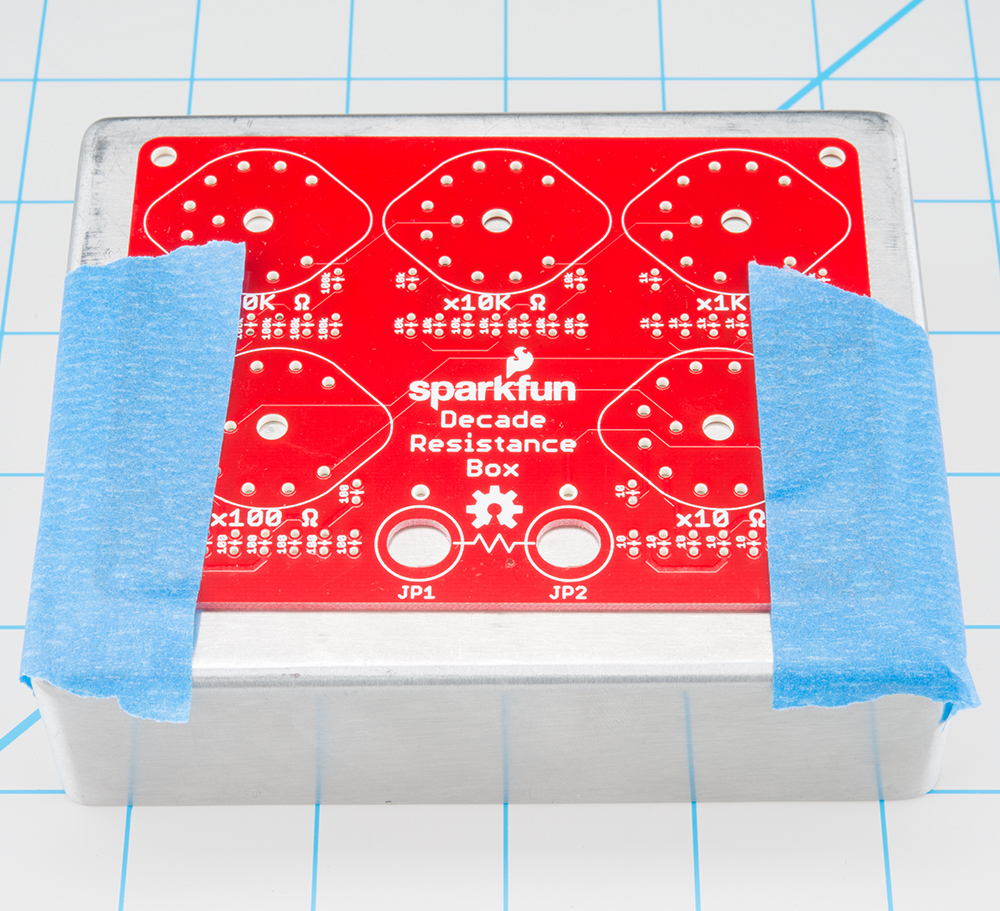
The PCB for the decade resistance does double duty as a drilling template. Each of the holes needed in the enclosure has a matching hole in the PCB.
To use the template, tape the PCB onto the enclosure, with equal spacing to each edge.
Mark the center of each of the holes with a center punch. Tap it with a hammer so it leaves a small divot - the divot will serve to guide the bit when you start drilling. There will be five marks for the rotary switches, and two more for the banana jacks.
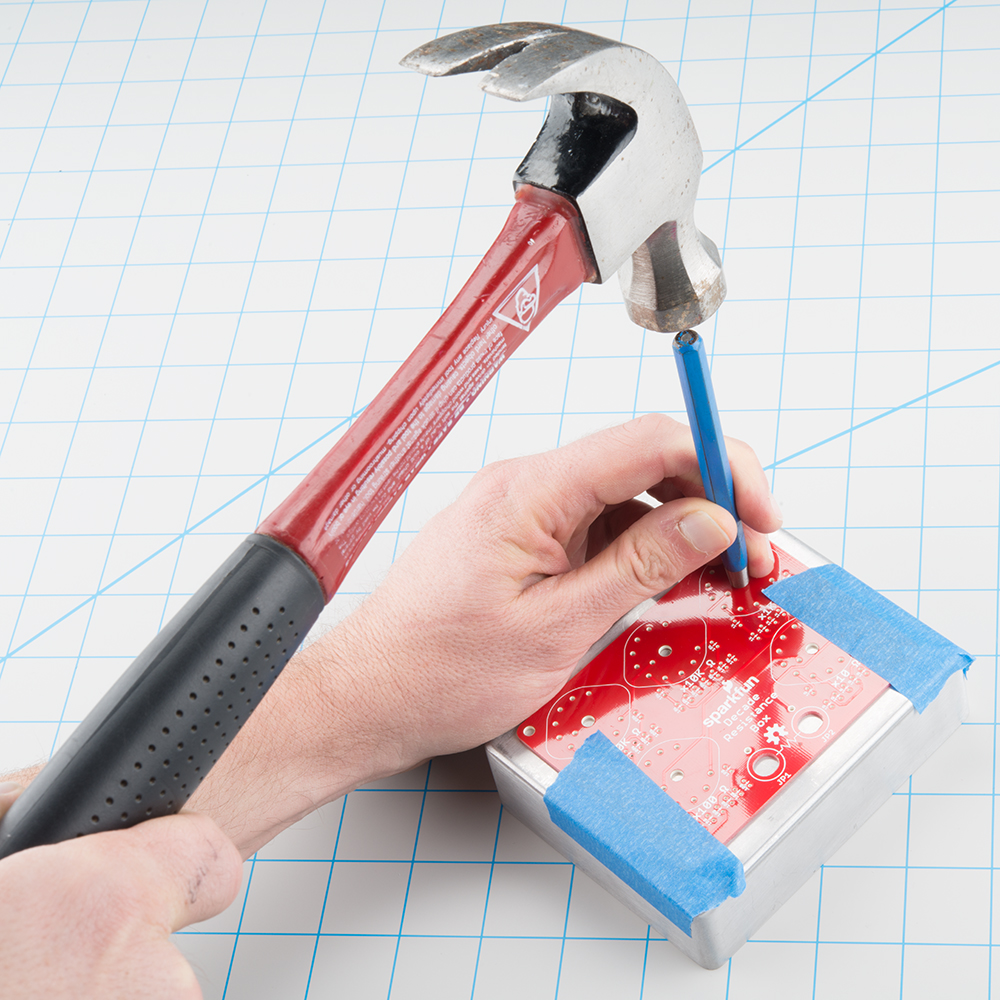
The oval holes for the banana jacks won't be as precise a guide for the punch - it's OK to gauge the center of those holes by eye.
Drilling
Before we start drilling, let's take a moment to review some basic drilling safety practices, which apply whether you're using a hand drill or a drill press.
Drilling aluminum produces small, sharp pieces of metal ("curliqueues" or "chips" as machinists call them). Safety glasses or a face shield are essential, and work gloves help protect your fingertips.
The bit can bind in the material, and cause the box to spin on the end of the bit. This is dangerous, as it can damage the box, the bit, and your fingers. Secure the box with a vise or clamps before drilling!
A little lubricant can help the bit cut more smoothly, and prevents dulling. There are specialty machinist's bit lubricants, but if you don't have them handy, a few drops of light household oil will help.
If you're using regular bits, start with smaller ones, then work up to larger ones. We began with a 1/8" bit to make pilot holes on each of the center punch marks, then worked progressively up to larger bits. The five holes for the rotary switches should be drilled to 3/8".
The two banana connectors fit in 5/16" holes. Lacking a 5/16" bit, we drilled them to 1/4", then filed the holes until the connectors fit.
If you're not enthusiastic about all of those bit changes, consider using a stepped drill bit, such as the Irwin Unibit.
Once the holes are drilled, consider using a countersink to deburr and bevel the holes, to remove any sharp edges left by the drilling.
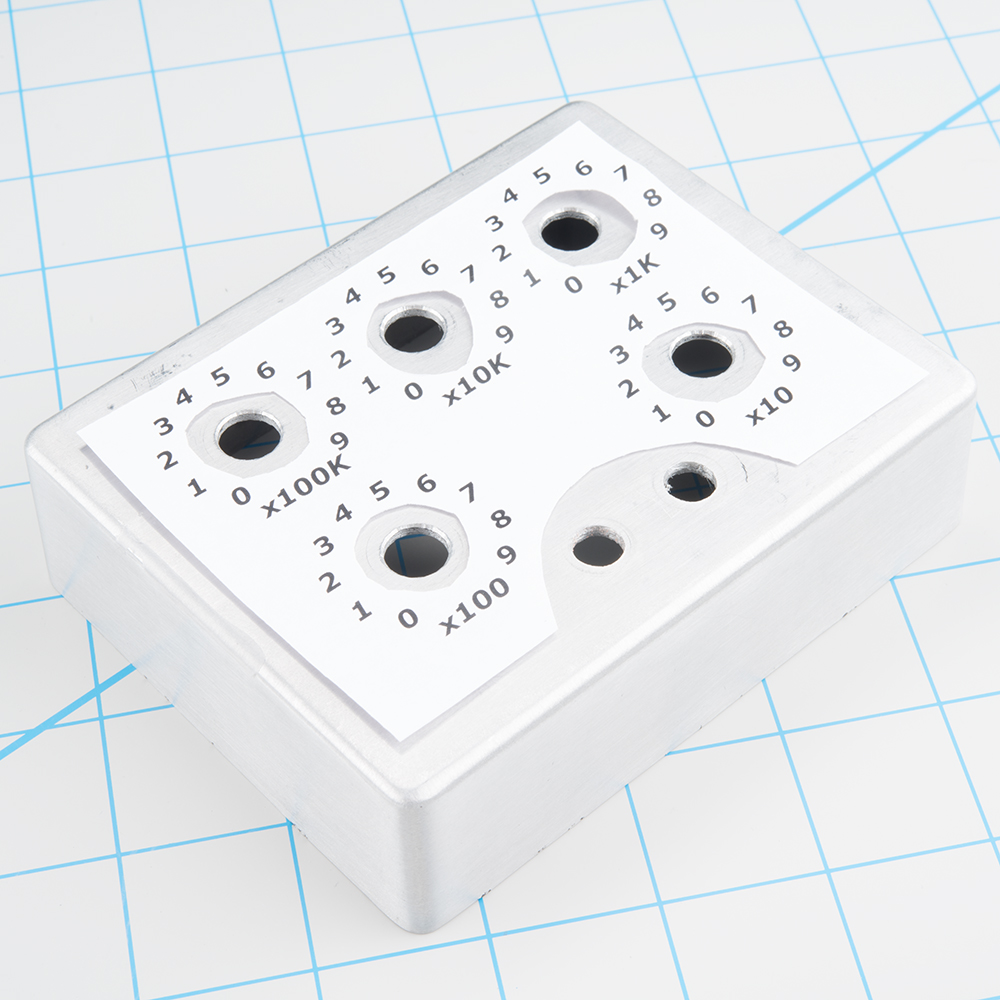
Labeling
In the decade box GitHub repository, there is an SVG file of the panel legend. If you have access to a laser engraver, you can etch it into the enclosure.
If you aren't lucky enough to have access to a laser cutter, you can simply print it on paper, trim it to fit, and stick it on with adhesive tape.