Copernicus II Hookup Guide
Talking to the Module
Once you have your boards connected, open up your favorite serial terminal program and connect to the appropriate COM port for your FTDI Basic. The connection settings should be 4800 bps, 8 data bits, no parity, 1 stop bit, and no flow control.
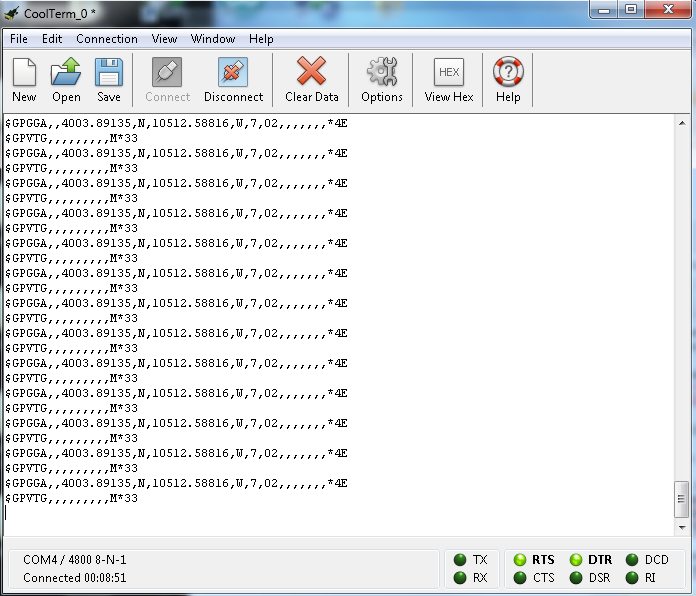
If your module is hooked up properly and has a lock, you should see a scrolling output like this.
As you can see in the GPGGA output, the module is reading the position to be 4003.89135 N and 10512.58816 W, which happens to be SparkFun's headquarters. The module is also currently only seeing 2 satellites, and the location data being output is from the last value stored in the flash (shown by the GPS Quality Indicator of 7). The lack of additional data is due to testing this inside a large building like SparkFun where the signal fades in and out, so you should actually be getting more data from your module if testing near a window or outside with a clear view.
Talking to a Microcontroller
If you're looking to add GPS to your Arduino project using the Copernicus, we suggest you look into the Tiny GPS library. This library is great for parsing out the data that you want to use in your project such as time, altitude, position, etc. There are plenty of resources involving this library around the web. A quick search should yield plenty of examples. If you need a refresher on how to install an Arduino library, instructions can be found here.
