Connecting Arduino to Processing
 b_e_n
b_e_n 
...to Processing
Our task now is to find a way to listen in on what our Arduino sketch is sending. Luckily, Processing comes with a Serial library designed for just this kind of thing! If you don't have a version of Processing, make sure you go to Processing.org and download the latest version for your operating system. Once Processing is installed, open it up. You should see something like this:

Looks a lot like Arduino, huh? The Arduino software was actually based in part off of Processing - that's the beauty of open-source projects. Once we have an open sketch, our first step is to import the Serial library. Go to Sketch->Import Library->Serial, as shown below:
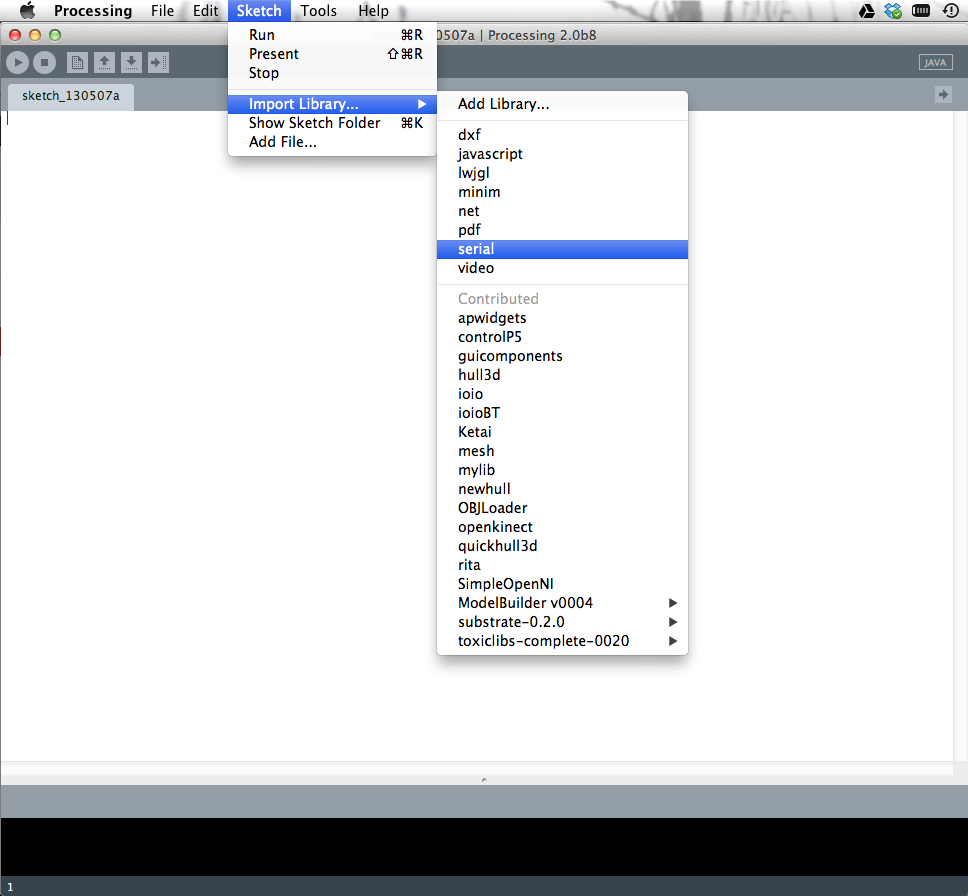
You should now see a line like import processing.serial.*; at the top of your sketch. Magic! Underneath our import statement we need to declare some global variables. All this means is that these variables can used anywhere in our sketch. Add these two lines beneath the import statement:
language:java
Serial myPort;  // Create object from Serial class
String val;     // Data received from the serial port
In order to listen to any serial communication we have to get a Serial object (we call it myPort but you can it whatever you like), which lets us listen in on a serial port on our computer for any incoming data. We also need a variable to recieve the actual data coming in. In this case, since we're sending a String (the sequence of characters 'Hello, World!') from Arduino, we want to receive a String in Processing.
Just like Arduino has setup() and loop(), Processing has setup() and draw() (instead of loop).
For our setup() method in Processing, we're going to find the serial port our Arduino is connected to and set up our Serial object to listen to that port.
language:java
void setup()
{
  // I know that the first port in the serial list on my mac
  // is Serial.list()[0].
  // On Windows machines, this generally opens COM1.
  // Open whatever port is the one you're using.
  String portName = Serial.list()[0]; //change the 0 to a 1 or 2 etc. to match your port
  myPort = new Serial(this, portName, 9600);
}
Remember how we set Serial.begin(9600) in Arduino? Well, if we don't want that gobbledy-gook I was talking about, we had better put 9600 as that last argument in our Serial object in Processing as well. This way Arduino and Processing are communicating at the same rate. Happy times!
In our draw() loop, we're going to listen in on our Serial port and we get something, stick that something in our val variable and print it to the console (that black area at the bottom of your Processing sketch).
language:java
void draw()
{
  if ( myPort.available() > 0)
  {  // If data is available,
  val = myPort.readStringUntil('\n');         // read it and store it in val
  }
println(val); //print it out in the console
}
Ta-Da! If you hit the 'run' button (and your Arduino is plugged in with the code on the previous page loaded up), you should see a little window pop-up, and after a sec you should see `Hello, World!' appear in the Processing console. Over and over. Like this:
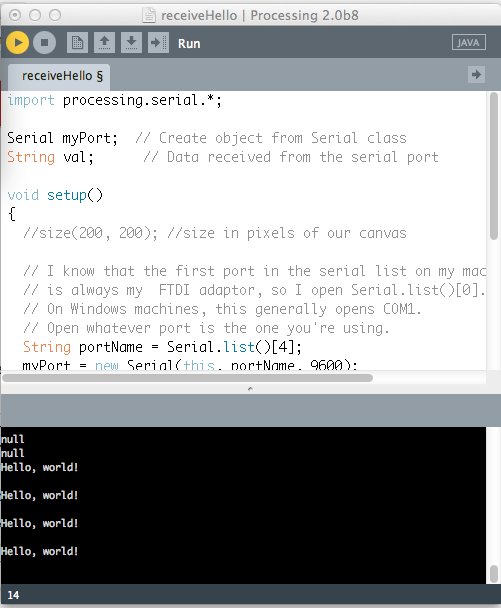
Excellent! We've now conquered how to send data from Arduino to Processing. Our next step is figure out how go the opposite way - sending data from Processing to Arduino.