Connecting Arduino to Processing
 b_e_n
b_e_n 
Shaking Hands (Part 1)
So far we've shown that Arduino and Processing can communicate via serial when one is talking and the other is listening. Can we make a link that allows data to flow both ways, so that Arduino and Processing are both sending and receiving data? You bet! In the biz we call this a serial 'handshake', since both sides have to agree when to send and receive data.
On this page and the next, we're going to combine our two previous examples in such a way that Processing can both receive 'Hello, world!' from Arduino AND send a 1 back to Arduino to toggle an LED. Of course, this also means that Arduino has to be able to send 'Hello, world!' while listening for a 1 from Processing. Whew!
Let's start with the Arduino side of things. In order for this to run smoothly, both sides have to know what to listen for and what the other side is expecting to hear. We also want to minimize traffic over the serial port so we get more timely responses.
Just like in our Serial read example, we need a variable for our incoming data and a variable for the LED pin we want to light up:
language:cpp
char val; // Data received from the serial port
int ledPin = 13; // Set the pin to digital I/O 13
boolean ledState = LOW; //to toggle our LED
Since we're trying to be efficient, we're going to change our code so that we only listen for 1's, and each time we hear a '1' we toggle the LED on or off. To do this we added a boolean (true or false) variable for the HIGH or LOW state of our LED. This means we don't have to constantly send a 1 or 0 from Processing, which frees up our serial port quite a bit.
Our setup() method looks mostly the same, with the addition of an establishContact() function which we'll get to later - for now just type it in.
language:cpp
void setup()
{
  pinMode(ledPin, OUTPUT); // Set pin as OUTPUT
  //initialize serial communications at a 9600 baud rate
  Serial.begin(9600);
  establishContact();  // send a byte to establish contact until receiver responds
}
In our loop function, we've just combined and slimmed down the code from our two earlier sketches. Most importantly, we've changed our LED code to toggle based on our new boolean value. The '!' means every time we see a one, we set the boolean to the opposite of what it was before (so LOW becomes HIGH or vice-versa). We also put our 'Hello, world!' in an else statement, so that we're only sending it when we haven't seen a '1' come in.
language:cpp
void loop()
{
  if (Serial.available() > 0) { // If data is available to read,
    val = Serial.read(); // read it and store it in val

    if(val == '1') //if we get a 1
    {
       ledState = !ledState; //flip the ledState
       digitalWrite(ledPin, ledState);
    }
    delay(100);
  }
    else {
    Serial.println("Hello, world!"); //send back a hello world
    delay(50);
    }
}
Now we get to that establishContact() function we put in our setup() method. This function just sends out a string (the same one we'll need to look for in Processing) to see if it hears anything back - indicating that Processing is ready to receive data. It's like saying 'Marco' over and over until you hear a 'Polo' back from somewhere.
language:cpp
void establishContact() {
  while (Serial.available() <= 0) {
  Serial.println("A");   // send a capital A
  delay(300);
  }
}
Your Arduino code should look like this:
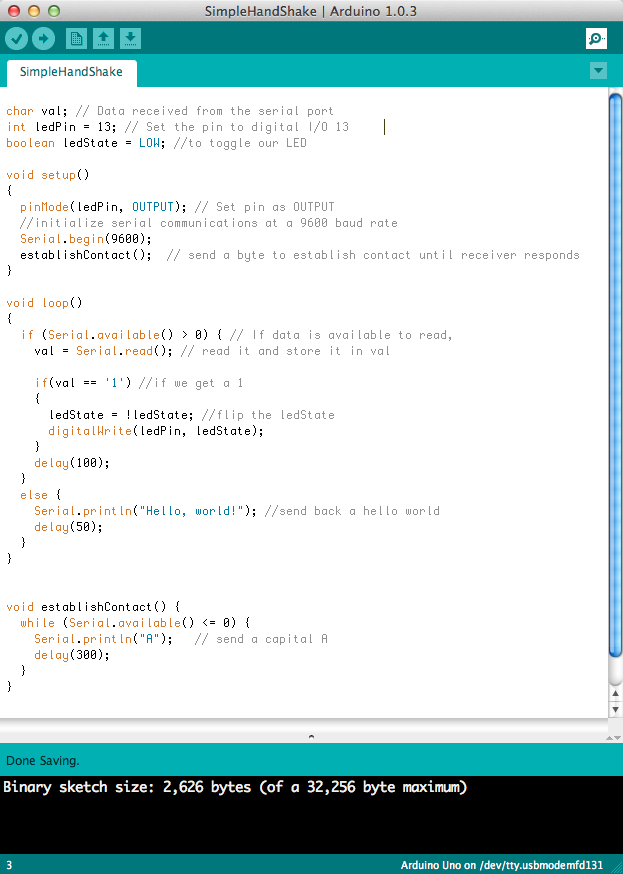
That's it for the Arduino side, now on to Processing!