AT42QT1010 Capacitive Touch Breakout Hookup Guide
This Tutorial is Retired!
This tutorial covers concepts or technologies that are no longer current. It's still here for you to read and enjoy, but may not be as useful as our newest tutorials.
View the updated tutorial: AT42QT101X Capacitive Touch Breakout Hookup Guide
Contributors:
 Shawn Hymel
Shawn Hymel 
Example Code
Open the Arduino program and paste the following code into the sketch:
language:c
/*
 12-23-2013
 SparkFun Electronics 2013
 Shawn Hymel

 This code is public domain but you buy me a beer if you use this
 and we meet someday (Beerware license).

 Description:

 This sketch shows how to use the SparkFun AT42QT1010 Breakout
 Board. If you touch the Capacitive Touch area on the breakout
 board, the LED attached to the Arduino will light up (in addition
 to the LED on the AT42QT1010 breakout board).

 Simply connect power and ground to the breakout board,
 and the AT42QT1010 handles all the capacitive touch functions.
 By default, the board will light up the green LED when the pad
 is touched. A wire may also be connected from OUT on the
 breakout board to a digital input pin on an Arduino. This signal
 is normally LOW but goes HIGH on a touch detection.

 The "LED Enable" solder jumper may be de-soldered in order to
 control the LED directly from the LED pin. This is useful if you
 want to light up a button that the user needs to push.

 Hardware connections:

 Uno Pin    AT42QT1010 Board  Function

 +5V        VDD               Power supply
 GND        GND               Ground
 2          OUT               Capacitive touch state output
 */

// Constants
const int TOUCH_BUTTON_PIN = 2;  // Input pin for touch state
const int LED_PIN = 13;          // Pin number for LED

// Global Variables
int buttonState = 0;             // Variable for reading button

void setup() {

  // Configure button pin as input
  pinMode(TOUCH_BUTTON_PIN, INPUT);

  // Configure LED pin as output
  pinMode(LED_PIN, OUTPUT);

}

void loop() {

  // Read the state of the capacitive touch board
  buttonState = digitalRead(TOUCH_BUTTON_PIN);

  // If a touch is detected, turn on the LED
  if (buttonState == HIGH) {
    digitalWrite(LED_PIN, HIGH);
  } else {
    digitalWrite(LED_PIN, LOW);
  }
}
Plug in the Arduino and upload the code. You should see the LED on the AT42QT1010 board and the LED on the Arduino light up when you touch the electrode.
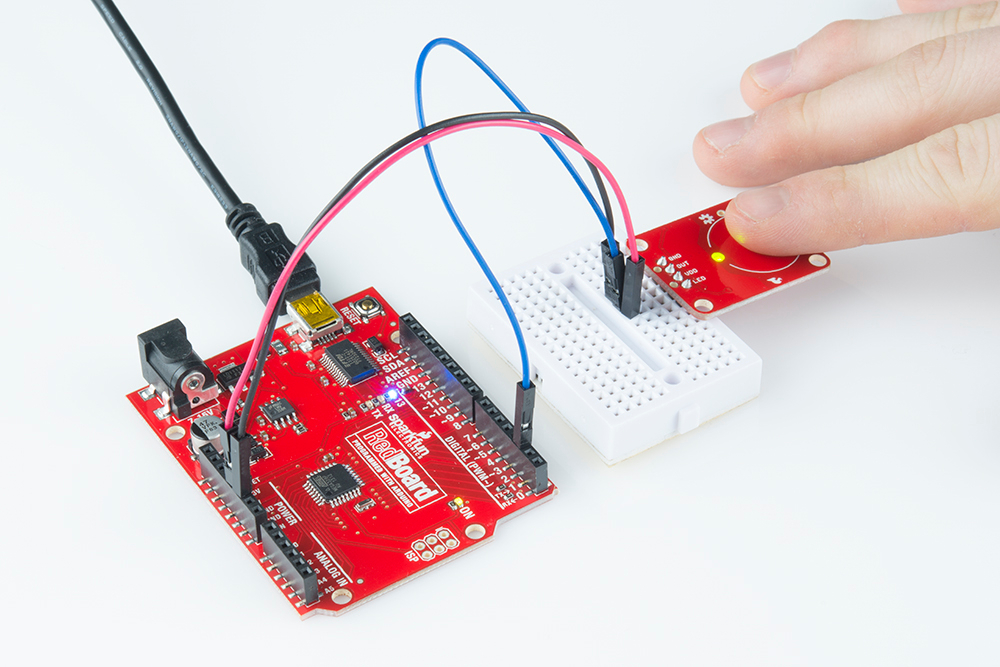
The AT42QT1010 detects touches, and the Arduino monitors pin 2 for the output of the AT42QT1010.