Adding a Timed Button to a Project
 Sarah Al-Mutlaq
Hardware Hookup
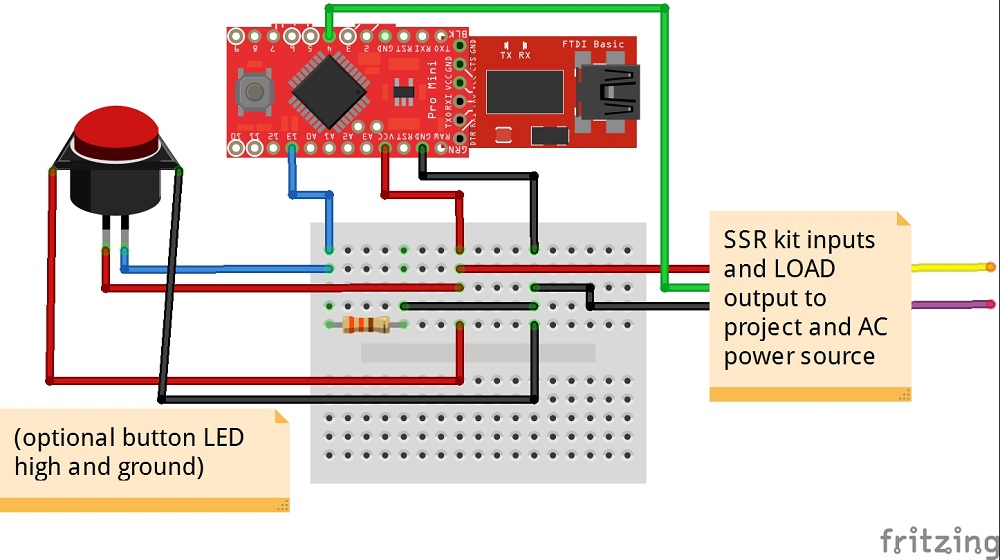
As you can see in the code, we will be hooking up the button to pin 13 of the Pro Mini (this can be changed to any pin in the code) and pin 4, as well as 5V high and Ground to our SSR kit (also can be changed in the code). To connect the Pro Mini, you can either directly solder wires onto the pins, 5V, and ground. Or, you can solder on female headers, and plug wires into those.

The SSR kit does not come with all of its parts soldered on, so you will need to assemble it.
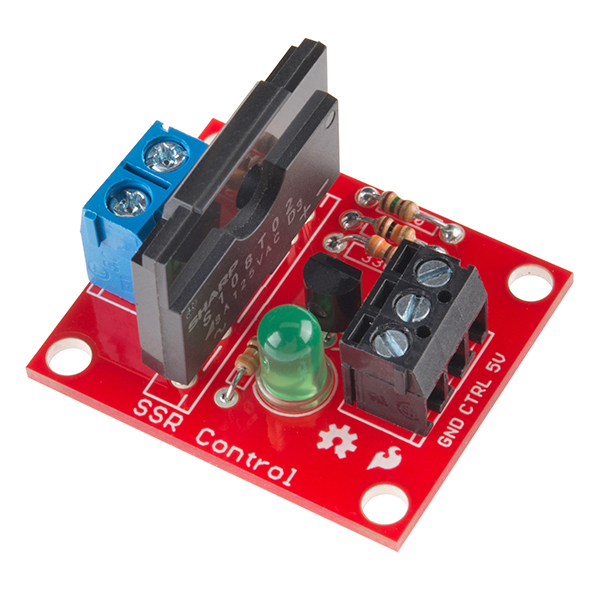
This solid state relay kit is rated for a max of 125VAC at 8A, so, for a small-medium size project, this is a fine option. However if your project is going to be pulling more current or voltage you might want to look into a full blown Solid State Relay (SSR), this one can handle 380VAC and 40A!
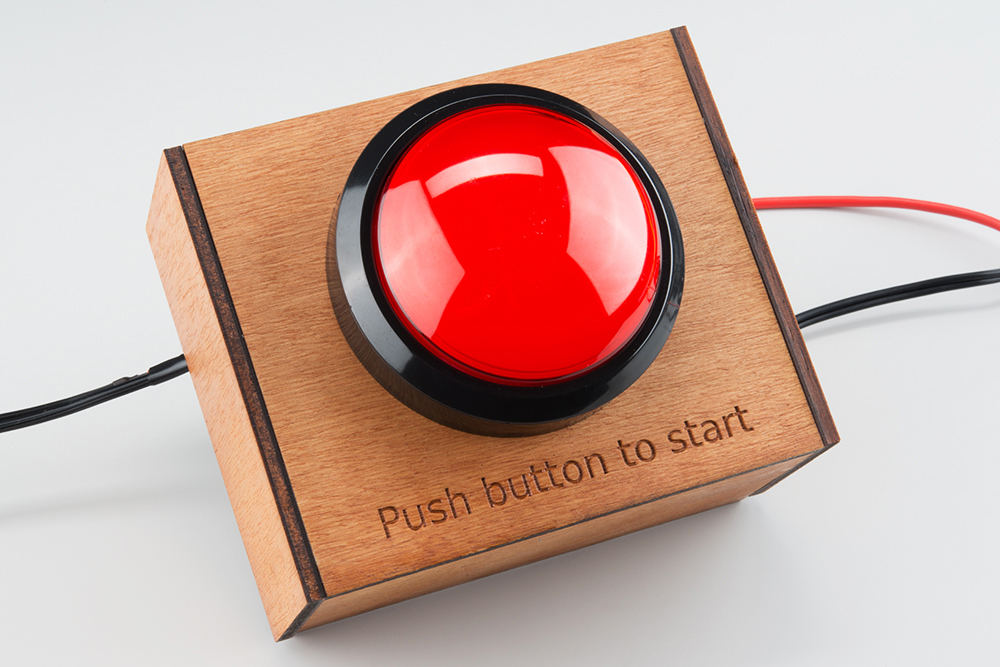
Since I used a Big Dome Pushbutton, I will also be hooking up the LED inside to Vcc and Ground. The code recognizes that the button is pushed when the pin goes high. This means the button will be pulled low and only go high when the button is pushed (meaning 5V will be connected to the pin the button connects when it is pushed).
Last, the load pins on the SSR kit will be hooked up to one of the wires that are going from your project to the AC power supply (usually the wall).

To protect the project and make sure that nothing is going to short, I recommend covering everything with electrical tape or Heat Shrink. I also added a fair amount of hot glue to this project to protect all the connections and keep everything in place.
Once everything is hooked up and in place, you can plug your Pro Mini (through the FTDI Breakout) into the wall with a 5V adapter, plug in your connected project, and there you have it! A timed on button for your project!
I cut a few pieces of plywood and glued them together to form a little housing for the button.