21st Century Fashion Kit: Electrochromatic Circuits
 Dia, Member #313449
What is an Electrochromatic Circuit?
Electrochromatic circuits use electricity to make something change color. It’s very experimental, so you won’t see anything electrochromatic for sale in the store. Here’s a tutorial to get you started making your own electrochromatic circuit. You will combine thermochromatic pigment (which changes color when heated) with steel conductive thread (that will heat the pigment in a short circuit). When you push a felt button, your electrochromatic circuit will turn on, and a design will appear in the thermochromatic pigment. Here's a video example:
ReplaceMeOpen
ReplaceMeClose
Suggested Reading
Before getting started with this tutorial, here are some related concepts you might want to check out.
Required Materials
Craft materials first:
- Scissors
- Felt (to create the button)
- Thread
- Thin Fabric to paint your electrochromatic design (quilting weight works well)
- Fabric Paint
- Paint Brush
- Paper Plate (to mix paint on)
- Fabric Glue
All of the parts for this are included in the 21st Century Fashion kit. Should you need to buy all the parts separately, here is a wishlist for your convenience.
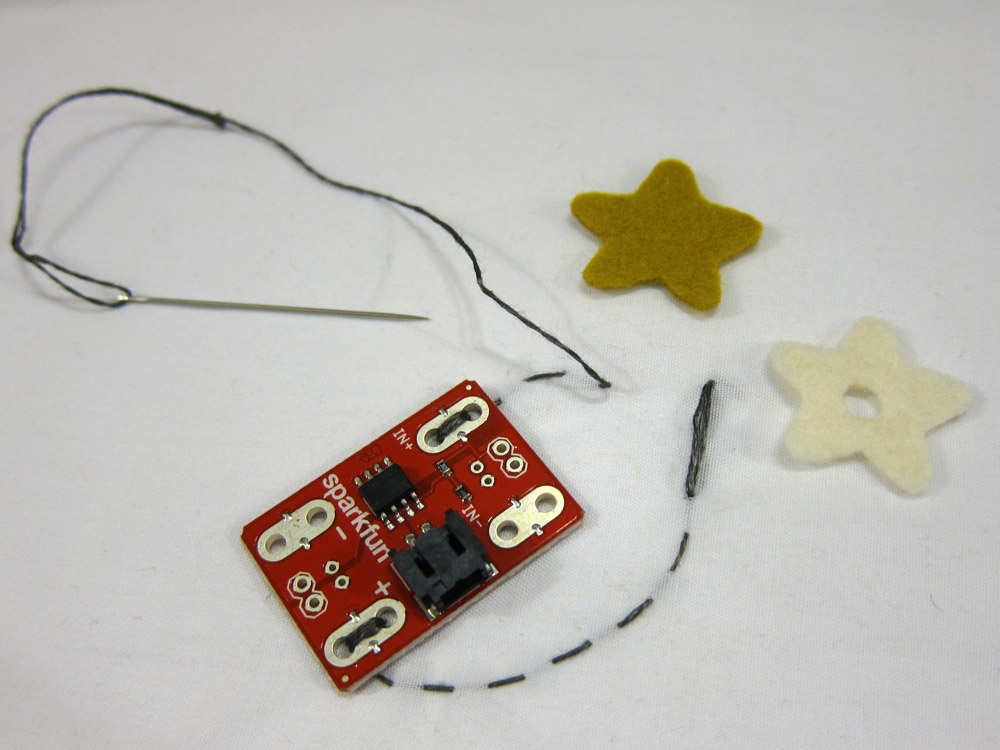
Making a Soft Circuit Button
In this section, you will use conductive thread and felt to make your own button. When you push the felt, two pieces of conductive thread inside of the button will touch turning the circuit on.
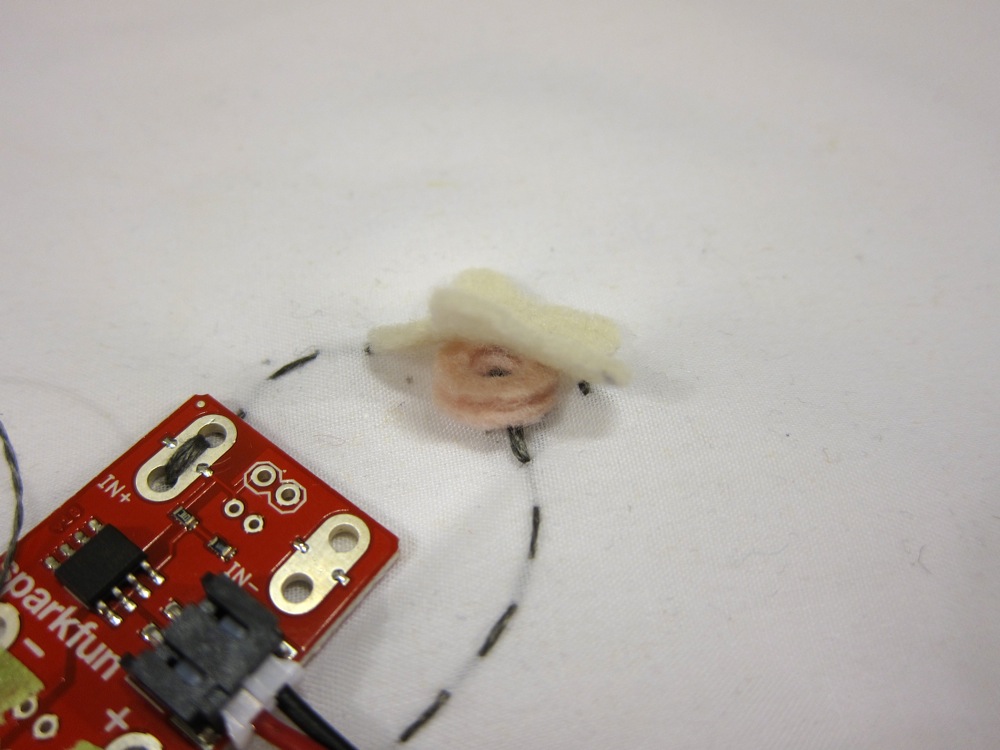
To begin, Cut a piece of felt for the top of the button and a piece for the inside. Cut a small hole in the inside piece of felt (the conductive thread will touch through this hole when the button is pushed).
Using the conductive thread, sew from In+ on the MOSFET power Controller to the side of your button location. With a second piece of conductive thread, sew from In- to the bottom of your button location. For a strong secure connection, stitch through the through-holes in the board a few times, and make sure your stitches are tight. The two threads should not touch. Tip: Don’t use your fancy sewing scissor to cut the conductive thread; it is steel and will dull them.
With one thread, create a long stitch in the fabric that will go under the button. Sew back over the stitch three times, then tie off the thread on the back. Cut off any loose ends.
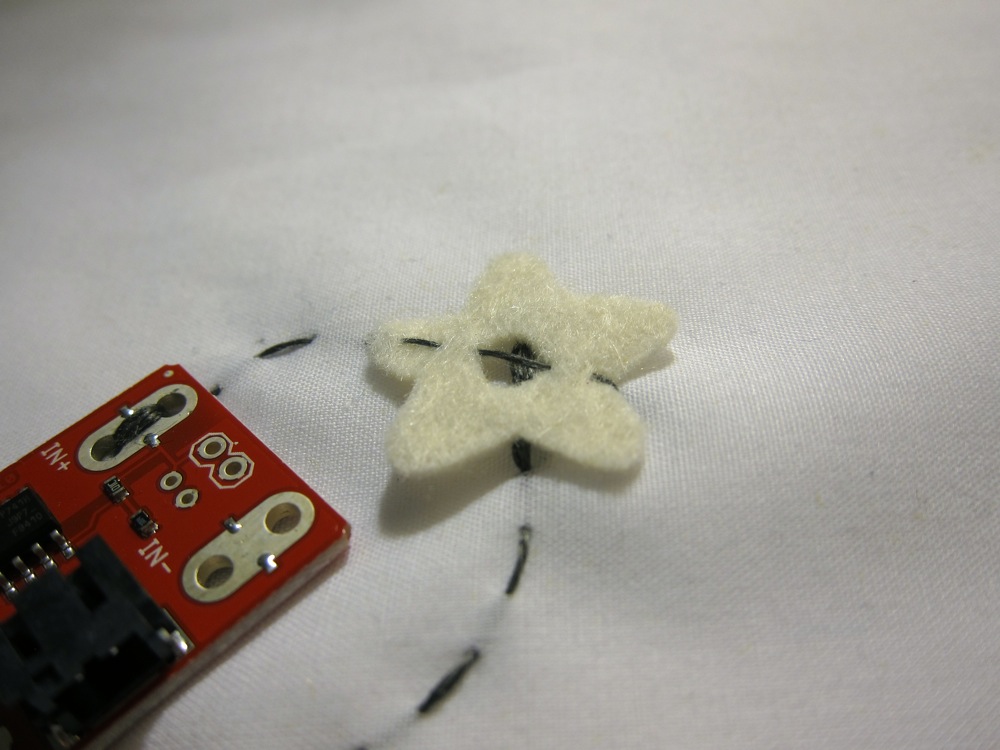
Place the felt button inside piece over the long stitch. With the remaining conductive thread, sew across the felt button inside piece so that the two threads are perpendicular to each other. Stitch so that the thread spans across the top of the hole and is separated from the bottom thread by the felt. Once you’ve sewn to the opposite side of the button, tie off the thread on the back, and cut the loose end. Make sure the two threads do not touch.
Fine-tuning Your Button
This is experimental fashion, so getting a working button takes some fine tuning. Be sure to unplug your battery whenever you are working on your circuit.
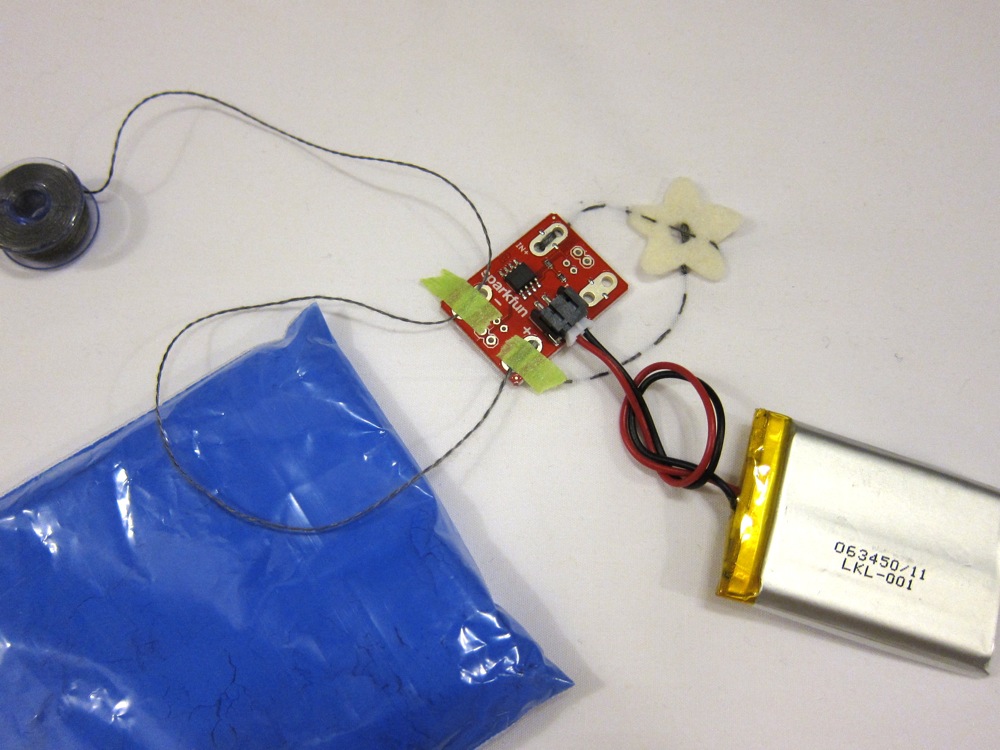
Tape four inches (4") of conductive thread between Out+ and Out – on the Power Controller. Make sure the thread lays flat against the metal part of the through-holes and is taped tightly in place.
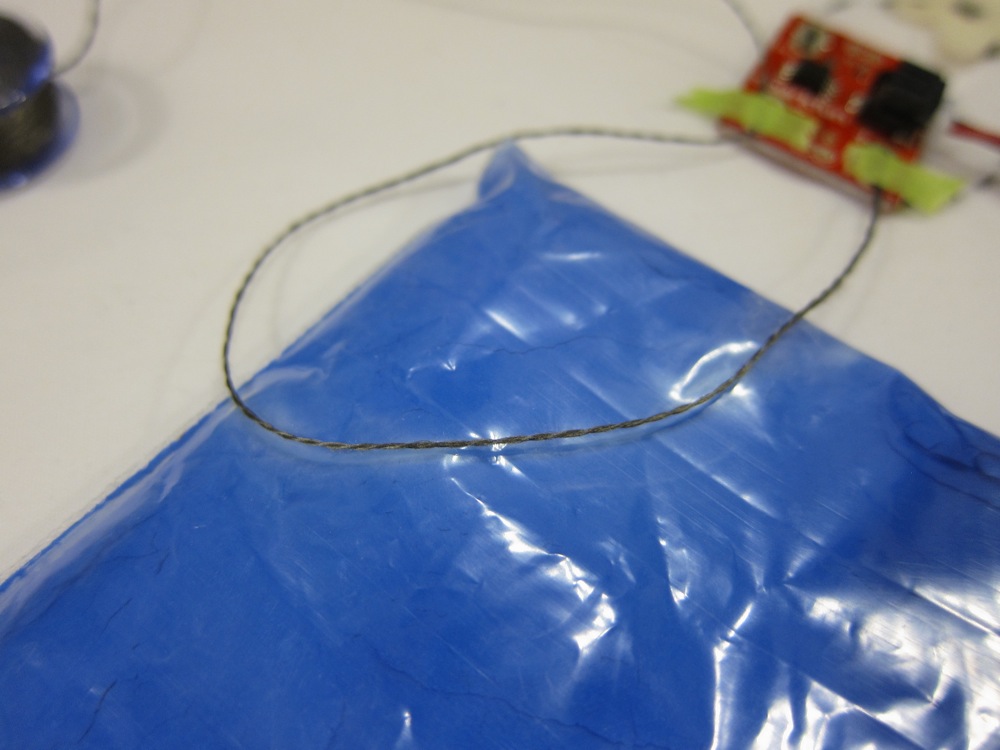
Start by making sure your button can be turned off. Plug your battery in and look to see if the thread is heating up and making the thermochromatic powder turn white. You may need to press the thread against bag of powder with your fingers to make sure the thread is close enough to the powder to heat it. If it turns white, unplug your battery immediately. This means the top thread of the button is too close to the bottom thread (it’s completing the circuit before you even press the button!). Cut a small doughnut of felt and slide it under the button felt.
Repeat until the thread is no longer heating up and making the thermochromatic pigment turn white (I wound up adding two doughnuts of felt under my button).
Now it’s time to make sure your button can be turned on. With the battery plugged in, place the top piece of felt on the button. Then push the button. Make sure that the thread is heating and turning the powder white. If the thread is not heating, trim the holes in the felt button and felt doughnuts a little bigger. Then try to push the button again. Be patient, you will probably need to trim and test several times. Repeat until your button turns on and off at the appropriate times.
Got a working button? Great! Stitch all of your felt pieces in place with traditional thread. Be careful not to sew through the conductive thread. Give the button one more test. If it isn’t working, you may need to do some restitching and troubleshooting.
Stitching Your Design
Sew conductive thread where you want your design to change color. You can use a minimum of two inches (2") and a maximum of six inches (6") of this particular steel conductive thread. Less than two inches will overheat the battery and more than six inches may not heat hot enough to make the pigment change color.
Tip: After sewing the connection to Out-, I cut my thread so that it was nine inches long. When there were only three inches left, I stitched the connection to Out+.

Start by sewing the connection at Out- by stitching through the through-holes a few times. For a secure connection keep your stitches tight.
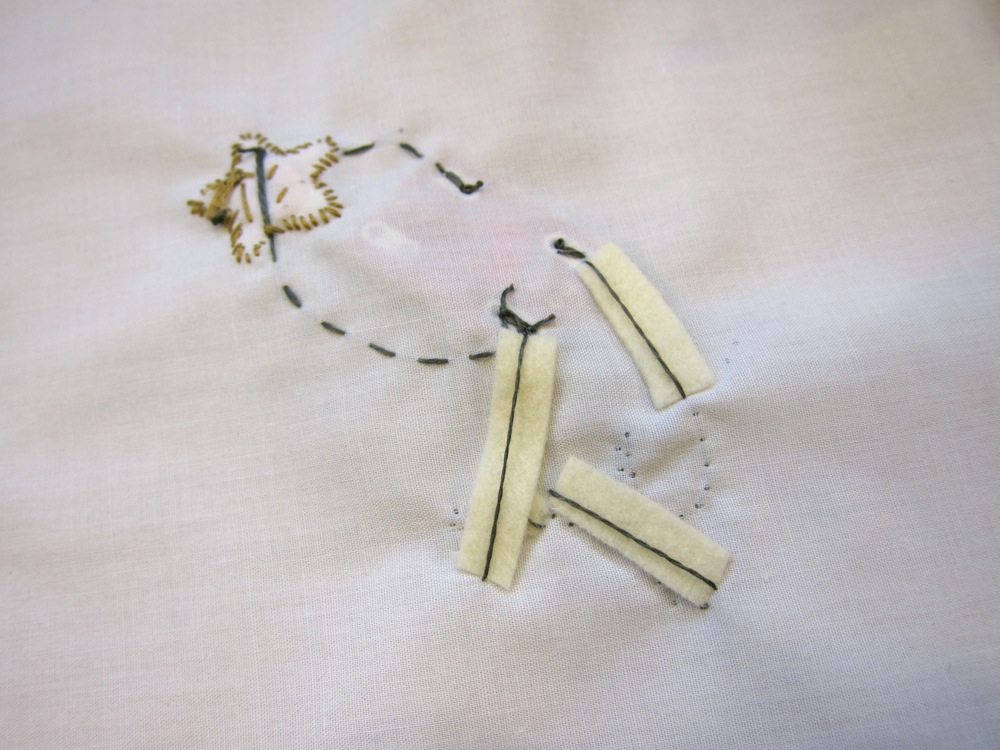
If you want there to be a little space between your board and your design, pull your thread to the back of the fabric and start stitching a little ways away from your board. If you need some extra insulation to keep this part of the thread from heating the thermochromatic pigment, you can stick some felt between the thread and the fabric.
Sew your design with an upside-down invisible stitch by sewing through a few threads of the fabric every 1/8 inch. This will keep the thread mostly on the top of the fabric so that it can heat the pigment.
Finish by sewing the connection at Out+ by stitching through the through-holes a few times.
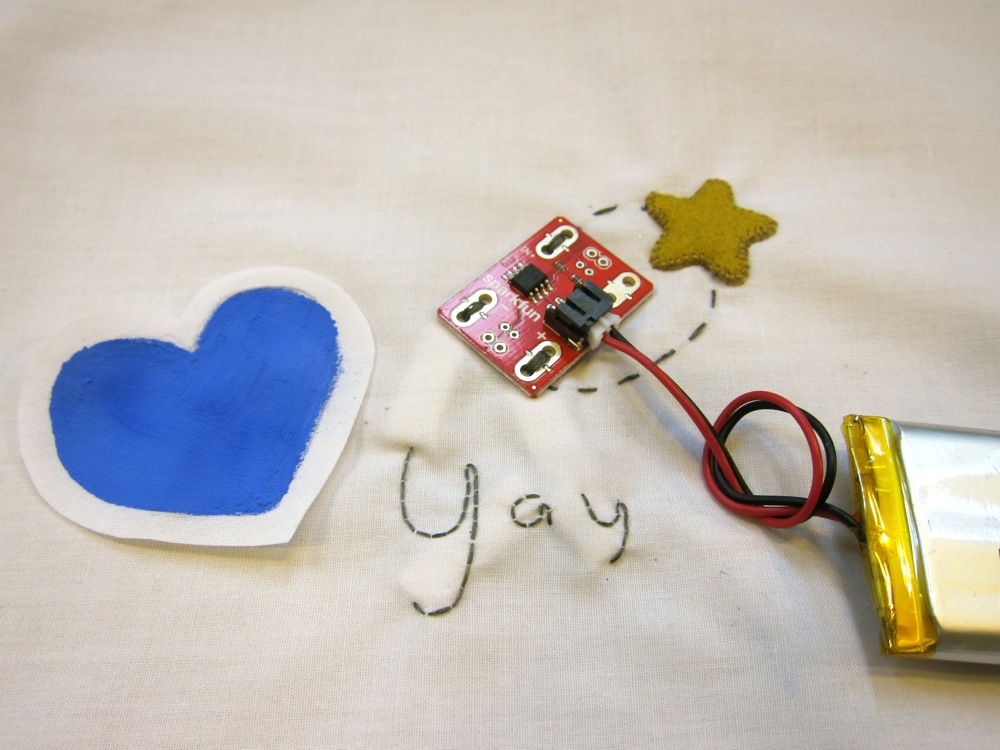
Mix the thermochromatic pigment with your paint, and paint your design on the piece of thin fabric. Put your thermochromatic design on top of your stitched conductive thread design. It is important that the conductive thread design is placed flat against the thermochromatic design, so that it will heat up evenly. You can adhere your designs with fabric glue, or very carefully stitch them to make sure they are touching evenly.
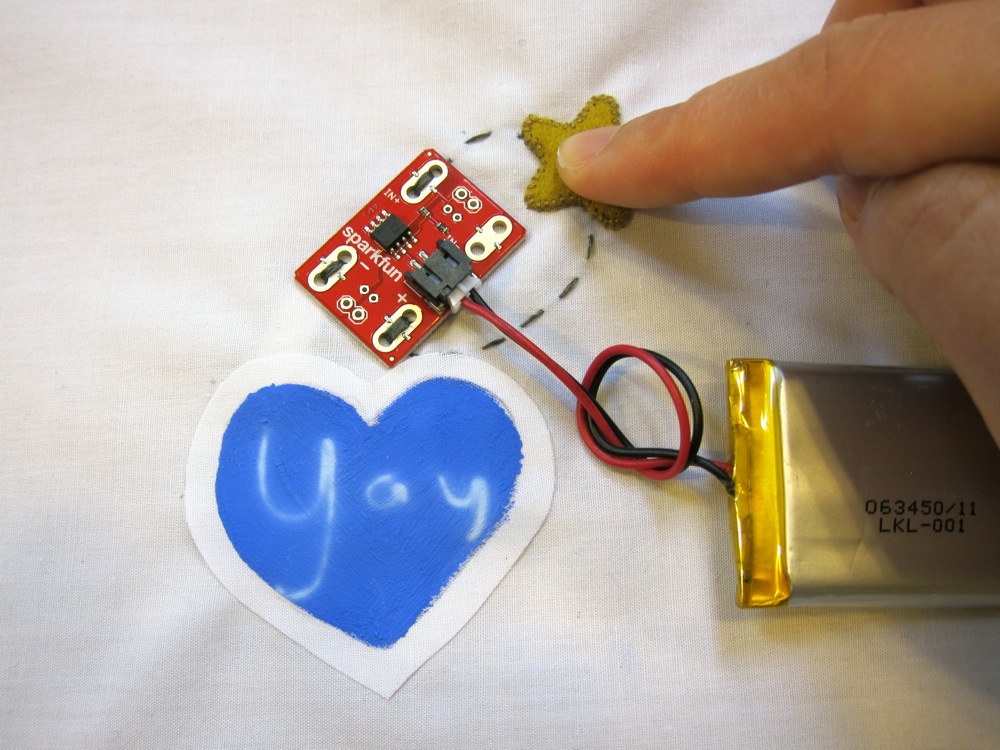
You're done! This is just one of an endless variety of applications for thermochromatic pigment. It's a beautiful way to paint everything from an evening gown to your fingernails with heat-reaction.
Resources and Going Further
If you'd like more thermochromic adventures, check out this episode of ElectriCute:
ReplaceMeOpen
ReplaceMeClose
Or maybe control the thermochromatic pigment with heating pads.
Thanks for reading! Check out these other great E-Textiles tutorials:
- Humidity-sensing LED Flower - Use the 21st Century Fashion Kit to create a smart flower that can tell you if it needs some water.
- Twinkling Trick or Treat Bag - Make a light up goodie bag with conductive thread, LEDs, and the LilyTwinkle!
- E-Textile Mask - Use LilyPad LEDs, a switched battery holder, and coin cell battery to make a fun light up mask for your next costume party.
- My Drunk Kitchen Apron - A fun project that uses the LilyPad MP3 trigger. This apron will dispense helpful kitchen advice and humor from the host of My Drunk Kitchen, Hannah Harto!